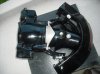
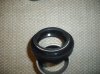
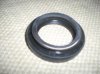
Anyone had a leaking stator? You can fix it yourself !
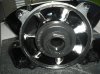
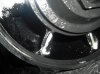
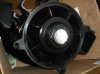
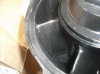
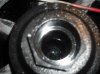
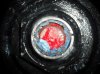
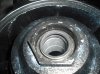
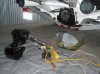
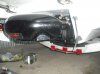
Recently got a m2 jet drive with 250 optimax attached to a 22 foot Polaris Made by BAJA one ton (2050lbs) boat. While catching up service, I found that the drive oil was like tar (pretty nasty) but no water in it. I changed it out with freah merc HP gear oil. I found the stator was the one leaking., I changed the oil through the nozzle and found it contaminted with water looked pretty milky. REfilled with 85-140 and lake tested, drained and seemed like it picked up a little water ove 2.5 hours. ahhhh man this stinks.
The boats runs out well and preforms well but I know this issue is bad news as to how bad I have not figured it out yet.
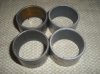
DO STATOR seals just start leaking ? or is it something else that has caused this to happen. ???????
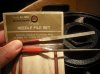
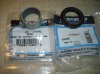
If someone has torn into this before or knows about how to seal this up any support would be great. I am trying to figer out what other boats have the optimax 250 with jet drive as well. Finding usable data regarding my jet is not easy.
Recently got a m2 jet drive with 250 optimax attached to a 22 foot Polaris Made by BAJA one ton (2050lbs) boat. While catching up service, I found that the drive oil was like tar (pretty nasty) but no water in it. I changed it out with freah merc HP gear oil. I found the stator was the one leaking., I changed the oil through the nozzle and found it contaminted with water looked pretty milky. REfilled with 85-140 and lake tested, drained and seemed like it picked up a little water ove 2.5 hours. ahhhh man this stinks.
The boats runs out well and preforms well but I know this issue is bad news as to how bad I have not figured it out yet.
DO STATOR seals just start leaking ? or is it something else that has caused this to happen. ???????
If someone has torn into this before or knows about how to seal this up any support would be great. I am trying to figer out what other boats have the optimax 250 with jet drive as well. Finding usable data regarding my jet is not easy.
Last edited by a moderator: