


ardy
New Member
Hello All,
Long time member, first time posting. I have always been able to get answers from the forum by searching. Very good forum. But this is a first time that I think I know what I need to do but need bit knowledge support in the background. Needed access to manuals (service, parts) and whatever else. But mostly knowledge. So I became a member, my guess is my dues are due……. I love my SeaDoo, purchased it blindly 4 years ago, I have been told the engine is very clean, I guess the last owner took care of it and I have been also, on stuff that are obvious.
SeaDoo Info:
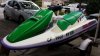
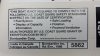
Year = 1994
Model = 5862
Mot.nbr = 4244825
Hull Nbr: ZZN82733J394
ISSUE:
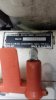
Started towards the end of last summer. The engine starts perfect and right away, in and out of water. At the first start I get a puff of blue smoke and once in the water in within 10 min or so it is less to none(The Smoke), I never had any oil issue because it mixes it and I keep adding when it needs it. It revs OK but as soon as I push full throttle it goes like it should but in 20 sec or so it bogges down to coast speed(Sometimes less than 10 sec, and some times right away), the engine doesn’t die it just idles…. I do this for several times then it is ok and takes off to top speed of 35 (first I got this top speed was around 45, but got lessen as years pass) but it revs between 25 and 35 back and forth and sometimes goes back to idle. It feels it is not getting the fuel it needs. So I changed All filters the in line and Assembly filters, I also drained the old Gas and put new gas(for this season), I also cleaned the carb(not rebuilt) the filter arrester and spark plugs. With all that it got a bit better but the real issue is still there. and yes, I also have the Gray fuel lines, I guess I saw a lot of comments abt them.
From what I have been reading, it all points to rebuilding the carb. I am not a mechanic but do OK with tools and such, I don’t have an issue as long as I get my hand on service manual and people I can ask questions. My first step is to see what you guys think? So please give me your thoughts…..
Thanks
Ardy
Long time member, first time posting. I have always been able to get answers from the forum by searching. Very good forum. But this is a first time that I think I know what I need to do but need bit knowledge support in the background. Needed access to manuals (service, parts) and whatever else. But mostly knowledge. So I became a member, my guess is my dues are due……. I love my SeaDoo, purchased it blindly 4 years ago, I have been told the engine is very clean, I guess the last owner took care of it and I have been also, on stuff that are obvious.
SeaDoo Info:
Year = 1994
Model = 5862
Mot.nbr = 4244825
Hull Nbr: ZZN82733J394
ISSUE:
Started towards the end of last summer. The engine starts perfect and right away, in and out of water. At the first start I get a puff of blue smoke and once in the water in within 10 min or so it is less to none(The Smoke), I never had any oil issue because it mixes it and I keep adding when it needs it. It revs OK but as soon as I push full throttle it goes like it should but in 20 sec or so it bogges down to coast speed(Sometimes less than 10 sec, and some times right away), the engine doesn’t die it just idles…. I do this for several times then it is ok and takes off to top speed of 35 (first I got this top speed was around 45, but got lessen as years pass) but it revs between 25 and 35 back and forth and sometimes goes back to idle. It feels it is not getting the fuel it needs. So I changed All filters the in line and Assembly filters, I also drained the old Gas and put new gas(for this season), I also cleaned the carb(not rebuilt) the filter arrester and spark plugs. With all that it got a bit better but the real issue is still there. and yes, I also have the Gray fuel lines, I guess I saw a lot of comments abt them.
From what I have been reading, it all points to rebuilding the carb. I am not a mechanic but do OK with tools and such, I don’t have an issue as long as I get my hand on service manual and people I can ask questions. My first step is to see what you guys think? So please give me your thoughts…..
Thanks
Ardy
Attachments
Last edited by a moderator:


