RESTO Project Dog House: 1996 Challenger

Note: This site contains eBay affiliate links for which SeaDooForum.com may be compensated
Status
Not open for further replies.

rjcress

Active Member
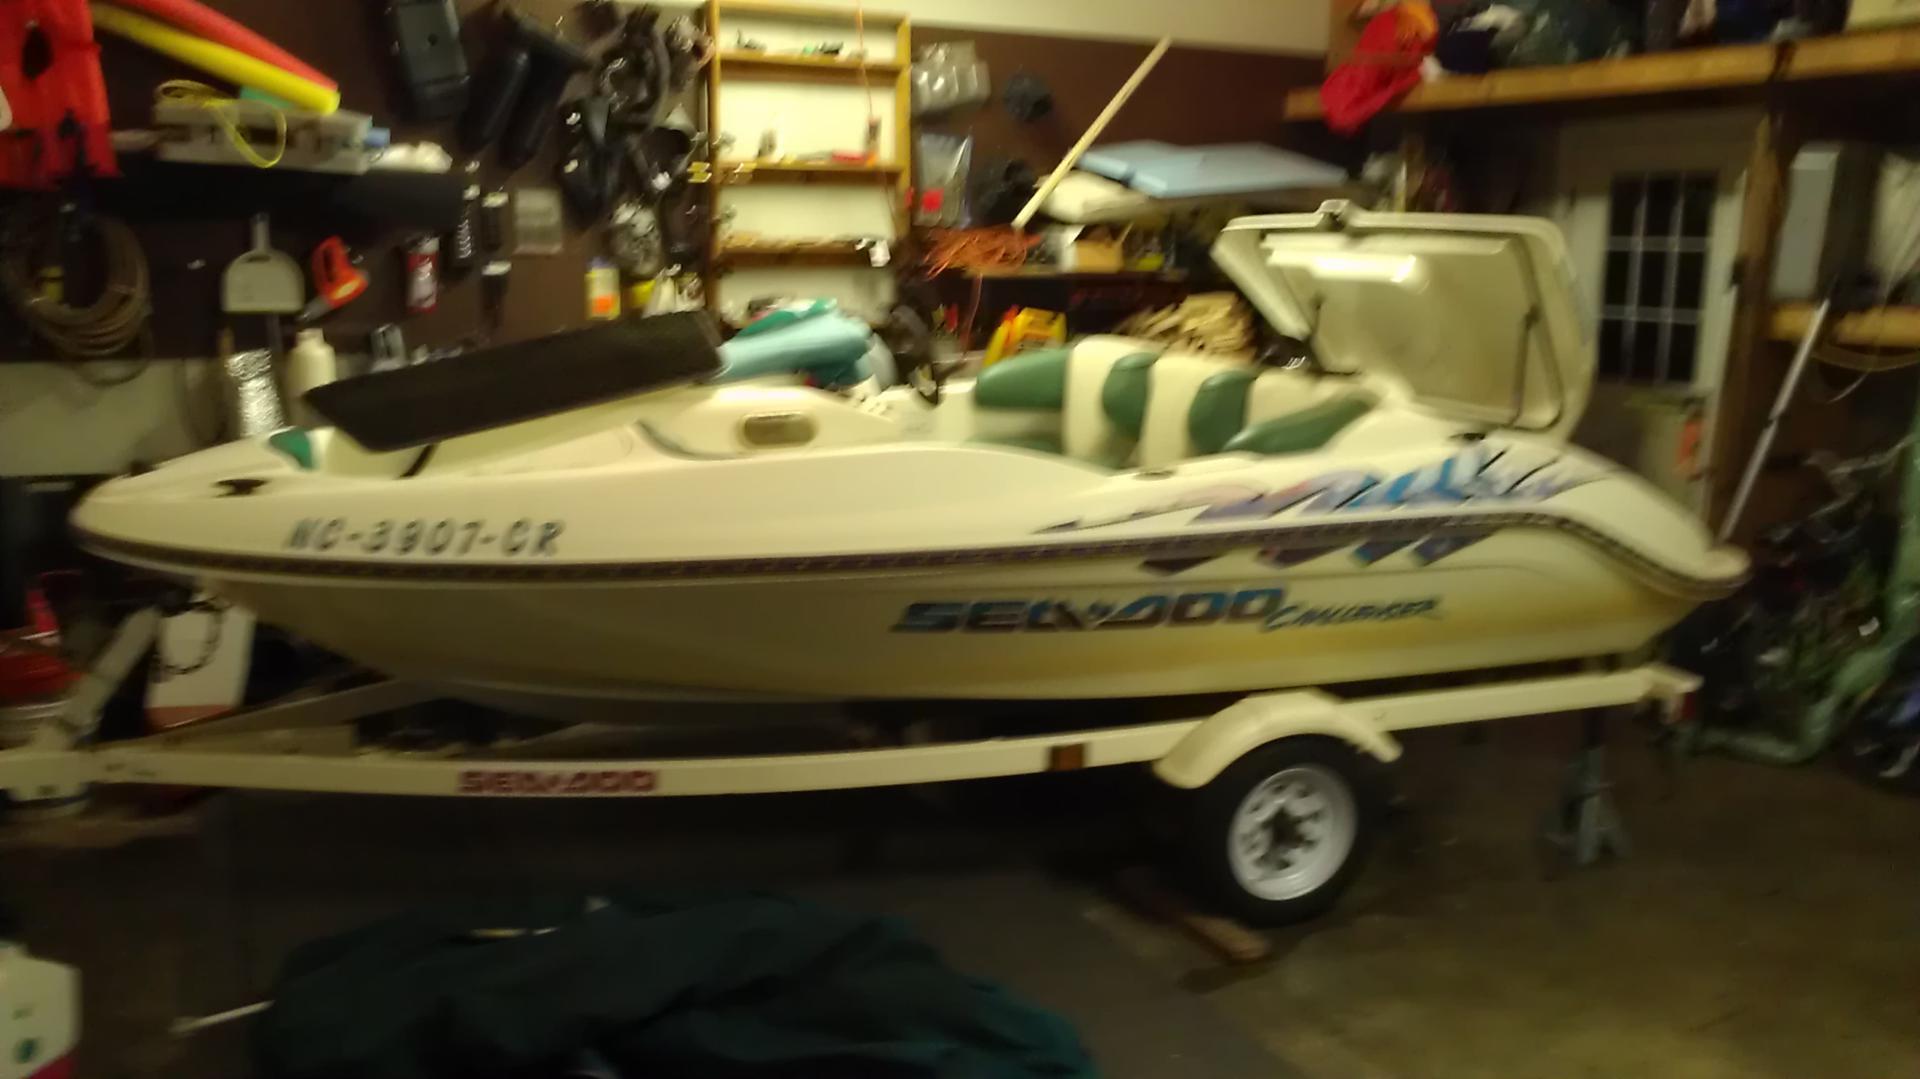
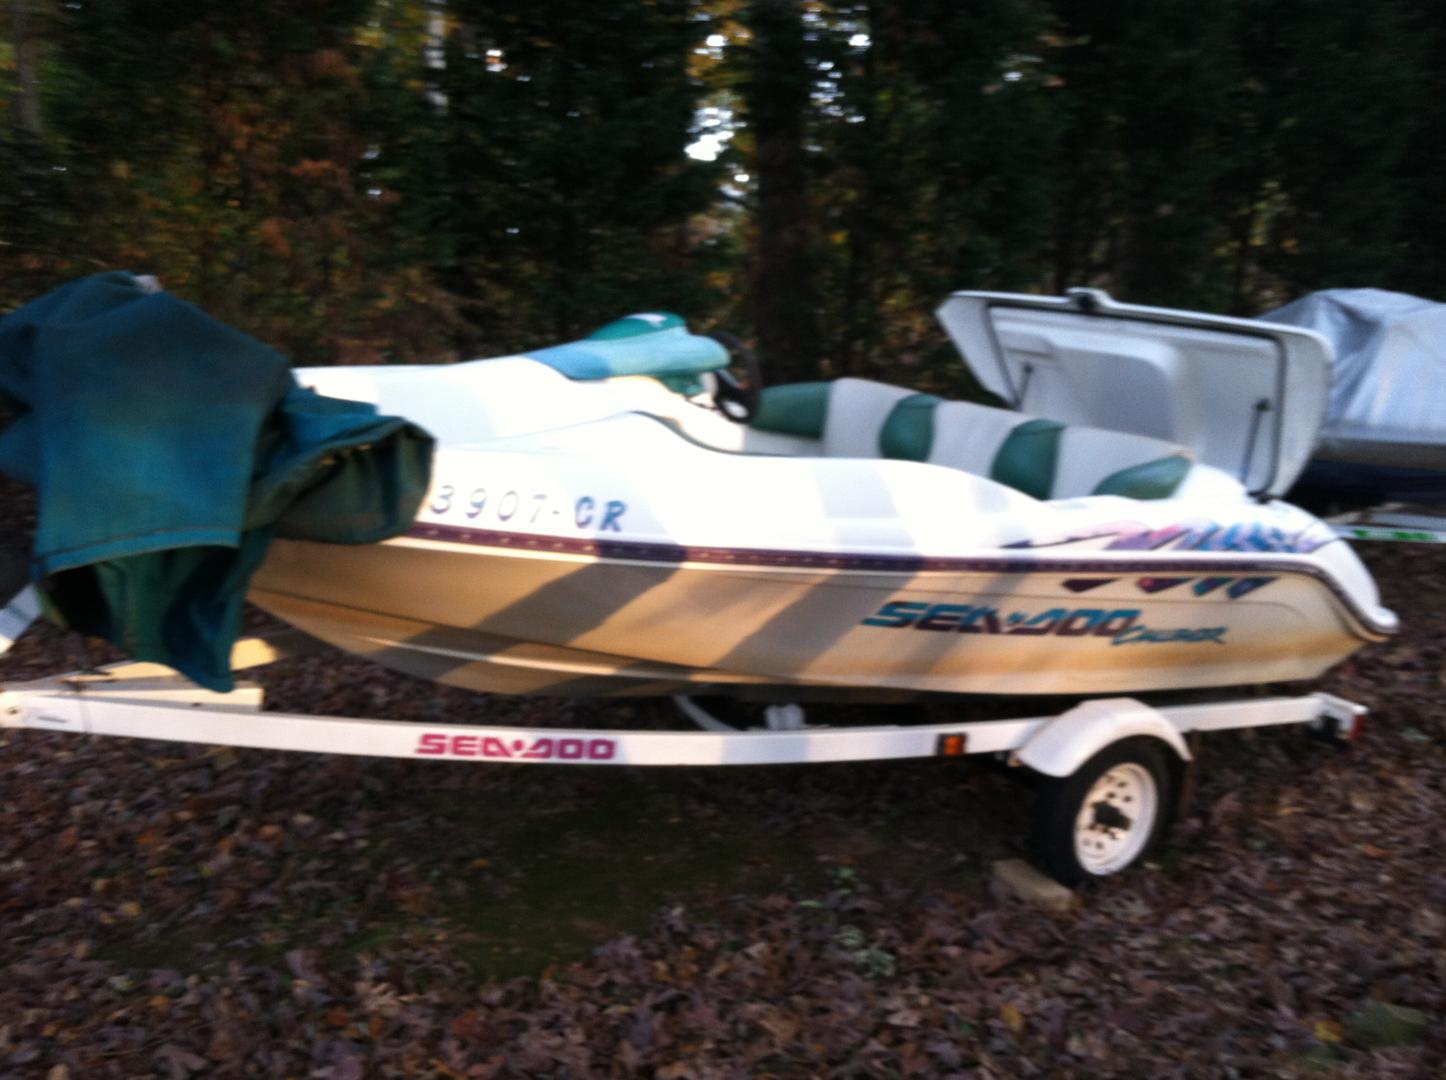
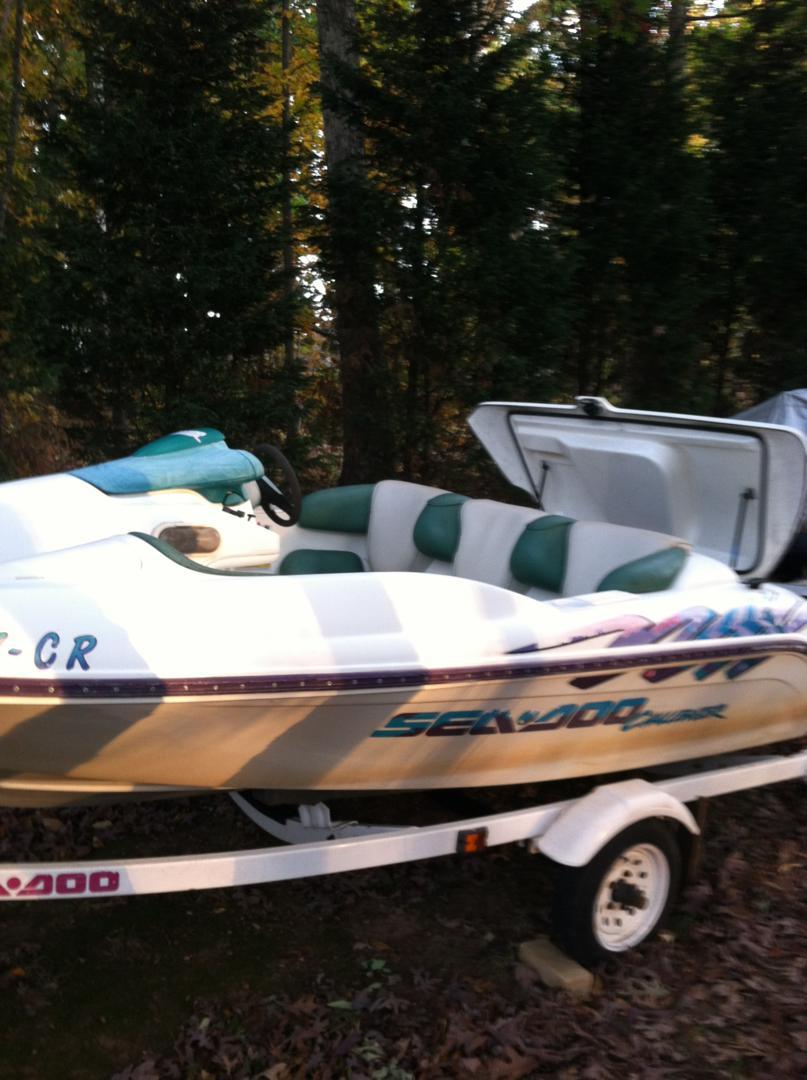
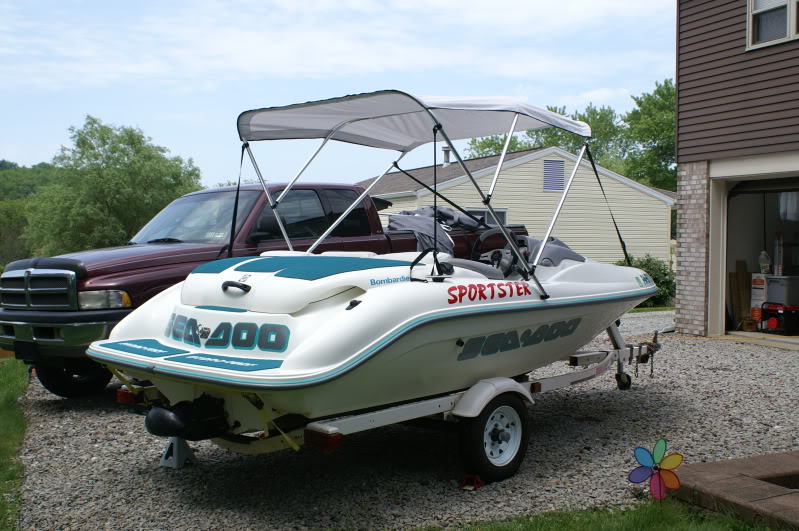
Today I gave $400 cash for a fairly nice 4 person pedal-powered paddle boat, 5 purple and black SeaDoo life jackets, a 1996 Challenger with cover, and the SeaDoo trailer that the Challenger sat on. The trailer needed new tires and tie-down straps for the 2 hour drive home, so add $185 for 2 pre-mounted trailer tires and some straps from Northern Tool. Too bad it was Sunday. Could have gotten new tires mounted a whole lot cheaper than buying pre-mounted tires. Doh!
I'll have to take my other trailer back soon to get the paddle boat, which I'll likely sell in the spring.

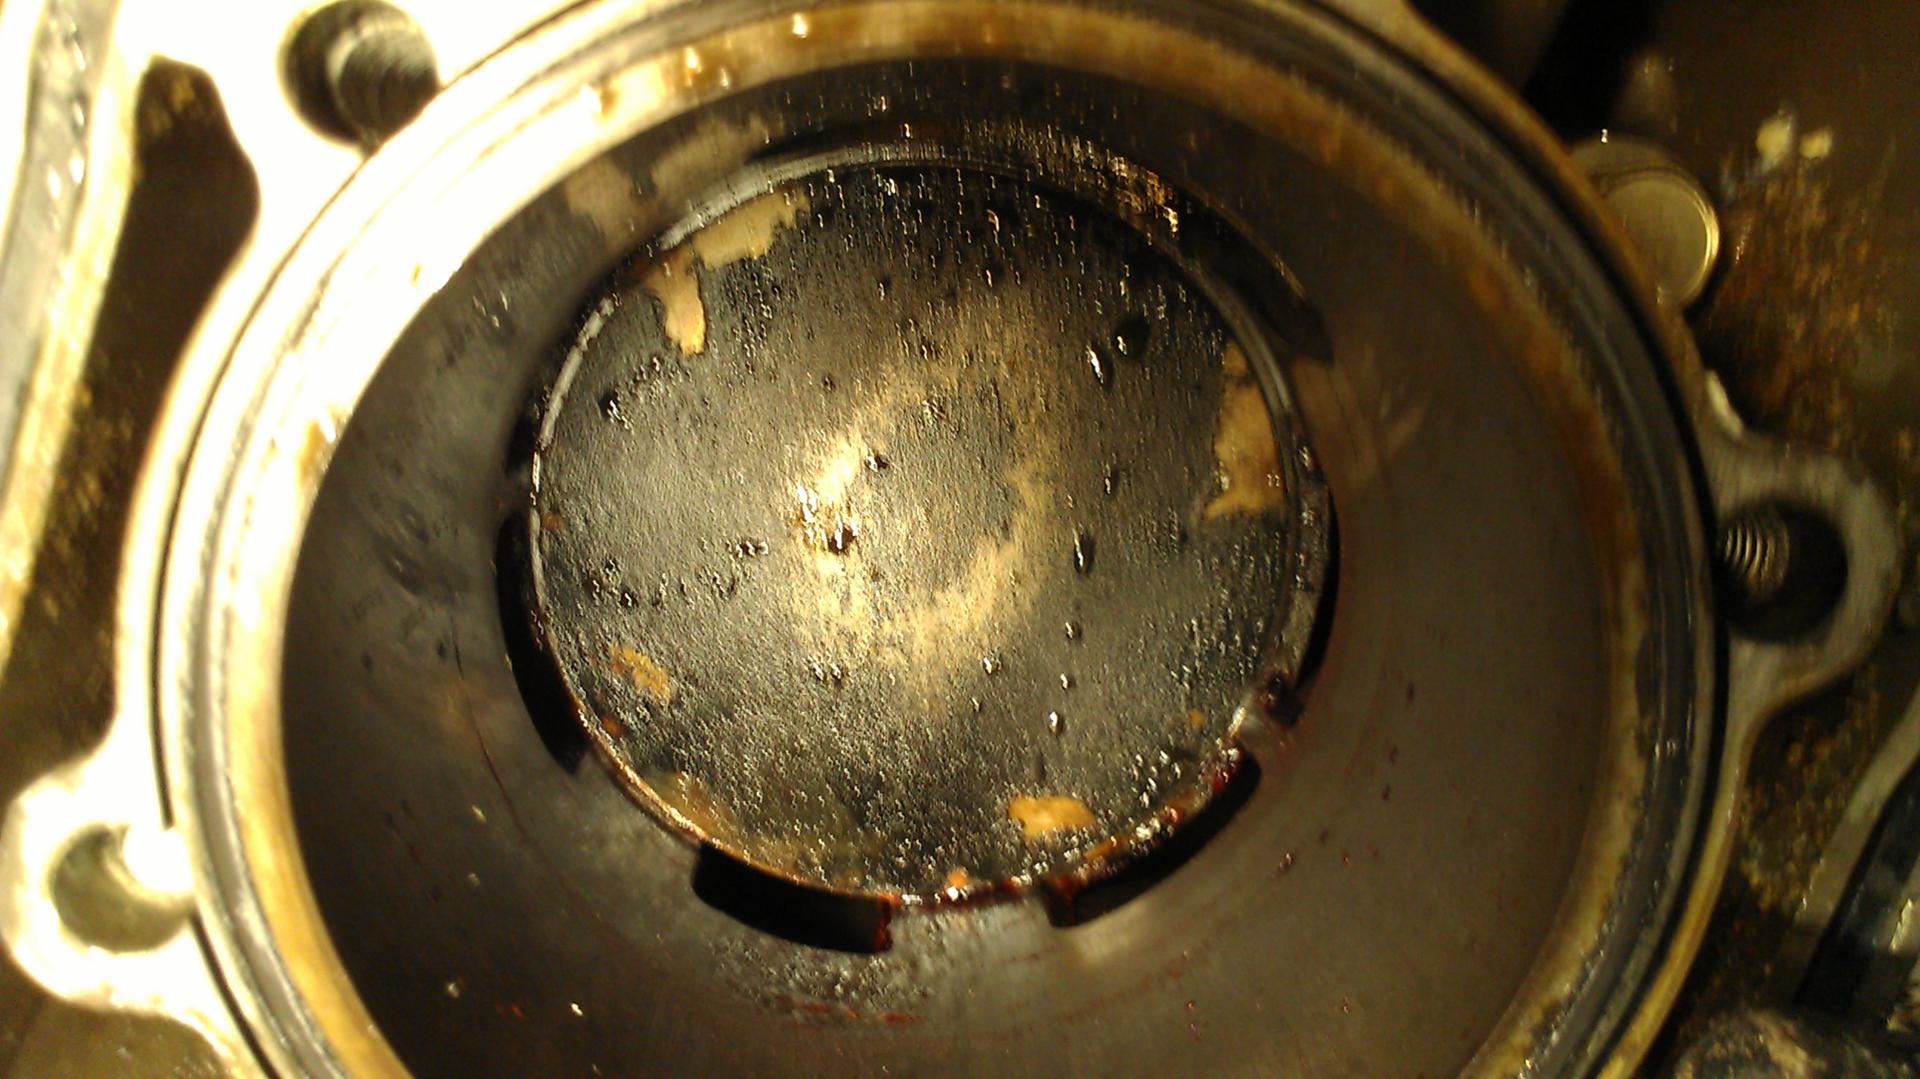
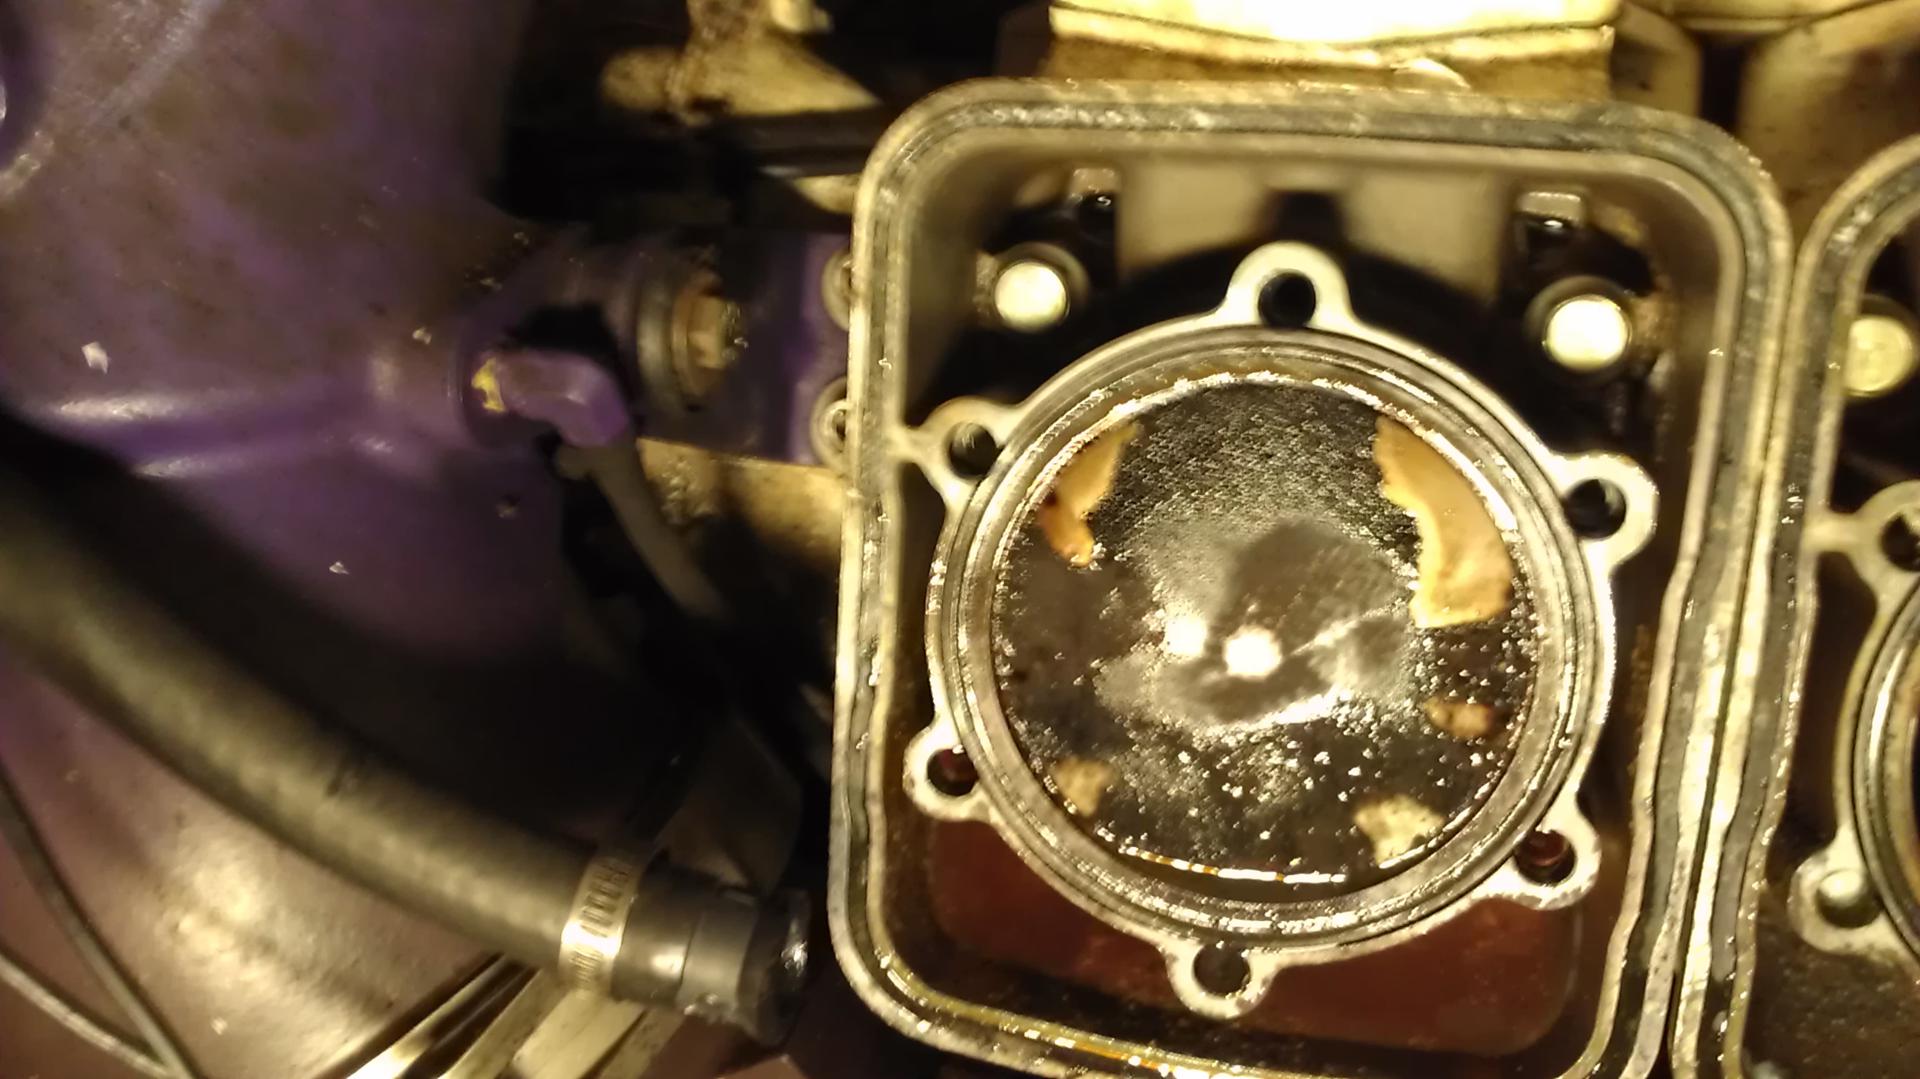
The guys says that the motor sucked in some water in August. He pulled the plugs and blew the water out, but had other things to do and he never got around to putting it back in the water to run and burn out any remaining water.
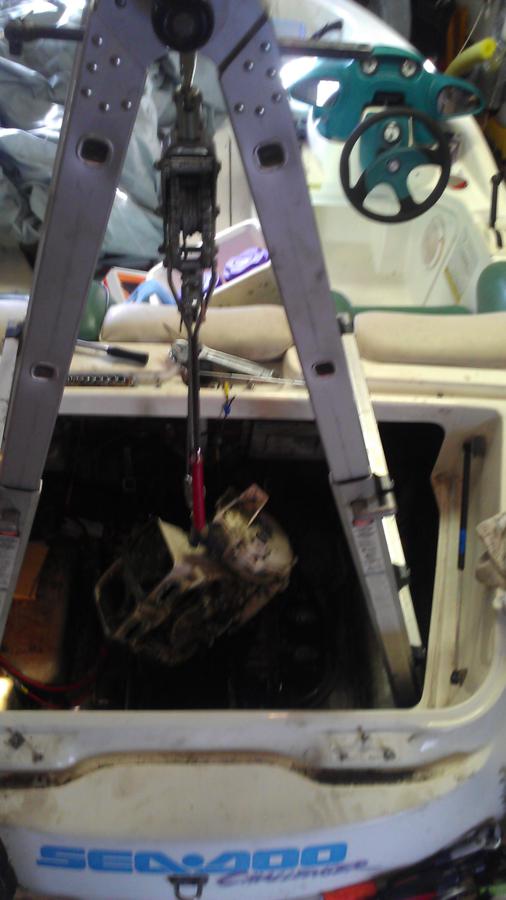
So the engine seized.
He lives in a Mc-Mansion on Lake Norman near Charlotte, NC. I imagine that this little old jet boat just wasn't on his priority list. His wife wanted it gone. :)

I bought it assuming that I'll be pulling engine and sending it off to be rebuilt... but am cautiously optimistic that I may be able to free it up. Am I dreaming?

First impressions:
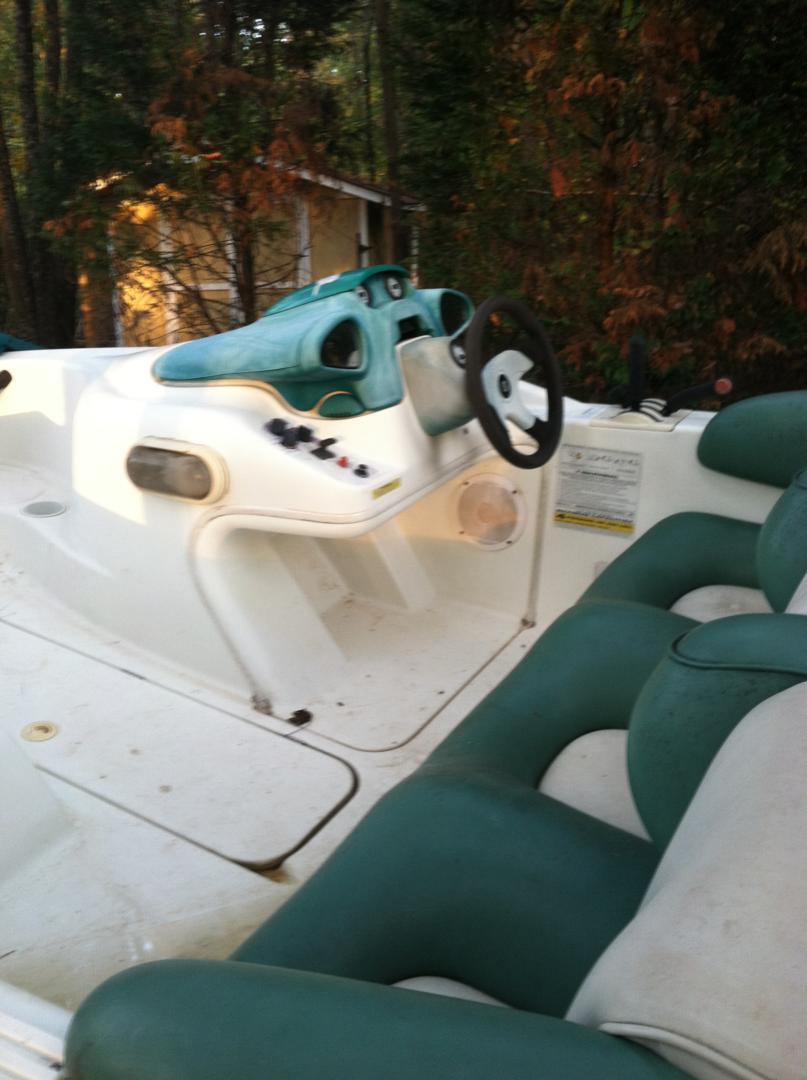
- gel coat is a bit chalky on the topside, glossy on the bottom
- hardly any scratches on the bottom... looks like it was practically never beached
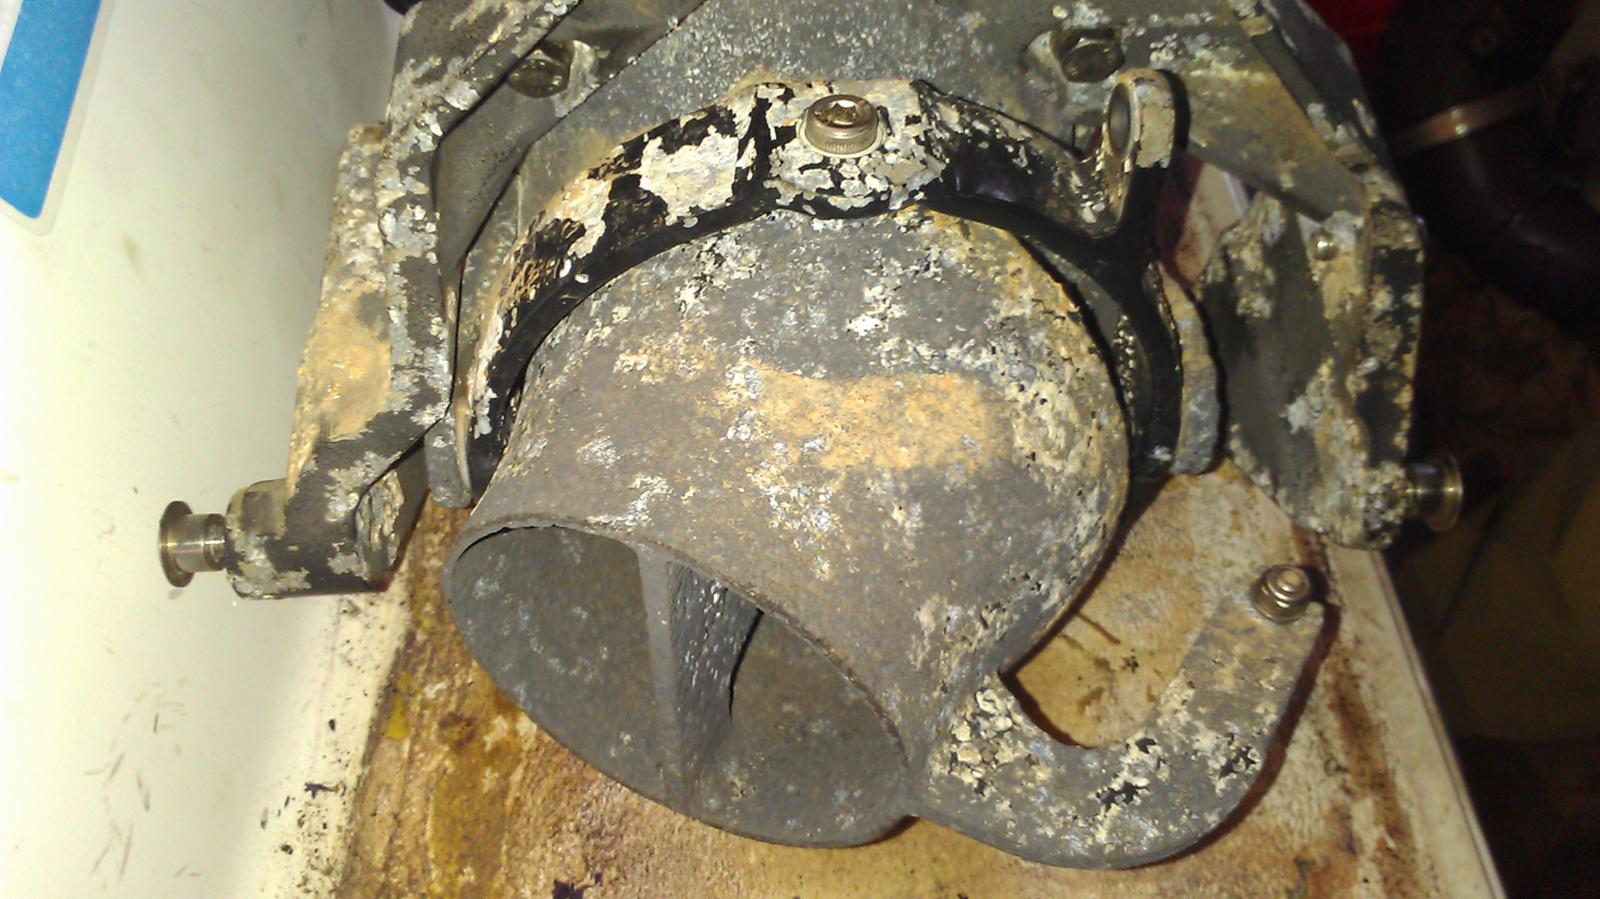
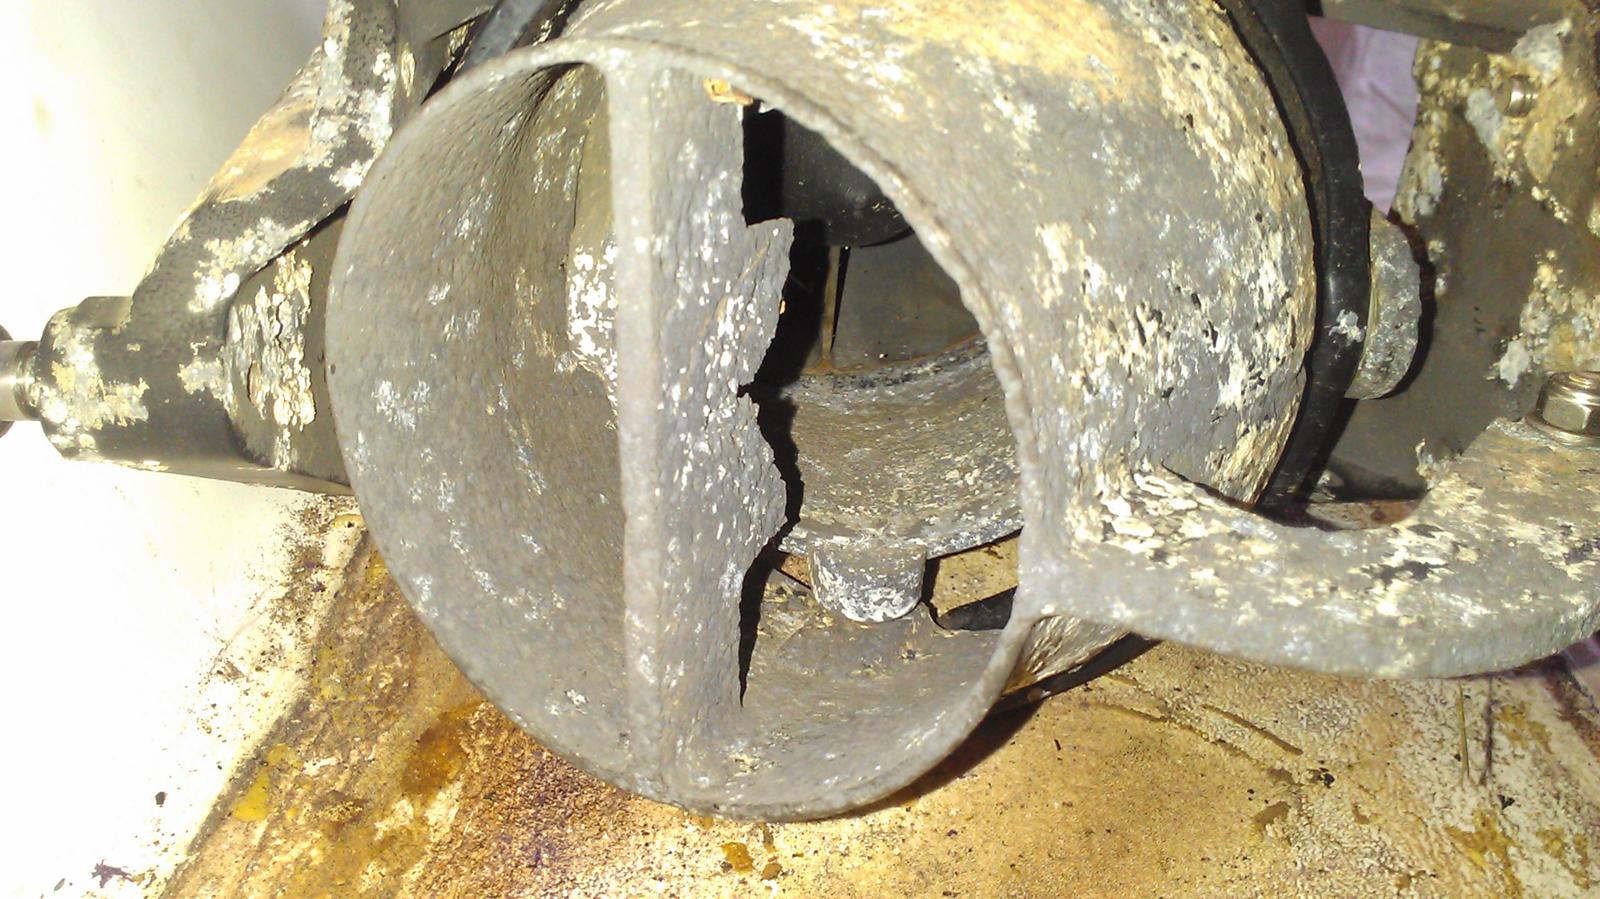
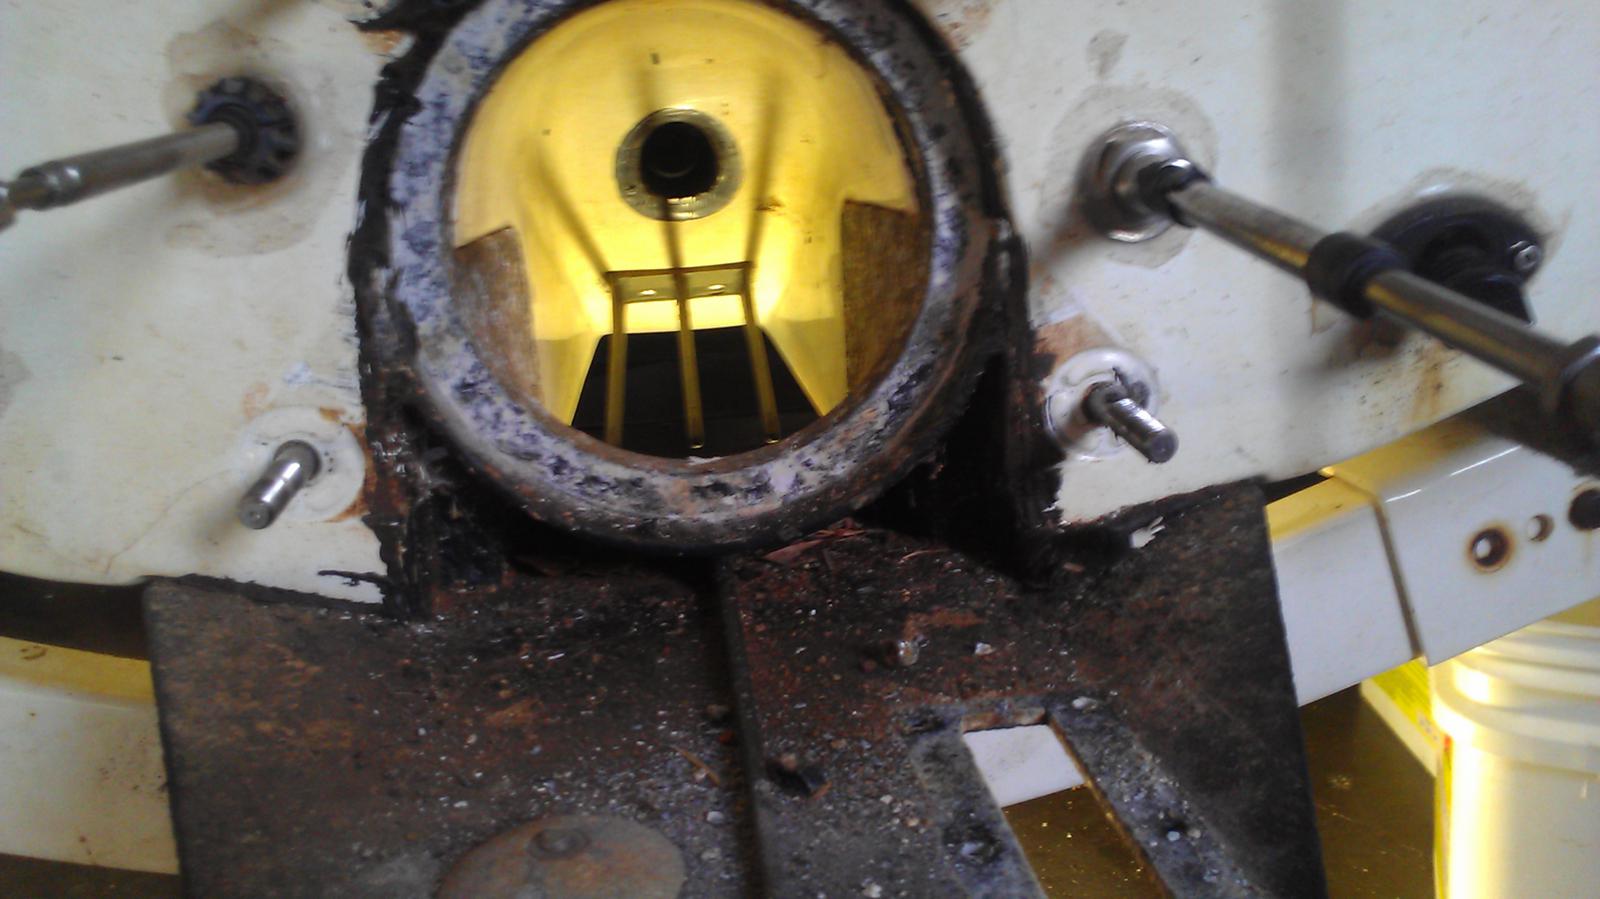
- some corrosion on the jet pump nozzel, but intact
- impeller and wear ring look good looking with a flashlight from the nozzel
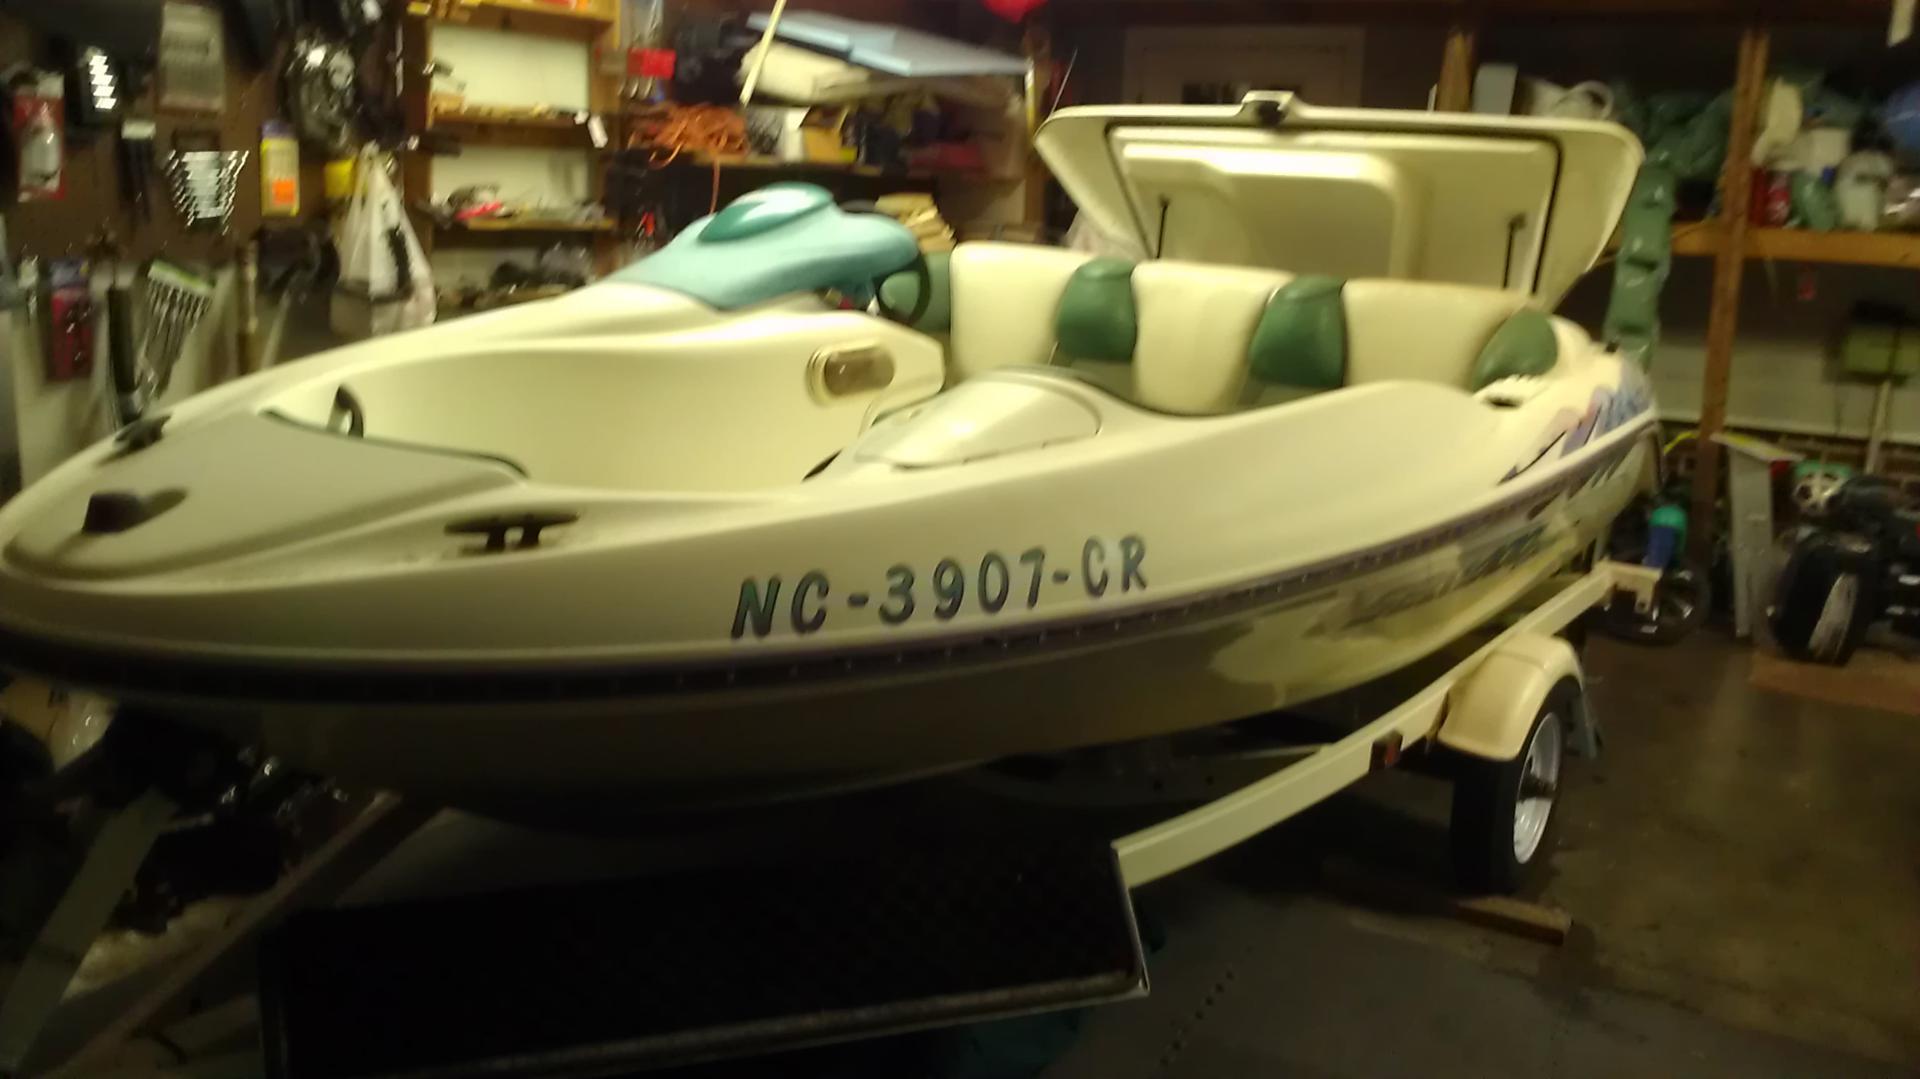
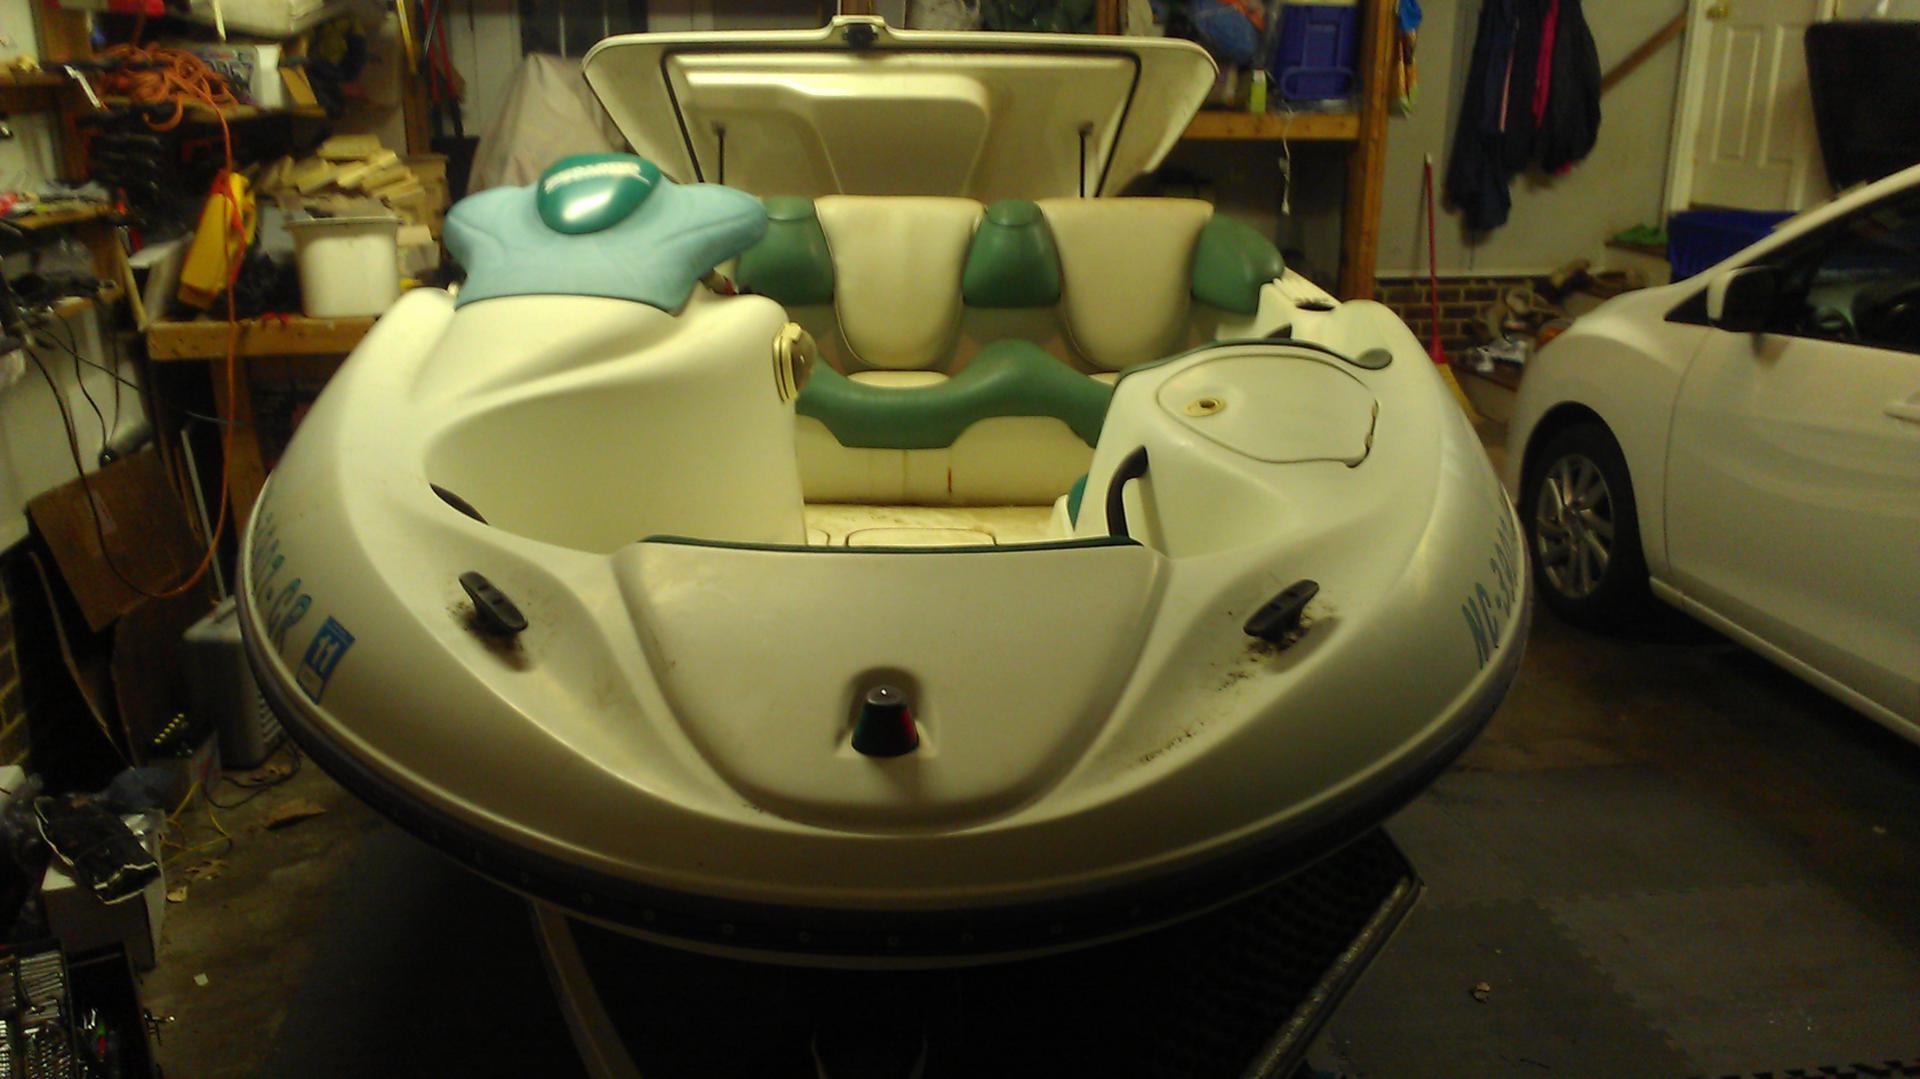
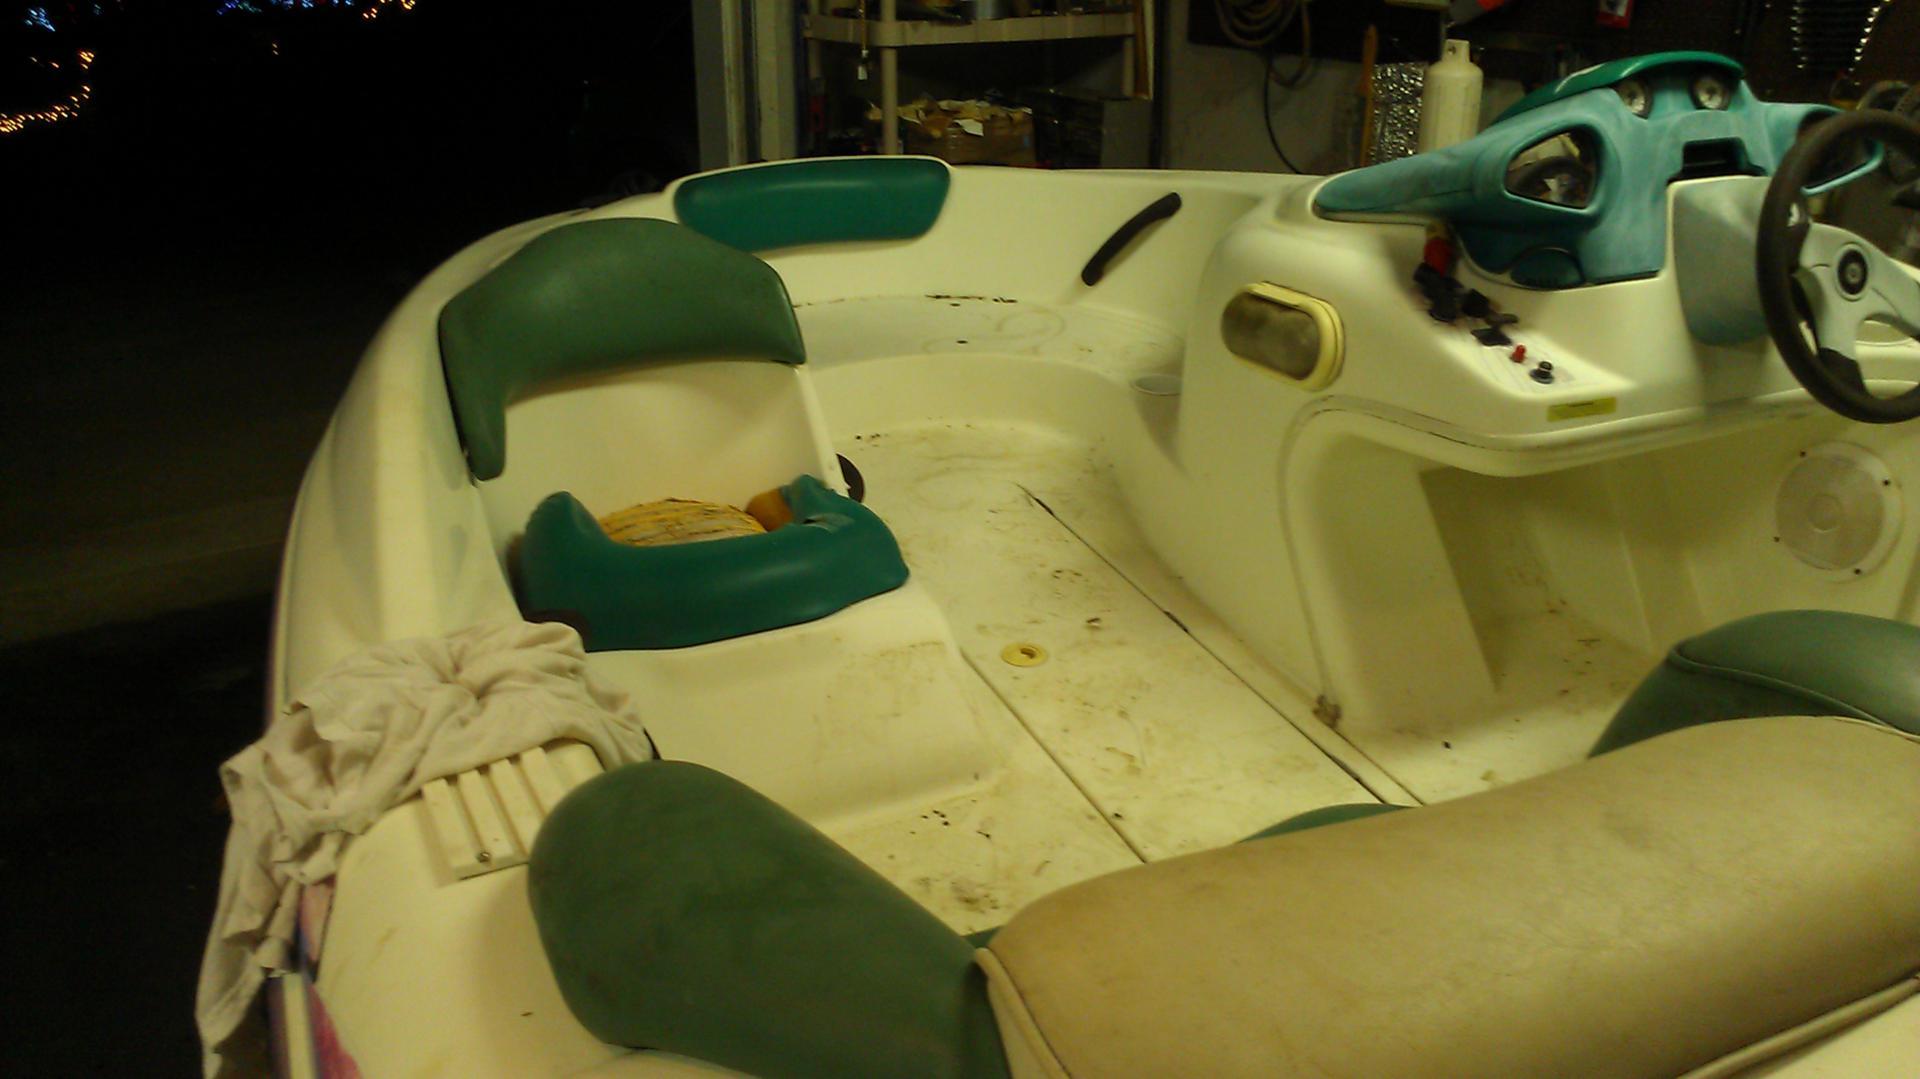
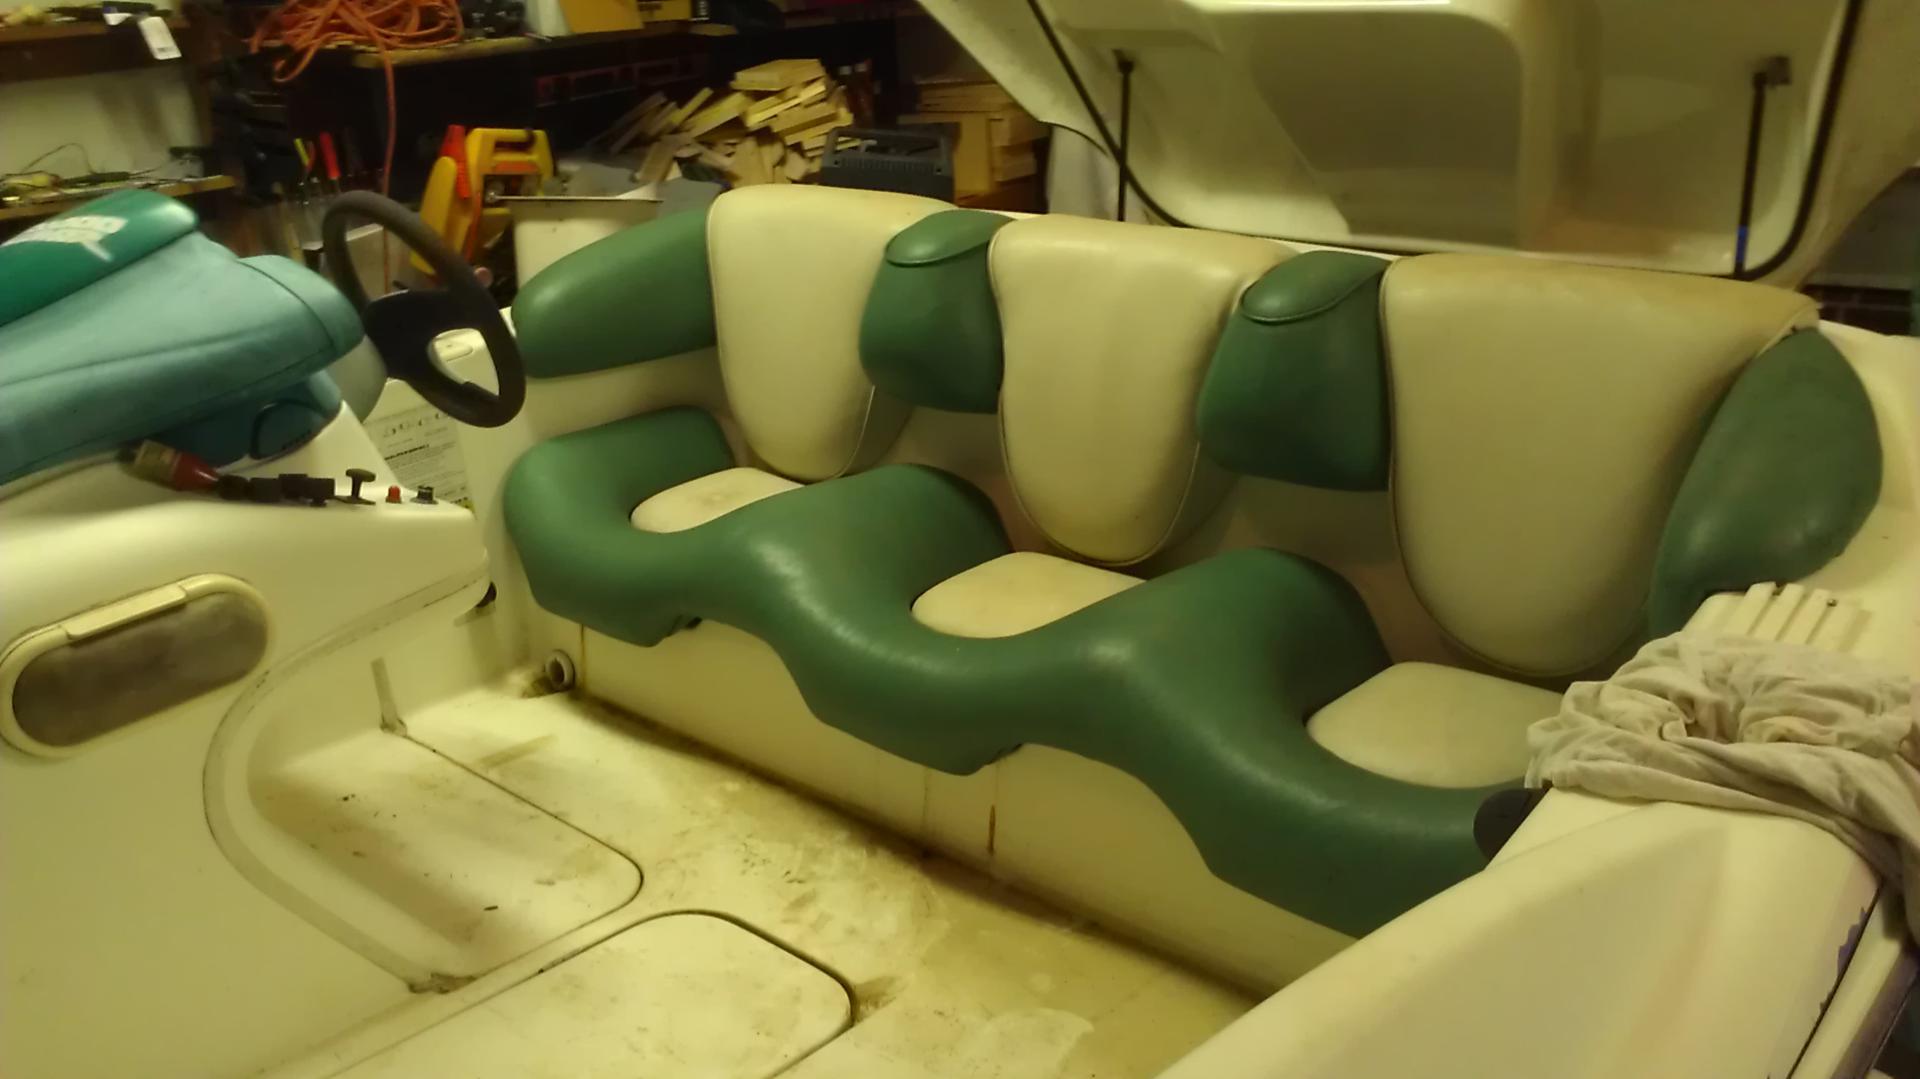
- main seats are unripped and serviceable, spotter seat has to be recovered
- 8 month old battery, but dead from sitting on the trailer for 3 or 4 months
- hull appears solid with no cracks, abrasions, etc.
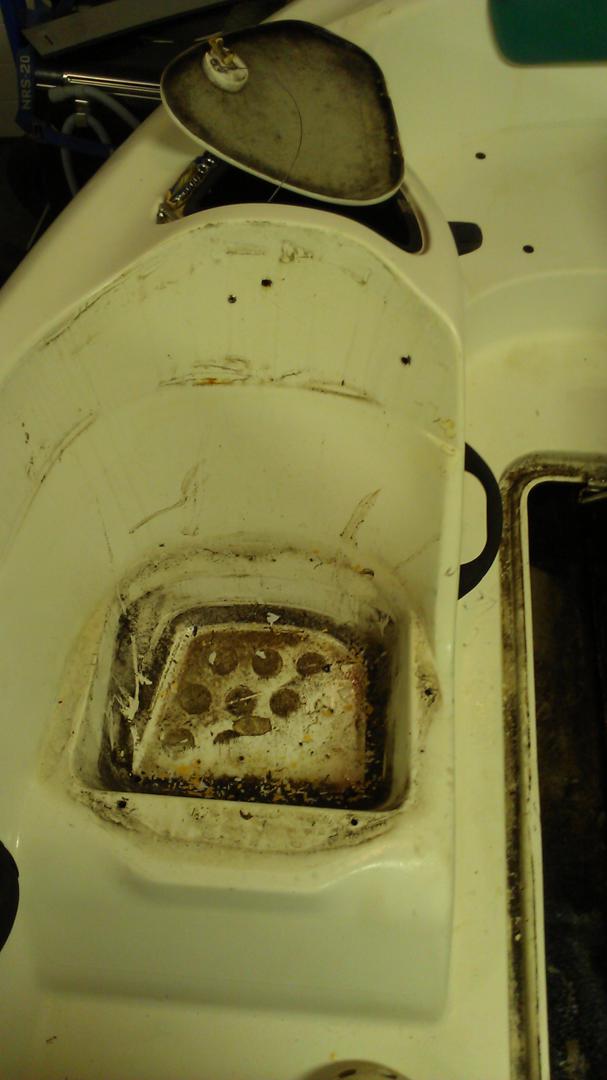
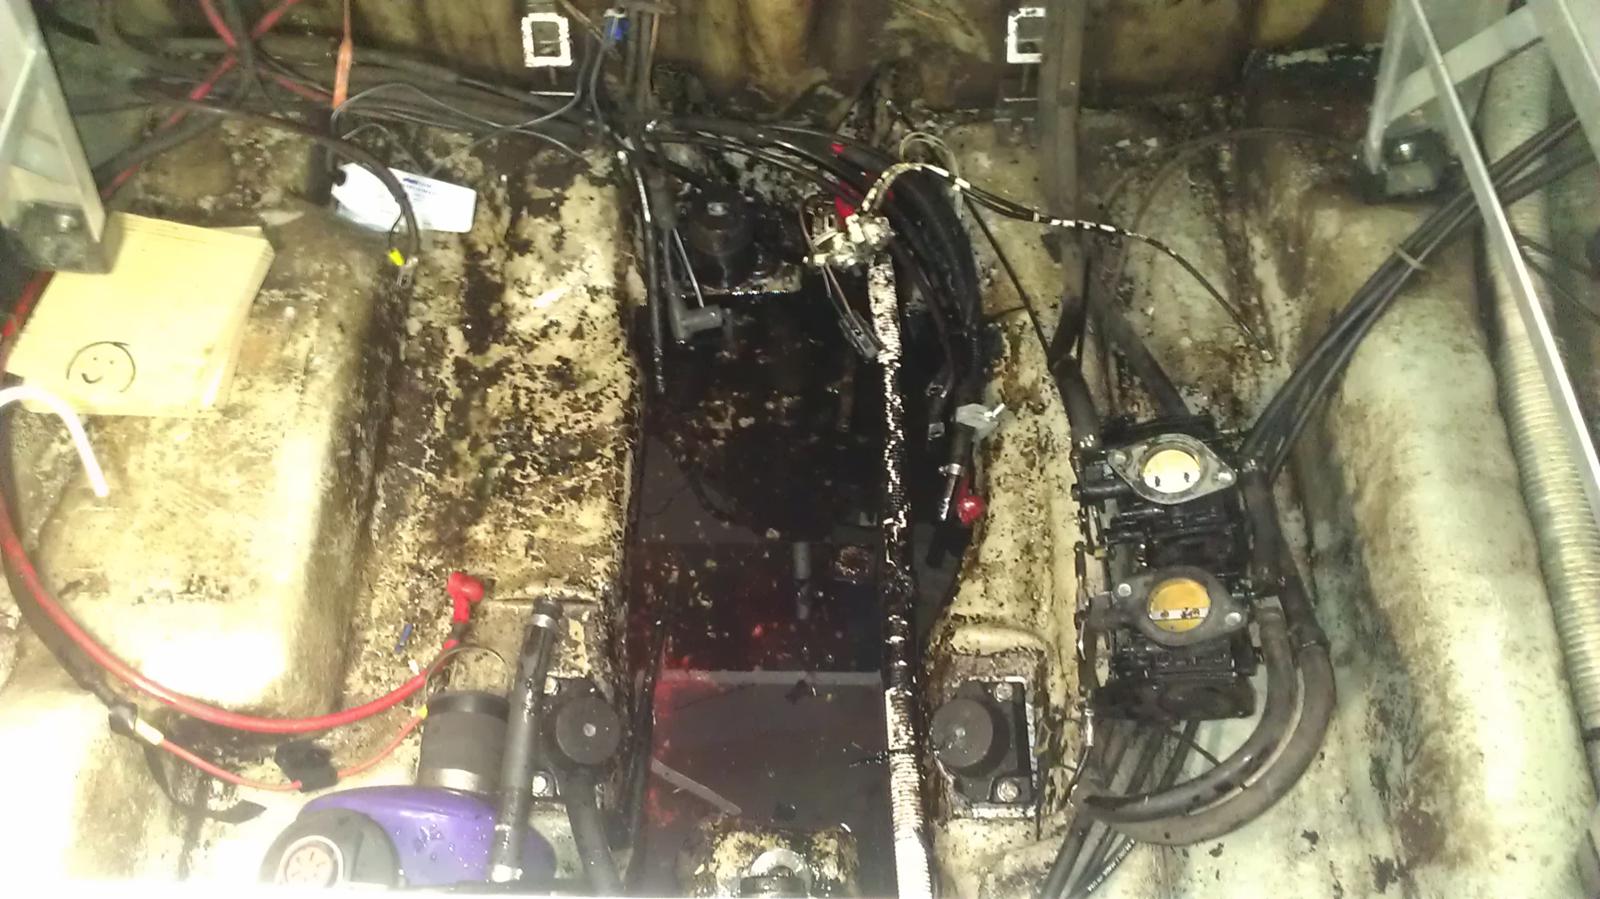
- engine bay looks pretty good. no oil, but a little dirty
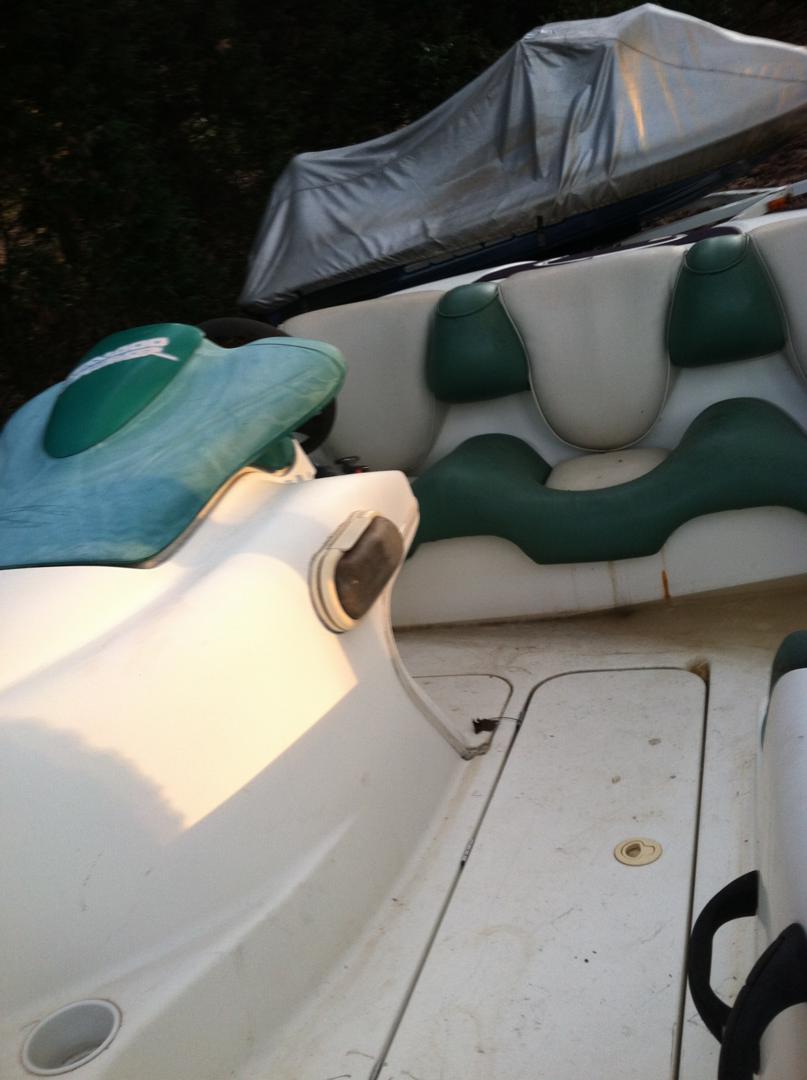
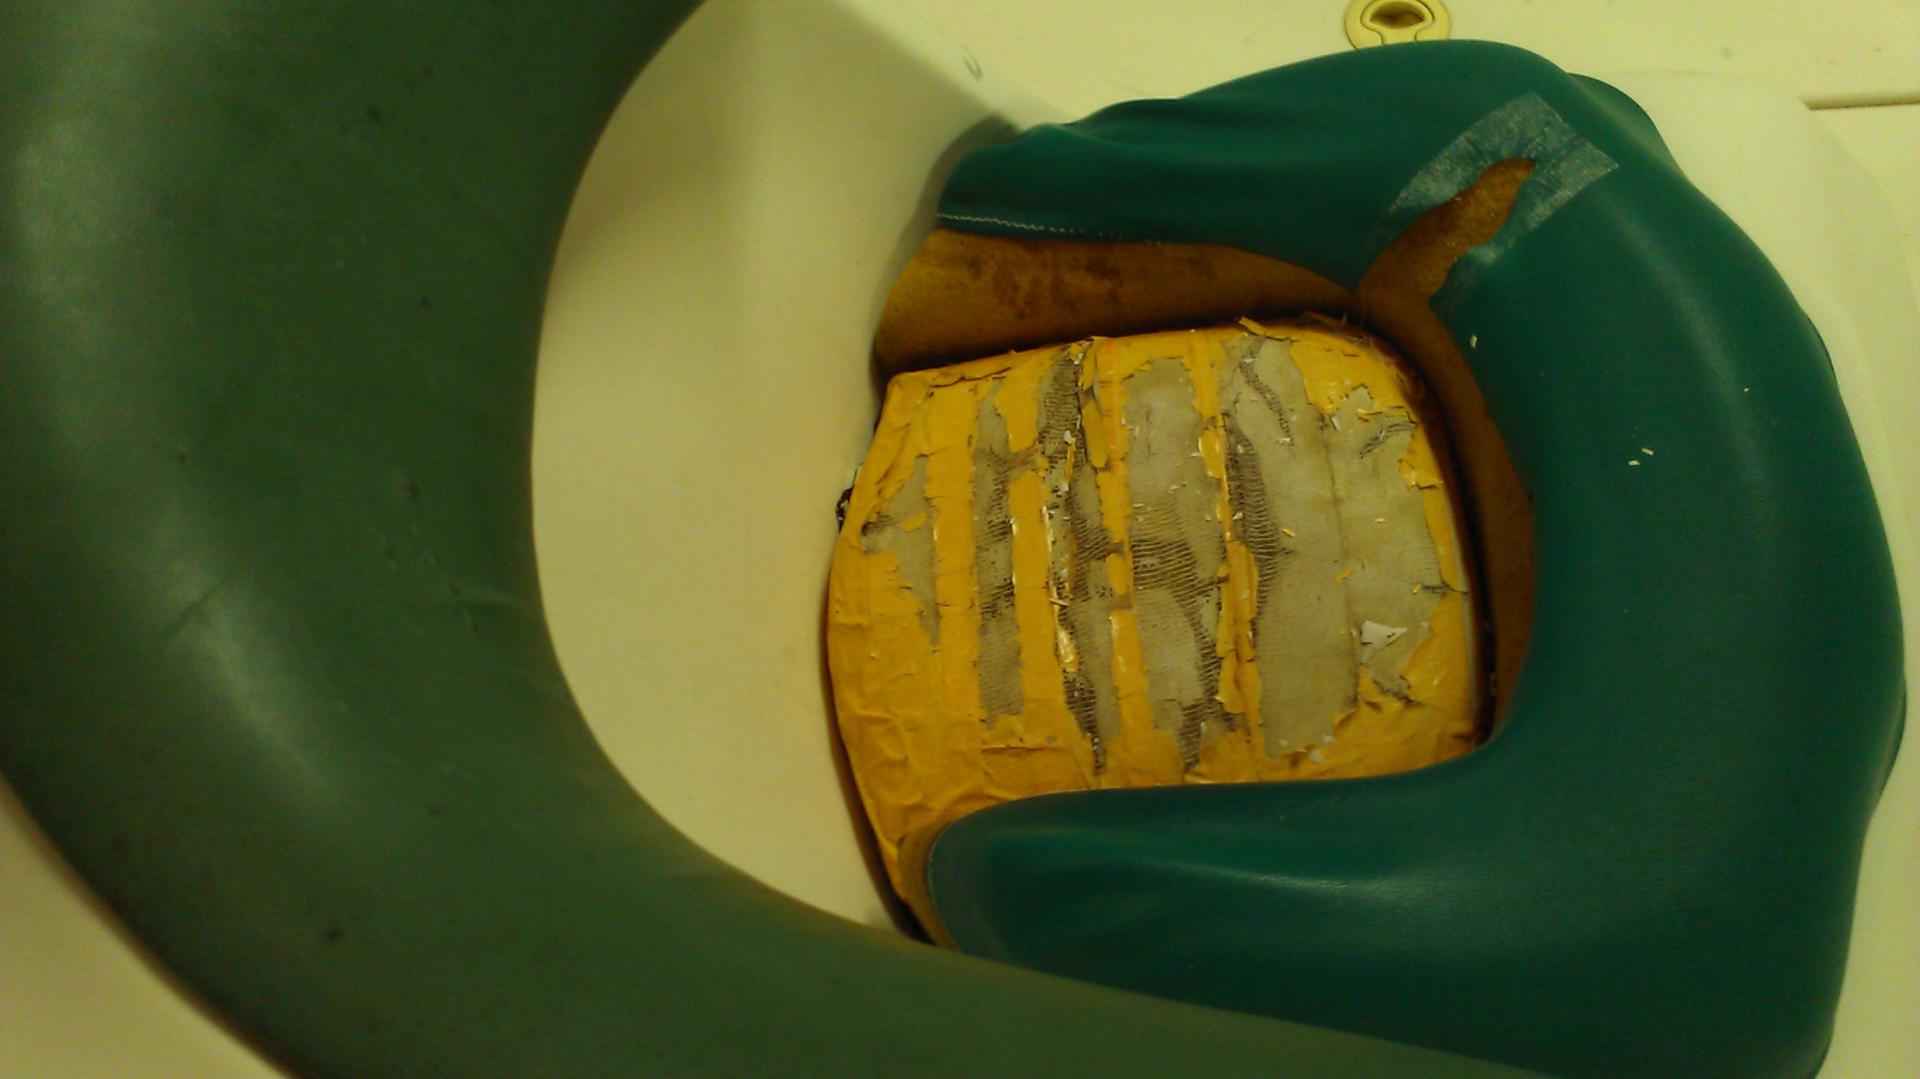
- the traction pads on the swim platform are dry rotted and falling off
- the plastic hinges on both little hatches are broken
- the hideous purple and pink stickers on the sides are faded.

The only thing missing is the port cup holder that must have blown out on the drive home. I wish I would have noticed that it wasn't glued in, as I would have put it in the van.

General thoughts on how to proceed:
- charging battery so i can inventory the electrical systems to see what works/doesn't
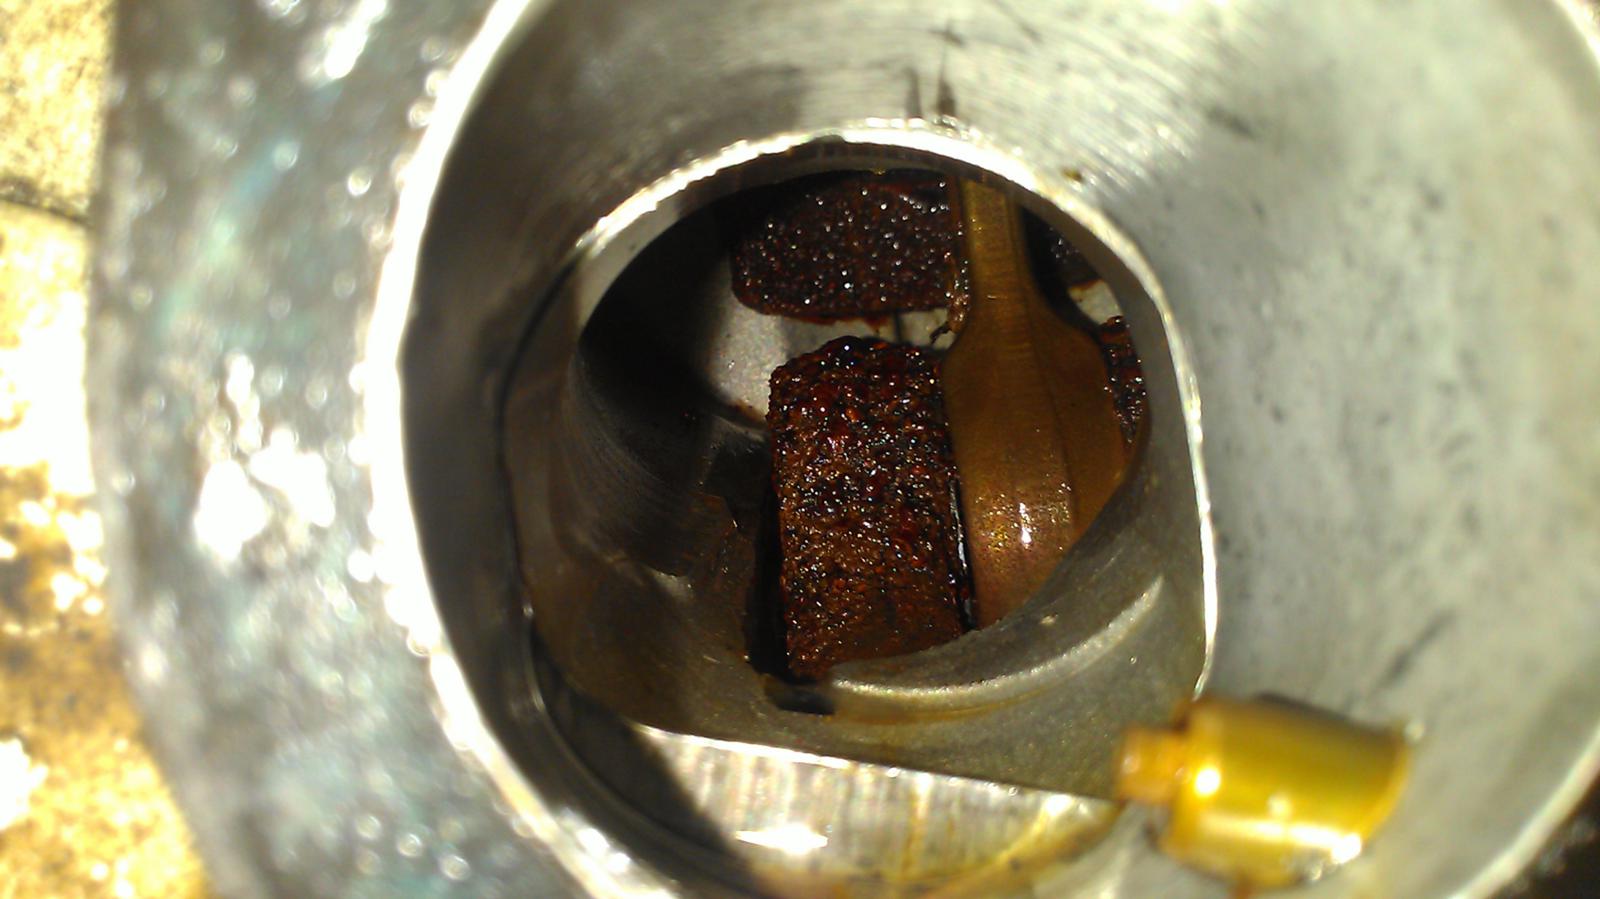
- shot some 3 in 1 oil in the plug holes... wondering if I should have used penetrating oil... or if I'm flat out wasting my time
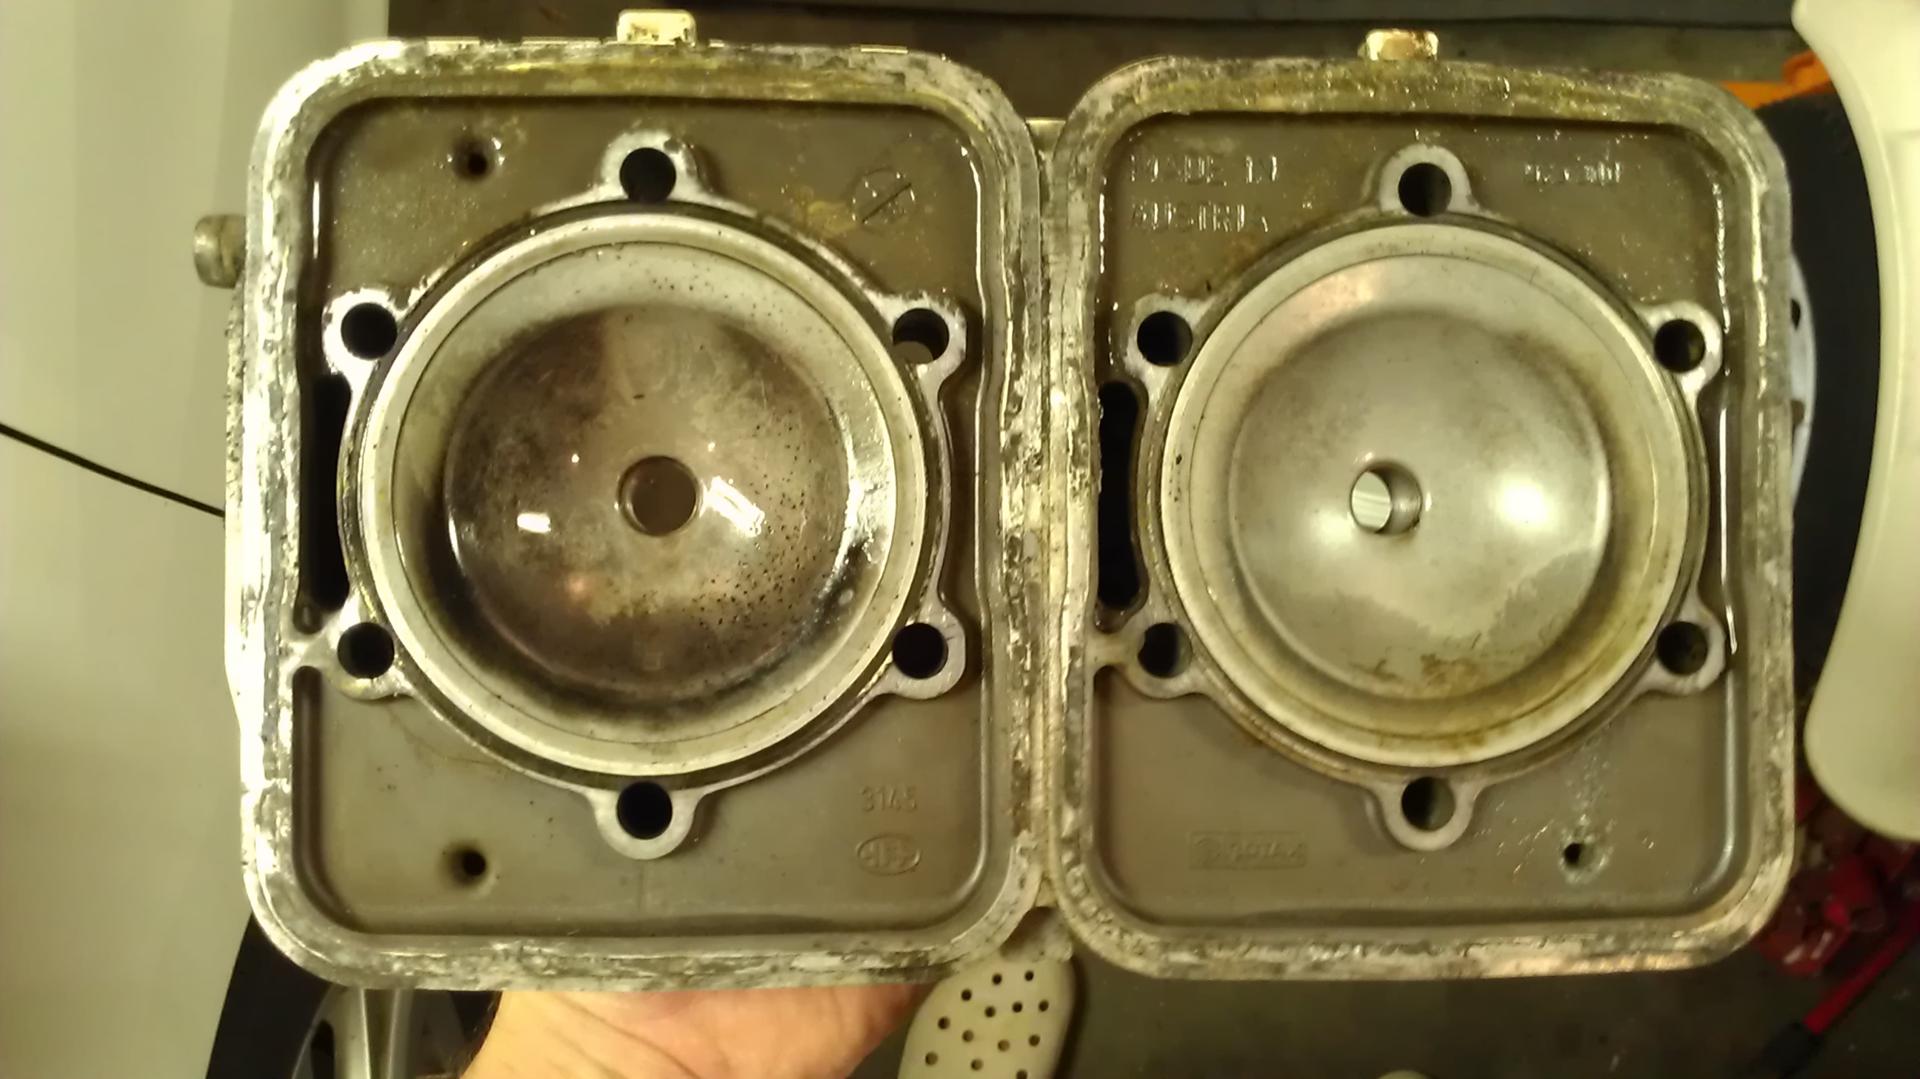
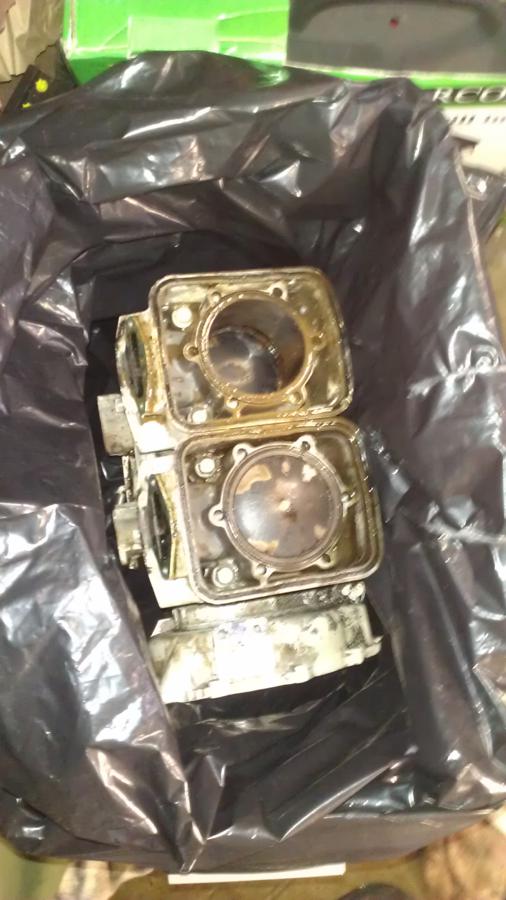
- likely to pull the head to see how bad the cylinders look
- once I've got my head around the extent of work required, then I'll decide where to start.

I'll post pics when I figure out how.
And yes, it is called Project Dog House, because my better half was totally against the purchase and is rather unhappy with me at the moment.:cuss:
 
Last edited by a moderator:
She will get over it. They always do. :thumbsup: Congrats on the boat.

Cup holder is easy. They are generic, and can be bought at any boat shop. AND... even some wal-marts will have them in the boat/fishing section. Also... the dull finish on the top deck is easy. There are a bunch of threads on polishing gel-coat.


As far as the engine goes... if there was water in it... and it's locked... IT'S DONE !! Even if you break it free... I wouldn't trust it to take a ride. SO... just plan on a rebuild.

Before you try to check over the electronics... make sure there are no shorted wires anywhere. The boat MPEM's are very sensitive, and they are no longer available. If you burn it up... a replacement will be hard to get. ALSO... do not try to tun on the system while hooked to a charger. Go buy a new battery (not wal-mart, they suck) put a charge in it... and then put it in the boat.

Post the pics once you get a chance.
 
Last edited by a moderator:
Here are the pics:
Just got home and parked in my garage. Haven't even sprayed it off yet.
139.jpg


140.jpg


141.jpg


142.jpg


143.jpg


144.jpg


145.jpg


Dry rotted swim platform foam
146.jpg


Here are the pics the prior owner sent me before I went to see it:
147.jpg


148.jpg


149.jpg


150.jpg


151.jpg
 
Actually... that's not too bad. The seats have been reupholstered already, and the rest is cosmetic.

Strip it down, and just clean/repair/replace as it goes back together.

Both of my boats were projects. When they are done... they look great, and you will be proud to say... "I rebuilt it".
 
Actually... that's not too bad. The seats have been reupholstered already, and the rest is cosmetic.

Strip it down, and just clean/repair/replace as it goes back together. .

Agreed.
Little boats like this have very few systems, and what they have are relatively simple. I am optimistic that I can do what it needs over the winter and be riding around in the spring.
 
Last edited by a moderator:
DejaVu...

A new motor and all the required items checked and replaced when needed will net you a great boat in the spring. Good luck on your build, can't wait to see how yours comes out.
 
Made some progress last night:

- removed the head to see how bad the cylinders were rusted. Actually, they look pretty good, considering. I tried to pour some ATF in to try an unseize the pistons, but the mag side is around TDC, so it won't hold any fluid, and the PTO side has ports exposed in the cylinder, so the fluid just runs out. grrr. Also tried to free the pistons by tapping with a rubber mallet and block of wood. Didn't work. Shot some Penetrating oil in this morning and will hit it every day to see if I can get them free.
161.jpg

162.jpg

163.jpg

164.jpg

165.jpg


- removed the battery and battery box

- removed all 4 cleats, and the pads for the front 2 seats to facilitate buffing and to recover the pads. The area under the spotter seat was disgusting.

166.jpg

167.jpg

168.jpg


- heat treated the fugly green driver's console to bring back the green color... it was almost white.
169.jpg

170.jpg

part way done... amazing difference
171.jpg


- the kids wanted to help, so I gave them a bucket of soapy water and they washed the inside of the boat. Still in the garage, so I jacked up the port side and let the water drain out the scupper and into a bucket. :)

- wiped down and armor-all'd the main seats

- the front nav light didn't work from the switch, but verified that it works when a 12v souce is connected... so a wiring issue to sort out.

- identifed that the new bilge pump float switch that the seller told me about was installed with new wire, using household splice clamps and twist-on wire nuts. awesome (no, not really)
172.jpg


- removed 1/2 of the top pink/purple graphic from the starboard side using the heat gun to warm and peel as I went. Went well at first, but the further back I went the more brittle the sticker was. Decided to tackle this later, after the engine is out.
173.jpg

174.jpg


- discovered that the gas tank that I thought appeared empty is, in fact, so full that there weren't even any air bubbles showing at the top. At marina prices, that is over $100 worth of gas that is about 5 months old. Don't know if it is still any good, but I put stabil in it for now. I'll siphon some and see how it does in the lawn mower.

What is next?
- remove engine and prep to be sent off for rebuild

And while engine is away being rebuilt:
- scrub the bilge and clean up the engine compartment
- id which hoses, clamps, etc. will need replaced before re-installing engine
- finish removing hull stickers (probably all of them)
- scrub the hull and buff
- re-cover the back rests for the 2 front seats
- rebuild and recover the spotter seat
- make a new front seat pad, as there isn't one now
- install new hinges on the rope and cooler hatches
- replicate CLAYMORE's inspection checklist and work through it to see what needs replaced, fixed, cleaned, or otherwise monkey'd with.

-all while getting the engine back from the rebuilder for my 2000 GTX DI, prepping that ski, and resinstalling the engine.
-and likely having shoulder surgery in a couple of weeks
Should be easy to get all of that done before spring, right?!
 

Attachments

  • SeaDooChallenger_dog_house(11).jpg
    SeaDooChallenger_dog_house(11).jpg
    186.4 KB · Views: 68
  • SeaDooChallenger_dog_house(12).jpg
    SeaDooChallenger_dog_house(12).jpg
    257.7 KB · Views: 77
  • SeaDooChallenger_dog_house(14).jpg
    SeaDooChallenger_dog_house(14).jpg
    182.1 KB · Views: 69
  • SeaDooChallenger_dog_house(16).jpg
    SeaDooChallenger_dog_house(16).jpg
    237.6 KB · Views: 78
Last edited by a moderator:
Careful with the heat gun. I find a sharp razor to be more productive on old graphics than heat. Basically... the vinyl is old, and brittle. (as you know) but it will fall apart before the glue gets soft from the heat. Also... on crusty stickers like those... by the time you do get the glue soft... you can discolor the hull.

Most of the bilge funk is mold. I find that Super Clean is the best thing for that job. Just spray it on full strength... give it a few minutes to work... and hose it out with water.

From the top... the engine doesn't look bad... but I do see rust. Unfortunately... the crank is what will be rotten.

The shame here is that engine was fine. BUT... because someone was LAZY... it's now rotten. That's, $800 worth of lazy.

If you are looking for some inexpensive, basic graphics... let me know. :thumbsup:

12.jpg


89.jpg


11.jpg
 
Last edited by a moderator:
From the top... the engine doesn't look bad... but I do see rust. Unfortunately... the crank is what will be rotten.

The shame here is that engine was fine. BUT... because someone was LAZY... it's now rotten. That's, $800 worth of lazy.

If you are looking for some inexpensive, basic graphics... let me know. :thumbsup:

I don't doubt that the crank is bad. And I should clarify that much of what looks like rust in the pics of the cylinders is actually residual ATF that I poured in though the plug holes because I read somewhere that it can sometimes help free stuck pistons. When I look in the actual cylinders, I don't see any rust around the pistons and am thinking that the lower end is what is keeping it from rotating.

I'm open to suggestions on graphics. Thinking that i'll stick with green, since the seats and most plastic is green. Something very generic. Not looking to customize since I may not keep it too long. Don't want to put a lot of time and effort into customizing, since that is a great way to turn-off potential buyers. :)
So far I'm thinking probably just some dark green HydroTurf and some basic SeaDoo stickers on the sides.
 
Sure... that would be easy. Basically... 3 big seadoo stickers. (sides and rear) I also have a sticker for the dash. (where your switches are)

FYI... I do a new (or 2) seadoo project every spring. :thumbsup:


57.jpg
 
Good start. You will have a nice boat when you are finished.

One big suggestion. DO NOT use wire nuts anywhere on a boat. You should only use crimp connectors to splice wires and crimp rings for connections. Wire nuts will vibrate off and cause other problems. Also, make sure you use marine grade tinned stranded wire. Do not use solid or non-tinned wire.

As Doc said, do not use a heat gun to remove stickers. A hair dryer is safer as it does not get as hot. Remember, this is a plastic boat. Even fiberglass will distort and discolor under high heat. If you use a razor blade, be careful not to gouge the fiberglass.

Good luck on your project and keep the status and pictures coming.
 
Received my 951 DI engine back from SES today, so I'll shift focus soon from the boat to the 2000 GTX DI. Ideally, I'll get the engine out of the Challenger and sent off to be rebuilt BEFORE I start putting the GTX back together, but who knows when my ADD will kick in and have me running off in another direction :rolleyes:
 
My shoulder surgery is scheduled for this Thursday morning, so I'm frantically trying to get the engine out and packed to send off to be rebuilt while I still have the use of both arms. I expect my right arm to be in a sling for at least a month, maybe more. :(
Most everything came off of the engine easily. I had trouble getting the exhaust manifold to pipe connection loose, as the pipe partially blocked access to two of the screws. I used a straight hex wrench with a 8mm open end wrench to turn it and got them all out.

Current challenges:
1) The whole electrical connector on the front of the mag cover is wanting to pull out, instead of separating into two pieces. I'll have to get in there and see if I can get a better angle to wiggle the male part free from the female part without pulling the female part free of the mag cover. Having one broken thumb has made gripping one side of the assembly challenging.

2) I'm having trouble getting the jet pump out in order to pull the drive shaft free from the engine. I am jealous of CLAYMORE, as his jet pump had a neoprene seal, where mine has a half a vat of black locktite welding it in place. The manual says to pry it out with a 90 degree pry bar, so I guess I'll be doing that tonight. Wish me luck.:rolleyes:
I thought about trying to slide the engine forward and leave the pump/shaft in place, but I'm afraid I've wiggled the jet pump housing around enough that I've probably broken part of the black locktite seal and will have created leaks.

3) Also going to have to drill the heads off of a couple of the screws that hold the speedo on the ride shoe, as the heads of the screws have been worn down by ground contact such that there isn't enough left to get a grip with even an impact screwdriver. The speedo wire has a cut half way between the speedo and the hull, and the same wire is completely severed on both sides of the thru-hull. Can I splice this back together, or should i just order a new speedo?

4) In trying to take the steering assembly off of the pump assembly one of the four bolts was already loose and won't come out. I'm guessing that the nut is spinning, but can't tell until I get the whole pump assembly off. That gives me something to look forward to. :lol:

5) The aluminum parts of the steering/trim assembly have got some pretty intense corrosion, so I'll likely replace them. I hope I can find some replacements at a reasonable price.

6) The ride shoe appears intact, but has some of the same pitting/corrosion as the steering assembly, although less intense. Part of me wants to replace it, but part of me sees all of the black locktite and multi-bottle jack and dual heat gun arrangement that the manual says to use to remove it and wonders if it makes sense to mess with it, since it appears to be intact. I think I'll skip this for now.

The plan is to finish removing the engine tonight. Fingers crossed.:coolgleam:

Other stuff I've tinkered with since the last post:
-I've been trying different solvents to get the remains of the mat adhesive off of the swim platform. Goo Gone and a Scotchbrite pad seem to work well on most of it, but it looks like a prior owner also added a bead of some other glue along the edges, and I haven't found anything that will dissolve it... so it will likely be scraped off. I hope it doesn't mess up the textured gel too bad. Maybe a plastic scraper will break the glue free without damaging the gel. Although I'll just be covering it with some HT or blacktip mats.

-I see that the heat gun did discolor my hull when removing stickers as Dr H mentioned. I've tried a wide razor blade scraper and find it works well at removing old stickers. Not the priority at the moment, though, so I'll revisit this later.

-I found a 45W Sony amplifier hiding under the steering linkage (radio was already removed when I bought the boat). I won't need the amp, so I repurposed it to power the new 24" tv sound in my conversion van (tv only has headphone out, so level is too low to power van's AV speakers). Also had my first fiberglass repair experience fixing 12" x 3" a hole in the roof of said van. While cutting out the damaged area, making a foam form, and laying new glass was an interesting learning experience, it was not how I wanted to spend the weekend before Christmas... but rain was in the forecast and no repair shops were open, so I had to do it. :willy_nilly:

-By accident, found that Goo Gone dissolves the plastic of the throttle console. When used _carefully_, one can effectively wipe off the old yellowed top layer, leaving the plastic looking bright white and new.

-And I found that SeaDoo Engine Shop didn't send my bottom waterchannel cover back when they rebuilt my 951DI for my GTX... so it looks like I won't be able to put that motor back in before my shoulder surgery. :ack: I had really hoped to get that one done so that I could shift focus to the Challenger. Not sure why, but I am way more excited about the Challenger than the GTX. Well... it is probably since the GTX has been in my family since it was new in 2000, so I've logged plenty of hours on it. The Challenger will be the first jet boat I've ridden in.
 
Last edited by a moderator:
The engine is OUT and in the crate to be sent off for rebuild.
144.jpg


And yes, I know that the head hasn't been reattached yet in this picture. :)
145.jpg


Bilge is a filthy mess. That will teach me to pinch the lower oil supply line BEFORE disconnecting it next time.:eek:
146.jpg


I could see the crank through the rotary valve and it is the nastiest orange blob of rusty mess I've ever seen.
147.jpg


Does anyone have a good steering nozzle assembly they are looking to part out? You can see that mine is so pitted that the divider in the center of the nozzle has partially eroded away.
148.jpg

149.jpg


Also would like thoughts on whether it is worth the trouble to remove and replace the ride shoe due to some pitting. It is held on with so much black goo that I suspect it will be a real joy to remove. :rolleyes:
150.jpg
 
Good to see you doing this, I hate seeing things get parted out, even though Im always looking for parts from them
 
I hope the central NC weather cooperates today. I paid seadooengineshop.com yesterday and got my shipping label to send this 787 engine to them for rebuild. Finished packing the engine last night and zip tying the lid on. Scheduled UPS pick up for today... UPS usually gets to my house pretty late in the day. The kids have already been sent home from school because of impending snow, freezing rain and sleet. Fingers crossed that the weather holds off long enough that they can pick up the engine today. I grew up near lake Erie in Ohio, and snow wasn't a big deal up there. Down here in NC we get too little snow to justify the equipment for effective snow removal, so even an inch of snow closes pretty much EVERYTHING. Tom at SES said I should have my engine back around the end of February.

My goal is to have both the GTX and Challenger ready to ride by the time I unwinterize my big boat. Last spring that was the first weekend in May. I had hoped to get my GTX engine reinstalled and the Challenger ready by the time the 787 gets back to me. Not real optimistic though, as the GTX is in the back yard on a stand. I've got to get the jet boat out of the garage, then get the GTX back on the trailer and into the garage so i can work on it. I live in the South for a reason... I grew up with COLD and I HATE it. I had shoulder surgery 2 weeks ago yesterday, and will be unable to work with my right arm for at least 4 more weeks... so all work is exponentially more difficult right now. I've got a couple of friends that have offered to help, so fingers crossed. :)

Also, when looking for a new steering nozzle I was also looking for one of the impellers that I've seen people list as a better option for the Challenger than the stock impeller. I found a nice whole jet pump assembly on fleabay that already had a nice Skat 17/22 swirl impeller, good bearings, good wear ring, and good steering nozzle assembly... all put together and cheaper than I could get the parts separately. So, that is all together and ready to go back on when the engine is back. Just have to attach the reverse gate.
 
The UPS man dropped off my 787 engine yesterday. Tom @ SES called early last week... Tuesday, I think, and said he just finished painting it, so it would ship the next day. I was about to head out of town for the long weekend, so I told him he could let the paint cure a bit before he shipped it. I'm glad I did, as I would not have been home to receive it on Friday... so good that it arrived on Monday when I was home.

Haven't fully uncrated it yet, but a quick peak looked pretty good. I had hoped to have the engine bay fully prepped by now, but wasn't able to. Shoulder surgery sucks. :(
Forecast is for 62 on Sunday. Maybe I'll be able to pull the boat into the drive and pressure-wash the engine bay.
The original plan was to pull the engine, then move the Challenger out of the garage to make room to put the GTX engine back in. However, I am still not able to get the GTX off of the stand in the back yard to move it to the garage. I would probably be OK, but don't want to risk damaging my freshly rebuild shoulder by muscling the GTX from the stand to the trailer. So, the current plan is to put the Challenger back together first, since it is already in the garage, and do the GTX after.

Also, my wife didn't understand my excitement, but I bet y'all will... I stumbled across a set of SeaDoo tools on the local CraigsList.
Here is what I got for $125:
2 impeller tools
SBT alignment tool with 2 transom plates and a few end pieces for the alignment shaft
pop-off tester
flywheel puller
VTS tool

Spare parts from a 1996 XP
oil pump
starter
drive shaft w/ bellows, support ring, carbon ring, end bumpers
 
also, my wife didn't understand my excitement, but i bet y'all will... I stumbled across a set of seadoo tools on the local craigslist.
Here is what i got for $125:
2 impeller tools
sbt alignment tool with 2 transom plates and a few end pieces for the alignment shaft
pop-off tester
flywheel puller
vts tool

spare parts from a 1996 xp
oil pump
starter
drive shaft w/ bellows, support ring, carbon ring, end bumpers


cha-ching!!!!!!!!!!!!! Score
 
Good job on the tools, I just paid 150 plus shipping for the alignment tool.:(

I got my motor last week and I am still giddy.
 
Good job on the tools, I just paid 150 plus shipping for the alignment tool.:(

I got my motor last week and I am still giddy.

Thanks.
She just rolled her eyes when I said I was going to buy some SeaDoo tools.
When I itemized them and what they were worth, she grudgingly said "good job".
I was fist pumping and yelling "booyah!" after I picked up the tools, as my project budget is drying up and this find saved me.
:hurray:
 
I'd love to come across something like that! I've been keeping a passive eye on CL for a gem. I'd LOVE to get ahold of a 97 speedster as I have a passion for all things yellow. :) Especially for that kind of a deal.
 
I have been monitoring CL for about 16 cities in a 400 mile radius for about 4 months looking for an alignment tool.
It was sheer luck that when I found one it just happened to be my local CL. The guy was a bit over an hour away, but offered to meet me half way.
 
I'd LOVE to get ahold of a 97 speedster as I have a passion for all things yellow. :) Especially for that kind of a deal.
Agreed on the Speedster.
If the Challenger serves me well this summer, then a speedster may be in my future. :)
 
I def know how that is with your project fund drying up. Mine dried up several hundred $$ ago. lol Fortunately I'm on the tail end of it, and don't currently see any big expenditures.
 
I def know how that is with your project fund drying up. Mine dried up several hundred $$ ago. lol Fortunately I'm on the tail end of it, and don't currently see any big expenditures.

You are tempting fate, suke. :)
My problem is that I have 2 SeaDoo projects in the works, and I had not budgeted for either. Both were rather impulsive "I found a deal" pick-ups. I have spent more than I would like on each. I could have gotten away with cheaper in several cases, but have tried to err on the side of making sure it is done right so I don't have problems with them over the summer. Between the big boat and these little toys, if I take short cuts I'm pretty much guaranteed to be wrenching all summer instead of playing.
 
Status
Not open for further replies.
Back
Top