RESTO Project Dog House: 1996 Challenger

Note: This site contains eBay affiliate links for which SeaDooForum.com may be compensated
Status
Not open for further replies.
You are tempting fate, suke. :)
My problem is that I have 2 SeaDoo projects in the works, and I had not budgeted for either. Both were rather impulsive "I found a deal" pick-ups. I have spent more than I would like on each. I could have gotten away with cheaper in several cases, but have tried to err on the side of making sure it is done right so I don't have problems with them over the summer. Between the big boat and these little toys, if I take short cuts I'm pretty much guaranteed to be wrenching all summer instead of playing.
I had a yammi project I was JUST wrapping up when I stumbled onto my XP. Now I'm pretty certain the yammi needs more work. Have this weird whine. Gonna guess it's pump bearing. Dunno......need to take the pump off and see.
 
Finally have this project moving forward again...
Sunday I got out the pressure washer and spend a few HOURS cleaning. Mainly the engine bay, but also the other contained areas that were covered in black, crusty funk like under the spotter seat, the ski locker and cooler.
Before:
168.jpg

1996_seadoo_challenger_cleaning_before (3).jpg

1996_seadoo_challenger_cleaning_before (5).jpg


After:
373.jpg


Note that you can't even see the gas tank in the Before pic since it is totally covered in black funk.

For anyone else that needs to clean their engine bay, a few lessons learned:
  • Don't forget to cover your electronics! I did not forget... but it is really important since the "brain" is worth more than I have in the whole jet boat so far. I also bagged the carbs, as I didn't disconnect them... just unbolted from the intake.
  • The drain plugs for the engine bay aren't at the absolute lowest point on the transom, so not ALL of the water will gravity drain out. I have a sloped driveway, so I had the boat on the trailer with the bow pointed up the hill on the driveway. I even backed the van up on my oil change ramps to get the trailer hitch, and therefor the bow of the boat another 12" off the ground and still couldn't get all the water to drain out. So, as I broke loose black funky stuff from inside the boat, it just pooled up in the engine bay.
    A big shop vac would have been perfect to suck out this sludge. However, my shop vac is on my big boat at the lake 2 hours away, so I tried to just keep flushing water through the hull. Eventually I found some clear tubing and siphoned the water out through the drive shaft hole. It took a couple of refills and siphons to get all the nastiness out. I tried wiping it out with a towel, but it just smeared the black goo everywhere. :facepalm:
  • Simple green concentrated cleaner combined with a pressure washer is an awesome combination. :thumbsup:
  • It wasn't hard at all, just time consuming... and could have been done MUCH faster with a shop vac.
  • Now, instead of dreading climbing in the engine bay to reinstall the engine, I'm actually pumped up and ready to "git 'er done!"

Last night I also cleaned all of the components that will be bolted back on the engine. With some luck, I'll be able reinstall some of them tonight. Just have to scrape off the old exhaust manifold and RAVE gaskets and clean up the mating surfaces, then read up on installing the gaskets, bolt torques, etc.
 
Today I gave $400 cash for a fairly nice 4 person pedal-powered paddle boat, 5 purple and black SeaDoo life jackets, a 1996 Challenger with cover, and the SeaDoo trailer that the Challenger sat on. ...

Since I bought the boats in December, I figured I'd wait until it warmed up to put the paddle boat on craigslist. I put it on last Thursday. On Friday a guy came and gave me $250 for it. :) So, that effectively puts the jet boat and trailer at $150 + the new trailer tires... so about $335 in acquisition costs. :) At least selling the pedal boat covered the cost of the jet pump and Skat impeller that I picked up off of fleabay. :cheers:
 
The engine is just about ready to go back in. I've put all of the stuff back on that was taken off before sending it off for the rebuild.
Sadly, I got in a hurry and broke the temp sensor off in the head. So, I've got to fix that.
http://www.seadooforum.com/showthread.php?59755-temp-sensor-threaded-shaft-broke-off-in-cyl-head

Minnetonka4me is sending me a temp sensor for a fraction of the price of a new one, and Amazon says the tap to restore the threads will be here Thursday... so I HOPE the engine will be back in by the weekend.

I am hoping that once I get it in place, reconnecting all of the lines, wires, carbs, etc. won't take more than a few hours.
With some luck, I might be able to run it on the hose for a few minutes this weekend.
Of course, I probably just guaranteed that something will go wrong by saying that.

Once I've addressed whatever went wrong, then I'll align it with the Way-longer-than-I-had-expected alignment tool, bolt the "new" jet pump on, and be ready to back the trailer in the water and run it on the trailer to see what leaks. (Not IF something leaks).

Engine before... it looked so bad that the camera refused to focus on it:
538.jpg


Engine after:
539.jpg

540.jpg
 
Thanks for posting RJ, I love project threads like this. I can't believe the price you paid, what a steal, if you do sell it you'll defiantly have to let us know for how much.

Why is called project dog house?
 
Thanks for posting RJ, I love project threads like this. I can't believe the price you paid, what a steal, if you do sell it you'll defiantly have to let us know for how much.

Why is called project dog house?

The answer is in his first post, last paragraph. Somewhat comical, cause I am sure most guys can relate.
 
Hope to get the remaining hoses, carbs and battery hooked up in the next couple of days so I can test run it.

Reinstalling the engine would have been comical to watch, as I didn't have the clearance on the pipe side that I thought I would once the engine was bolted down... so first I set it in and bolted it down... then remembered that it is easier to reconnect the starter if it is raised a bit... so I unbolted it, hooked the engine hoist back up and lifted it a few inches to hook up the starter... then lowered it, unhooked the hoist, bolted the engine down...

Then realized that I couldn't reach the oil hose and block drain hoses because they were under the exhaust pipe (so THAT is why folks usually put the pipe on after the block is bolted down)...so hooked up the hoist again, unbolted and lifted the engine again so I could hook those up. That time I looked around for anything else that might be easier to hook up while the engine was a couple of inches above the mounts, and also spun it to the side a bit to make hooking the oil pump feed and control wire from the carbs before lowering it and bolting it down again. Hopefully I got it all that time... but I haven't returned my neighbor's hoist yet, just in case. :)

Here it is going in and before I started reconnecting lines/hoses, etc.
658.jpg

659.jpg
 
Last edited by a moderator:
Hey Rjcress ,
Looks like your doing a nice job.... I just read this today.... I went through this last year....
I have a 1995 Speedster , my friend rebuilt the engine and it Blew again I don't know why....
Some one told me the carb might have been leaned out to much....
There are some interesting break-in procedures in these Forums , it probably would be good
to look at them.... I was also told Bartenders Friend is good for cleaning the waterline guck....

For anyone else interested diesel fuel put in the spark plug holes can free a rust siezed engine ,
let it soak for a couple of weeks and then carefully work it back and forth , it is time consuming....

Good luck the rest of the way with your rebuild my friend... I like that you are posting your results
it's good of you to share !! Don't worry you'll be out of that Doghouse once she feels the wind
and sun on her face....lol..
 
Woo hoo!
Hooked up the carbs and remaining hoses, then the battery.
Squirted some oil in the cylinders and cranked it a few times with the plugs out.
Turned over fine
Now to pull the trailer out of the garage, hook up the hose, put the plugs in and see if she runs.
:leaving:
Wish me luck.
 
It ran!
Only ran it a minute or so, since it was on the garden hose.
No leaks or issues so far.

How long should it take for the oil lines from the pump to the manifold to fill with oil?
After probably 2 minutes of cranking without the plugs and a minute or so or running, the oil in each cylinder's line is getting close to the manifold, but hasn't made it there yet.

Next I'll put the jet pump back on so I can run it on the trailer at a lake to see what leaks.

I'm still giddy that it ran on the first try, nothing leaked, nothing blew up, etc. :cheers::hurray:
 
I think I recall somewhere that you may need to prime the oil lines that go to the manifold. I could be wrong though. Great progress so far!
 
Best of Luck , Budd !!

F.Y.I I was told on these forums ;
not to run the engine on the hose for more than 5 mins.
and don't forget to read break-in procedures on these forums....

I feel you're excitement , Woo - Hoo !!
We still have Ice on the Lakes up here in Northern Ontario....
 
Looks like I'm stuck.
I finished moving the reverse bracket from the old jet pump to the "new" one, cleaned up the transom and was putting the drive shaft in the impeller when I realized that I'm missing a part. I had not realized that the impeller boot from the OEM impeller is way too big to fit in the new Skat-Trak impeller... so I've got to get the right boot before I can put the jet pump back on. Sucks when a little 20 cent part holds up a project.

Also, I picked up an alignment tool a few weeks go. I just re-installed the original engine, so I wasn't expecting the alignment to be way off.
The tip of the alignment tool is hitting the PTO about 1/4" lower than it should. It is far enough off that it won't go in the PTO. I'm wondering if I did something wrong, as that looks like a lot of misalignment. I did not unbolt the engine mounts from the floor of the engine bay, and didn't touch the shims, so everything should be as it was before. Also, wondering if the mounting plate on the alignment tool is off. I had trouble fitting it on the mounting studs. Had to malletize it (hit it with a rubber mallet) to get it on all the way... which made getting it back off really challenging. Pretty sure the jet pump mounting studs in the transom are misaligned. They look a bit off visually. I would be shocked if the holes on the alignment tool plate were not drilled in in the right places. If the engine were this poorly aligned prior to the rebuild, then I would have thought there would be significant wear on the ends of the drive shaft and carbon ring... but there wasn't.
I think I'll install the jet pump (when i get the right impeller boot) and see if it looks like it is out of alignment then.
Not sure what the "right" way forward is.
 
Last edited by a moderator:
Someone PM'd me a request for pics of how the spotter seat fits together on the '96 challenger. Rather than reply privately, thought it would be more helpful to post here where others can find it if they have the same question.
Keeping in mind, of course, that I have partially stripped mine down and have not yet re-covered it.

Here is the empty seat frame:
153.jpg


First thing to go in is the styrofoam, with the smooth side up (the bottom has a series of holes)
154.jpg


On top of the styrofoam is this seat base cushion assembly (yes. I made up the name). The center cushion that will be visible was covered by a prior owner with orange duct tape. You can see that the exposed part deteriorated and faded, while the part hidden by the rest of the seat is still orange. I'll remove center cusion, remove the duct tape, stretch some marine fabric (vinyl?) over the center cushion, secure the fabric with staples to the bottom of the center cushion, and reattach to the base... I think. I'm actually not sure how the center cushion attaches to the base, so the plan may evolve. Top down view.
155.jpg


seat base cushion assembly from the port side.
156.jpg


Bottom of the seat base cushion assembly.
157.jpg


On top of the seat base cushion assembly is this U shaped cushion... here is what it looks like without the vinyl cover.
158.jpg


...and here is what is left of the vinyl cover that was on the U shaped cushion.
159.jpg


view of the spotter seat looking forward from the aft bench seat.
160.jpg


If this doesn't answer any specific question, let me know.
 
Last edited by a moderator:
Looks like I'm stuck.
I finished moving the reverse bracket from the old jet pump to the "new" one, cleaned up the transom and was putting the drive shaft in the impeller when I realized that I'm missing a part. I had not realized that the impeller boot from the OEM impeller is way too big to fit in the new Skat-Trak impeller... so I've got to get the right boot before I can put the jet pump back on. Sucks when a little 20 cent part holds up a project.

Also, I picked up an alignment tool a few weeks go. I just re-installed the original engine, so I wasn't expecting the alignment to be way off.
The tip of the alignment tool is hitting the PTO about 1/4" lower than it should. It is far enough off that it won't go in the PTO. I'm wondering if I did something wrong, as that looks like a lot of misalignment. I did not unbolt the engine mounts from the floor of the engine bay, and didn't touch the shims, so everything should be as it was before. Also, wondering if the mounting plate on the alignment tool is off. I had trouble fitting it on the mounting studs. Had to malletize it (hit it with a rubber mallet) to get it on all the way... which made getting it back off really challenging. Pretty sure the jet pump mounting studs in the transom are misaligned. They look a bit off visually. I would be shocked if the holes on the alignment tool plate were not drilled in in the right places. If the engine were this poorly aligned prior to the rebuild, then I would have thought there would be significant wear on the ends of the drive shaft and carbon ring... but there wasn't.
I think I'll install the jet pump (when i get the right impeller boot) and see if it looks like it is out of alignment then.
Not sure what the "right" way forward is.

There is nothing wrong with your alignment tool, they do fit tight onto the bolts. Most times they need to be tapped on with a rubber hammer. 1/4" off in alignment is not enough to visual see significant wear, but it would still be a stress on the system and nice to get it aligned properly.
 
More detail later, but a quick update...
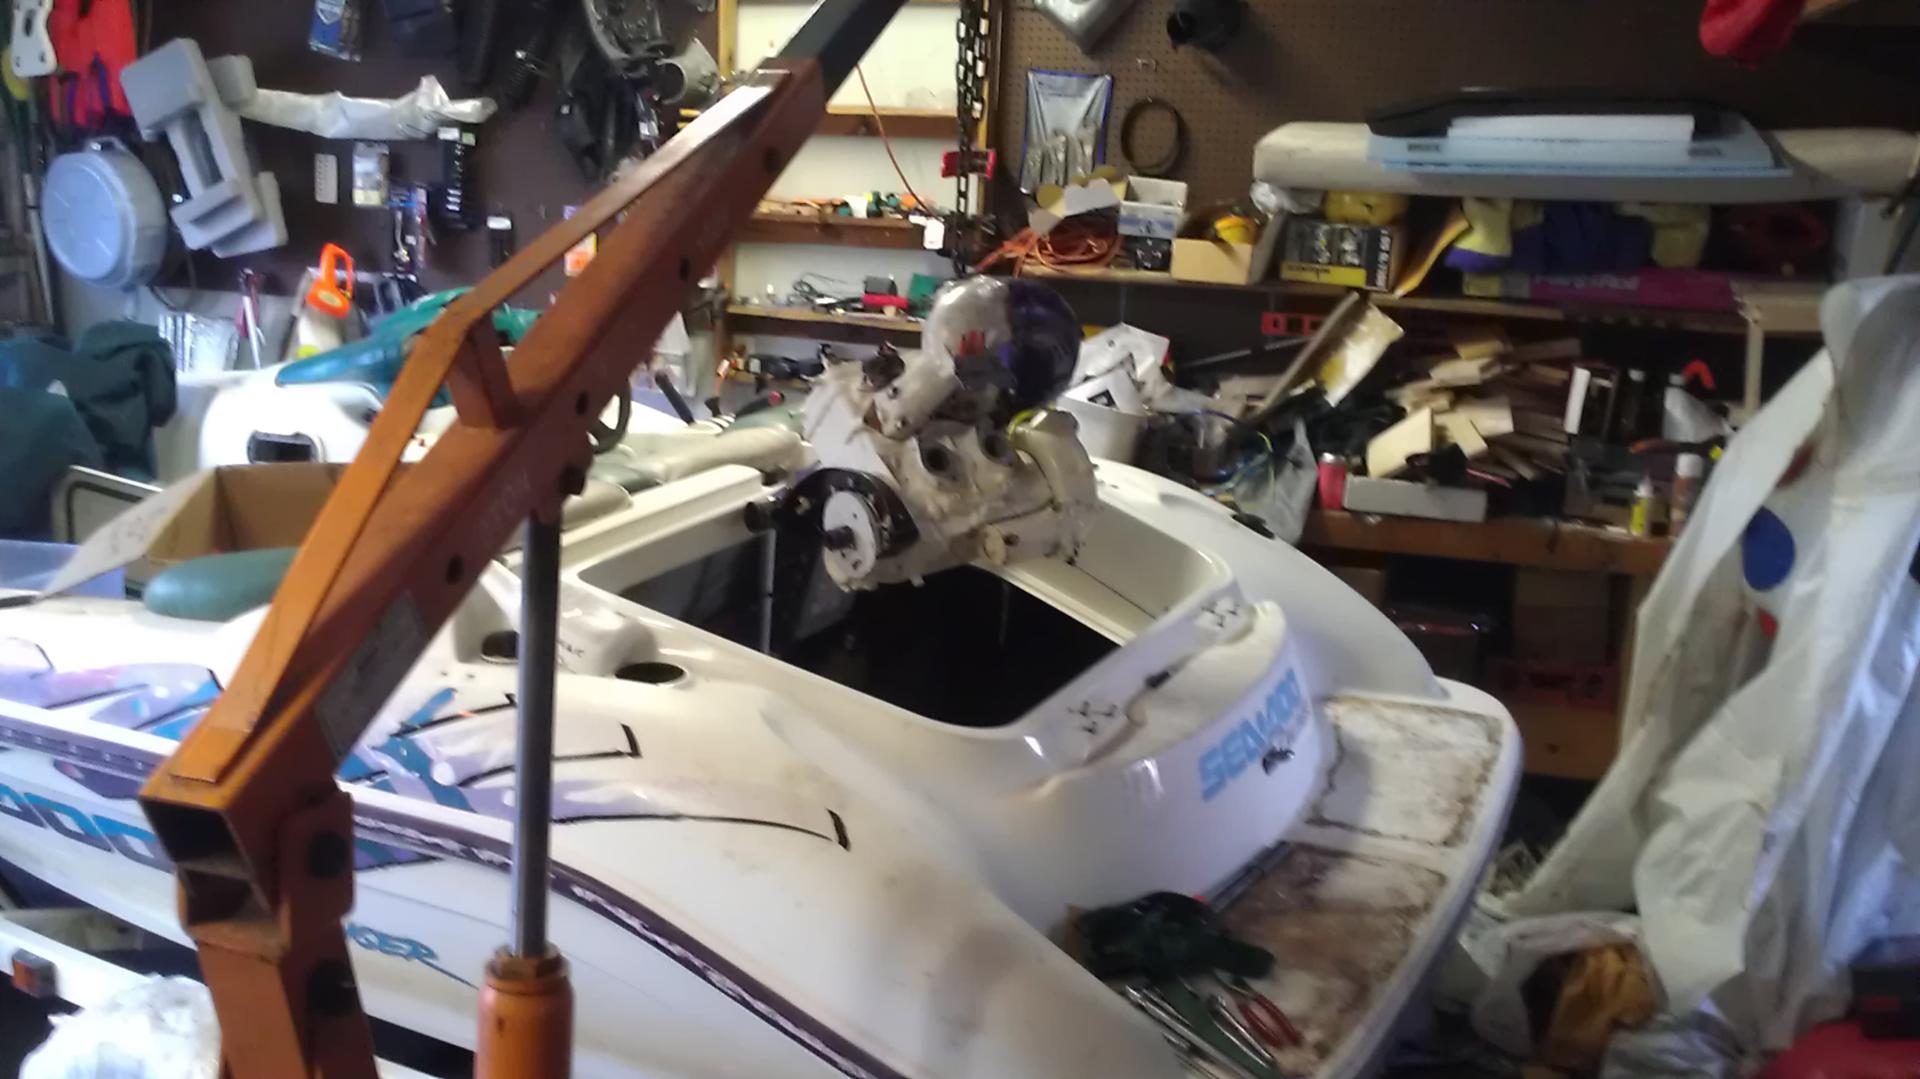
I was busy with last minute taxes Saturday morning, so I wasn't feeling motivated to install the jet pump. However, a friend came over Saturday night to help me and we got it all back together. Thanks Kicker for your thoughts on alignment. We took out the aft shims under the engine mounts and it lined up perfectly. :)
Sunday my friend picked me up and we took his new home made cloth over bamboo canoe (rather awesome) and the Challenger to a local lake to see how bad they leaked.

The plan was to run the Challenger on the trailer and leave with a list of things that leaked that would need addressed before I took it out "for real". I left the engine cover hatch at home so I could see the engine while running.
The trailer was backed in a little far... half of the swim platform was under water. The exhaust and speedo ports had a slow trickle leaks, but nothing else leaked. I choked it and it fired up pretty quickly, but wouldn't idle consistently. Pulled the plugs and they were wet. Stopped using the choke (was only using it to start, not when running) and it gradually ran better. I was concerned at how smoky it was running. I knew it would smoke, but wasn't prepared for that much smoke. I had forgot that I squirted a little oil in the cylinders last week to ease the initial starting. With the bilge fan on it wasn't that bad, but I had it off initially so I could hear what the engine sounded like.
Once it settled in and was idling reliably we pulled it out, drained the little bit of water that had leaked into the bilge, took off the trailer straps, and got the boat in the water off the trailer.
First time out we just idled around the no wake area by the boat ramp. When I tried to speed up past idle the throttle was stuck and wouldn't advance, so back to the boat ramp dock to pull the throttle assembly and look at it. All looked fine and my buddy figured out that if you push the Forward lever all the way forward, that it unlocked the throttle. I probably should have re-read the operators manual before this trip.:facepalm:
With that figured out, we headed back out. It idled smoothly out past the no wake markers, then as I slowly increased the throttle it would sputter... so back to idle. I kept doing that routine and it gradually got more smooth at higher rpms. It did die a few times, but seemed to be getting smoother every time I bumped up the throttle a bit. Eventually it was running smoothly enough to get up on plane.

HOLY CRAP! This thing is AWESOME!

I varied the speed a LOT and only got up to full RPM for a few brief moments here and there. We rode around for an hour or so. Every now and then it would sputter and die, mainly when at planing speed. My buddy and I were thinking that the gas is from mid August, so it may be old enough to cause some poor performance. I put Stabil in it in December, but it was already a bit old. I can't get the fuel filter open to clean it or replace the element, so I'll likely remove it from the boat this week so I can either get it open or replace it.

Doh! Gotta go to a Dr. appointment, but I'll share why we ended up paddling back to the boat ramp later. :willy_nilly:

Here is a video of my friend driving, with me and my son riding.
10 points to the person that correctly identifies from the video the clue of the problem that caused us to paddle shortly after this video. :blush:
http://youtu.be/loNUh39YxYc
 
spark plugs were not torqued down.

I think you are correct... and quick too. :)

In the video you can see some oil seepage around the plug holes, especially the mag side.
I noticed it just after turning off the camera. We shut it down and tightened the plugs.
Within a minute or so of running it died and we found the PTO side spark plug had a broken nose insulator. Since the plug is installed with the gap down, the insulator would slide down the electrode and touch the ground side of the gap (whatever that bent post is called)... so there was no gap. Sadly, I hadn't had enough sense to get new plugs (these were who knows how old plugs from the prior owner and from before the rebuild), and didn't have a spare. So, we bent the ground post to open up and make space to remove the nose insulator cone, then bent the ground post back and were able to limp back to the dock.

For clarity, the part that broke is the ceramic cone that surrounds the electrode in the combustion chamber... not the ceramic insulator that is on the outside of the engine and under the plug wire.

What I really don't know is if the insulator broke due to heat, as it had some whitish deposits on the ground post... or if it cracked due to shaking when the plugs backed out a bit.

Also, one of the aft motor mount bolts backed out, so there was more vibration than normal.

So, not sure if it is running lean and hot, or if it was a mechanical failure in the plug itself.
*Anyone have thoughts before I start messing with the PTO side carb to richen the mixture?

I was THRILLED to see that the broken insulator was all in one piece, so it looks like none of it got into the cylinder.
 
when you put your alignment tool on, did you align it to your transom? I mean, when the tool was sticking through your Through-Hull-hole, was it centered in that hole? I had to shim the tool quite a bit before I as comfortable with the alignment of the tool with the hole. If that's misaligned, you can ruin your carbon seal, or it will leak, causing cavitation. Am I right, or is that not that big of a deal?
 
when you put your alignment tool on, did you align it to your transom? I mean, when the tool was sticking through your Through-Hull-hole, was it centered in that hole? I had to shim the tool quite a bit before I as comfortable with the alignment of the tool with the hole. If that's misaligned, you can ruin your carbon seal, or it will leak, causing cavitation. Am I right, or is that not that big of a deal?

First, the off topic shout-out... I see you are an Apexican. I graduated from Apex High many moons ago. How is life in the Peak of Good Living these days? :)

I think I follow your logic on the process you used, and I am certainly not an expert here, but I suspect that you would have been better off NOT to shim the alignment tool. It looks to me that, with the tool secured flush to the transom, however the tool lines up, that is how your pump will line up. So, if you shimmed your alignment tool, then bolted your pump on and did not use the exact same shim setup (which you can't do), then your engine to pump alignment has to be off. Again, I'm new at this, so I could be way off base here, but that is how it looks to me. Makes me wonder if using the bolt-on part of the alignment tool is even a good a idea vs the way the manual shows... which is to take out the impeller and shaft and use the jet pump with the alignment tool. Seems like that would be the only way to KNOW that it is lined up properly. Although I guess there could be some misalignment introduced by then removing the pump to put it back together and reinstalling it.
 
Well, I got the idea to shim the tool because one of my skis came with shims between the pump and the hull. When I bolted my tool to the hull, it was grossly misaligned with the thru-hull fitting. This, in-turn, caused my carbon seal to be misaligned too. I shimmed my tool, then aligned the motor, then used the same shim setup when I reinstalled the pump. It all seemed to go together nicely, and in my mind, I feel better knowing all parties are aligned to the through-hull fitting.

Regarding the old-style alignment tools, Seadoo actually had a special pump that they modified to act as an alignment tool. I guess it was easier than cutting hundreds of plates of aluminum. I don't think we can just pull the shaft out of our pumps and use them to align with. The only reason I feel this way is I actually saw one of these "Factory Alignment tools" on eBay a while back. It looks bulky and I don't see how it would work any better than the ones out now.
 
Haha, yep. Love it here. Currently, Apex is a good place to be. It's not too big yet to truly hate the traffic, but it's quickly getting there. They're chopping down trees faster than the rainforests in S. America. I found a quiet little lot near Knight's Play and built a house out there. It's close to everything, yet I can still go outside and enjoy peace and quiet. Until I start working on the seadoos that is :) Did I mention that I actually found a place w/o an HOA? SCORE!!!
 
Haha, yep. Love it here. Currently, Apex is a good place to be. It's not too big yet to truly hate the traffic, but it's quickly getting there. They're chopping down trees faster than the rainforests in S. America. I found a quiet little lot near Knight's Play and built a house out there. It's close to everything, yet I can still go outside and enjoy peace and quiet. Until I start working on the seadoos that is :) Did I mention that I actually found a place w/o an HOA? SCORE!!!

Sounds awesome. :) I honestly don't recognize most of Apex any more. Incredible change in the past couple of decades.
 
Hey rjcress, where are you in NC? Will we see your challenger out on Jordan or Harris lakes anytime soon? I have 3-4 more people with seadoos and/or boats. We're gonna go out all summer long, gonna be a wet summer :) Should join sometime!
 
Status
Not open for further replies.
Back
Top