


-
This site contains eBay affiliate links for which Sea-Doo Forum may be compensated.
You are using an out of date browser. It may not display this or other websites correctly.
You should upgrade or use an alternative browser.
You should upgrade or use an alternative browser.
RESTO 98 spx mod
- Thread starter Jasonv
- Start date
- Status
- Not open for further replies.
Jasonv
Active Member


Fitting came in today for the egt.
I going out to the shed and going to try to install the gauge tonight. Do you guys have a switch to turn your gauges on or is it hooked into the wiring harness so it comes on when the ski is on.
No switch is preferable to me but I did notice Matt carbon fiber x4 did have a switch.
1of500
Well-Known Member
I stole power from the guages it hasn't been an issue it comes on when the key comes onView attachment 38449View attachment 38450
Fitting came in today for the egt.
I going out to the shed and going to try to install the gauge tonight. Do you guys have a switch to turn your gauges on or is it hooked into the wiring harness so it comes on when the ski is on.
No switch is preferable to me but I did notice Matt carbon fiber x4 did have a switch.
Yes I followed the Racepak instructions giving it it's own switch. I had a hole on the dash to fill. The rest of my skis have them wired in with the gauges though.
You have a taller impeller and tighter nozzles then I was using with those pipe and carbs. I would go with the stock nozzles to take the load off that new engine until you have it good and broken in.
The rev limiter under your MPEM in the grey box has timing adjustment on it. It would be a safe thing to back it off a degree or two. We can wait and see how the WOT temps are first though. If it's all good just let it ride.
Not trying to give you too much to think about just want to stay on the safe side of things.
Jasonv
Active Member
Yes I followed the Racepak instructions giving it it's own switch. I had a hole on the dash to fill. The rest of my skis have them wired in with the gauges though.
You have a taller impeller and tighter nozzles then I was using with those pipe and carbs. I would go with the stock nozzles to take the load off that new engine until you have it good and broken in.
The rev limiter under your MPEM in the grey box has timing adjustment on it. It would be a safe thing to back it off a degree or two. We can wait and see how the WOT temps are first though. If it's all good just let it ride.
Not trying to give you too much to think about just want to stay on the safe side of things.
Ok sounds good I'll probally be calling or posting picks on the rev limiter. I'm going to be looking into changing the whole gray box to a 97 box (that has a rev limiter unit also)so my gauges will work. Or rewire the box I have so my gauges work, nick helped me with the last one I rewired or he rewired will I was up there.
I can help you figure out that gauge wiring when your ready it won't take long.

Jasonv
Active Member
Not real happy with the way this is run I really want a storage container but we will see how it flows when I fill it up later tonight. I had a local muffler shop bend me a two inch od pipe and had to beat on it with a sledge hammer to complete the bend.


Last edited by a moderator:
Jasonv
Active Member
Cranked it up tonight runs great! Still have some things to do.
Install working vts
Install hose kit from nick
Install primer
Waiting for a small oil reservoir for the rv line
Decide where to install mount for gray box
Install pisser up front
Make and install mount for koso gauge
Change gauges the gas gauges has a crack in the clear plastic and the vts has moisture inside the gauge.
I found some minty ones on a junk hood


I might also have to leave the gas inlet line the fuel poured in as fast as the dump jug would let it.
Install working vts
Install hose kit from nick
Install primer
Waiting for a small oil reservoir for the rv line
Decide where to install mount for gray box
Install pisser up front
Make and install mount for koso gauge
Change gauges the gas gauges has a crack in the clear plastic and the vts has moisture inside the gauge.
I found some minty ones on a junk hood
I might also have to leave the gas inlet line the fuel poured in as fast as the dump jug would let it.
Spimothy Leary
Well-Known Member
if your plumbing lets you have a fast fill, then you did much better than I did, I had to fill up at about half of my normal pace to avoid it backfilling.
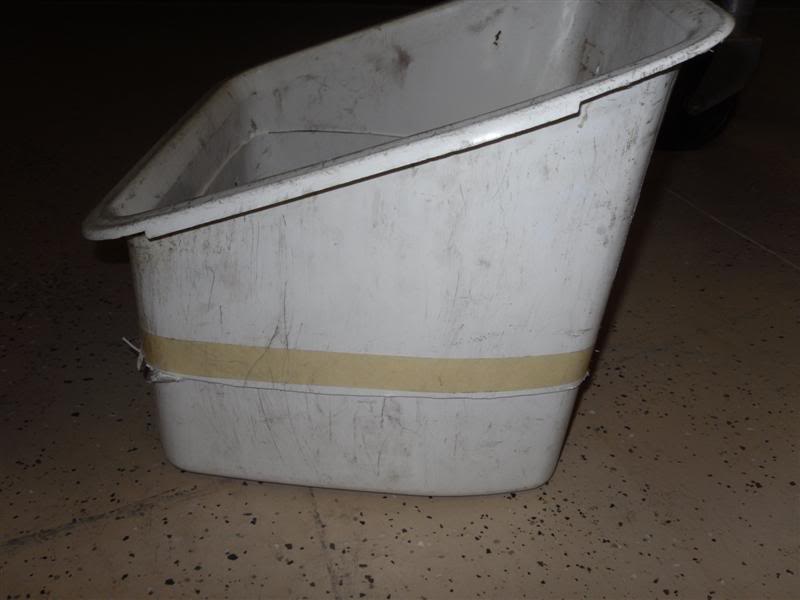
note: you can cut down your storage bin and still have at least a little bit of storage, I had about a half sized storage bin when I was finished, depending on your specific clearance you might get more or less.
I used an old crappy bin that I had in the attic so I wouldn't ruin a good one, just cut it down near the middle slid both sides together and riveted them together.


It looks great.

Jasonv
Active Member
So just use the purple for power coming out the gray box going to the gauges and the black for ground on the same plug?I just wired into the gauge power.
Kingsspeedshop
Active Member
Yep that's what I did also on my Koso setup.
Yes, that's all I did unless you don't want it to come on with gauges and be a separate switch controlled circuit.So just use the purple for power coming out the gray box going to the gauges and the black for ground on the same plug?
Jasonv
Active Member
Yes, that's all I did unless you don't want it to come on with gauges and be a separate switch controlled circuit.
Thanks just over thinking stuff. Almost done with this ski and didn't want to screw anything up.
Jasonv
Active Member
Got everything wired up on the gauges and I placed my gray box where the oil tank used to be. The vts in this ski had the cover siliconed in to place so I used another vts that was cleaner to install the trim fix. Hydro turf arrived today so it looks like a few hours on this ski tomorrow and I can start on the next one.


Looking good. When the silicone between the Trim Fix and the housing dries you will not need the tie straps. I guess the gauge reads OK on the original magnet?
I like the turf choice, looks right with that ski.
I like the turf choice, looks right with that ski.
Jasonv
Active Member
Looking good. When the silicone between the Trim Fix and the housing dries you will not need the tie straps. I guess the gauge reads OK on the original magnet?
I like the turf choice, looks right with that ski.
I'm hoping the gauge still works with this housing I haven't checked it yet we will know in the morning. This time I paid extra for not having the logo in the turf.
Make sure the part you use internally has a good magnet in the top of it. I test them by just making sure a screw driver sticks to it. If it has any pull to it then it should run the gauge. Be sure to leave the two brown wires connected because they run the gauge needle.


- Status
- Not open for further replies.
Similar threads
- Replies
- 5
- Views
- 461
- Replies
- 42
- Views
- 3,236
- Replies
- 4
- Views
- 484
- Replies
- 2
- Views
- 313