RESTO 1995 xp800 resto

Note: This site contains eBay affiliate links for which SeaDooForum.com may be compensated

Lee.Harrison

Active Member
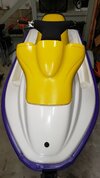
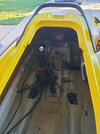
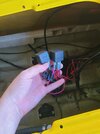
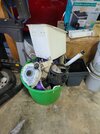
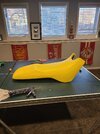
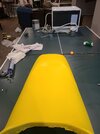
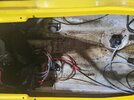
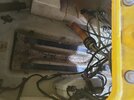
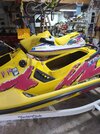
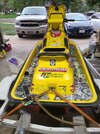
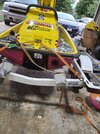
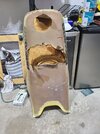
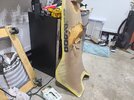
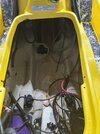
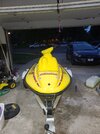
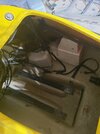
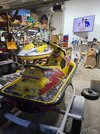
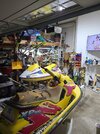
Picked up this 95 800 and will be posting some updates of my progress. Will be getting a full rebuild because I got the engine in pieces.
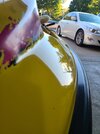
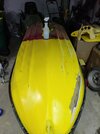
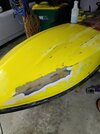
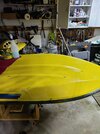
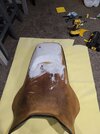
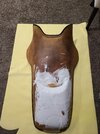
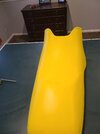
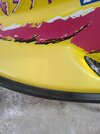
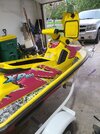
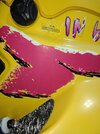
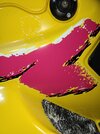
Did a little polishing but I still have a lot to do, also put some ceramic coating on one of the graphics and it turned out fantastic.
 

Attachments

  • 20211010_175943.jpg
    20211010_175943.jpg
    388.5 KB · Views: 83
  • 20211010_175949.jpg
    20211010_175949.jpg
    282.1 KB · Views: 75
  • 20211010_180000.jpg
    20211010_180000.jpg
    471.6 KB · Views: 70
  • 20211010_180003.jpg
    20211010_180003.jpg
    244.7 KB · Views: 67
  • 20211010_180009.jpg
    20211010_180009.jpg
    398.9 KB · Views: 62
  • 20211010_180013.jpg
    20211010_180013.jpg
    415.1 KB · Views: 59
  • 20211010_180016.jpg
    20211010_180016.jpg
    484.1 KB · Views: 58
  • 20211010_180020.jpg
    20211010_180020.jpg
    387.8 KB · Views: 57
  • 20211010_180025.jpg
    20211010_180025.jpg
    376.5 KB · Views: 59
  • 20211010_184348.jpg
    20211010_184348.jpg
    317.7 KB · Views: 57
More pics
 

Attachments

  • 20211010_184411.jpg
    20211010_184411.jpg
    338.8 KB · Views: 57
  • 20211010_184404.jpg
    20211010_184404.jpg
    240.3 KB · Views: 57
  • 20211010_184348.jpg
    20211010_184348.jpg
    317.7 KB · Views: 57
  • 20211010_184352.jpg
    20211010_184352.jpg
    456.7 KB · Views: 61
  • 20211010_184455.jpg
    20211010_184455.jpg
    469.3 KB · Views: 57
  • IMG_163391463569F.jpg
    IMG_163391463569F.jpg
    104.1 KB · Views: 56
  • 20211012_185411.jpg
    20211012_185411.jpg
    73.5 KB · Views: 54
  • 20211012_223536.jpg
    20211012_223536.jpg
    275.9 KB · Views: 51
  • 20211012_223545.jpg
    20211012_223545.jpg
    252.3 KB · Views: 66
Almost wrapped up with a similiar project. Someone recommended "Rustoleum Wipe New" for finishing the hood and other plastics. I was skeptical but it worked very well.
 

Attachments

  • 20211016_141821.jpg
    20211016_141821.jpg
    153.6 KB · Views: 47
Did some more polishing on the top half of the ski, turned out great and shined up nicely. Stripped the inside completely, every single water line was completely filled with sand so looks like it's getting new lines as well. And the vts was bypassed which looks like the trim fix so I will be ordering a new vts setup.
 

Attachments

  • 20211017_172533.jpg
    20211017_172533.jpg
    196.5 KB · Views: 44
  • 20211015_125727.jpg
    20211015_125727.jpg
    112.5 KB · Views: 41
  • 20211017_172548.jpg
    20211017_172548.jpg
    307.3 KB · Views: 42
  • 20211017_172556.jpg
    20211017_172556.jpg
    184.7 KB · Views: 43
  • 20211017_172621.jpg
    20211017_172621.jpg
    362.8 KB · Views: 47
Since the bottom of the ski was repainted, I started sanding to get the original gelcoat back. This is what I got done In about an hour, lots and lots more to go. Trying to be careful and not thin the gelcoat out too bad.20211019_191317.jpg
 
Got a lot done with the bottom of the hull, just have to pull the sticker off one of the sides and then sand both of the sides more. But as you can see there is a huge exposed section of fiberglass, looks like I will be regelcoating the entire yellow half. I will be following nick jarmans guide on the today we wrench YouTube channel.
 

Attachments

  • 20211102_202116.jpg
    20211102_202116.jpg
    222.7 KB · Views: 49
  • 20211102_202122.jpg
    20211102_202122.jpg
    263.1 KB · Views: 46
  • 20211102_202133.jpg
    20211102_202133.jpg
    306.7 KB · Views: 55
*Little update*
It's too cold in Kansas to gelcoat so I think im going to focus on the upper half and engine. The case and head are already sandblasted so all I need is to sand blast the jugs, the cylinders are in great condition and will be hitting it with a ball hone instead of my stone hone since one of the stones broke and I have seen great stuff with the flex hone. Going to try and get the closest to oem match for the color on the engine, anyone have any recommendations?
I have an extra crank that is good, so all I need is a top end and a counter balance and all the miscellaneous gaskets.
Also will be ordering some new graphics from pwcgraphics.com
 
Decided to level the foam off with some flexible caulking since there was some deep ridges in the foam. Once the caulk is dry I'll be installing the vinyl tomorrow.
 

Attachments

  • 20220109_212218.jpg
    20220109_212218.jpg
    352.2 KB · Views: 44
  • 20220109_212213.jpg
    20220109_212213.jpg
    439.8 KB · Views: 46
I will say, taking off 20 year old hydroturf with old contact cement is a pita. Will be ordering some two tone turf soon.
Seat cover will be on tonight and pictures posted.
 
Also I noticed Saturday night that canary yellow was back in stock on bottompaintstore.com so I ordered that and some white to mix the right ammount
 
Just finished the hump seat, I think it turned out great.
 

Attachments

  • 20220110_162323.jpg
    20220110_162323.jpg
    378.4 KB · Views: 43
  • 20220110_162333.jpg
    20220110_162333.jpg
    207 KB · Views: 40
  • 20220110_162327.jpg
    20220110_162327.jpg
    135.5 KB · Views: 40
Excellent save on the seat!! Looks awesome!! Like the work table lol, I use my pool table covered in a blanket when I do new seat covers. I think having a big work surface helps when recovering seats!
 
Excellent save on the seat!! Looks awesome!! Like the work table lol, I use my pool table covered in a blanket when I do new seat covers. I think having a big work surface helps when recovering seats!
Yep and it's the perfect height too lol
 
As much as it pained me to remove these decals, they were very dull and had some imperfections. I will ne ordering new reproductions from pwcgraphics.com
20220111_150501.jpg20220111_150534.jpg20220111_150549.jpg20220111_150543.jpg20220111_150856.jpg20220111_150540.jpg
 
Back
Top