1995 HX Project

Note: This site contains eBay affiliate links for which SeaDooForum.com may be compensated

burtshaver2021

Premium Member
Premium Member
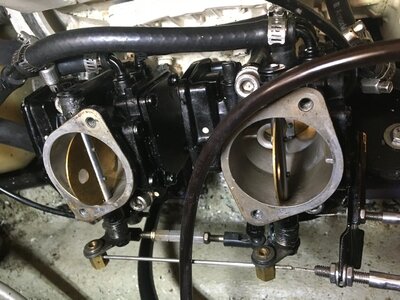
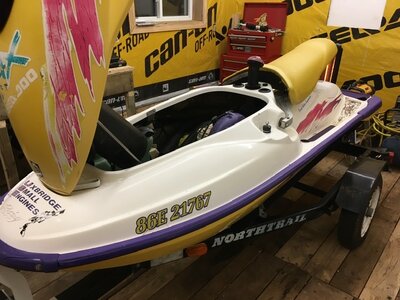
Hello everyone, spring has came early here in Ontario so my attention has turned back to my seadoo’s. I have a 1995 HX that I purchased in 2021 on a double galvanized trailer, a non running 1992 XP and a parts 92 XP were included for 1800.00 total. I’ve been looking forward to getting it running since I bought it, should be a lot of fun to drive. I’m not looking to do a total restoration at this point just what needs to be done to get it on the water running without doing any damage to it. My experience is almost non existent, but I should be able to muddle through with some help from the people on this forum. So far I’ve taken it to the local dealership and had a new dess key programmed for it, started changing the tempo fuel lines, I’ve Had it running for about 15 seconds with mixed fuel down the carbs, taken a compression test, I believe it was roughly 140 pounds per cylinder. I plan on removing the old fuel from the gas tank, removing old oil and replacing it with xps, I will be following Mikidymac’s thread to rebuild the carburetors. I could be awhile as I have some other projects coming up that have to be done like renovating our rental house and have a roof coming up as well but I will see this through. I have looked quickly at the manual but haven’t looked at any utube video’s, first question is, what is the best way to remove the carburetors from the intake manifold? Mainly what is the best way to detach the throttle and choke cable? And the throttle cable is connected to the 2 carburetors with the adjusting bolt, this adjuster has a ball joint on each end, can I pop this joint apart? Do I simply press it apart? I would like to take them off without disturbing the set up of the carburetors if it’s possible as I am worried about being able to set them up properly after cleaning. 452963A3-D4B4-4C7E-97C1-E3D18299380D.jpeg5DC73F8B-F30D-4787-854F-DE138971B4E8.jpeg
 
1 small step at a time, found a thread on here to remove carburetor, Choke cable was easy enough, just unscrew the 2 brass pieces holding the cable to the 2 carbs. It was ultra small Allen key, probably supposed to be a metric size as these machines are all Canadian made but my 5/64” Allen worked fine. Even my 2.5 metric Allen was to big, I will probably pick up a set of small metric Allen’s. Throttle was also easy, not sure exactly how I did it but the end of the cable has a block, just made some slack in the cable it it comes off. Next step is to figure how to remove cable for the oil pump from the carburetor?
 
Oil cable was easy enough, just loosen the 10mm jamb nut from the bolt that the oil cable goes through and then back that bolt out with an 8mm from the block that holds it. Looks like I can now just remove the 1 fuel line and the 4 bolts holding the carbs on. I’d that the rotary valve case behind the intake manifold? Also while I have these carbs off I think it would be a real good time to change the small oil lines. I will cross check but I have some small oil line part number 219704404 that I got from brp when I was rebuilding top end of 05 skidoo. Just wondering if someone knows if they use same small oil line? Also once I get those small clamps off of small oil lines, are zip ties ok to use?
 
The 1995 HX does not have DESs so not sure what you paid to have programmed?

No reason to remove the manifold or rotary cover, just the 4 bolts that hold the carbs on.

Oil line on the manifold is 3/32" and any mower shop will sell it.
Good quality zipties with the stainless locking tab are recommenced for the oil and fuel lines.
 
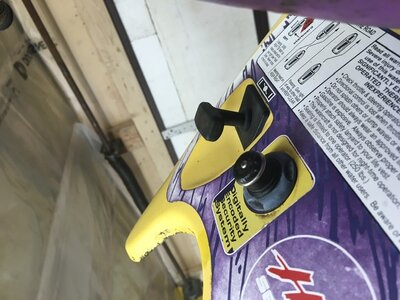
Thanks Miki, not sure about other 95 HX’s but this one is a 95, last 2 digits on the vin are 95 and it’s definitely a dess key. 66521AC1-2086-4BFE-91DA-01F29704BA63.jpeg
 
Just ran into something I didn’t want to, there’s about an 1/8th of an inch play when I grab the motor, I don’t believe it’s the mounting plate to Hull but possibly where the plate mounts to the engine. Is this normal? I doubt it, there probably shouldn’t be any movement at all correct? Would I have to pull the engine to fix this?
 
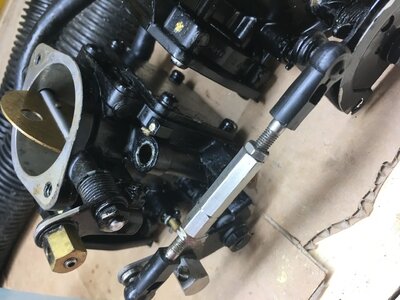
5E21EFC8-86E0-484F-8667-A25A53D88353.jpegNot sure what this linkage is called butwhar is the best way to get it apart? Does the black plastic end piece just pull off the ball joint?
 
Sorry not clear on the linkage that is holding these 2 carburetors together. Should I back the 2 jamb nuts off and spin the Center off? Or do I just apply pressure to 1 if the ball joints and pop that off to separate them? I’m worried about breaking the plastic part off that ball joint?
 
Sorry not clear on the linkage that is holding these 2 carburetors together. Should I back the 2 jamb nuts off and spin the Center off? Or do I just apply pressure to 1 if the ball joints and pop that off to separate them? I’m worried about breaking the plastic part off that ball joint?
No removing the nuts. It will just pop off the balls.
 
Perfect, thank you. That 1/8th of inch play when I push on the motor, is that an issue? I’m thinking it should be solid? But I’m not sure. Unfortunately the mounts look tight that attach the saddle motor bracket to the hull,
 
Perfect, thank you. That 1/8th of inch play when I push on the motor, is that an issue? I’m thinking it should be solid? But I’m not sure. Unfortunately the mounts look tight that attach the saddle motor bracket to the hull,
There should be no play as the HX will eat the driveshafts. The mounts are rubber so it will move a little but I would closely inspect everything from the bedplate to the mounts.
 
I’m sure I will have to pull the motor Out. I was just reading an older thread and it sure sounds like the bolts from bed to engine case have loosened up. Never pulled the engine before. I would like to leave on as much as I can while getting out, what steps to get the motor out? Will it come out with the tunes pipe still attached?
 
It’s easier if you pull the pipe.

You are going to have to align the engine with the correct alignment tool.
 
The tool is 300.00 US funds so probably about 400.00 CDN but at least it says it works for all models up to 2017
 
SBT has engine removal guides as well as the SeaDoo service manual!
If you can find a mechanic that works on these older ski's they should be able to check and align the driveshaft.
I just made a post about removing the motor out my '95 SPX- helped to have a hoist.
 
Thanks Bowser, i will have a look at your thread. I prefer to do any work I can on my own, just a little hobby for me,
 
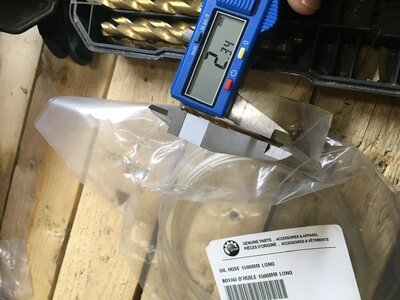
29AE0E38-837A-4325-95D6-51589B0E66ED.jpegfrom what I read 3/32” equals 2.4mm tubing. I put a drill bit in the end of this factory tubing I got for the snowmobile, measured the drill bit and got 2.34mm. Think this would work? I will get a littlechunk of 3/32” and check it with the same drill bit.
 
Just trying to get a list together as I read through the manual for reassembly. The manual calls for sealant 736 on the sealing ring between head pipe and tuned pipe, when I google sealant 736, Dow 736 sealant comes up in amazon for 91.07 for 90ml. Went to 95 HX parts catalog and it calls for part number 413 710 300 for the same sealing ring. When I googled up the part number an 80 ml loctite sealant came up as an OEM seadoo product on partzilla for 22.05 which is a great price and what I need but I’ve ordered from Partzilla before and had to wait a long time. Any other equivalents for the sealant which appears to be an RTV sealant good from -65 to 260 Celsius
 
For the copper ring on the pipe joint you use Permatex Ultra Copper RTV available at all parts stores.

Only other thing you should need is Loctite 515/518 "Flange Sealant" available at the same parts stores for the air filter base and pump cone.

Carb gaskets go on dry or maybe a small amount of ThreeBond 1211.

I would suggest blue loctite on all bolts except Red on the bedplate to motor.
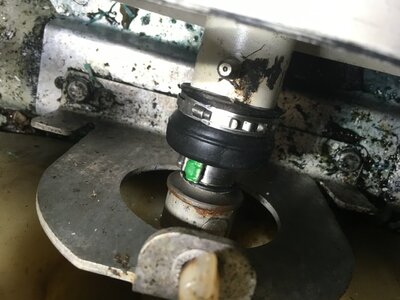
I have red loctite, you don’t think It would be ok with blue? Just hate to use red unless I have too. Also will snap a picture as I’m not sure exactly what I’m asking yet but I’m reading through the manual and it says I can take the engine out of HX without removing jet pump. I will be removing jet pump later for aligning purposes but for now I would like to remove the engine with jet pump in. Not sure what has to be taken off at PTO area, I see a rubber gasket of some type with a special clamp on it, manual says I need a special tool to remove this clamp? Just wondering what I need to detach in the pto area and how? and do I need this special tool? Are these clamps reusable? Or should I order some new ones? I’m just heading back out to my little shop now, I will have look at machine and manual so I can use some proper words and clarify.
 
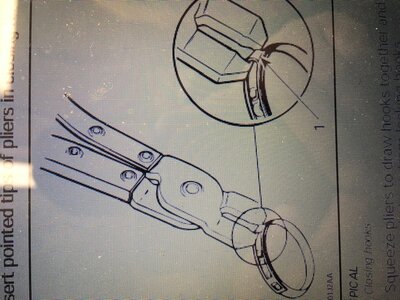
82CCDBDE-9057-4B5E-8F1F-97C4C2E87B35.jpegIt looks like I will need to remove the PTO boot to start? Calls for part number 295 000 069 to remove and install this clamp.
 
A206FEC2-5FE1-48F6-8AF2-DF0CB3DF9A05.jpegI found these OEM pliers at partzilla for 77.37 and a set from OSD that’s not OEM but says it replaces the part number I need? What do you do? Get the pliers or will another tool work? Or do you use a different style clamp during installation. I would think I could get these pliers at a local hardware store.
 
Back
Top