RESTO Project Dog House: 1996 Challenger

Note: This site contains eBay affiliate links for which SeaDooForum.com may be compensated
Status
Not open for further replies.
A bit more progress to report.
After the adventure at the lake Sunday I headed to WallyWorld to fill in some gaps. Left with:
-new battery box with lid, tie down and stainless screws to hold it down.
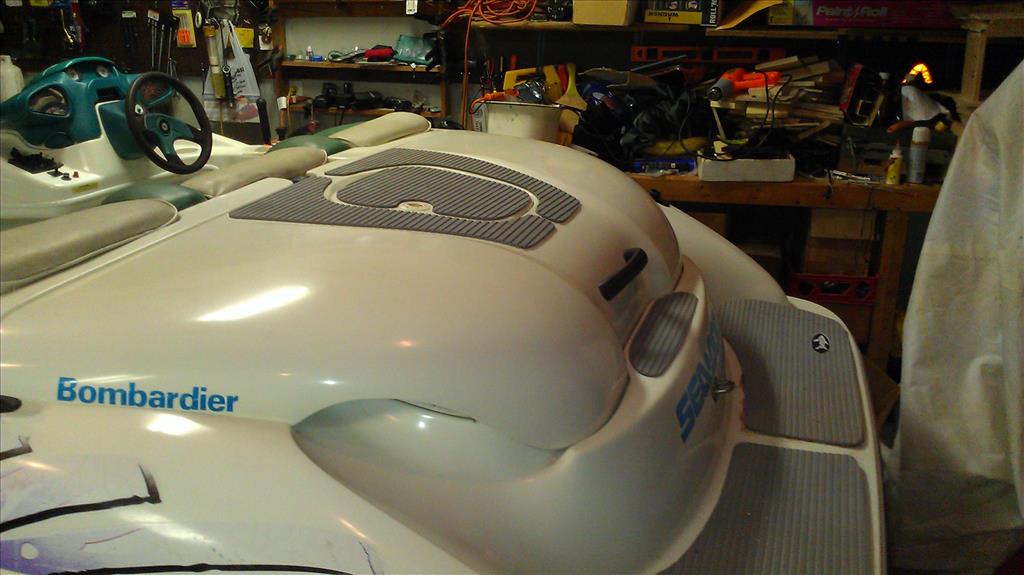
-a couple of bumpers that are size appropriate for the Challenger 800
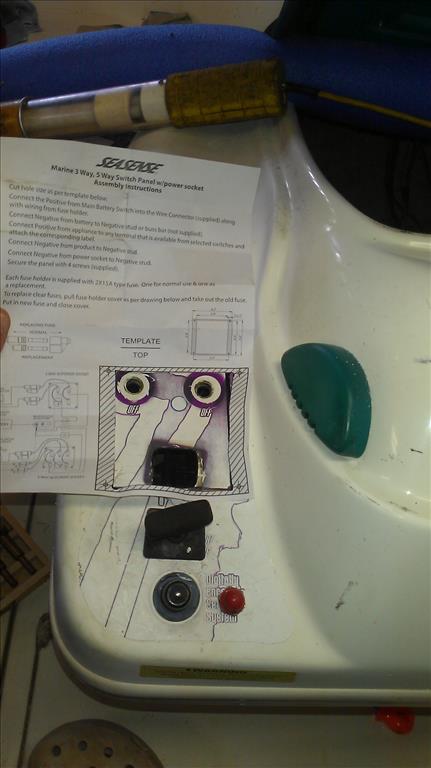
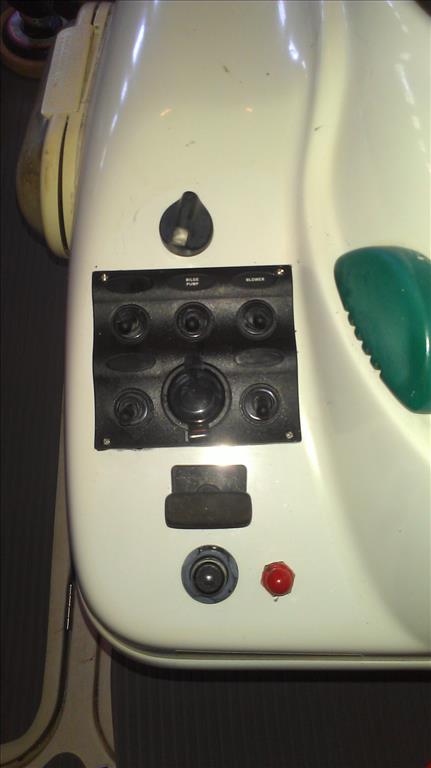
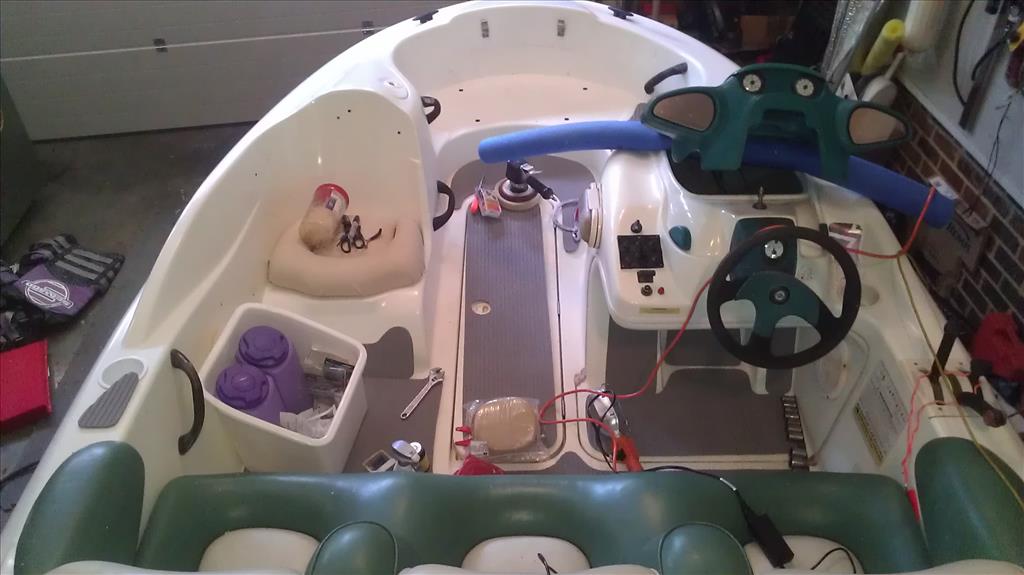
-most of the stuff to redo the incredibly terrible wiring the prior owner did on the new bilge pump float switch and pump. I got most of it done this morning before work with running the right lengths of wire, connecting stuff with heat shrink/adhesive connectors (awesome), liquid electrical tape, and taking the time to actually route wires instead of draping them over the engine, as the prior owner did. :eek: Just need to pick up a fuse and fuse holder, as I forgot those, and I can finish that up.
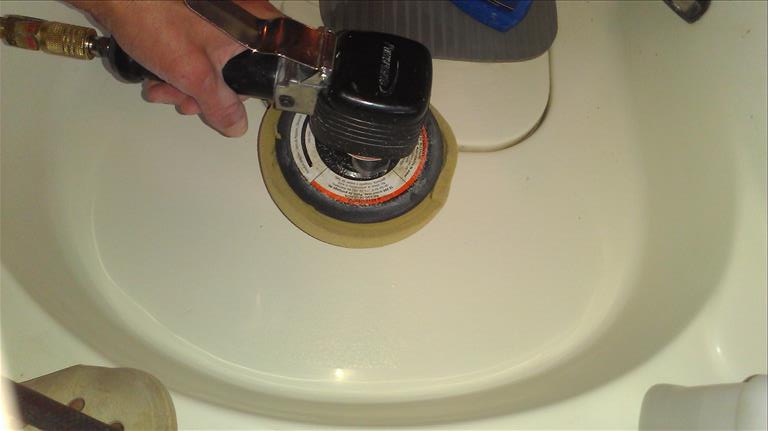
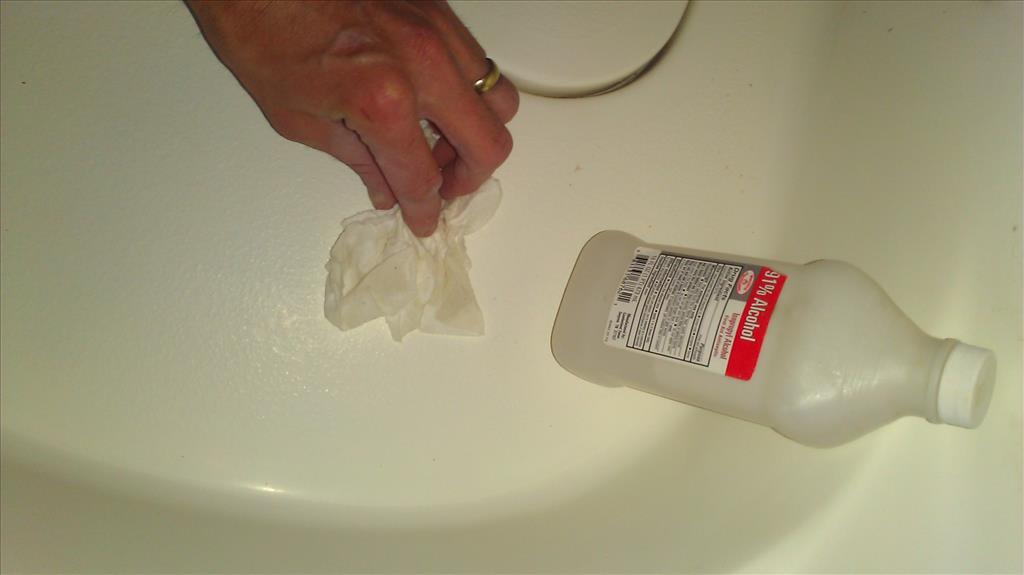
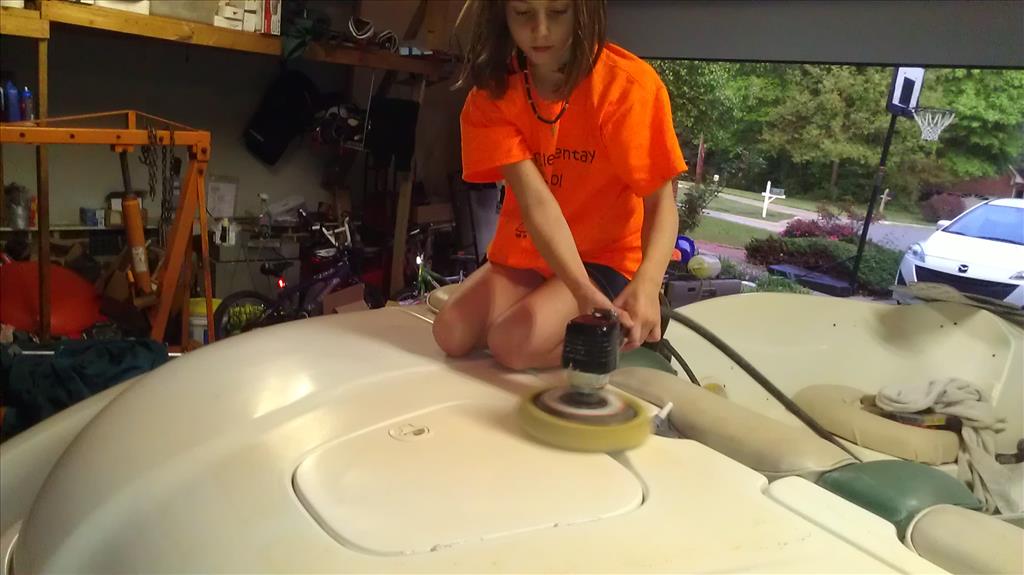
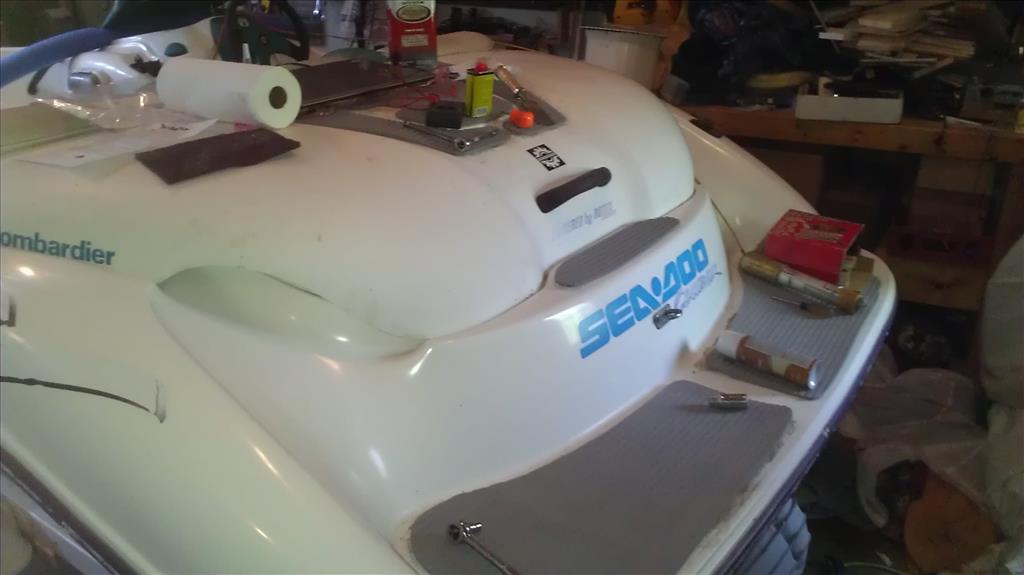
-rubbing compound, polish, and a foam pad for my orbital polisher... so I can start knocking the chalky layer off of the topside gel coat.
-a safety whistle. I had thought the SD had a horn, but couldn't find one last night. I'll have to install one, but the whistle will keep me in compliance for now.
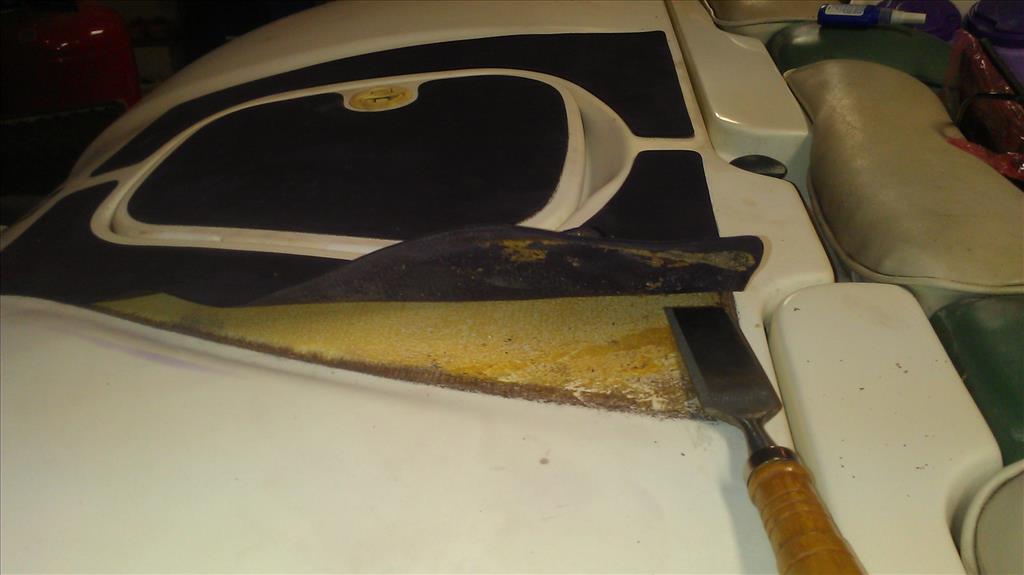
-a variety of SS hose clamps. I put one on the outlet hose of the head where it is very visible. Not sure if these are SS band with regular steel worm-gear housing... so if this one shows any sign of rust I'll see it and replace it quickly.
-seafoam-like fuel treatment
-#7 danforth anchor and 150' of anchor rode. I've got a spare chain on my big boat that I'll add between the anchor and the rode to help it stay on the bottom. By the way... where is everyone storing the anchor on your jet boats? I haven't found an ideal place yet, but am leaning towards the space below the bin in front of the driver's seat.
-2 new spark plugs, which I installed this morning. They only had Champion brand, number 8902, I think. Regardless, it had the br8es NGK plug listed as a cross reference. I'll order some genuine NGK plugs later today as well.
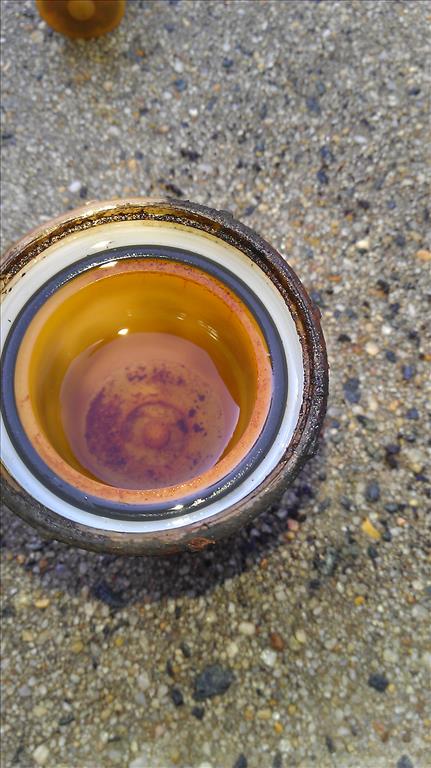
-A replacement cup holder for the hole in the port side gunwhale. Lost the original somewhere on I-85 they day I bought the boat.

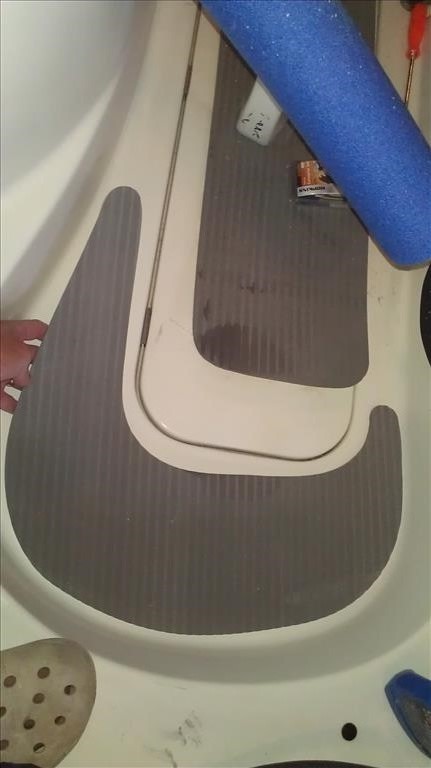
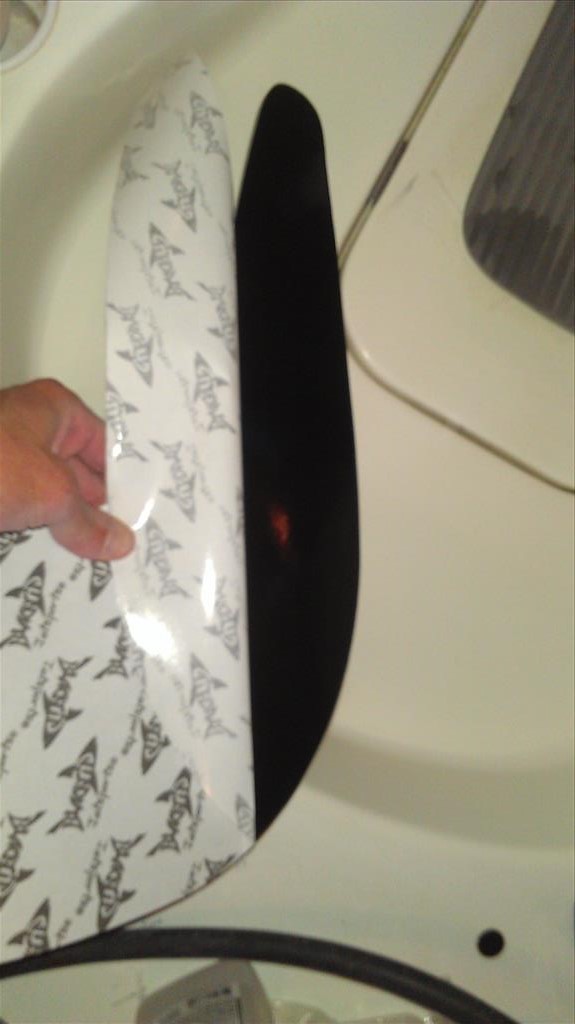
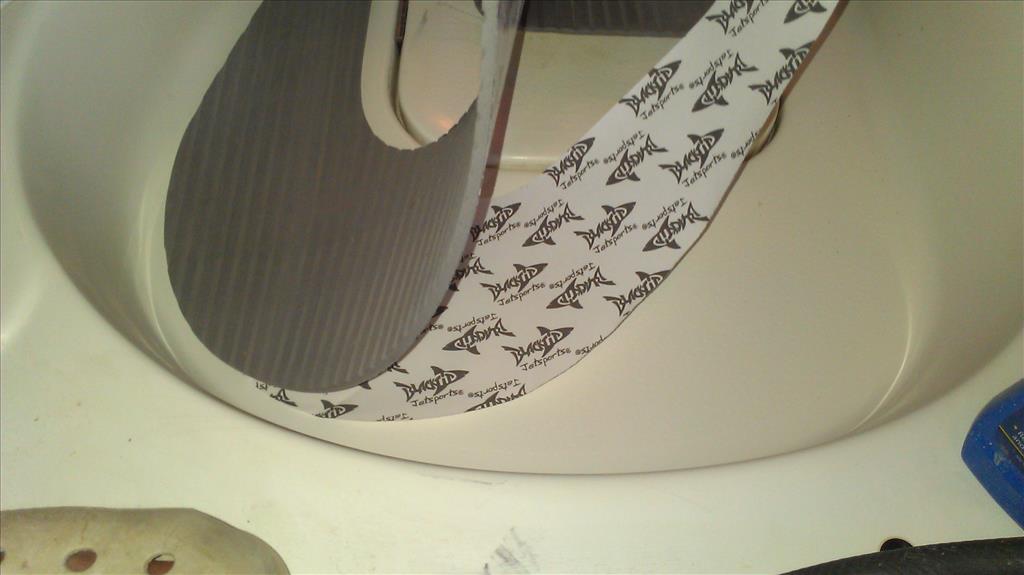
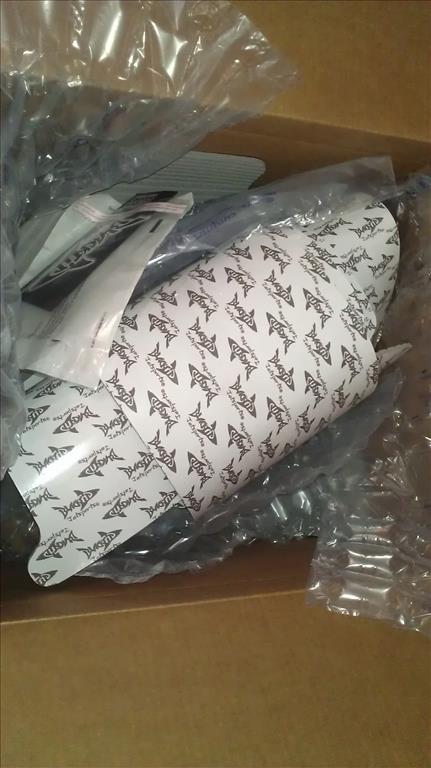
And I just ordered Black Tip mats from Kieth at seadooupholstery.com Not sure if he wants his prices posted, so I'll just say that he gave a smoking good deal on them. I went with Slate Gray, as I can't see how anything else would remotely go with the FANTASTIC pink, purple, and seafoam color scheme that SeaDoo had the wisdom to go with on the '96 Challenger. Now to start saving for new seat covers...
 
Last edited by a moderator:
Hey rjcress, where are you in NC? Will we see your challenger out on Jordan or Harris lakes anytime soon? I have 3-4 more people with seadoos and/or boats. We're gonna go out all summer long, gonna be a wet summer :) Should join sometime!

I'm just West of Burlington by Elon University. We used to take my Dad's Sea Ray to Jordan and Harris quite a bit. I spend most of my water time now in Virginia at Smith Mountain Lake, where my big boat is. However, PM me when you are headed to the water. I may be able to bring my Challenger or GTX and catch up with you some time. :) Went to Lake Cammack North of Burlington on Sunday. First time there for me. It is pretty small, but also really close for me.
 
I'm just West of Burlington by Elon University. We used to take my Dad's Sea Ray to Jordan and Harris quite a bit. I spend most of my water time now in Virginia at Smith Mountain Lake, where my big boat is. However, PM me when you are headed to the water. I may be able to bring my Challenger or GTX and catch up with you some time. :) Went to Lake Cammack North of Burlington on Sunday. First time there for me. It is pretty small, but also really close for me.

Harris is getting insanely busy. I live down the road from there. I need to start my ski on the trailer in the water to look for leaks and feel I'll be pissing MANY people off by taking up a ramp for a little while. Hell I even get pissy when folks take forever to back up a trailer that may be new at it. Soooooo may take a random day during the week and do it. I wish Harris had some beach areas to beach on, relax, switch drivers, etc.
 
Last edited by a moderator:
I'm just West of Burlington by Elon University. We used to take my Dad's Sea Ray to Jordan and Harris quite a bit. I spend most of my water time now in Virginia at Smith Mountain Lake, where my big boat is. However, PM me when you are headed to the water. I may be able to bring my Challenger or GTX and catch up with you some time. :) Went to Lake Cammack North of Burlington on Sunday. First time there for me. It is pretty small, but also really close for me.

Cool man, will do. I'd like to go explore some new lakes myself. I'd be down for an hour or so drive someday. My GTS is on a single trailer, and I towed it all the way to Key Largo (with my diesel Jetta of all things, getting like 30mpg). Rode around the mangroves and even went offshore to do some snorkeling this past Thanksgiving. Met up with ocod, a member here and he showed me around the Miami South Beach area. It was sweet! Good to get on some new water every now and then. After a trip like that, an hour or two is nothing! lol

The depth gauge is a great idea. I have one on the GTS (wanted it for my FL trip, and a good thing too!) and my Challenger has a fish finder from the PO that reads depth, speed and even water temp. only prob. is finding a place to permanently mount it. Right now, it just kind of hangs out wherever I set it down.

Sounds like a cool trip to FL.
Looks like there are a few of us in the area. Not sure if I'll stick around this weekend, or go up to Va and un-winterize the big boat. If I'm around, might be fun to look for a place to get the SeaDoos wet. Will have to see what the weather does.

I have a spare fishfinder sitting around... brand new actually. Bought it when I was waiting for my big boat to be delivered and before realizing that the big boat came with a fishfinder that was built into the GPS. However, like you said, there isn't a good, or even a relatively bad place to mount it on the Challenger. :(
 
Yea, the PO had it right on top of that cup holder on the right side, but comon, let's be real here: we can't eclipse the cup holder!
 
Harris is getting insanely busy. I live down the road from there. I need to start my ski on the trailer in the water to look for leaks and feel I'll be pissing MANY people off by taking up a ramp for a little while. Hell I even get pissy when folks take forever to back up a trailer that may be new at it. Soooooo may take a random day during the week and do it. I wish Harris had some beach areas to beach on, relax, switch drivers, etc.

The reason Harris is so busy these days is they're rebuilding the other boat ramp. So everyone has to use the one. If I were you, I would drive the extra ten min to the Ferrington boat ramp on Jordan and launch there. They have a 4-stall ramp. It's a damn shallow ramp when the water is high, but there's no 1-hr wait. We were all the way out on the tarmac the other day waiting to pull our boat out. It's ridiculous!! And I know what you mean about ppl taking their sweet time loading/unloading. Some are even inconsiderate enough to actually pull out their boat plug and attach straps while still on the ramp. Drives me nuts as I sit in my hot car, waiting to get in the water. Sorry for hijacking your forum rjcress :)
 
The reason Harris is so busy these days is they're rebuilding the other boat ramp. So everyone has to use the one. If I were you, I would drive the extra ten min to the Ferrington boat ramp on Jordan and launch there. They have a 4-stall ramp. It's a damn shallow ramp when the water is high, but there's no 1-hr wait. We were all the way out on the tarmac the other day waiting to pull our boat out. It's ridiculous!! And I know what you mean about ppl taking their sweet time loading/unloading. Some are even inconsiderate enough to actually pull out their boat plug and attach straps while still on the ramp. Drives me nuts as I sit in my hot car, waiting to get in the water. Sorry for hijacking your forum rjcress :)

Wait......there was a second ramp on Harris? Where? Or are you saying even the one by me is now down to only one stall at the ramps there?

EDIT: Just looked at google maps.....wow there is 2. Never knew. So the other one off of 42 is closed then?
 
Last edited by a moderator:
I spent a couple of hours Friday and Saturday and most of the day Sunday in the garage working on the Challenger. Really happy with what I got done, but also frustrated that EVERYTHING seems to be taking about 2-4x as long as I thought it would. I guess I just work really slow.

Here is what I got done:
-registered the boat with the state so I'm legal to use it... and the added bonus is that my county can start taxing me every year just because I own it. Also ID'd an option for the rub rail insert... but not liking the $150 price.
402.jpg


-installed a 5 switch + 12V socket panel at the helm. http://www.amazon.com/gp/product/B003E24MKA So far, I've just hooked up the 12V socket (so I can charge my mobile phone), bilge pump & blower. Might get an on-off-on switch and move the nav-off-anchor lights to the panel and plug the hole that rotary switch sits in. I'll be adding LED interior and transom lighting at some point. When I looked at adding a 12V socket & 2 other switches, it looked like a simpler, cleaner solution to go with the panel.
Before:
403.jpg


In progress:
404.jpg


AHHHH! Don't cut me, bro!
405.jpg


Done:
406.jpg


-compounded, polished & waxed the upper exterior gel and a bit of the interior. Used the Meguiar's Marine/RV Fiberglass Restoration System kit and am VERY pleased with the results. However, not as pleased with the Meguiar's 6.5-Inch Foam Pads (Cutting, Polishing, & Finishing), as the velcro backing came off of the cutting and polishing pads before I even finished the above the rub rail exterior section on my little boat. Definitely complaining to Amazon/Meguiar's on this one, as they should hold up better than that. The pads worked great, just didn't hold up.
Not a great shot, but the left has been polished, not the right:
407.jpg


-replaced the plastic hinges on the little door that is on the exterior of the engine cover.

-disassembled the stern light base to verify that it is not getting power. The front nav lights aren't working either, so I'll be testing the wires at the switch to see if they are getting power... and if not, tracing wires. I wish the shop manual had an actual wiring diagram or chart of which wires are which color. I thought I had seen one before, but couldn't find anything last night when I needed it.

-reinstalled the engine cover. Sadly. I did this very late and the kids were already in bed, so I couldn't run the air compressor to power my buffer. So it still looks chalky and nasty. Probably just as well that it was late, since my cutting and polishing pads wouldn't attach to the buffer any more anyway. :(

-made temporary covers for the 2 parts of the spotter seat that are visible. I'll get a kit from Kieth at http://seadooupholstery.com/ once my budget has recovered from all the work thus far.... so I didn't spend much time and just used some scrap vinyl. Intended as a short term solution so the seat is at least usable. Screwing the seat base down to the floor of the boat was the hardest part, as those screw holes are HARD to reach. I ended up pulling several long slivers of fiberglass out of my arms before I was done.
Before:
159.jpg


After:
408.jpg


-finished the bilge pump re-wire with the addition of the inline fuse.

-installed the new battery box

-used a small drum sanding head to open up the port cup holder hole enough to fit the cup holder from Walmart. It was just a bit too snug, but fits good now.

-used a sharp wood chisel to remove some more of the oh-so-stylish purple and pink graphics sticker from the starboard side above the rub rail. So far, this seems to be the easiest method, although it is way easier on flat areas where the blade can sit flat on the hull vs curved areas.

-pulled off the last of the factory traction mats from the engine cover. The swim platform mats were hard and disintegrated when i tried to pull the off. these mats pulled off in one piece. :)
409.jpg


-Used the wood chisel to remove more of the traction mat glue from the swim platform and engine cover. The hard, crusty glue came off pretty well with the chisel, but the sticky glue didn't want to. I found that if I soaked the sticky glue with acetone, then scraped it with the chisel, that worked best. It doesn't get all of the glue, but gets most of it. I think I've accepted that I won't ever get all of the glue off and am just tying to get enough off that I can put the new traction mats on without fear that the old glue underneath will come loose.

-Booya! As I was typing this note the FedEx truck dropped off my new BlackTip mats. :) I unrolled them on the boat at lunch and put stuff on them to help them flatten out. Maybe I can install them tonight.
410.jpg

411.jpg


You can see the difference in the polished and waxed part, and the unpolished engine cover:
412.jpg


One problem... the new mats don't completely cover all of the nasty old glue on the swim platform. Looks like I'll have to work harder to get all of that residue off. Grrrrr. :(
413.jpg
 
Last edited by a moderator:
Good job. Yea, you def. want to get all that gunk off or your new mats won't stick well. I need to go over my hull with some of that restorative compound. I'm digging the grey look too btw. Good choice, as dark colors tend to heat up in the summer.
 
Good job. Yea, you def. want to get all that gunk off or your new mats won't stick well. I need to go over my hull with some of that restorative compound. I'm digging the grey look too btw. Good choice, as dark colors tend to heat up in the summer.

Thanks. I think I'll get seat covers without any green in them. Maybe light and dark gray? I don't know. If I go that route I'll likely paint the fugly green hatch/console in front of the steering wheel. I'll see what Keith suggests, as he's seen way more custom color schemes that I have. Open to suggestions as well. :) Actually, now that I think about it... I'd most like to be rid of the purple. Just don't think I dislike the purple enough to drill out a bazillion rivets and replace the rub rail. So I could end up with a green and gray color scheme.

I'm thinking I may have to sand the hard glue residue, as goo gone and acetone aren't softening it at all.
 
Oh, and I have to share this...
My wife was out of town most of the weekend. When she got home last night she reluctantly followed me to the garage so I could show her the difference in the polished and unpolished sections of the boat.
When she saw it she perked up and said "Wow. That is awesome!"
And I was proud and excited. :hurray:

Then she said "It should really help sell the boat." :ack::puke:
Oh, brother.
 
Prepped the boat and installed the first couple of traction mat pieces this morning. Also had to call SBT because one of the pieces of traction mat was missing. They are going to cut it and send it to me this week as they don't keep any pieces in stock. Sadly, the kit does not include pieces for the top of the gunwale by the port cup holder, or on the bow... both places that appear obvious to me that they should be there. The only option is to buy a full 39" x 78" sheet for $46 + almost $20 for freight. I probably need about 1.5 square feet of mat to fill in these places and don't care to spend over $65 for those 2 pieces. It sucks that they won't sell anything smaller. I guess I'll just have to keep an eye out for eBay or classified posts for partial sheets of slate gray mat.

And I'm returning the Meguiar's 6.5-Inch Foam Pads today since the velcro backing already came off of the cutting pad, and is half-way off of the polishing pad. Both were only used to do most of the topside of the little jet boat before they started coming apart. I've used the a different brand of cutting pad to do most of the topside of my other boat (36 foot cabin cruiser with a LOT of topside fiberglass)...so probably 5 times as much use, at it is still going strong. Really not happy about this, as I need the pads to prep the areas that the traction mats will stick to. You can see in the first pic below where the polishing pad has torn loose from over 1/2 of the velcro backing.

Surface prep:
Compound and polish...
425.jpg


Clean with alcohol:
426.jpg


Test fit:
427.jpg


Applied the mat starting with one side to get it lined up, then peeling back the paper backing as it progressed:
428.jpg

429.jpg

430.jpg
 
Last edited by a moderator:
I`m glad to see that your diligence is paying off. The boat has come a long way by leaps and bounds and looks great.
I have a few comments and tips for you...
Do you have a shop manual? if not download a manual here: http://www.sea-doo.net/Specifications/index.asp
And the people at PPG are great people and Rob is the guy to talk to for parts.

Proper torque is absolutely necc as these engines shake like crazy and as a result you saw what it did to the old spark plug. Now what came first the chicken or the egg, who knows, you dodged a bullet with those old plugs...
you can also buy plugs here, they are on sale often and get them by the dozen> http://motorcycle.motorcycle-superstore.com/search#w=BR8ES+solid+spark+plugs

These are solid tipped plugs and the screw on caps won`t vibrate off bc there aren`t any!

cleaning glue, rub marks, stains. ACETONE works great for removing any left over residue from glue and rubs marks in the hull... do a little at a time. I also use Goo Gone for lighter uses.

cleaner: Marine Spray 9 is awesome for mold removal. and daily care of washing the boat removing the day`s stains. I also use Meguires Gel boat wash...

as far as engine alignment, if anything had changed since new, I would say that the original mounts may have sagged or lean one way or the other. If I were you I would read up on the procedure to correct align the engine bc shaft wear is imminent along with killing a carbon seal. As I read earlier in this thread, there are shims to properly set the pump to hull. I would just read up on the procedure if nothing to make you sleep better at night knowing it is correct.

the oil lines, there are procedures to also bleed the lines prior to starting any newly install engine or disrupted oil lines/filters.
I`m hoping you at least ran premix for your first outing to ensure the new engine did get a good oiling.

ok, comments: after all the hard work, going thru shoulder surgery (which I hope you are feeling better now :) ), why not rebuild the carbs. That is key to engine performance and can absolutely cook a new engine. seeing you leave them in the hull gave me the heeby jeebies!:willy_nilly::lols: unless I missed a the post where you installed new Mikuni rebuild kits, accelerator pump diaphragm, and needle and seats. Also most never look at the fuel pumps. I`m not certain your are remote or on the sides of the carbs.
another no no is running on the OLD stale fuel regardless of additive... that could have ended very badly.

tell us a little about the power valves, have they been cleaned, replaced, how`s the bellows and retention spring? if they leak oil at all, don`t even fool around and just replace the whole assy`s since you came this far...
Don`t be afraid to give SBT a try on their replacement RAVE parts. I can def say they stand by their product 110%. And the folks there like Jeremy C and Tom V are awesome to speak with!!!

I have to commend you for having a great attitude and outlook in approaching this project, even while you have a few others on the burner... concentration is key to success, and it looks like your nailing it as you go along!:cheers::thumbsup:

Good luck in finishing the rest of the boat!

I actually got away from the jetski`s to get more family time on the water with the boat, we have had other boats before, but returned bc it is a fun family time!

hat`s off! enjoy the newly rebuilt ride!:patriot:
 
Last edited by a moderator:
I`m glad to see that your diligence is paying off. The boat has come a long way by leaps and bounds and looks great.
Thanks, PR. It is slowly getting there.


I have a few comments and tips for you...
Do you have a shop manual? if not download a manual here: http://www.sea-doo.net/Specifications/index.asp
yep. and I think that is where I downloaded it from :)


And the people at PPG are great people and Rob is the guy to talk to for parts.
Good to know. I haven't ordered from them before.


Proper torque is absolutely necc as these engines shake like crazy and as a result you saw what it did to the old spark plug. Now what came first the chicken or the egg, who knows, you dodged a bullet with those old plugs...
you can also buy plugs here, they are on sale often and get them by the dozen> http://motorcycle.motorcycle-superstore.com/search#w=BR8ES+solid+spark+plugs

These are solid tipped plugs and the screw on caps won`t vibrate off bc there aren`t any!
I have 2 replacement plugs, 2 new spare plugs, and 1 old spare plug. I think I'll order some more to keep on hand.


cleaning glue, rub marks, stains. ACETONE works great for removing any left over residue from glue and rubs marks in the hull... do a little at a time. I also use Goo Gone for lighter uses.

cleaner: Marine Spray 9 is awesome for mold removal. and daily care of washing the boat removing the day`s stains. I also use Meguires Gel boat wash...
Good to know. I've been using Acetone and Goo Gone on the old traction mat glue. Had to stop until I can get the boat outside. I ruined too many brain cells in undergrad... can't afford to use that type of solvents in the garage and sacrifice any more brain cells. :)
Had not heard of Marine Spray 9. Will look it up.


as far as engine alignment, if anything had changed since new, I would say that the original mounts may have sagged or lean one way or the other. If I were you I would read up on the procedure to correct align the engine bc shaft wear is imminent along with killing a carbon seal. As I read earlier in this thread, there are shims to properly set the pump to hull. I would just read up on the procedure if nothing to make you sleep better at night knowing it is correct.
Yeah. I was going to skip alignment, thinking that it would be right since it was the same engine. VERY glad I went ahead and did it. It is right on the $ now. :)


the oil lines, there are procedures to also bleed the lines prior to starting any newly install engine or disrupted oil lines/filters.
I`m hoping you at least ran premix for your first outing to ensure the new engine did get a good oiling.
I did bleed the oil line to the oil pump and verified the pump was adjusted properly, but did not bleed the lines from the pump to the intakes. It had not occurred to me that I could take off the oil pump and run it off of my drill to prime the lines. Of course, I read about that AFTER the first trip to the lake. Even though I was running pre-mixed and had shot some oil down the plug holes before starting, I still was nervous watching how slowly the oil worked it's way from the pump to the intakes. The PTO side hose is longer so it got fully primed later. I sure hope I didn't under-lube that cylinder and cause it to over heat and cause the plug to fail. The head temp sensor never protested, although I'm not sure that means much.
If I could do it over I would have used the drill to prime the lines AND mixed the pre-mix stronger just to be safe.


ok, comments: after all the hard work, going thru shoulder surgery (which I hope you are feeling better now :) ), why not rebuild the carbs. That is key to engine performance and can absolutely cook a new engine. seeing you leave them in the hull gave me the heeby jeebies!:willy_nilly::lols: unless I missed a the post where you installed new Mikuni rebuild kits, accelerator pump diaphragm, and needle and seats. Also most never look at the fuel pumps. I`m not certain your are remote or on the sides of the carbs.
To be completely honest, I'm overwhelmed between all of my real life responsibilities and side projects and didn't want to add anything else to the list. I agree that I should rebuild them and will put that on my list. The shoulder is doing awesome, by the way. I'm about 3.5 months into the recovery and am able to do almost everything. Still can't do contact TaeKwonDo or hockey yet, but I can at least get back to both without the contact. :)


another no no is running on the OLD stale fuel regardless of additive... that could have ended very badly.
Probably fair to say I punted on this one also. I ran a 1/2 tank of the gas through my riding mower and it worked great, so I figured I had put Stabil in it early enough to save it. Wishful thinking, maybe, as the gas was from August 2012... so about 3.5 months old when I Stabil'd it. The big issue though, is that I have no idea what to do with a completely full 30 gal tank of gas if I had to dispose of it. I burn less than 5 gal per year in the mower. I only burned a couple of gallons in the SD so far. I think I'll fill my 5 gal gas can for the mower, and fill the mower tank. That should take me down to around 20 gal left in the SD. Tempted to burn 5 gal from the full tank in the van and replace it with 5 from the SD. That would put me at around 1/2 tank in the SD, which I could fill and dilute with fresh gas. Not an ideal solution, but likely better than running it "as is".
I am open to other ideas. :)


tell us a little about the power valves, have they been cleaned, replaced, how`s the bellows and retention spring? if they leak oil at all, don`t even fool around and just replace the whole assy`s since you came this far...
Don`t be afraid to give SBT a try on their replacement RAVE parts. I can def say they stand by their product 110%. And the folks there like Jeremy C and Tom V are awesome to speak with!!!
The raves were clearanced by SES when they did the rebuild. I cleaned them and inspected all parts on reassembly. The bellows and springs looked good and I haven't seen any leakage from them.


I have to commend you for having a great attitude and outlook in approaching this project, even while you have a few others on the burner... concentration is key to success, and it looks like your nailing it as you go along!:cheers::thumbsup:

Good luck in finishing the rest of the boat!

I actually got away from the jetski`s to get more family time on the water with the boat, we have had other boats before, but returned bc it is a fun family time!

hat`s off! enjoy the newly rebuilt ride!:patriot:

Thanks for the kind words. Part of my urgency is that it is getting warm already and I have a 2000 GTX DI engine sitting in the garage waiting to be re-installed after being rebuilt. I want to finish the jet boat before putting the GTX back together. The GTX should be quicker though, as it was taken care of and requires significantly LESS refurbishment. I also have a 36 foot cruiser that I need to un-winterize and get ready for the summer. The darned shoulder surgery really put me behind, as I'd have liked to be done with all 3 by now.
Like you said, I'll likely sell the GTX pretty quickly since it only holds 3 people and my family is 5 + the dog. The way the kids are growing, we've probably got 2-3 years before we pass the max weight on the Challenger. :)

Can't wait to get the kids out on the boats this summer. :)
 
Last edited by a moderator:
Ah, dang! Just thinking about the comments above on maybe running some gas from the boat through the mower or van, and remembered that I already added more oil to make it extra strong pre-mix. Probably best NOT to run that through the van. Should be OK in the mower though, right?
 
Ah, dang! Just thinking about the comments above on maybe running some gas from the boat through the mower or van, and remembered that I already added more oil to make it extra strong pre-mix. Probably best NOT to run that through the van. Should be OK in the mower though, right?

true, the RAVE`s get clearanced when the cylinders are bored past the OEM size.

hahahaha, you could run weasel urine in the mower! lol...

hahahaha, believe it or not I would run like 4 gals at a time of 40:1 in my Yota. maybe once a week... but you`d be surprised how it saved on using up what was left in the challenger 1800...
the way I look at it, as long as you don`t put to much in to foul a cat convertor or trip a CE light, it`s like top end lubrication :lols:

priming the pump or drill method... I`ve used a make shift rubber coupler attachment using rubber fuel line and a solid shaft in the rubber hose so there is no solid connection of the pump drive in the drill chuck, or even thinking about using the plastic coupler. The rubber hose method also worked well on other Mikuni oil pumps...

Motorcyclesuperstore.com has a lot of cool things for us, and even DennisKirk.com as well...

:cheers::thumbsup::cool:
 
Last edited by a moderator:
My to-do list on the Challenger is actually getting shorter. I fully expect a few things to break on the next trip out, since Murphy likes a long to-do list. :rolleyes:

Worked late the past 2 nights and for an hour before work each day and knocked out a few more tasks.

-It was warm yesterday so I opened the garage doors to get good air flow and busted out the acetone, goo gone, scotchbrite pad and wood chisels. It took an hour to get all of the old traction mat glue off of the engine cover and swim platform, but I stuck with it.

-My 8 year old really wanted to help, so as soon as the acetone was put away she helped me compound, polish and wax the remaining topside areas. I was nervous about letting her use the pneumatic buffer, she was SUPER careful and really enjoyed helping.
465.jpg


I think it turned out well :thumbsup:
466.jpg


Then we wiped down the spots where the BlackTip mats would go with alcohol and started installing the mats. No joke, the PSA on these mats is incredible. Better line them up just right the first time, 'cuz they aint coming up.
Since I had a LOT of surface prep to do before putting the mats down, it took several hours to install them. If my gel coat had not required so much attention to prep it, then I think I could have easily installed the entire interior and exterior traction mat kit in 45 minutes or less.
467.jpg


We did all of the topside compounding and polishing last night, but I still had a little waxing to do. Knocked that out this morning. Also reinstalled interior grab handles (after armorall'ing them), reattached the bow seat back and the port gunwale plastic step tread that the PO had installed. I really wanted to replace this with Blacktip traction mat, but there wasn't a piece in the kit for that location.

I also drained about 12 gallons of gas from the Challenger, leaving less than 1/2 tank. Filled up the riding mower, put 5 gal in the E150 van (it had about 20 gal of gas in it already, so it should be diluted enough), and left a full 1 and 2.5 gal gas can in the garage for a friend's weed eater and mower.
Now I can dilute the old gas with fresh gas on the next trip. :)

Go look at the "before" pics in post #3 of this thread (http://www.seadooforum.com/showthre...996-Challenger&p=300591&viewfull=1#post300591), then check out these pics that I took after all of the work last night::cheers:
468.jpg

469.jpg

470.jpg

471.jpg

472.jpg

473.jpg


What is left to do:
-another test run to be sure that the new spark plugs (properly torqued this time) solved the issue that had us limping back to the dock last time.
-reinstall the spotter seat back pad
-replace the trailer wiring connector that plugs into my vehicle's wiring.
-fix the busted starboard side light on the trailer.
-troubleshoot and fix the nav and anchor light circuit
-figure out how I'm going to store the 7# danforth anchor and rode. Right now it is sitting in the tray under the bin that is in the console just forward of the helm. I would prefer to have it fastened down, but haven't sorted out how to do that yet.
-cut my two 15' dock lines in half and splice new loops on the 2 sections that don't have them. Want them short enough that they can't get sucked into the drive shaft or jet pump. I had a dock line get wrapped around one of the prop shafts in my big boat and did not enjoy swimming under the boat with a knife to hack the rope free.

And the less urgent stuff that I'd like to get done by mid summer:
-install interior LED strip lighting and exterior under the swim platform... maybe on the transom to light below the water. Not sure yet. I've already got 20 feet or more of the lighting strips and some small marine LED fixtures on my big boat. I'll have to sort through options and see what fits and works the best. Not looking to "pimp my boat" with gaudy lighting. Just want some lights so that we can see enough in the boat at night to not get hurt stumbling around in the dark, and to be able to get in/out of the water without issues.
-install a radio and new speakers. The cutout is there from the prior owner, but the head unit isn't. The speakers look terrible and I'm sure they are due to be replaced. Likely to go with one of these , as I have 2 on my big boat and they are doing well... and they have NOAA weather. The weatherband pretty important on the lake where we keep our big boat, as the surrounding trees and mountain often block the view of approaching storms.
-somewhat related... I have a towable that had a ripped cover. I took the cover apart and started to replace the ripped part with a good section from another cover. It is a real shame that I had already cut the bottom out of the other cover and used it to reinforce the bottom of my hockey bag. otherwise I could have simply switched covers. Anyhow, have to finish putting this back together since the kids are excited to use it.
-order a new upholstery set from Keith at seadooupholstery.com and install it.
 
Last edited by a moderator:
WOW!!! :thumbsup::thumbsup::thumbsup:
That really looks Amazing and came out really well!!! If I had lived closer I would have traded wrenching for detailing...lol...
Looks really Good! congrats!:cheers:
 
Oh, also... I sent back the crappy Meguire's 6.5" cutting and polishing foam pads and replaced with pads from Chemical Guys. So far, the new ones are working fantastic and look like they will hold up MUCH better.
 
WOW!!! :thumbsup::thumbsup::thumbsup:
That really looks Amazing and came out really well!!! If I had lived closer I would have traded wrenching for detailing...lol...
Looks really Good! congrats!:cheers:

Thanks. It is never going to look new again, but I'm happy with how it looks now... especially after how it looked when I brought it home. :)
 
Before work, I reinstalled the spotter seat back pad. The PO had put the wrong nut on one of the studs, which made the threaded insert in the seat back spin. What should have been a 2 minute job of putting on 3 washers and nuts turned into 20 minutes of fixing the spinning threaded insert. Grrr.

And I FINALLY got the fuel filter out (it was stuck and I was afraid to really crank on it before). I used I big set of slip joint pliers to grab the fins on the sides of the filter housing and gently squeezed while using the leverage of the long pliers to get it loose. After I got it off I saw that the bottom of the housing has a plastic square protrusion that I could have put a wrench on to get the housing off. Doh!
I am really embarrassed that the fuel filter kept slipping my mind and I had not gotten it apart until today.:facepalm:

It was pretty gross!
Element:
527.jpg


Element:
528.jpg


Housing:
529.jpg


I cleaned the stock filter and element before reinstalling, but honestly, that little screen can't be doing much to filter the fuel, and certainly isn't separating out any water. I see that PR went with industrial strength Racor fuel filters. I was thinking of one of these http://www.amazon.com/Seasense-Fuel-Filter-Clear-Aluminum/dp/B004XAEW6Q/ref=pd_ybh_10, as I really like clear water separator bowl.
I had big Racors on my first big boat which I had trucked from Maryland to NC. The trip shook up a few decades of stuff that had settled in the gas tanks and within 5 minutes of starting the engines both Racors were completely clogged. They did their job, but I couldn't find local replacements, and when I found them online they were really pricey. So I went with spin on filters from Walmart, as they were affordable and getting replacements was cheap and easy. However, they had no water drain, which still seems odd to me.

Fuel filter suggestions anyone? Keep the cleaned stock filter element, install a new stock filter element upgrade to a water separating filter, something else? I should note that I am WAY over budget on this project, so I'm getting more price sensitive.

And seeing how bad the filter was makes me even more embarrassed that I've been avoiding rebuilding the carbs. Got to be sure that gets done very soon.
I suppose I also need to pull the fuel pickup from the gas tank and see if there is any debris in the bottom of the tank that needs sucked out before it clogs the fuel system.

Just ordered this battery tray yesterday, as I don't like how the battery box that I just installed last week is held down by the strap. The battery moves too much and is a pain to get to the terminals to disconnect so that I can put it on the charger.
I would like to install a battery disconnect switch, but can't decide which type or model to get.
I was thinking that I'd get a 7 Watt 12v solar panel from NortherTool to trickle charge the battery when the boat is not in use. However, I may just take the 5 watt panel off of my big boat, as it is just there to trickle charge a spare battery that we use for charging cell phones, powering the inflator for water toys, etc.

Also picked up a telescoping paddle for emergencies, a new trailer light to replace the busted one, more spark plugs, and some new carpet for the bunks on the GTX trailer. Luckily, I had a few Overton's gift cards that covered the cost of those. Had to go deeper in debt to get a new trailer tire from Amazon though. I have brand new tires on the trailer, but the old set are too dry rotted.

Fingers crossed that the weather is nice Sunday afternoon. I'll be Cub Scout camping tonight through Sunday morning. Hoping to get the Challenger back to the local lake for a few hours Sunday with some fresh fuel to see how it does. Forecast is for overcast, 66 degrees, and 50% chance of rain. :(

B.O.A.T.

Bust
Out
Another
Thousand

Fortunately, with this little boat it is more like hundred.
The big boat definitely eats larger bills though.:willy_nilly:
 
Last edited by a moderator:
ok, first thing is you can`t technically use a plastic cup Fuel/water separator. That`s why the all aluminum ones are a bit more money. the ones with the plastic drain cups or sight cups are for outboards and above deck. The all metal housing are for inboards/below deck as in our boats...

choices, you can use a generic 5/16 metal housing automotive filter for around 5-8 bux. I don`t really like the thin plastic ones like Moeller or Fram etc. The one you have I think can be ordered or bought locally at the stealership. just get a new O ring as well...

battery charger> don`t cheap out here.
Battery tender Jr > http://www.batterymart.com/p-batter..._Code=atv-jet-ski-motorcycle-battery-chargers

these come with a lead to attach to the battery terminals that you leave on, and just plug in when you need to maintain the battery. also these low amp units are MPEM safe... whatever you do, don`t use a high amp automotive charger with the battery cables connected or the MPEM goes Poof...

I have the Tender Jr and it works very well...


after seeing that filter, I`ll bet theres some crap in the carbs for sure, if not the body the little filters in the carbs for sure...
 
Last edited by a moderator:
ok, first thing is you can`t technically use a plastic cup Fuel/water separator. That`s why the all aluminum ones are a bit more money. the ones with the plastic drain cups or sight cups are for outboards and above deck. The all metal housing are for inboards/below deck as in our boats...
Hmmm. Interesting that the stock SeaDoo filter housing is plastic.
I'll have to think more about options here, and see how it does with the cleaned stock filter.

choices, you can use a generic 5/16 metal housing automotive filter for around 5-8 bux. I don`t really like the thin plastic ones like Moeller or Fram etc. The one you have I think can be ordered or bought locally at the stealership. just get a new O ring as well...
Since getting the GTX and the Challenger I've found myself using my Amazon Prime free 2 day shipping option MUCH more. Even stuff that I'd normally buy at Walmart, i can usually get it cheaper via Amazon, and it is often at my house the next day... although sometimes it takes the whole 2 days to arrive. So, the concept of "locally" is getting less relevant for me, as it is usually quicker for me to order via Amazon than to find time to drive to a local merchant.
And to think that I really only signed up for Amazon Prime to get access to their free streaming video library.

battery charger> don`t cheap out here.
Battery tender Jr > http://www.batterymart.com/p-batter..._Code=atv-jet-ski-motorcycle-battery-chargers

these come with a lead to attach to the battery terminals that you leave on, and just plug in when you need to maintain the battery. also these low amp units are MPEM safe... whatever you do, don`t use a high amp automotive charger with the battery cables connected or the MPEM goes Poof...

I have the Tender Jr and it works very well...

I have something similar for home, but need a solar charger since I'm likely to keep the boat on the trailer at the marina during the summer, and I won't have an outlet nearby to plug into.

Thanks again for the feedback.
 
Status
Not open for further replies.
Back
Top