


-
This site contains eBay affiliate links for which Sea-Doo Forum may be compensated.
You are using an out of date browser. It may not display this or other websites correctly.
You should upgrade or use an alternative browser.
You should upgrade or use an alternative browser.
RESTO Our 1st 951 ever!!! Resto
- Thread starter Jetskigoodies
- Start date
- Status
- Not open for further replies.
Jetskigoodies
Well-Known Member
http://t.harborfreight.com/5-piece-metric-s-type-wrench-set-99699.html
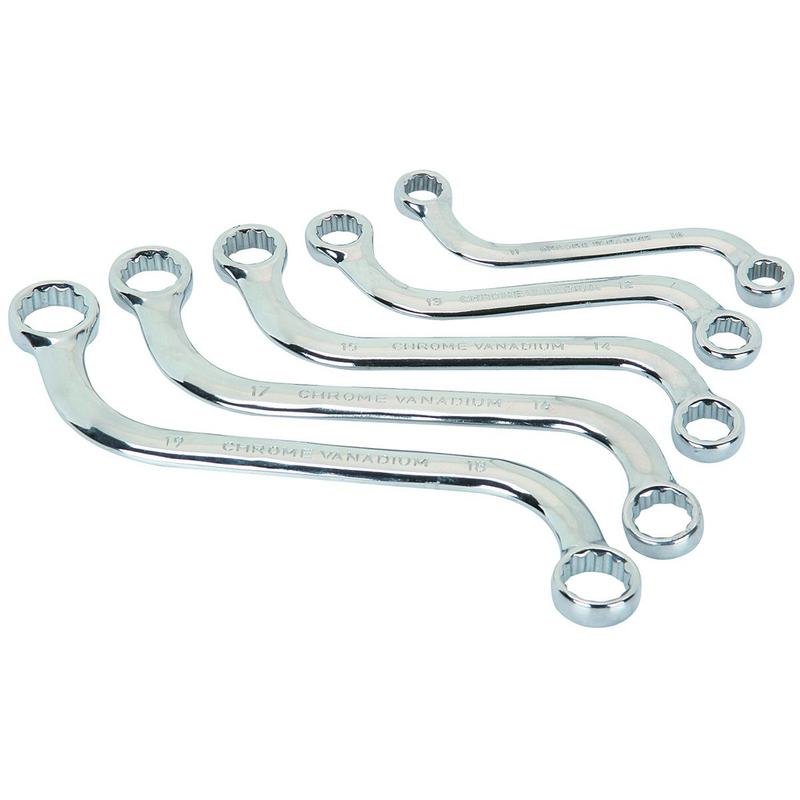
Here you go
That is what we have
Here you go
That is what we have
Last edited by a moderator:
Jetskigoodies
Well-Known Member
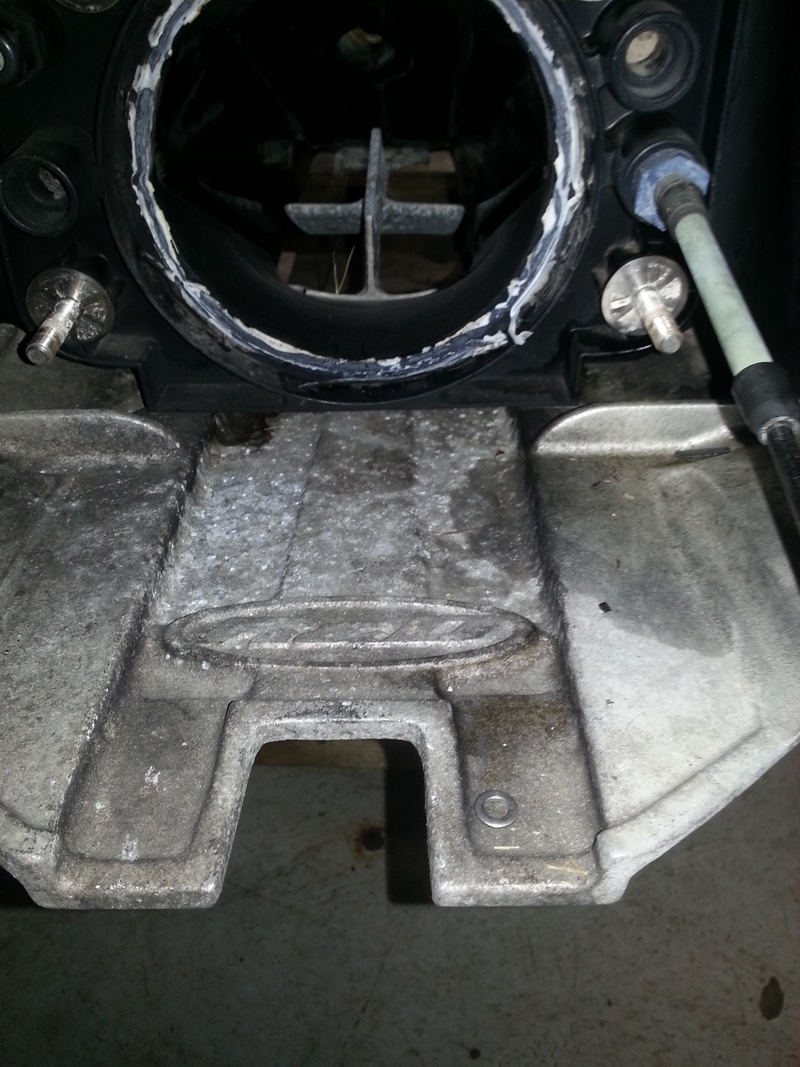
Started to polish the ride plate.
I started off sanding it with 800 grit paper, then 1000, 1200, 1500. Then I took an air 90 with a buffing attachment and some compound and went over what I could get to.
It turned out pretty good. It is not a mirror finish due to the pitting. In some areas I sanded the aluminum smooth and went back over it and I got a mirror finish.
I was thinking about pulling it off to really polish the whole plate. Then I thought it over and as soon as water hits it, it will start to tarnish and the exhaust blows right on to the plate. So I will clean it up a little more, to the point that when I put the pump back on All the area that is visible will be clean and shiney.
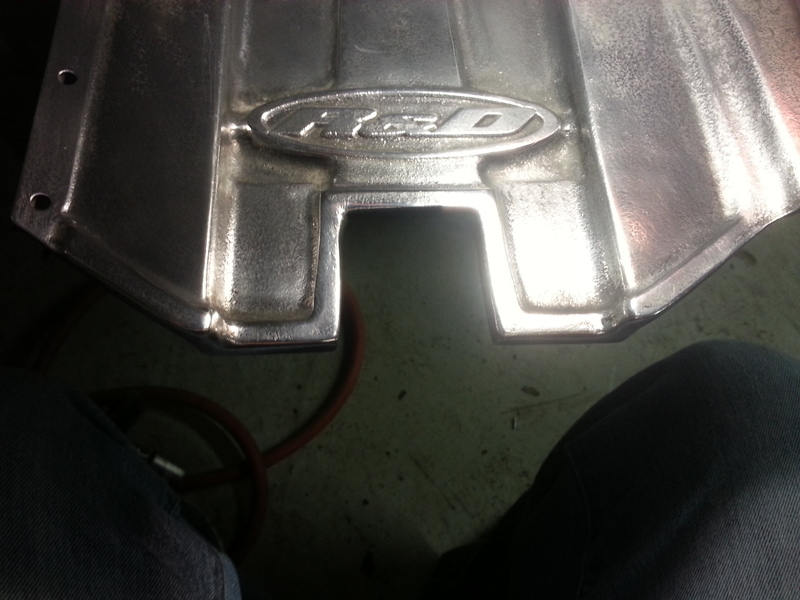
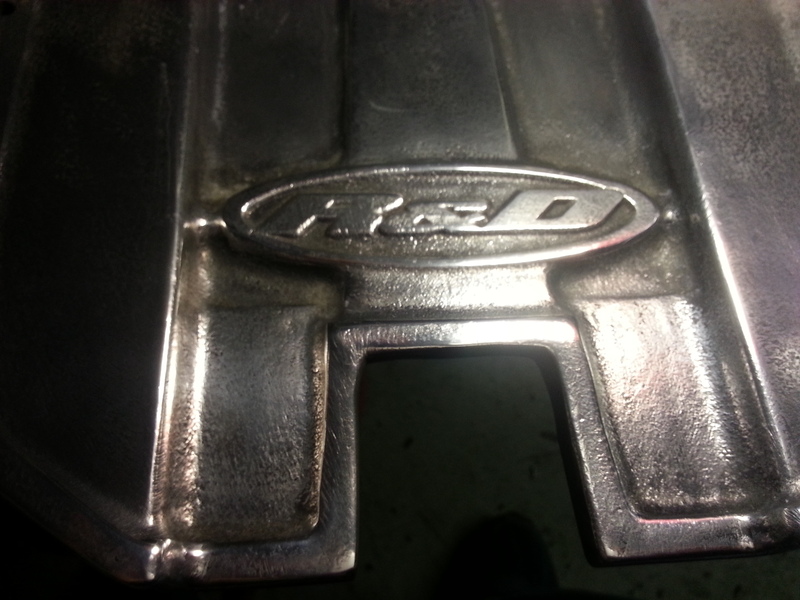

You can see up where the pump mounts that there is still some areas I need to get to. This plate was really nasty

I started off sanding it with 800 grit paper, then 1000, 1200, 1500. Then I took an air 90 with a buffing attachment and some compound and went over what I could get to.
It turned out pretty good. It is not a mirror finish due to the pitting. In some areas I sanded the aluminum smooth and went back over it and I got a mirror finish.
I was thinking about pulling it off to really polish the whole plate. Then I thought it over and as soon as water hits it, it will start to tarnish and the exhaust blows right on to the plate. So I will clean it up a little more, to the point that when I put the pump back on All the area that is visible will be clean and shiney.
You can see up where the pump mounts that there is still some areas I need to get to. This plate was really nasty
Last edited by a moderator:
Jetskigoodies
Well-Known Member
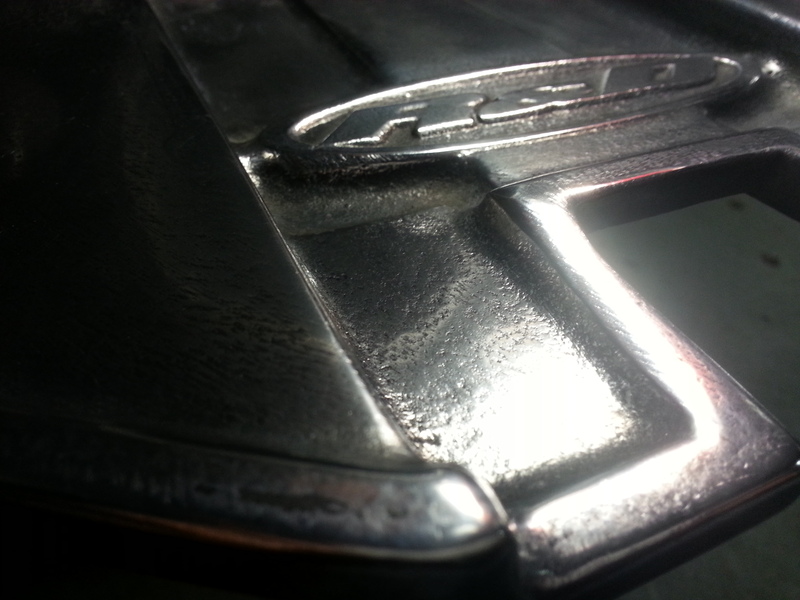
It looked like this
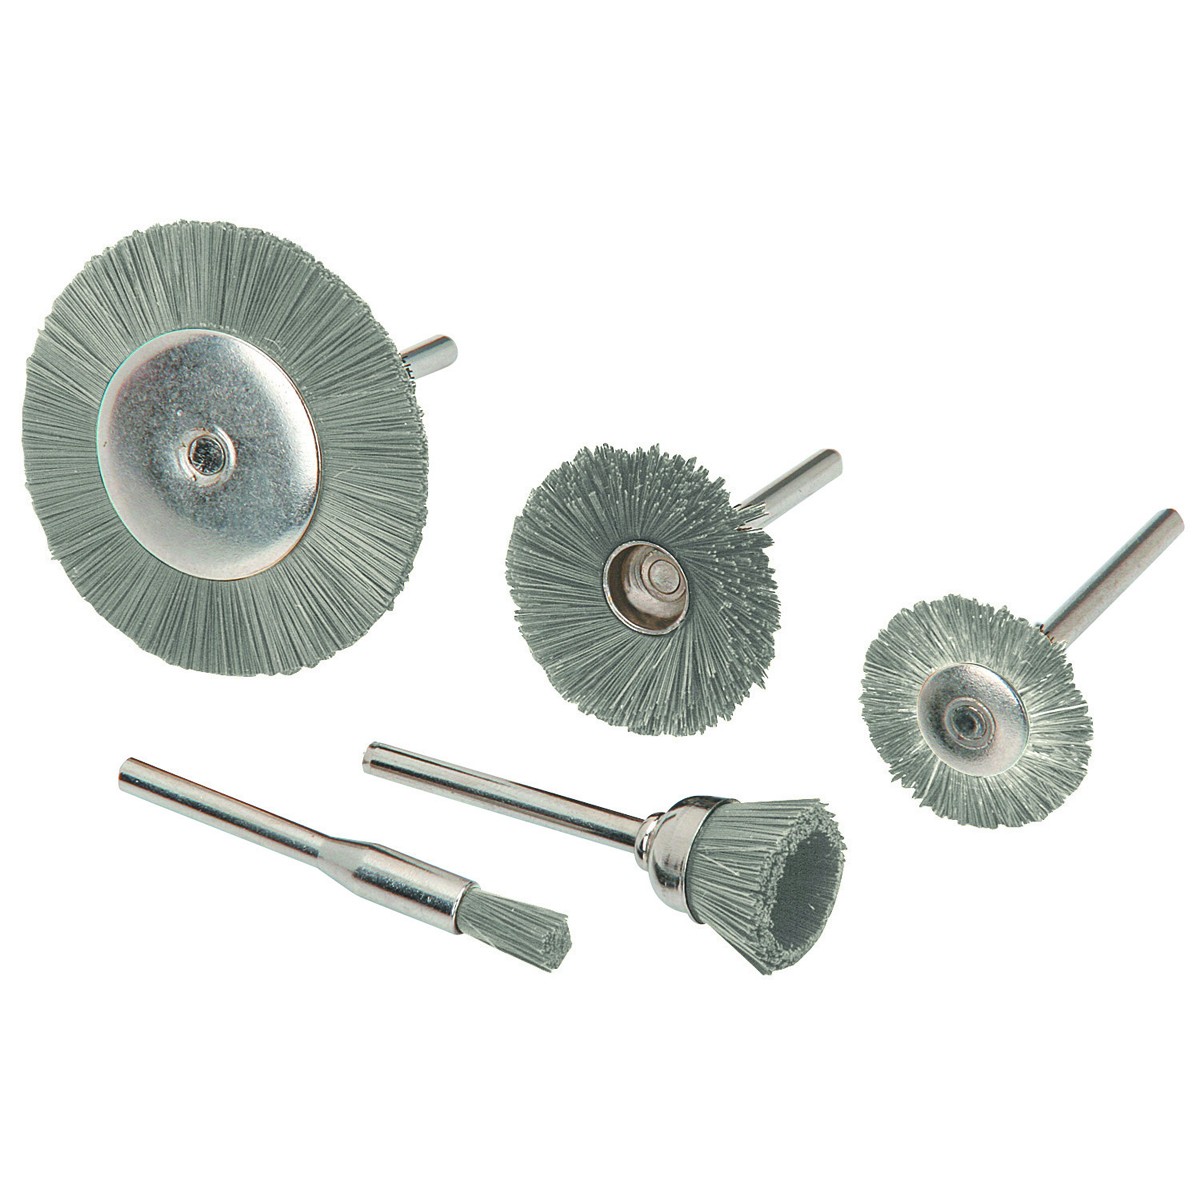
The 5 piece brush kit from harbor works pretty good and gets the nooks and crannies. Just use some mothers and a cordless drill and have at it. I like to use the cup brush. Like a micro buffer and it won't wear out your fingers. I would even the wrap the thing in paper towels bits to polish off the bulk black then hit it with micro fiber cloth. Dang I can be lazy. I even used Sink Perfect from Home Depot to cut the oxidation. I use that to polish my stainless sink in the kitchen.
http://www.harborfreight.com/5-piece-stainless-steel-wheel-and-brush-set-66129.html
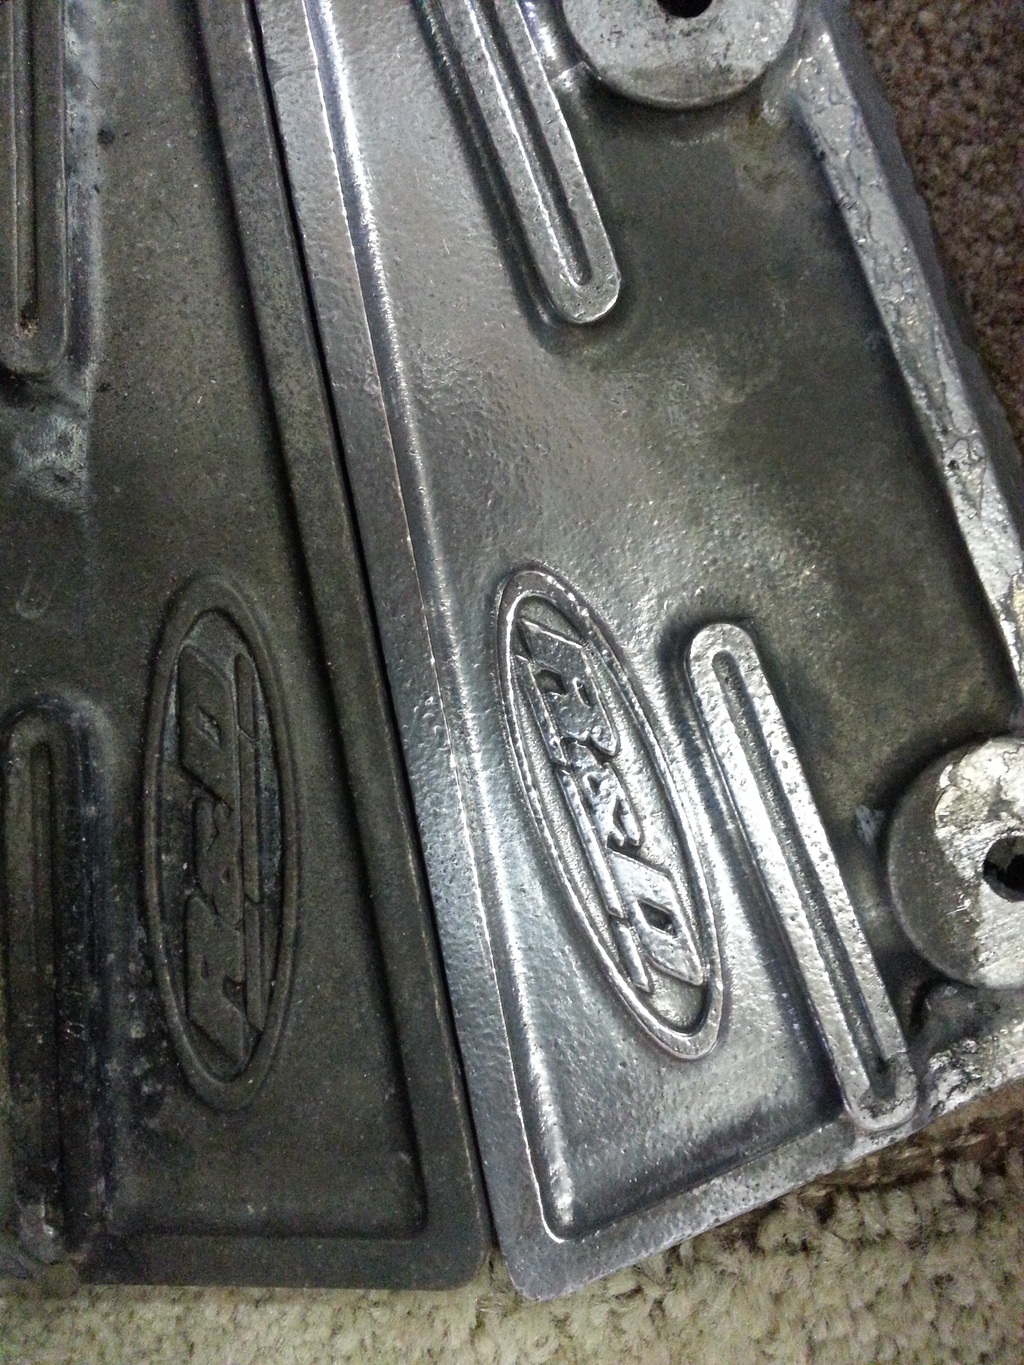
Here's CReynoldsMIZ trim tabs when I was measuring them for replication purposes. I gave them a good once over for him with the Harbor Effect, LOL.

http://www.harborfreight.com/5-piece-stainless-steel-wheel-and-brush-set-66129.html
Here's CReynoldsMIZ trim tabs when I was measuring them for replication purposes. I gave them a good once over for him with the Harbor Effect, LOL.
Jetskigoodies
Well-Known Member
I have those and the larger cup ones. I also have the brass. I started to use that on the bottom but it looked like it was scratching it.
P.s. Do not let your wife see that picture with the tabs on the rug lol
P.s. Do not let your wife see that picture with the tabs on the rug lol
Jetskigoodies
Well-Known Member
I use this on my sink.

I will try it out on the intake grate. That this is gross too.
I will try it out on the intake grate. That this is gross too.
Jetskigoodies
Well-Known Member
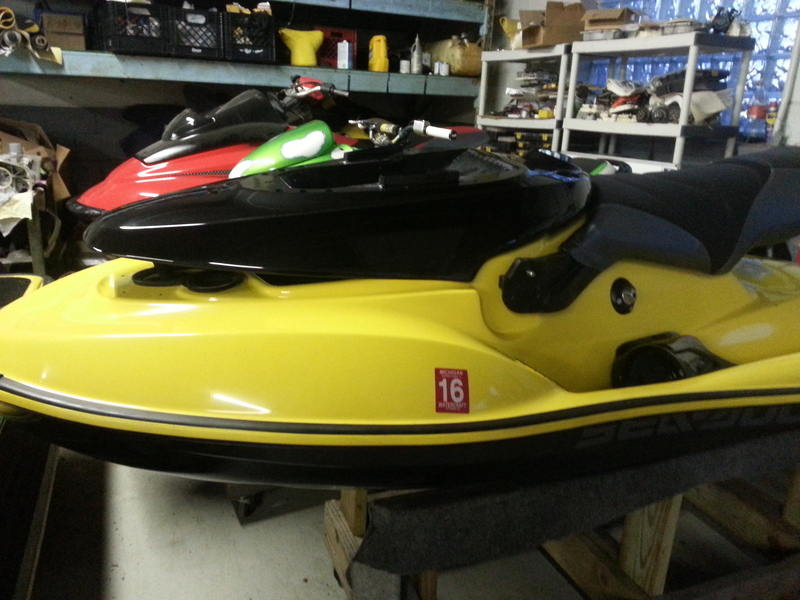
Nope it came with this. It rode fine for me before I blew up the motor lol. This had a bunch of goodies on it when I got it. R&D ride plate, pro k's, skat trak impeller, R&D intake grate, beach house sponsons but one was broken, umi bars, finger throttle, button holder. The a.m. Parts were worth close to what I paid for the whole thing. I have waaayyyy more into it now though.
I have those and the larger cup ones. I also have the brass. I started to use that on the bottom but it looked like it was scratching it.
P.s. Do not let your wife see that picture with the tabs on the rug lol
LOL, that is in my shop at my work bench. Drop a screw? It stays there and usually won't get lost.
I use this on my sink.
I will try it out on the intake grate. That this is gross too.
I used to use the Bartenders B!tch (as I call it) but switched the Perfect Sink when I redid the kitchen.
Jetskigoodies
Well-Known Member
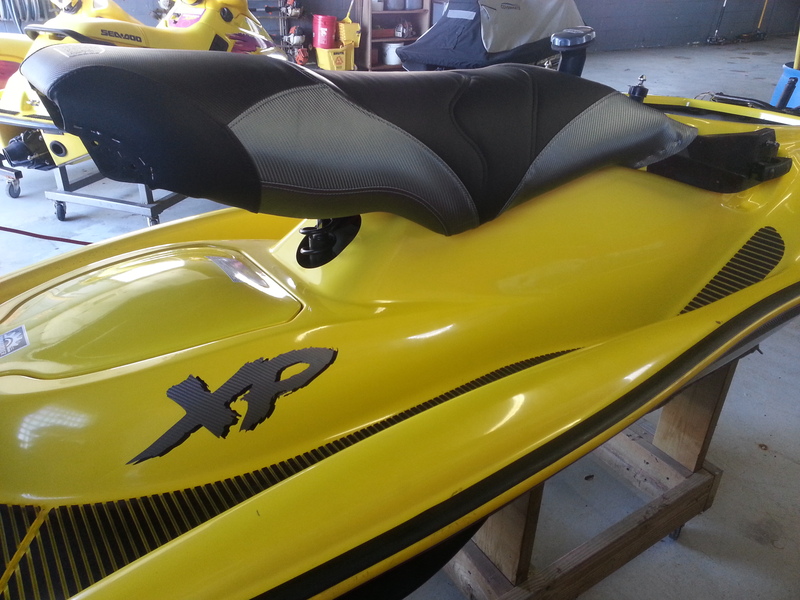
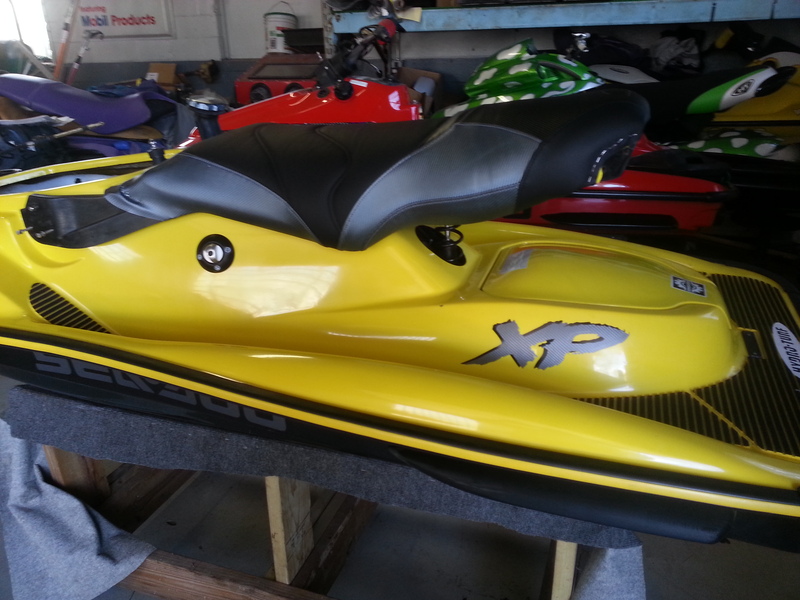
Today my seat cover came in. It looks much better than the yellow cover. The grey is darker then the decals but still looks great.
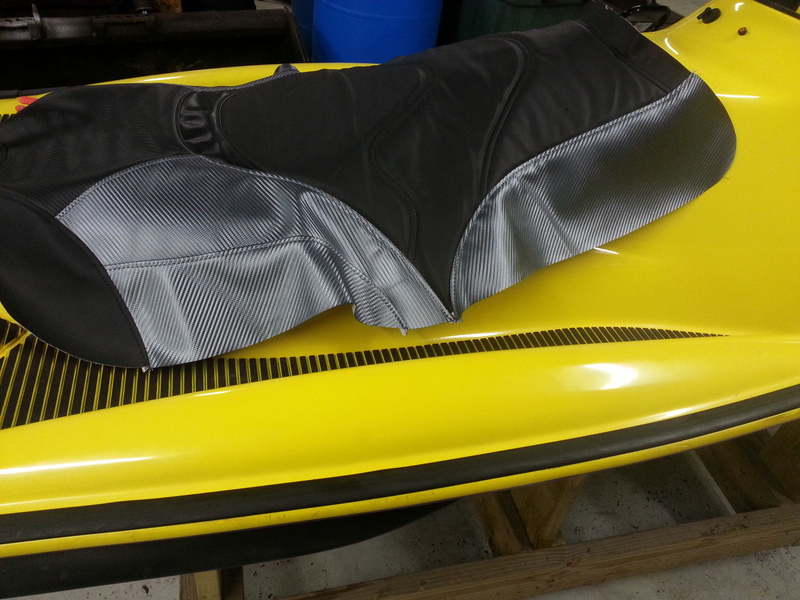
It will go on tomorrow
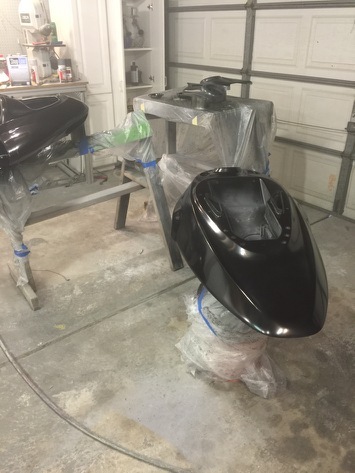
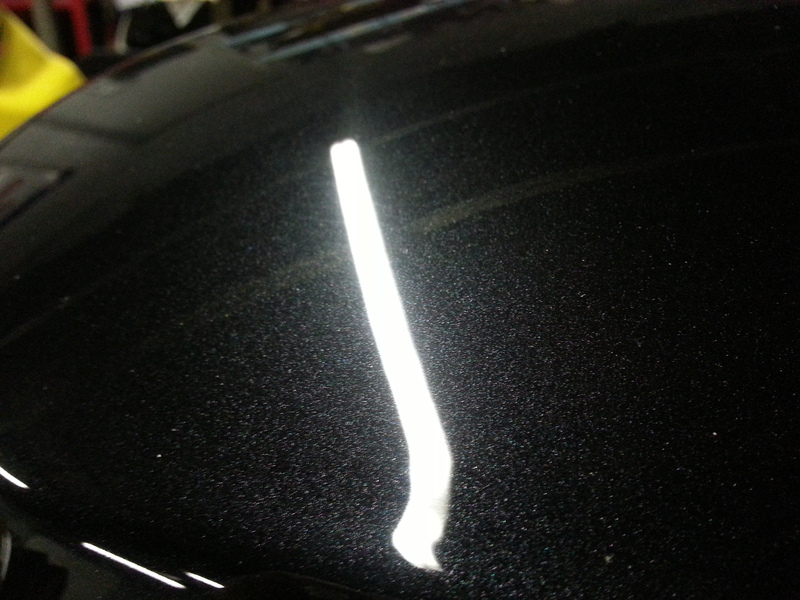
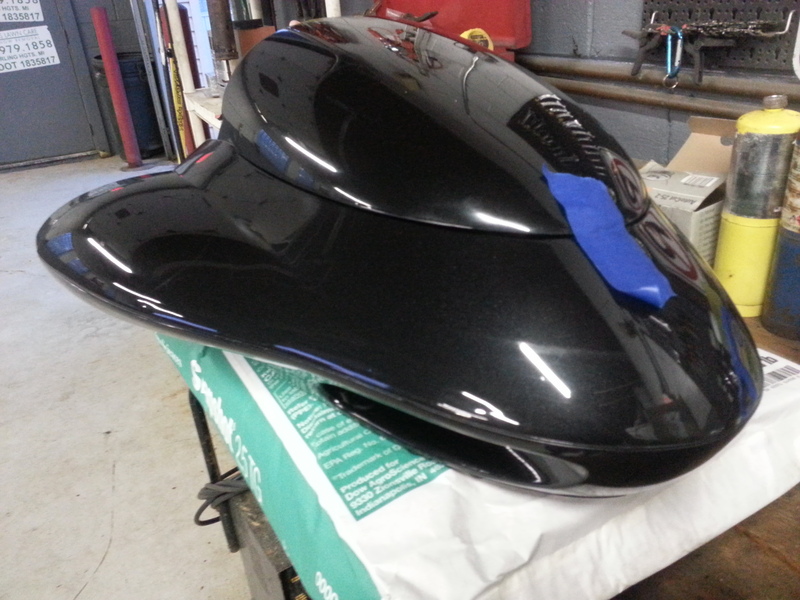
Just got another picture of the hood. This one is just the color. The clear has been sprayed. It will get wet sanded tomorrow and dropped off Sunday.
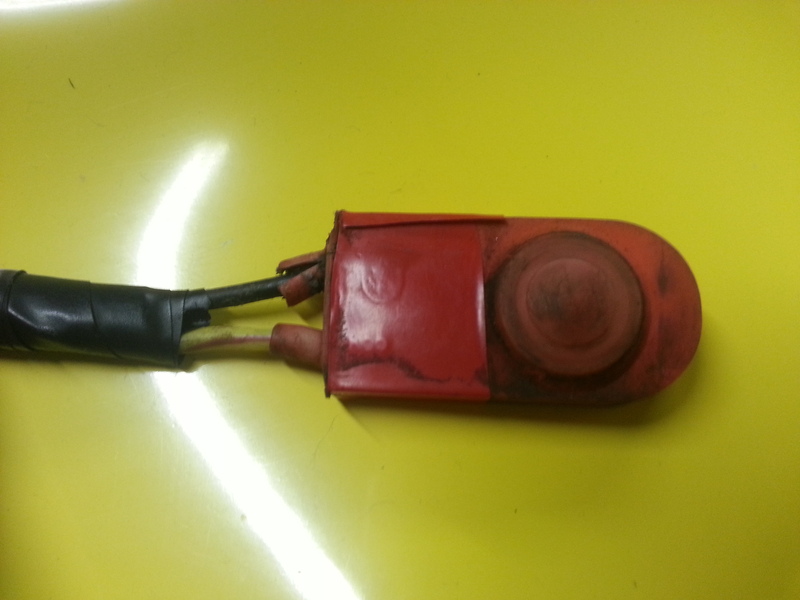
The start stop button is trashed, and yes that is red electrical tape. It is hard wired into the main harness plug. So I just cut the wire and added a weatherpack plug.
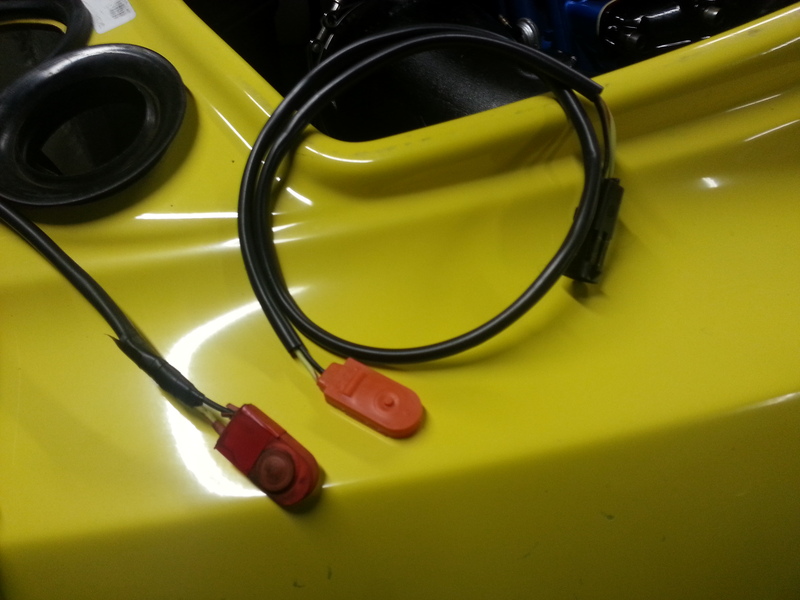
Replaced it with a new one.

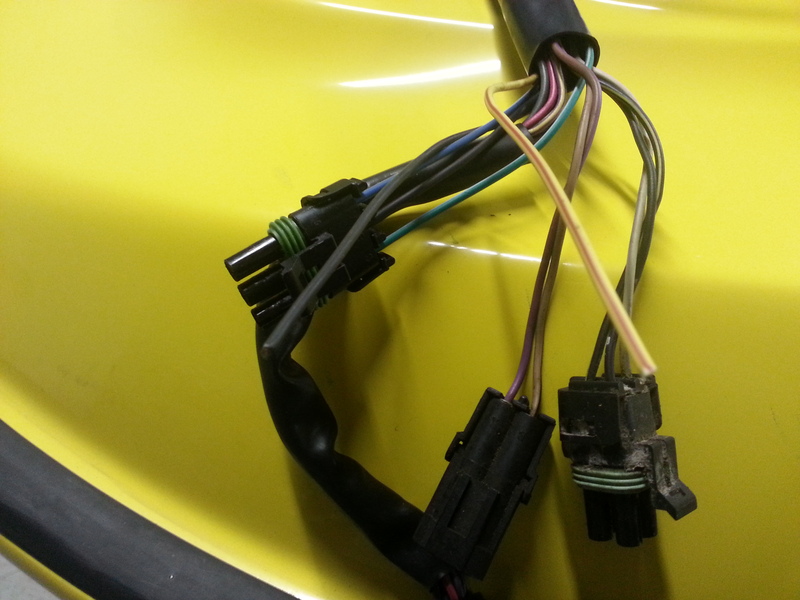
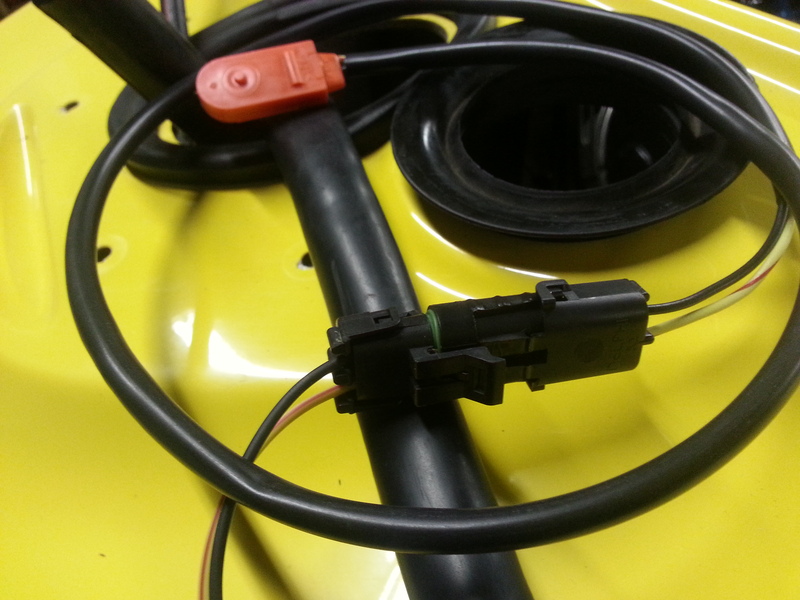
I am going to take apart all of the connectors clean them up and put dielectric grease on all the connections.
It will go on tomorrow
Just got another picture of the hood. This one is just the color. The clear has been sprayed. It will get wet sanded tomorrow and dropped off Sunday.
The start stop button is trashed, and yes that is red electrical tape. It is hard wired into the main harness plug. So I just cut the wire and added a weatherpack plug.
Replaced it with a new one.
I am going to take apart all of the connectors clean them up and put dielectric grease on all the connections.
Fantastic work man! Yeah some folks like a 97XP ride plate. I have an extra carbon fiber one somebody made. I think it has no chance of handling poorly with that Jet Dynamics grate and those Beach House.
JSG- did you fix you broken Beach House yet? I have a complete set if you need it.
JSG- did you fix you broken Beach House yet? I have a complete set if you need it.
Jetskigoodies
Well-Known Member
Seat cover is on and it looks fantastic.


Jetskigoodies
Well-Known Member
My review of the mline seat. At first when I was looking at it I thought it was cut too close to the factory cover and I would not have enough meat to pull on. Well I was wrong. I put this on by myself. I stapled the back on first and then went down the side about a foot on each side. I then stretched the material to the front and stapled down the front. Then just went back down the sides. It was very easy and it turned out great. It matches my theme very well. I am glad I went with this cover. It only took me about 20 minutes to do it myself.
Jetskigoodies
Well-Known Member
You wont regret it. The seat is really nice.
Jetskigoodies
Well-Known Member
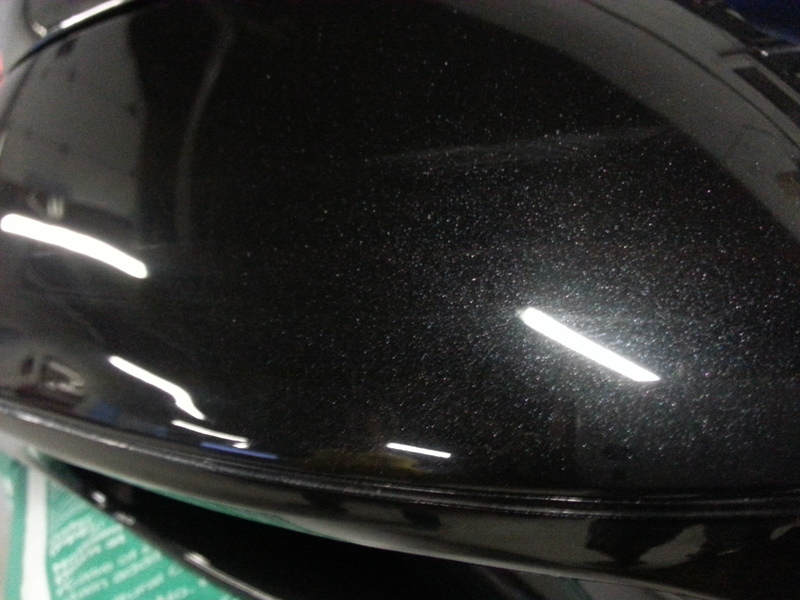
Bill dropped off some parts today and they look perfect. He did an amazing job. You can not tell the hood had damage.


Jetskigoodies
Well-Known Member
Everything is smooth as glass. He painted the rear grab bar, the hood, the pan under the seat, and the parts for the seat that hide the pivot points. I will take good pictures of it tomorrow. It was hard to get good pictures where the parts were the lighting was terrible.
AdamXP800
Well-Known Member
How I fix my gas gauge
Please start a new thread. Welcome to the forum
96 XP800!
Keep the 2 strokes alive!
Jetskigoodies
Well-Known Member
Lol thats 2 random posts in this thread. That one was deleted before I even saw it. Thanks mods
Jetskigoodies
Well-Known Member
Got the umi mounted today. Used the template Nick ( [MENTION=41828]Minnetonka4me[/MENTION] )sent. Just had to cut use a center punch on the new holes to be drilled.

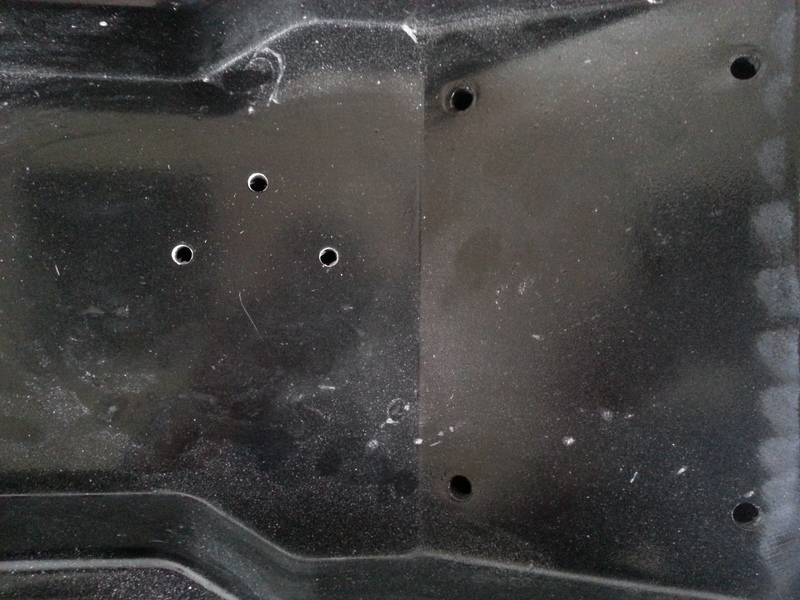
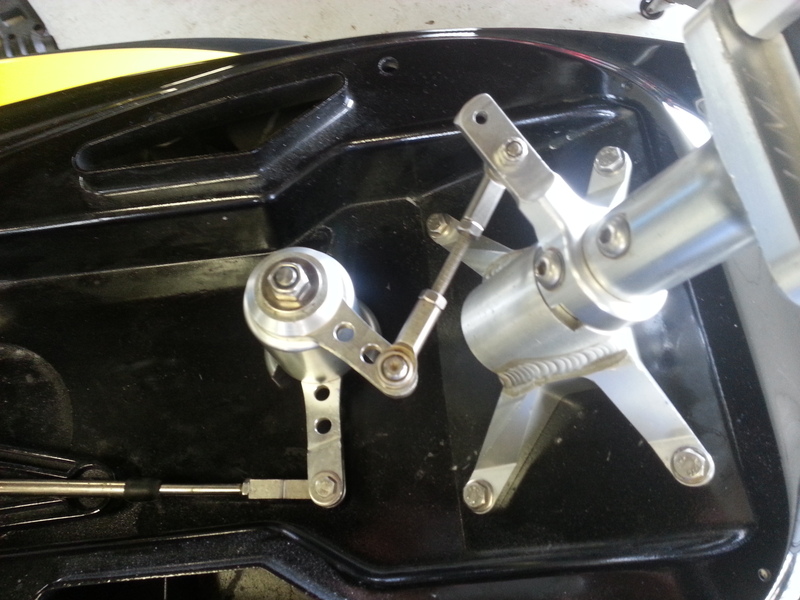


Last edited by a moderator:
Jetskigoodies
Well-Known Member


- Status
- Not open for further replies.
Similar threads
- Replies
- 15
- Views
- 364
- Replies
- 0
- Views
- 149
Share: