• This site contains eBay affiliate links for which Sea-Doo Forum may be compensated.

New seat cover, remove old cover or not.

Status
Not open for further replies.

Krispy

Well-Known Member
Hello all,

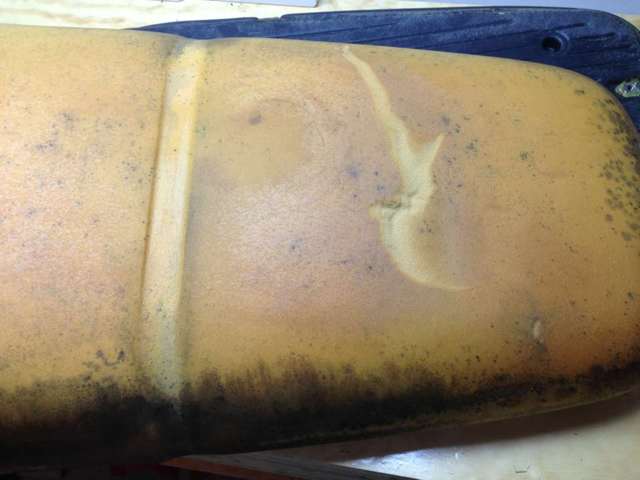
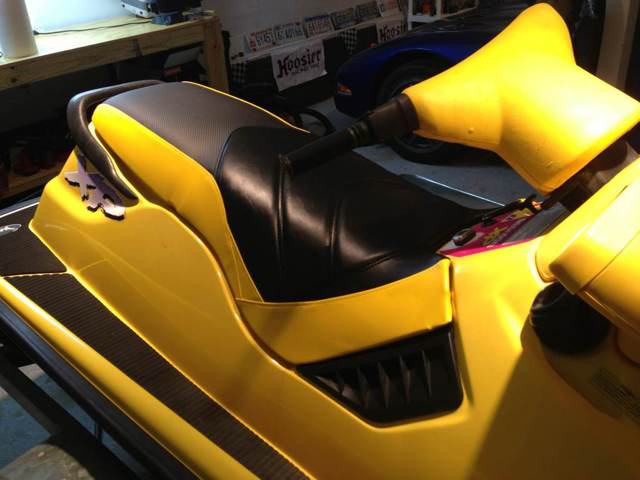
I will be installing a Mline cover tomorrow and I am curious as to if I should remove the original cover or not. I have seen others that left the original seat cover on, however they weren't in as bad shape as mine is see pic below:

600.jpg


My worry is that the damage on my seat is going to cause issues with the look of my new cover.

What do y'all think?

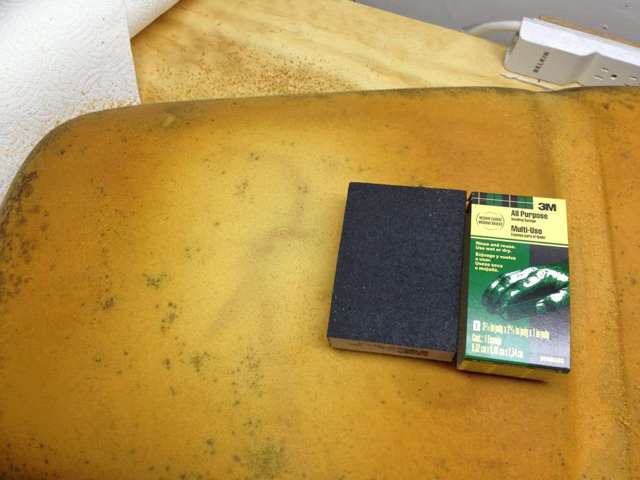
Is there a way to repair before recovering?
 
I didn't remove mine but there were no rips. I've heard you can feel it slip if you leave the old cover on but have not really felt it in my situation
 
Take it off. You will see the rips through your new cover. Pull out a few staples with a flat head screw driver and some pliers and after about 10 or so take a phillips head screw driver and run the shaft under the material right behind staples and pull up. The material will pull the staples out of the base. You will pull out like 10 staples at a time, just keep moving the screw driver forward. This way is much easier and faster than pulling the staples one be one.
 
I also left my cover on, but it was faded and not ripped. I'd take it off. No way that's gonna look good if you try and leave it on.
 
Take it off. You will see the rips through your new cover. Pull out a few staples with a flat head screw driver and some pliers and after about 10 or so take a phillips head screw driver and run the shaft under the material right behind staples and pull up. The material will pull the staples out of the base. You will pull out like 10 staples at a time, just keep moving the screw driver forward. This way is much easier and faster than pulling the staples one be one.

That staple removal tip was great. Thanks!

I got the old cover removed and all the staples pulled. I noticed the foam had lost most of its adhesion with the plastic base. I went ahead and carefully separated the two components.

I then spent some time with acetone and steel wool cleaning up the seat base (plastic part) tomorrow I will re adhere the foam to the base with some spray adhesive.

After removing the strap I noticed a permanent "dip" in the foam for lack of a better term, can anyone think of a good way to build the foam up in that area?

I used 3m double sided foam tape. You can see in my resto thread where I put it on. Filled the strap dip out almost perfectly.
 
I like that tape idea, I'll look over your thread. Thanks.

There also is another, less consistent low spot I need to fill. Any ideas?

3.jpg


Edit: After looking at the pic I came up with this idea:

What do you think about sanding some of the foam down on the rear area to smooth it out a bit
 
Last edited by a moderator:
Just a thought, if that black stuff is black mold or something similar I would clean it off before reinstalling the new cover.
If just dirt then just clean it with super clean or simple green and make sure it 's 100% dry before the new cover goes on.


Good luck....are you using Stainless steel staples?
 
Yes, I will be using stainless staples.

http://www.amazon.com/Stanley-TRA70.../ref=lh_ni_t?ie=UTF8&psc=1&smid=ATVPDKIKX0DER

I have found those but I am trying to line some up locally so I can get started tonight.

I am afraid that the black stuff you see on the seat isn't coming off, It is mold or mildew and It is similar to what was on my handlebar pad before I cleaned it with zippo lighter fluid.

Not sure what I am going to do about that but it is a signifigant amount. I would venture to say most skis of this age are going to have a good bit of that type of growth.

Thanks for all the suggestions / comments guys. Keep them coming.
 
Mold is like a live plant and keeps growing. My suggestion would be to get a strong cleaner or disinfectant on there that will at least kill the plant (so to speak) it might not make it clean looking but it should kill the mold/mildew. This will help it from "growing" or spreading into your new seat cover.

Like SDB suggested make sure it is dry as a bone before recovering.

That sounds like a good idea. I will use something with bleach to help clean the area. It has worked well for me in other mildew situations perhaps it will work well here.
 
Bleach will work. Don't use full strength it will be hard on the foam.
Full strength won't be needed to kill it.

Sent using Tapatalk
 
I figured I would follow up with an update.

I was able to knock the mildew back with Clorox cleanup. It didn't remove it but it did kill it. I hit it from the top and bottom of the seat

I then attacked the foam erosion that was under the cracked cover.

54.jpg


All I had to do was use this sanding block to smooth out and level the foam. It was quite simple and made a big difference. I probably only removed 1/32nd of an inch of foam in the area.

While the foam was drying from the cleaning. I siliconed all the seams and thread stiching from the back side of the cover.

55.jpg


While that was drying I re attached the seat foam to the seat base.

I used 3m super 77 spray adhesive on both the seat and the base.

56.jpg


The trick with the super 77 is to let it begin to "tack up" or become sticky before you try to put the parts together.

Once assembled it was left to dry and the it was time for the covering.

57.jpg


Sorry I didn't take any pics of the covering process I used this method outlined in a write up that I found.

All in all I am pleased with the final result.

58.jpg


What do y'all think?
 
Last edited by a moderator:
Status
Not open for further replies.
Back
Top