My 2004 Speedster 200 Project

Note: This site contains eBay affiliate links for which SeaDooForum.com may be compensated
Status
Not open for further replies.
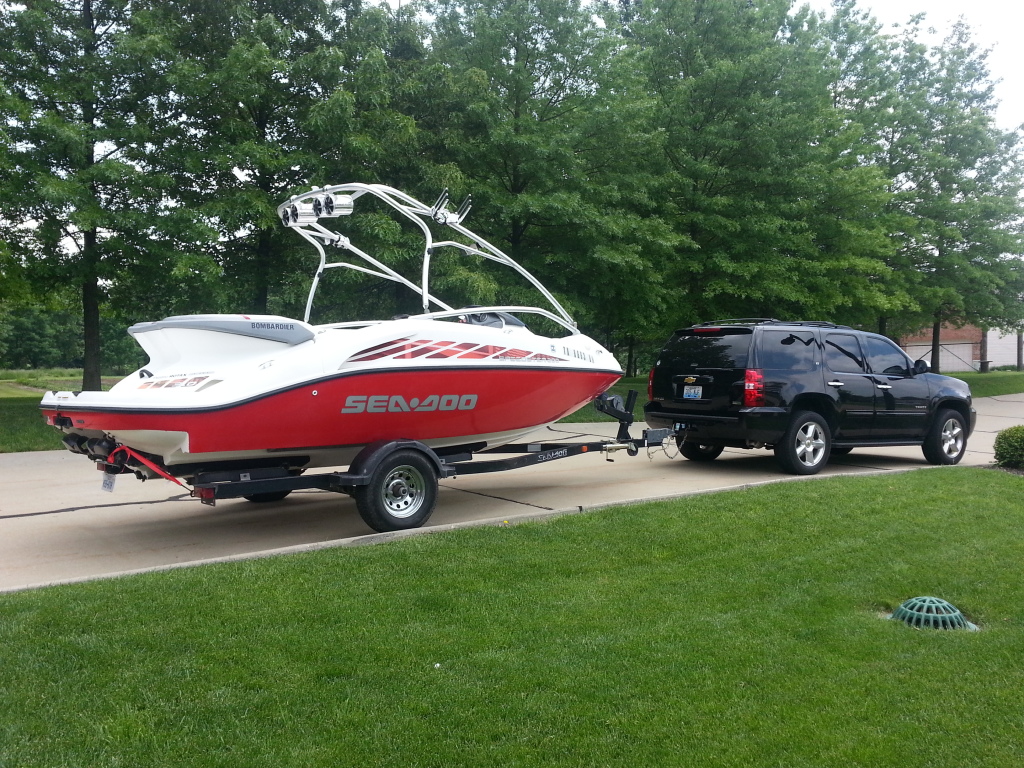
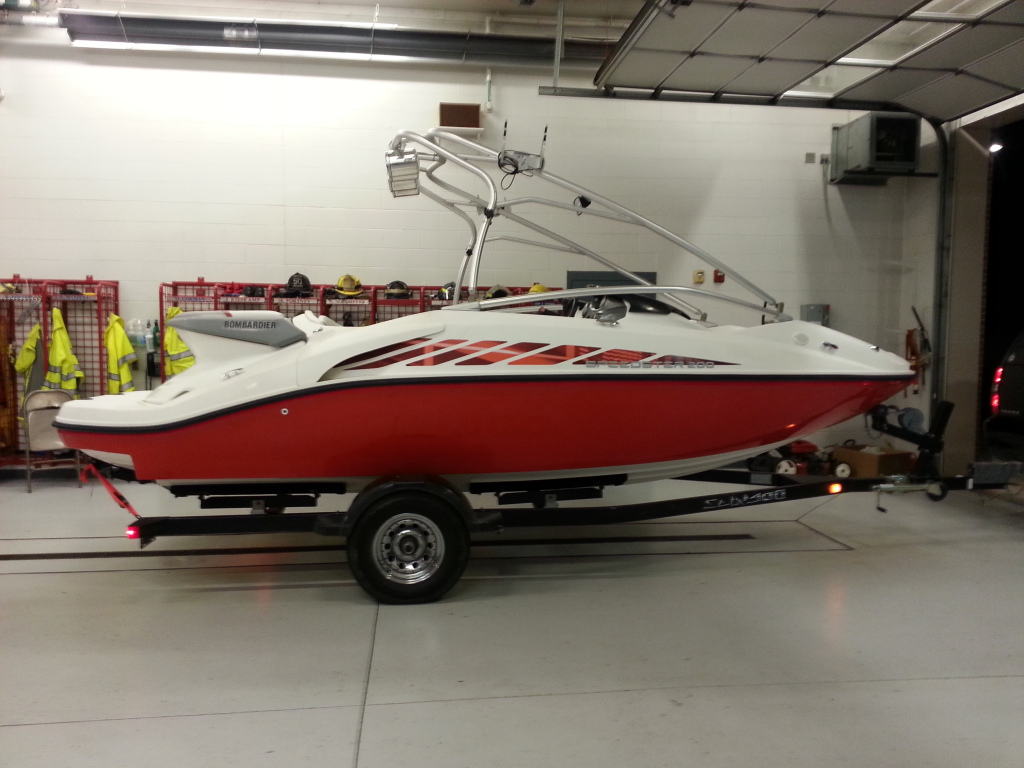
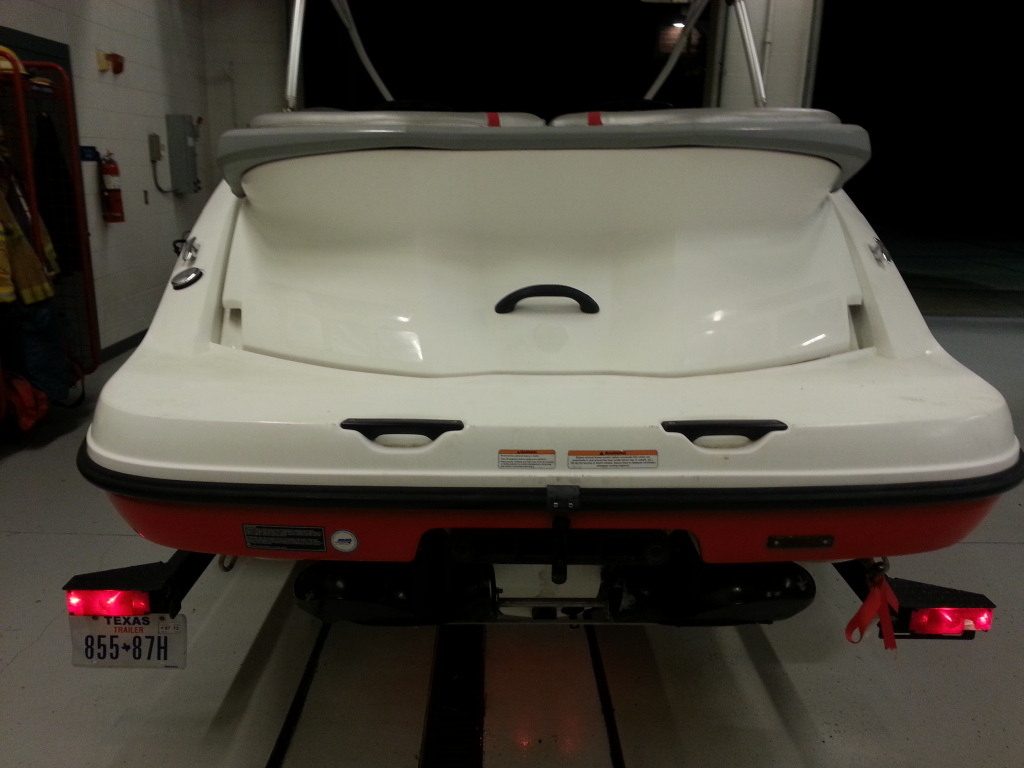
Well I brought it to work with me again today. It was a busy day here so I only spent about 4 hours on it. Got decals mostly peeled off though. Here are some pics of it with the stock decals. Im hoping in these pics you can see just how oxidized and crappy the whole boat looks. The decals are suppose to be red and black. I peeled off the old really crappy registration numbers, side sea doo logos, rear decals, and the decals on the front storage compartment lid. I have some new custom stuff going on, so i wanna show a comparison.

Stock decals


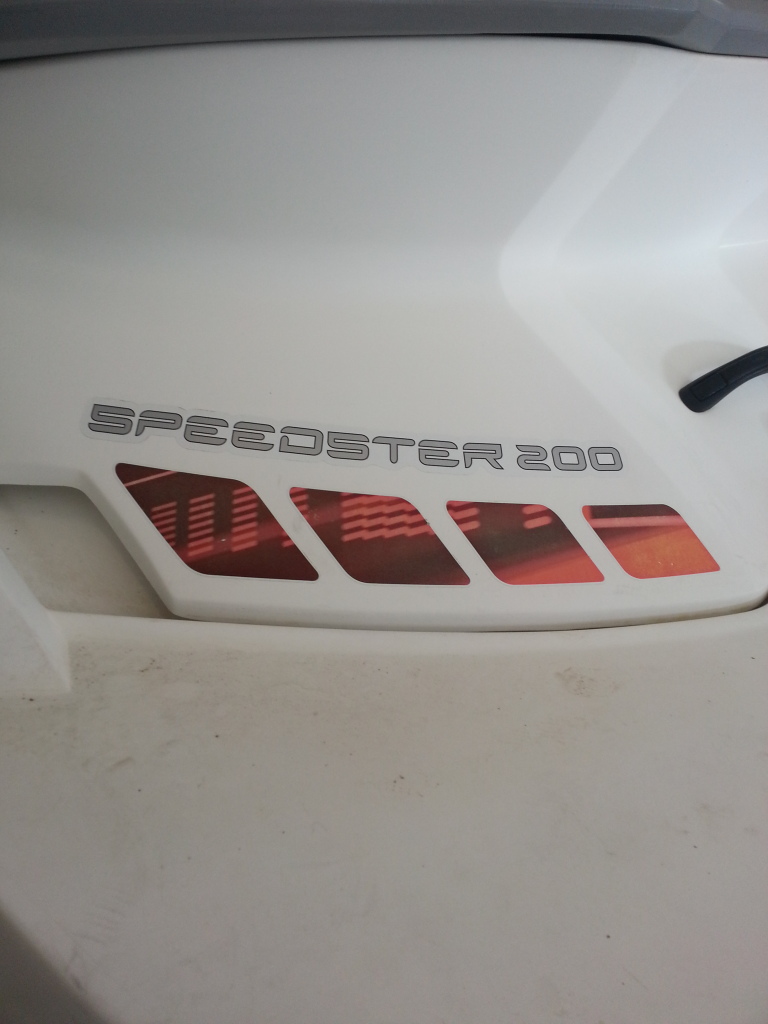
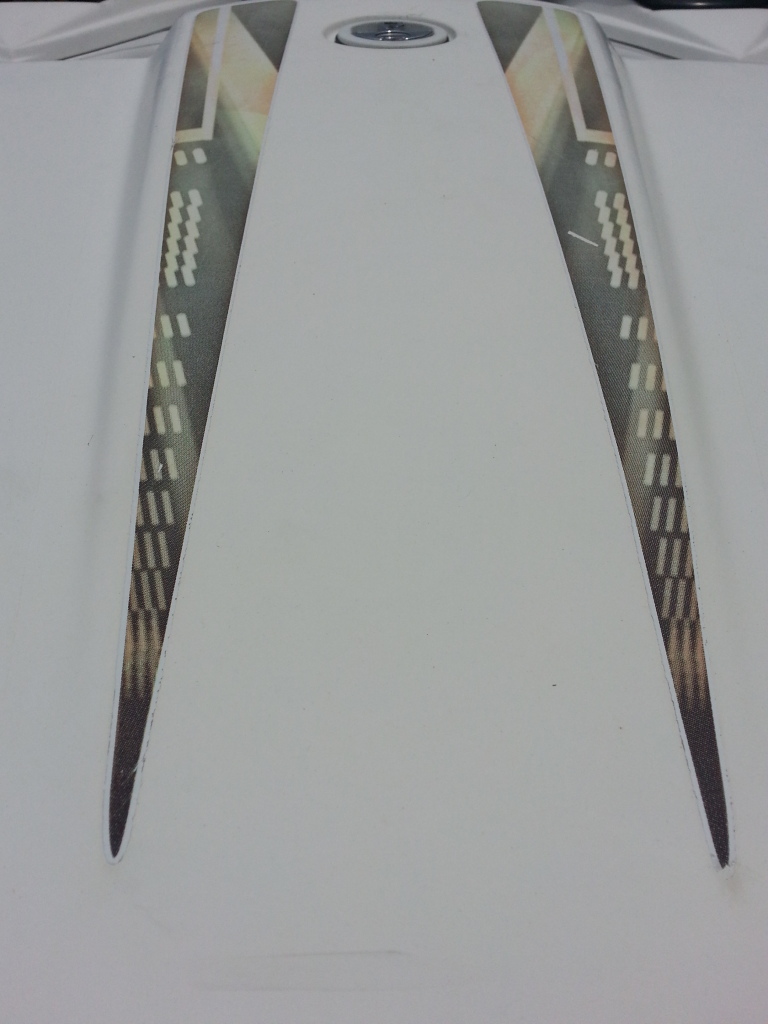
Here are the worst, on the front storage compartment lid.


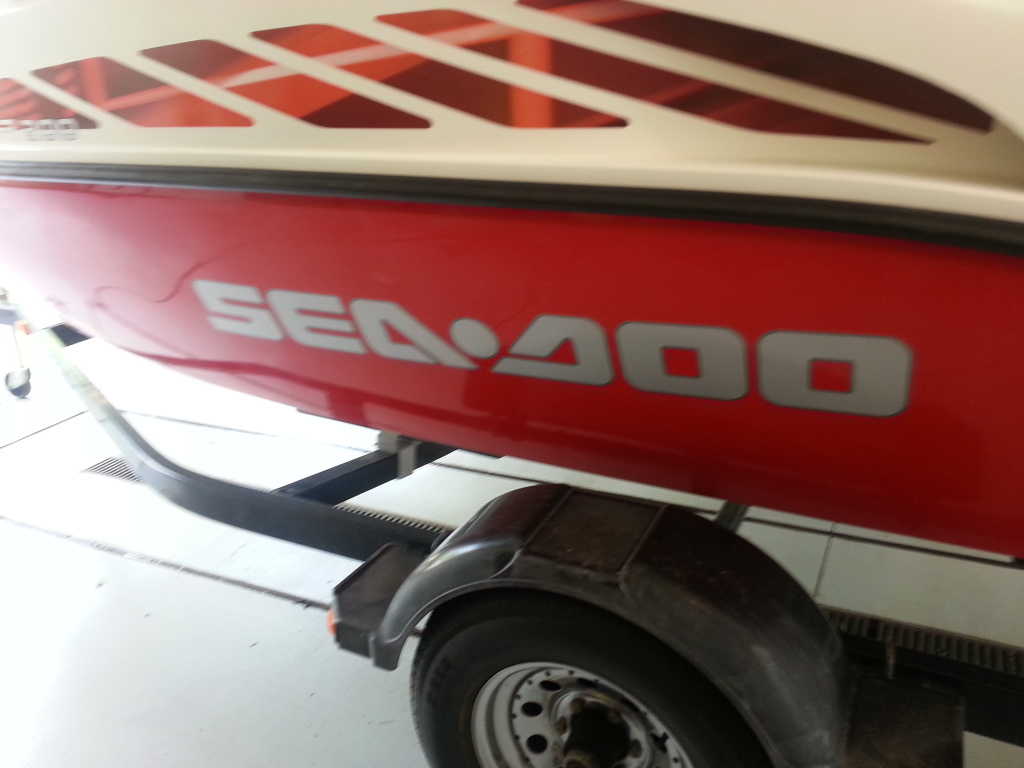
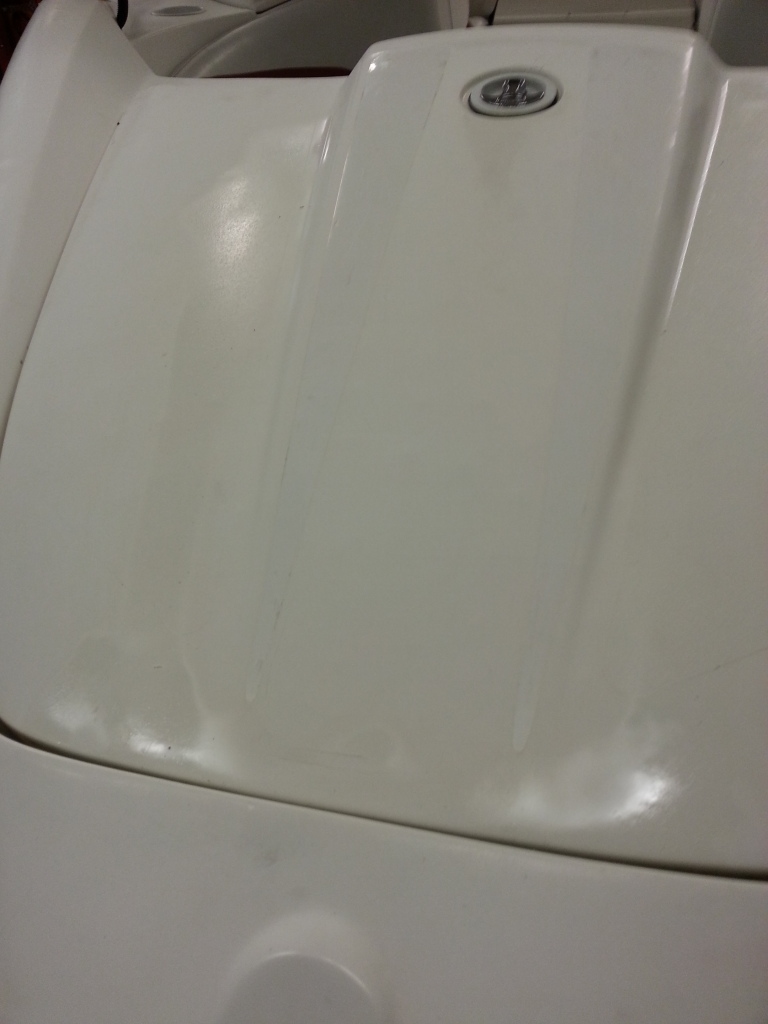
Well after 4 hours of peeling and wiping, I got the decals off.


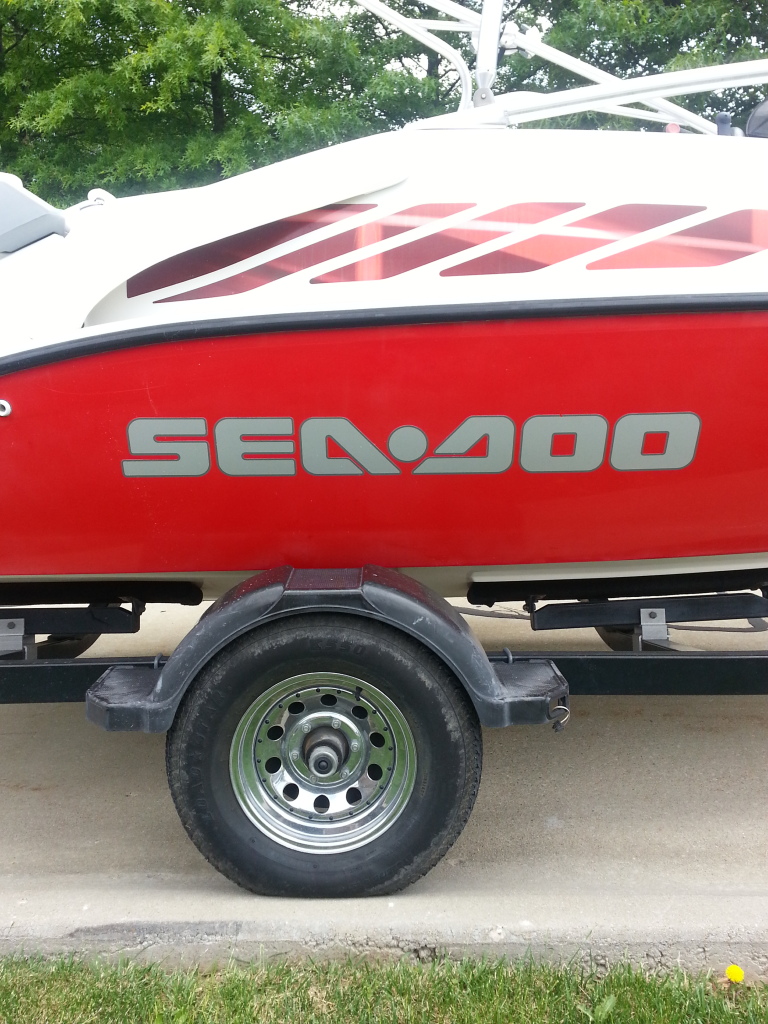
Once I got it done, i kinda like the look of the plain red on the sides. I already ordered new stuff though and spent a nice chunk, so im gonna go ahead with the original plan to place them. For the sides of the boat, i went with the exact same logos I had on the 98, only bigger. For registration numbers, they will match the same font and color scheme. The front storage lid, the OEM decals were still available, so i went with them. The back is where it got tricky. The OEM decal was available for the left side where it says speedster. The right side 4 stroke sticker is obsolete. So i ordered the speedster side and had the graphic place use it as a template to make 2 new ones. They will be totally different from stock, but fit in with the theme, using the same fonts and colors I used everywhere else. After i get all that done, the only thing left will be the 2 long decals down each side on the upper part of the boat. I think i will replace those another time. They looked good enough for now.

The next few days I am going to buff this whole thing out and make it shine. Then put the new decals on. IT is all very dependent on the rain though. Im thinking its going to take at least 15 hours or so to get it all done. Hopefully I have that done by the weekend. If so, then I will bring it back with me on sunday to bolt the audio stuff in and hopefully put in the hydro turf.
 
Last edited by a moderator:
Foster, I wish I was close to lend you a free hands...your boat is looking more and more beautiful day by day.

:thumbup:

Samsung S4...
 
Rfoster, I haven't seen this post, beautiful boat, and again, I know this will come out just as beautiful as your old boat.. Sorry for the Pyle radio cover link I sent you hopefully I didn't mess you up, I noticed that I sent you the wrong link? (should have been jensens)

Though I looked through this whole thread and you did a great job on the radio cover..

Anyways love your write ups so I subscribed! :)
 
Foster,

Did you consider putting a connector here? Either a socket in the hull, or a trailer grade flat-four connector just in case you need to remove the tower? It's not completely hindsight if you left slack in the wire.

There may come a time when you need to remove that tower, but you never know. As long as you left enough slack to allow you to tip the tower for bridges.

Nice work!

20130511_155710.jpg
 
The amp is in that compartment about 10" from where they come through. Its really no big deal to just feed it back through the hole. I could still put a connector on the inside if i want though, i left like 2' of wire extra. Its just as easy to just pull it out real quick though if i need to.
 
I didnt plan on sharing yet but it looks too good to keep to myself. After 15 hours worth of washing, buffing, rubbing and waxing it looks much better. Here are a few pics. I was actually kinda shocked how well it cleaned up. I didnt get the big decals on the side done yet, but here are some pics where you can see how much it cleaned up. It had major oxidation that wasnt really that visible in my earlier pics.


New OEM decals on front compartment.


New custom decals made for rear of boat.


Thats it for now. Ill get more pics tomorrow. I ran out of daylight. Tomorrow the side decals will be done and ill take pics of the inside.
 
Sweet. Nothing is more gratifying than doing what you are doing.

The best was just after doing a buff job, and I am sitting on the landing loading the boat with my 11 year old. A guy walks up and complimented us on the new boat. Macy says to me afterwards, but it's over 10 years old! I told her that is the very reason we take care of our things. Someday someone will feel that way when we decide to sell this boat.

Good work, love the pics.

I dont understand how more people dont feel that way. This 200 was just totally neglected. I dont know how someone could spend 30-40 grand on a boat and just leave it outside uncovered 24/7 to bake in the sun. 2 days worth of buffing and it basically looks new again. When I sold the 98 the guy couldnt believe how clean it looked. I like to take care of my stuff, really helps when you sell it.
 
Today was a good day. Got a good 6 hours in on it. Finished the buffing and decals. Here are a few more after pics. The big decals on the side im not real happy with. I put the left side on first. I lined the far left side of it up to be straight in line with where i thought it would be level. Once I got it on, i realized the wording wasnt parallel with the design. So it doesnt look perfect lined with the boat....i went ahead and did the other side the same way so they at least matched. I may have them remade and try again. Ill see how it looks on the water. Anyway here are some pics.


These were made using the original as a template. I like em better than the oem.


I plan on putting the hydroturf down sunday...but i was curious how it would look so i just sat the swim platform parts on for a quick pic.

 
Last edited by a moderator:
After I got the decals done, i worked some on putting the audio stuff in. Got the speakers all put in and the grills on the subs. Also got the radio and cover put in and all wired up. Just need to get the amp hooked up and mounted tomorrow.

Before the grill on the subs.


Front speaker


Radio and new cover bolted in and wired up.


Started to run out of daylight, but here it is with all speakers and radio in.


Tomorrow I hope to get the amp put in and wired up. Then set up everything and make it come alive. Then sunday ill work more cleaning the inside and adding the hydroturf.
 
Looking good rich!! :thumbsup: any chance you'll get it out this weekend?

Probably not. Gonna get it all finished up hopefully then maybe get it out later next week. Too many idiots out on the water for the first time this weekend usually anyway. Its also only gonna be in the 60's here.
 
Well i brought the boat with me to work again. Had a plan to get it all done. I worked on it about 6 hours and im happy to says its basically done. I was trying to get it done, so i didnt take as many pics as i would have liked.

First I got the amp wired up. I was going to mount it on the inside wall in the storage compartment under the driver windshield. That wall has a curve to it and i couldnt find a way to get it where it would mount flat. So i decided to leave it flat under the cooler in that same compartment. Thats where the boats with factory amps have it anyway.


After I got it in, i had a few odds and ends to finish up the audio system. I also installed the 2nd battery. Just for info on the battery, I went with a wal mart battery. I used them on my last boat and never had an issue in 4 years. It was $100 for the Ever Start Maxx deep cycle 24 series. It also comes with a 2 year free replacement warranty. I didnt get any pics of it. If you take the storage tray under the rear passenger seat out, you have good access. I had already ran the wires when i did the switch and audi system wiring. I drilled the holes and riveted the battery tray in. It fits perfect in that spot.

Next i cleaned the inside of the boat good to prep for the hydroturf install. I used a shop vac to get all the crap out from my wiring job. Then i cleaned it good wiping it all down with soapy water and drying it. After it dried then i wipe each section down with rubbing alcohol right before i stick each piece of turf down. Here it is all cleaned up ready for turf.


Next I lay out all the turf to make it easier. Nice to have it ready to go as you work. At this point, I had 2 large pieces i couldnt figure out where they went, ill mention them later.


Here it is all finished.


Here are the 2 large pieces i previously mentioned. I couldnt figure out where they went, then I realized the front storage compartment lid had the textured areas on it. So here it is on the front......still not sure if i like it there. I kinda liked it better without it. It might come off still.


Once I got it all done, I fixed some various odds and ends. Previous owner had stuff a mess. The glove box was stuck in the locked position. You could only open it by yanking the door hard. Also the storage compartment windshields would not latch. The locks for them were pushed in and turned in the unlatched position. I figured if i could get a key, i could fix it all. So i had previously removed the glove box lock. I took it to a local lock smith. He made me a key for $25. I put the lock back on today and it works perfect. Then took that key an unlocked both windshield latches. Now they both operate correctly. Also adjusted the front storage latch to tighten up the fit. Then i worked more on the back hatch to get it to work like butter. So now all compartments work properly and I have a key. Also had noticed the bilge pump didnt work. While doing the audio system i noticed the fuse for it was missing. There was also a ton of leaves and crap in the engine compartment where previous owner let it sit outside opened up. So i used a shop vac to get all the leaves and junk out Removed the bilge pump and cleaned the junk out of it. Put it back in and added a fuse and it works perfect.

Ran out of time. I noticed the navigation lights on the bow arent working, ill have to look at that next. But for now everything works perfect. I have to say I am very impressed with the audio system. It jams. I have it set pretty low now so drunk people don't turn it way up and blow stuff, but it is really loud and very clear.

Here it is all cleaned up and ready for the water. Hope to get it out later in the week.

 
Last edited by a moderator:
Rich , Nice work, but watch out for low overpasses :)

The mats on the 2 front bins might be there to prevent sun glare into the drivers eyes?????

Those speakers look like big Azz sirens.

Are you only keeping the EMS truck in the house to make room for the boat :)
 
Lookin' great. The dark gray Hydoturf is the way to go, I like the way my light gray looks, but it is more difficult to keep clean than I anticipated. I had the same question about the bow locker pieces, but am really happy they are installed. I don't notice them appearance-wise anymore, but they have come in very helpful a few times when stepping on the boat. It is nice to have a soft, good-grip section on the bow, you'll like them there.... I also had a problem with one of my nav. lights. Take a look at the wiring inside the front locker, it is really easy for crap up there to knock the wire connections loose. Mine was a simple matter of re-connecting wires where the prior owner must have knocked them loose. I'm envious of that stereo system, it rocks. Have fun whenever you are able to get it out on the water! Cheers.
 
Status
Not open for further replies.
Back
Top