


-
This site contains eBay affiliate links for which Sea-Doo Forum may be compensated.
You are using an out of date browser. It may not display this or other websites correctly.
You should upgrade or use an alternative browser.
You should upgrade or use an alternative browser.
Challenger 4tec Upgrade
- Thread starter IDoSeaDoo
- Start date
- Status
- Not open for further replies.
Eclipse1701d
New Member
:facepalm:
Sorry it has come to this, but I fully understand. Best of luck with parting it out..
IDoSeaDoo
Well-Known Member
You guys do realize it's April 1st, no? I wouldn't trust anything today.")
Well that was quick. At least I got two of you guys
There's no way I could quit this project before I launch it, which SHOULD be tomorrow. All contingent upon the post office. I hope tomorrow's delivery date is not a cruel april fool's joke.Finishing running the wiring today and will be starting it for the first time tomorrow. I'll be sure to get a video of that and throw it up here.
IDoSeaDoo
Well-Known Member
Tragedy!
I've had a very disappointing weekend. I was supposed to launch the Challenger today, but instead, I spent the time cleaning the garage, preparing for an engine tear down. So I had partially rebuilt this motor 2 years ago, with a new chain, new valves, new Flywheel bolts, and rebuilt the SC (OEM parts of course). The motor sat this whole time, and before I put it in, I decided to test compression. I had it lifted on an engine hoist and turned so that the supercharger hole was away from me. I tested compression in all three cylinders and pleased with the result decided to proceed with assembly. That's when I noticed the supercharger hole was gaping open. Hmm....did I remember to pull the paper towel out? There were some wads laying around, but I had them stuffed in each hole of the motor. I brought out an inspection light and peered into the timing cover, but saw absolutely no trace of paper towel. No fibers, no shreds, NOTHING. I thought, well, if something did get sucked in, it HAD to have left some trace. Eh, it's probably okay. Besides, I didn't want to break the timing cover gasket, as there's no way I could have gotten another one quickly, and I was dying to take it out that weekend.
So in went the motor.
The first trouble started when I started adding oil. 3.5 quarts in, I couldn't see the level. I added another quart. 4.5 quarts, still nothing. So I decided to start the motor. It started just fine. Ran well, although the idle loped some. I checked the oil again and found it to be way high. So I brought out the oil sucktion pump and began removing excess oil. That's when I noticed small chunks of SOMETHING moving through the clear tubing. WTF? I poured the oil over a metal mesh and caught some of the pieces. It was F*$@#ng paper towel!!!! All ground to shreds and soaked in oil, but there it was. I knew my maiden voyage had been postponed by at least a week
First thing I did was pull the oil filter. It was spotless. I mean, no sign of fibers anywhere. Strange. Then I pulled the valve cover. It had chunks all over it, and down in the head. So I pulled the motor out, which was extremely easy in a boat. I first pulled the scavenger pump, knowing that had a rubber, replaceable gasket. The screen was completely covered in oily shreds, totally blocked. But behind it was clean and clear. I didn't pull the actual pump off, as I don't want to rip that gasket just yet.
Next I pulled the timing cover and found bits EVERYWHERE. I was still too disappointed to take any pictures, but it was nasty. It was on the chain, on the gears, and just everywhere. Then I pulled out the mesh screen for the primary oil pump. It was so blocked, there was 1/2" of pulp stuck to it all the way across. I know that since I have pulled pulp out of the dip stick that I have paper fibers in the crank chamber, so splitting the case is a definite.
Here's where I have a question for you wise people:
1. The engine ran for maybe 1 minute. 2 TOPS! I only barked the RPMs twice, and only for a split second. Despite this, I still found aluminum particles in the oil. Something has been getting eaten. I am thinking of replacing the bearings on the connecting rods and mains. Is there anything else it could have been? Does the cam have replaceable bearings?
2. Can I get away with just buying the standard bearings, or do I have to buy the whole kit with all the different sizes
3. Can I do all this without pulling off the head? I really don't want to buy a new head gasket and bolts
5. I know I'm supposed to replace the connecting rod bolts, but can I reuse main case bolts? It doesn't say not to.
I'm planning to reuse the ARP flywheel bolts. Any chance I can reuse the connecting rod bolts too? I believe they're oem. Is there a spec I can check them against?
dcia3231
Member
IMO.... Do it right the first time.
WE HAVE HORRIBLE LUCK!
Sucks man. I was looking forward to talking you into taking me out next weekend! If you start itching to go we have my speedster sk = ) (if yours takes longer than expected.) Least our NC weather is still shitty....
Best of luck. Hope it doesnt cost a fortune!
WE HAVE HORRIBLE LUCK!
Sucks man. I was looking forward to talking you into taking me out next weekend! If you start itching to go we have my speedster sk = ) (if yours takes longer than expected.) Least our NC weather is still shitty....
Best of luck. Hope it doesnt cost a fortune!
IDoSeaDoo
Well-Known Member
$142 for bearings and gaskets. I think my oil galleys are clean as that is all protected by the two oil screens (which were totally clogged) and then the filter itself. Gonna measure all the crank and cam journals and install new bearings. Pistons staying in during all this.
Only one thing wrong here......."I think", you can't think you have to be sure. There is no way I would gamble.$142 for bearings and gaskets. I think my oil galleys are clean as that is all protected by the two oil screens (which were totally clogged) and then the filter itself. Gonna measure all the crank and cam journals and install new bearings. Pistons staying in during all this.
Take what you will out of this:
Any job big or small do it twice or not at all.
IDoSeaDoo
Well-Known Member
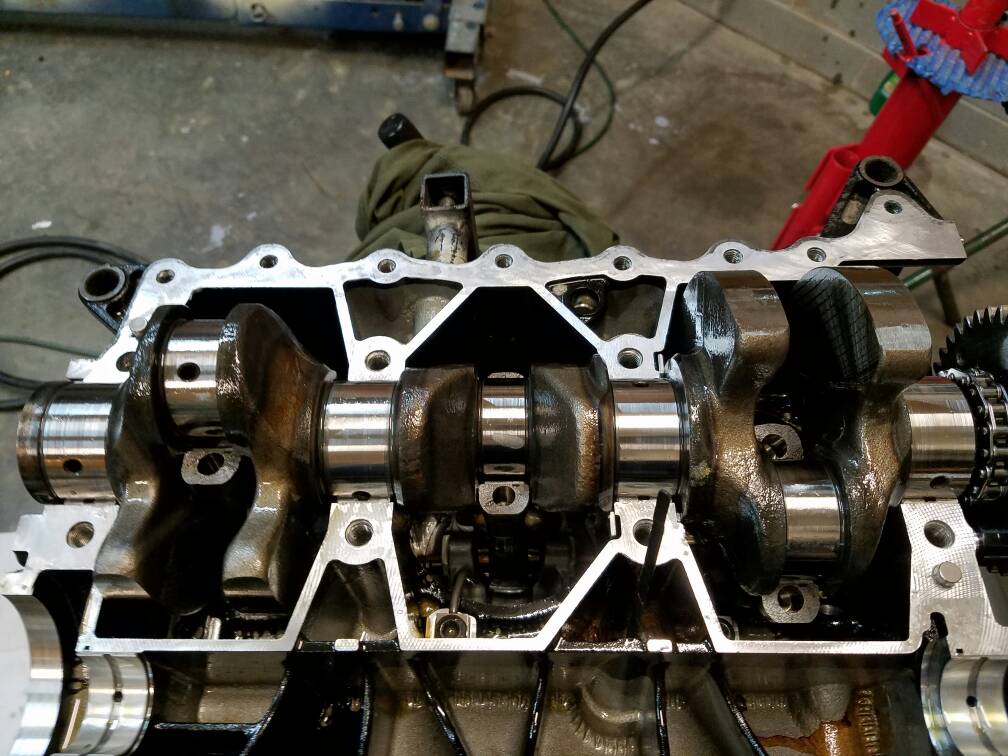
Well, I broke the engine down yesterday and began blowing the chunks of towel out. Most of them were still in and around the timing cover. Some were in the bottom oil pan, and a bit rode the chain up to the top, but not much. Before disassembling the head, I completely cleared out all oil passages, and opened every oil plug and cleared it too. Both pumps and all feeding passages are clear. There is a very good video of how the 4tec oil system works that someone on another forum posted for me:
https://youtu.be/C7zDoIy_QqQ
Watching closely, you can see that the oil goes up to the filter, THEN to the head galleys and the lower end journals. Knowing this, and knowing how clean the filter was (and the fact that it can't possibly admit a paper towel chunk past itself) I think they galleys are clear. I will not be removing the head and risking the stretch bolts and buying a new gasket. I dismantled all the lifters to release their oil and each was perfectly clean. I saw that some of them were already soft, hence the ticking noise I heard just before I shut her down the last time.
I used plastigauge on the bearings and got some very tight readings on the connecting rods. It was somewhere near .001in.
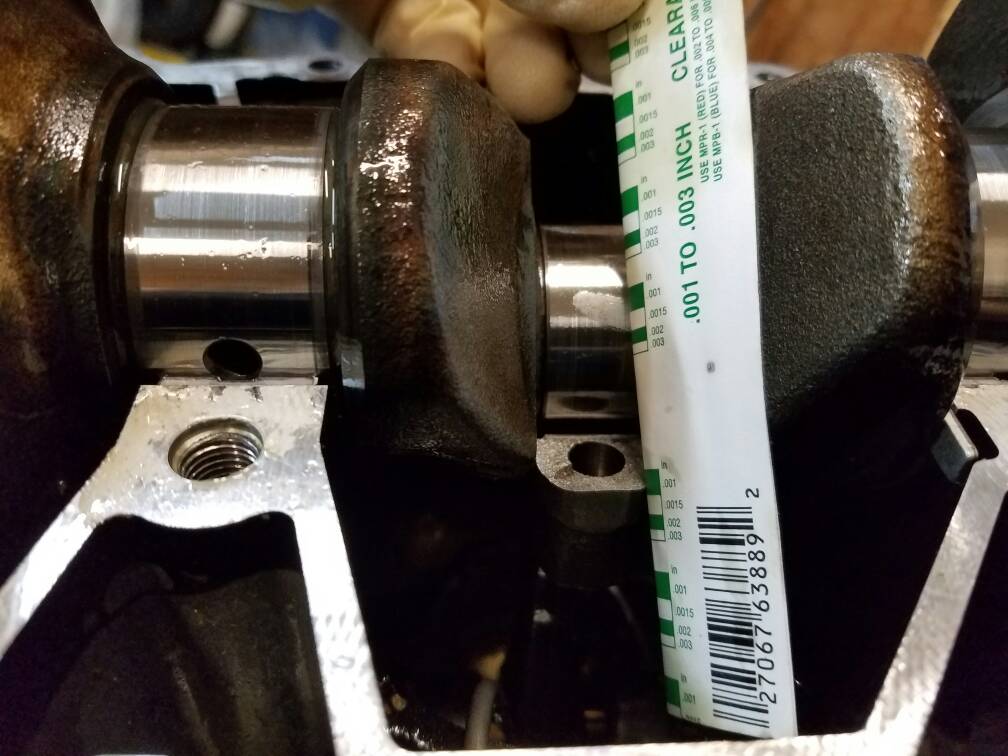
 Nearly the same reading on the Mains also. Anyone know what that reading should be? Perhaps my plastigauge is too old... The manual only says no more than .003in
Otherwise everything looked good

https://youtu.be/C7zDoIy_QqQ
Watching closely, you can see that the oil goes up to the filter, THEN to the head galleys and the lower end journals. Knowing this, and knowing how clean the filter was (and the fact that it can't possibly admit a paper towel chunk past itself) I think they galleys are clear. I will not be removing the head and risking the stretch bolts and buying a new gasket. I dismantled all the lifters to release their oil and each was perfectly clean. I saw that some of them were already soft, hence the ticking noise I heard just before I shut her down the last time.
I used plastigauge on the bearings and got some very tight readings on the connecting rods. It was somewhere near .001in.
Otherwise everything looked good
Last edited by a moderator:
IDoSeaDoo
Well-Known Member
Also, I think I figured out where my aluminum powder is coming from: When I first rebuilt the motor, I noticed that the oil pumps went through some hell when one of the ceramic washers lost a sliver. The sun gear had some concentric radial grooves on it's top. These grooves cut into the top of the oil pump covers. I took a piece of sand paper and sanded the aluminum covers flat. Just took the grooves out. Well, those same grooves are being cut back in by the oil pump sun gear. I've noticed them making a comeback. The bearings look really good actually, and I'm confident that they are in great shape. I will still replace them though, just because I'm already in here.
I checked the crank axial play, and the thrust bearings are perfectly in spec. That's good, because I forgot to add them to my cart at checkout. Glad I did now.
I checked the crank axial play, and the thrust bearings are perfectly in spec. That's good, because I forgot to add them to my cart at checkout. Glad I did now.
IDoSeaDoo
Well-Known Member
No no, the powder is aluminum. Super fine.If the powder is from ground up washers... that will eat your engine !!! That ceramic is hard ! (I have no idea what the engineers were thinking)
Annyway.... The hull work looks great ! Can't wait to see the finished product.

You can only see it when you swirl the oil. It's from the oil pump caps. The oil pump sun gear is making them fit better since I sanded the grooves out of them when I replaced chain and valves. The oil pump looks good otherwise. I think I dodged a bullet. Thank GOD I caught the paper towel before going out. You guys have no idea how close I was.
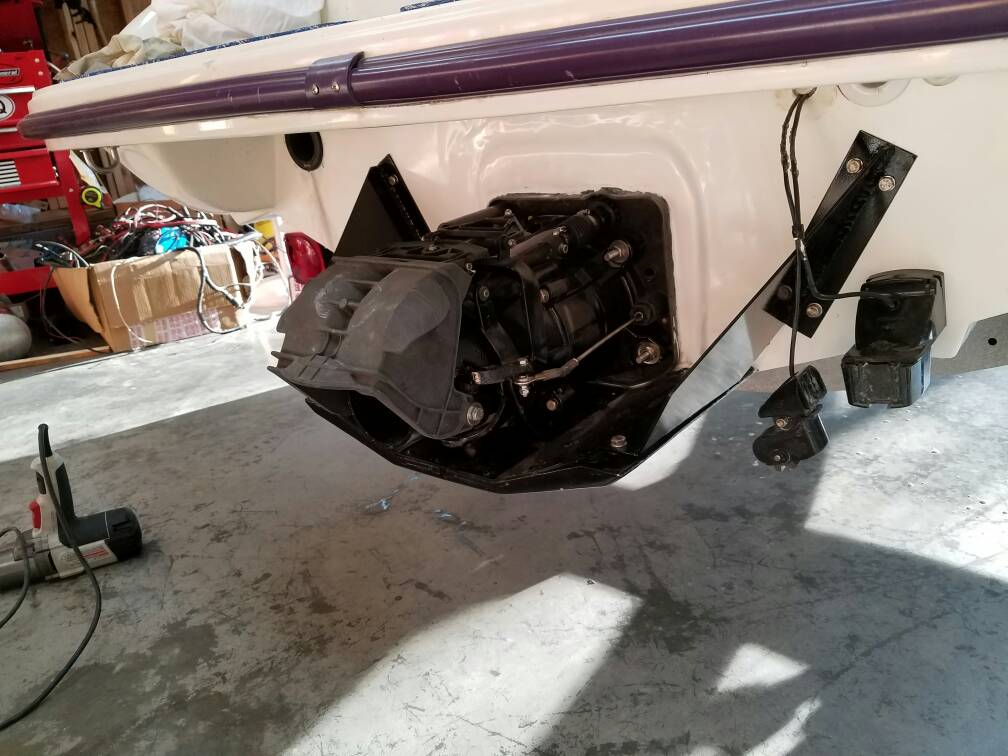
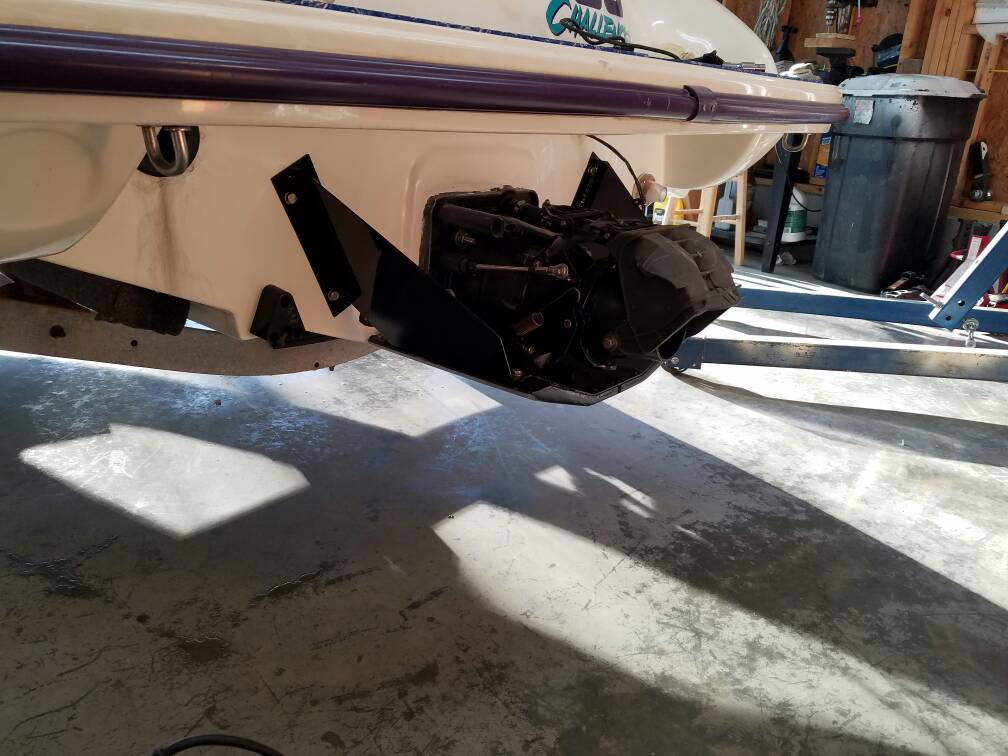
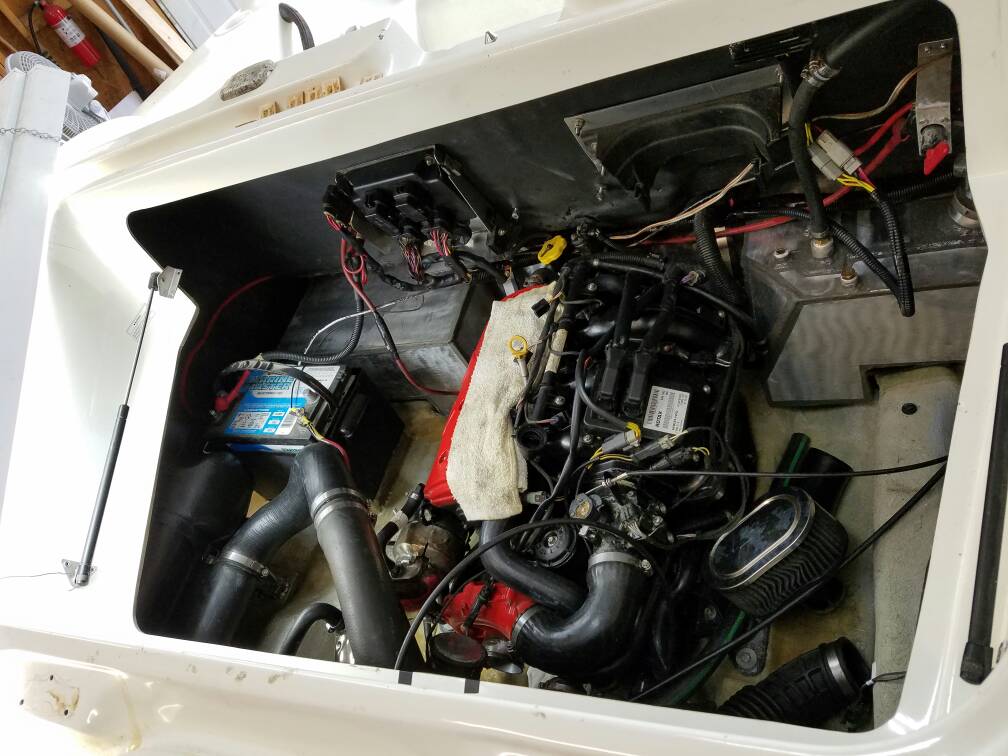
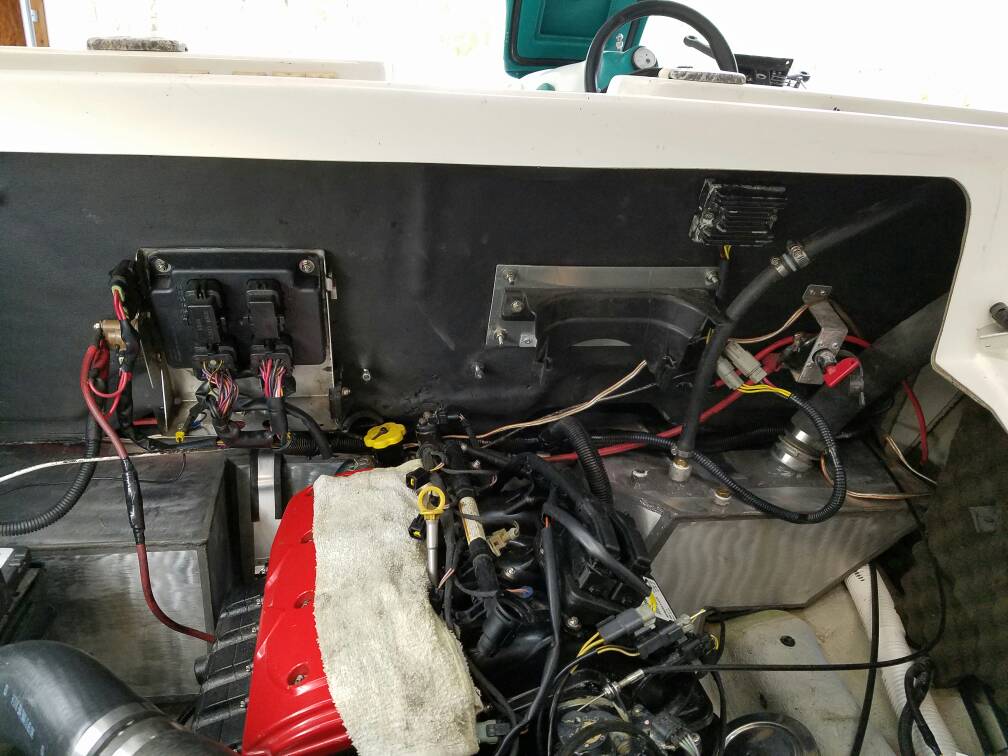
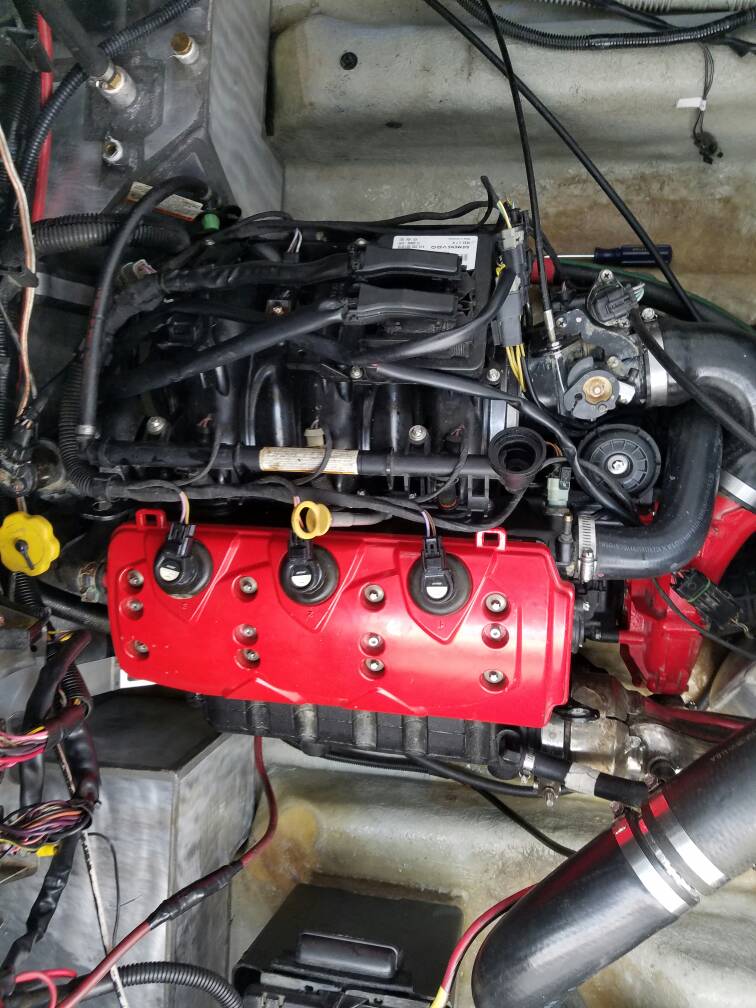
Here are some pics of the motor installed before I ripped her out for surgery
IDoSeaDoo
Well-Known Member
Thanks, parts will be in tomorrow. I'm a bit worried about the plastigauge reasons. .001in seems too tight a clearance. Going to use new plastigauge and a dab of grease on one tip of the filament. I think it should be more like .0018 or solooking great and huge bummer on the teardown. hope re assembly goes smoothly!
IDoSeaDoo
Well-Known Member
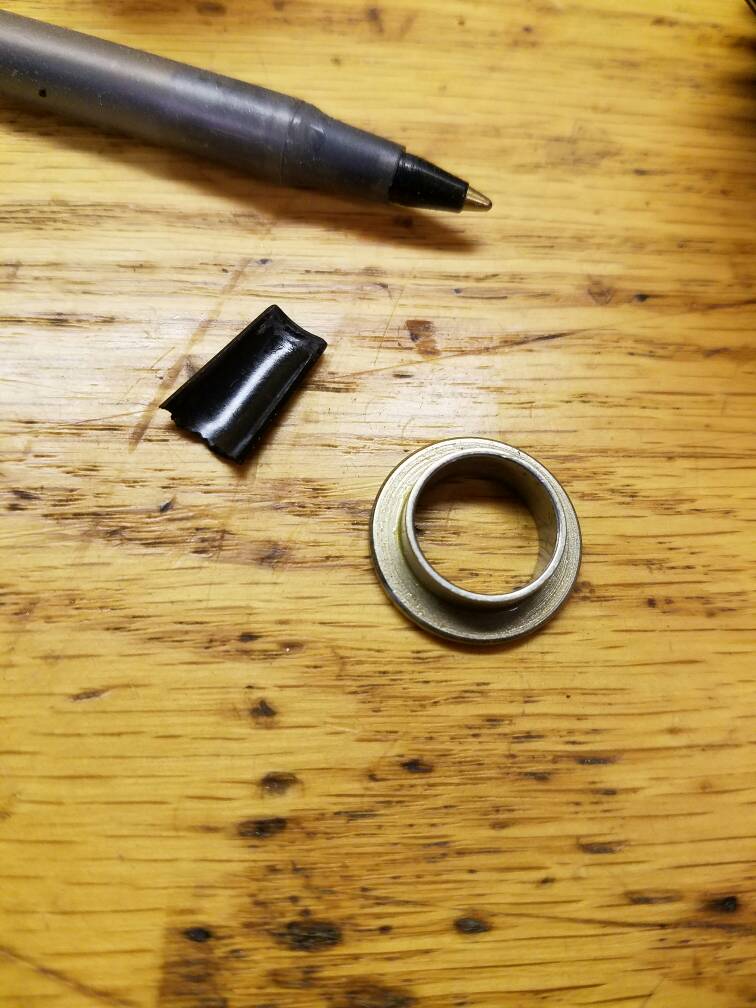
Nah, not expensive, obsolete. It came from the inside of the Oil Filter cap. There were apparently 4 of these tabs there at some point. Now there are none, and the motor works just fine. I suggest anyone that still have these on their oil filter cap to break them off before they too end up in their timing cover. I found another thread where a guy had the exact same thing happen. It's very hard to get them back out of the motor once they fall in.
The bushing turned out to be part of the starter bendix assembly.
I've assembled the most of the block. Today I will put the valve train back on and bolt the rest of the motor back together. Might even have it run again tonight.
The bushing turned out to be part of the starter bendix assembly.
I've assembled the most of the block. Today I will put the valve train back on and bolt the rest of the motor back together. Might even have it run again tonight.
IDoSeaDoo
Well-Known Member
So one thing has been bothering me lately about this build: the steering cable.
The one that came with the boat is a very thick and sturdy cable, about 2x the thickness of a 2-stroke ski cable. Naturally, it did not fit through the hole provided for for the GTX steering cable. Because I already had it, and it was long enough, I used the cable that was for the weedless system, a thin one, the thickness of the 2-stroke jet ski steering cable. It required no modification to the transom. I made it work well enough, but I keep thinking of what would happen if I ever lost steering... It would only happen as I am turning, and if I'm turning, I'm likely trying to avoid something. I've never seen it, but my hypothesis is that if steering ever went out, the nozzle would just point straight. If I'm trying to avoid a concrete bridge pylon or another boat, the results could be devastating.
I was browsing Cykrus 4tec converted boat, and in his, they used the original thick cable, and must have just bored out the plastic.
http://www.seadooforum.com/attachment.php?attachmentid=27415&d=1408415301
I'm now thinking that I should do the same thing and not trust any lives to this puny thin little cable...
dbechth
Member
I have had 2 break on me. One on my sp and the other on my xp. As you assumed, in both cases my nozzle pointed straight. On the ski I was able to lean to steer back to shore but on a boat it may leave you stranded. My plan for my boat project is to use the teleflex cable that is already in the boat, but I haven't devised a routing/hook up method yet.
IDoSeaDoo
Well-Known Member
You will definitely have to modify the plastic transom plate as teleflex has a much thicker cable end. That will surely take some creativity. Also, teleflex cables have longer travel, which may require some additional calibration.I have had 2 break on me. One on my sp and the other on my xp. As you assumed, in both cases my nozzle pointed straight. On the ski I was able to lean to steer back to shore but on a boat it may leave you stranded. My plan for my boat project is to use the teleflex cable that is already in the boat, but I haven't devised a routing/hook up method yet.
- Status
- Not open for further replies.
Similar threads
- Replies
- 2
- Views
- 160
- Replies
- 2
- Views
- 240
- Replies
- 2
- Views
- 403