Challenger 4tec Upgrade

Status
Not open for further replies.
04 should be easy. It's already got the 155 pump, you probably will not even have to do anything to the hull. You might not even need a different fuel tank, as you already have an in tank pump and don't have that protrusion for the 2 stroke pick up baffle. That was the biggest reason why my old tank wouldn't fit. Anyway, you can use the tank out of the donor ski, but it is rather small. Make sure I know about your build when you start it, would love to follow along :)
 
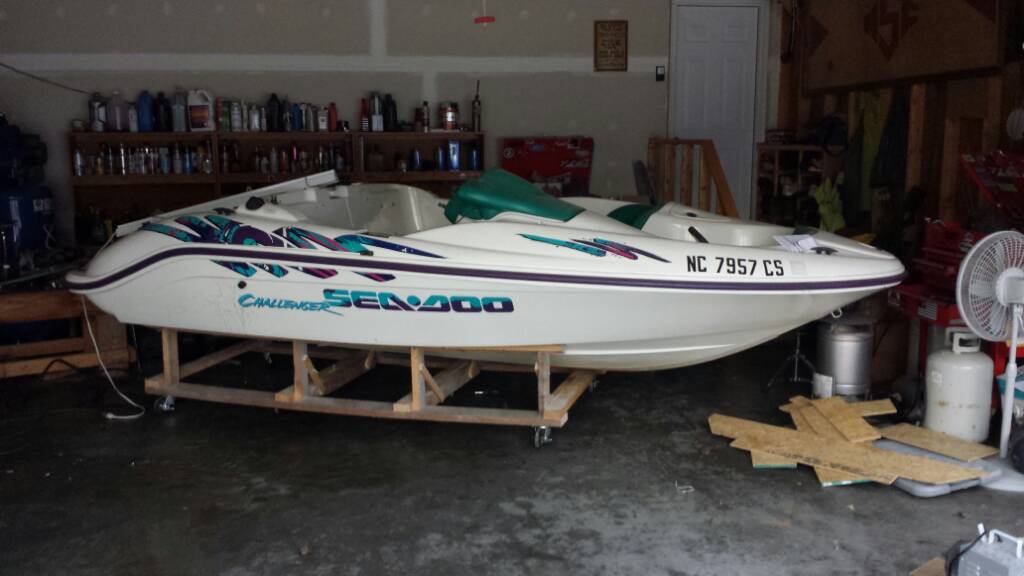
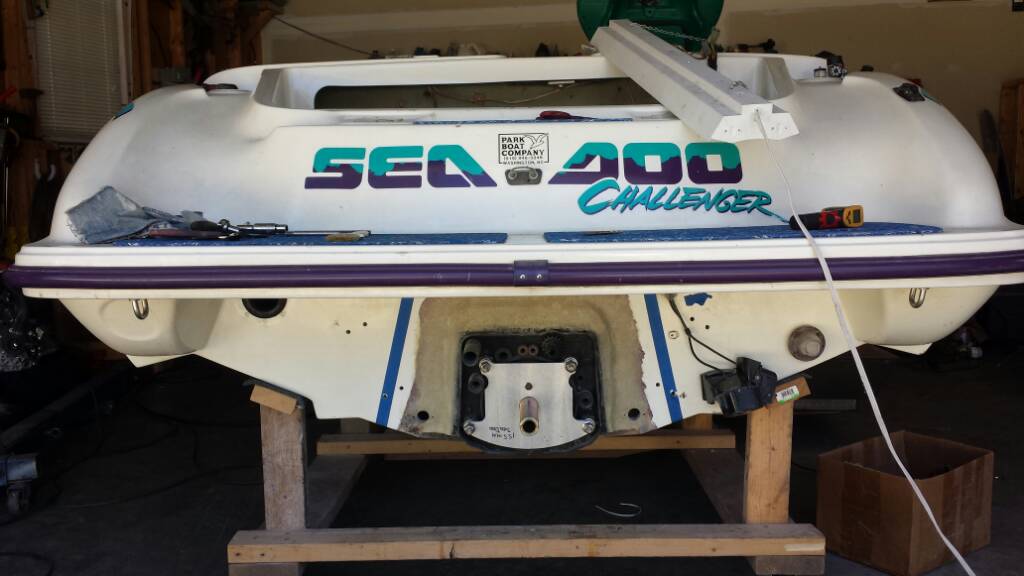
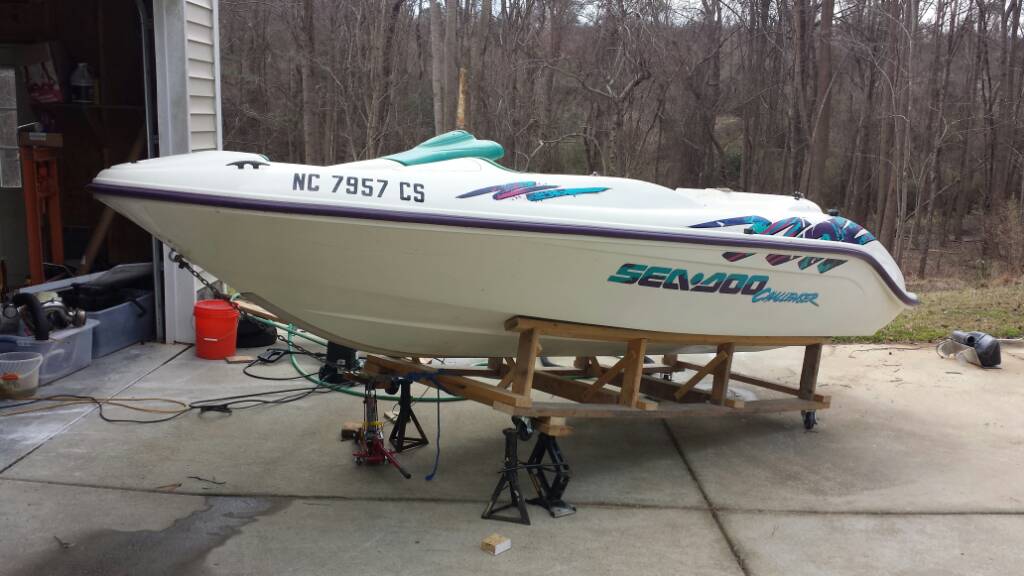
Opened the garage yesterday and was greeted by this sight
207.jpg

DAMN I love the lines on this boat! I like them so much more than the newer style that I went through all this trouble haha.
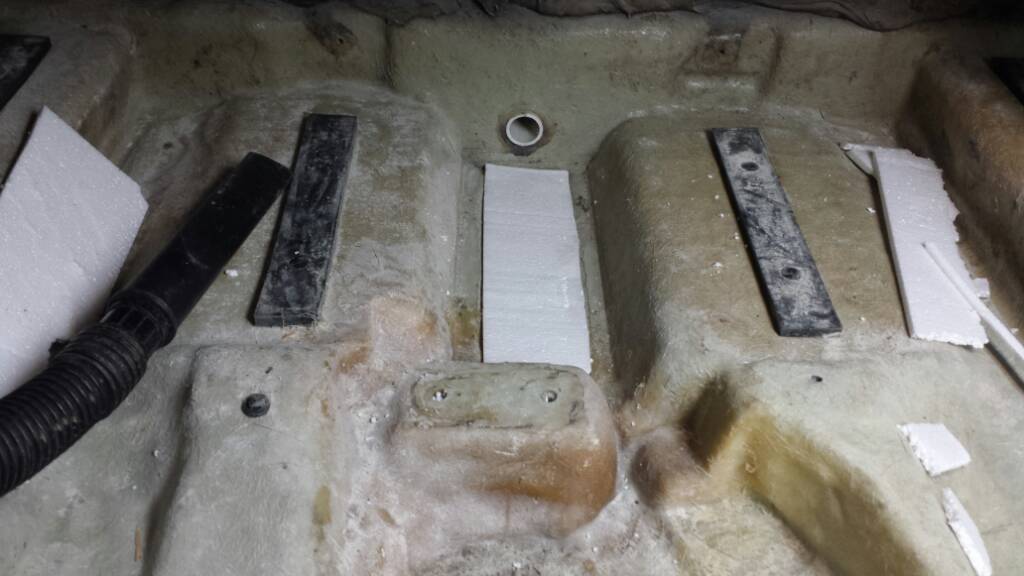
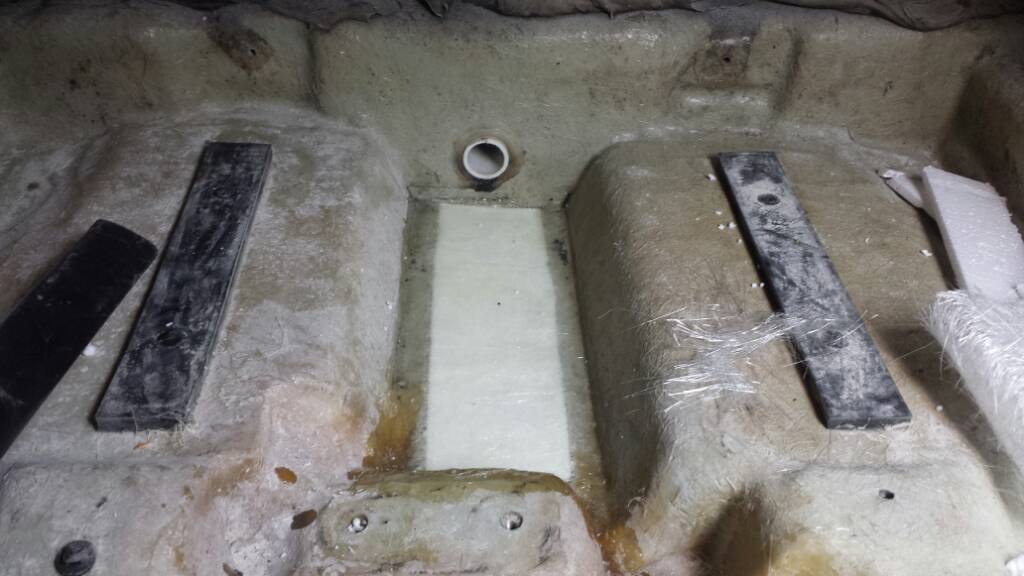
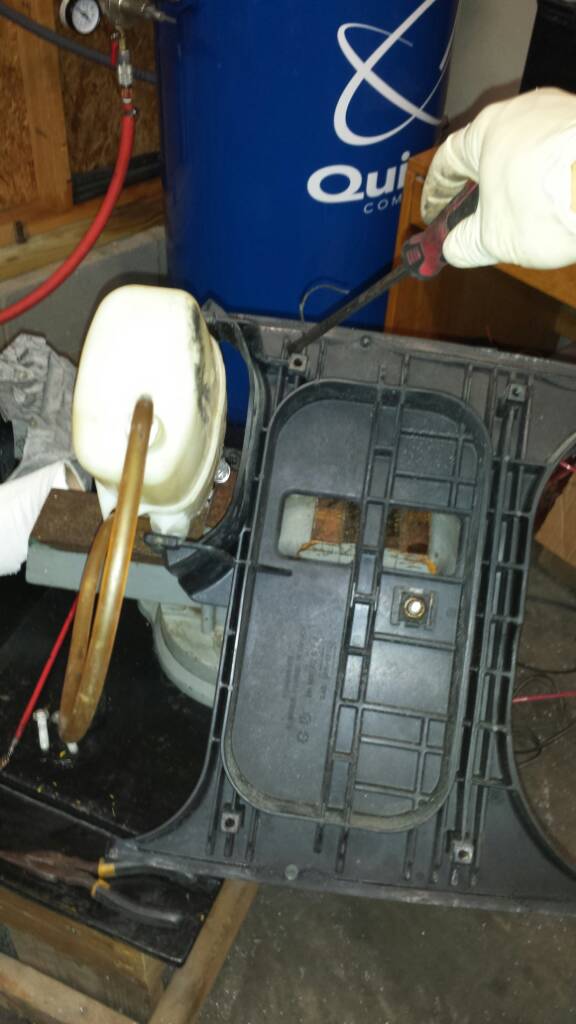
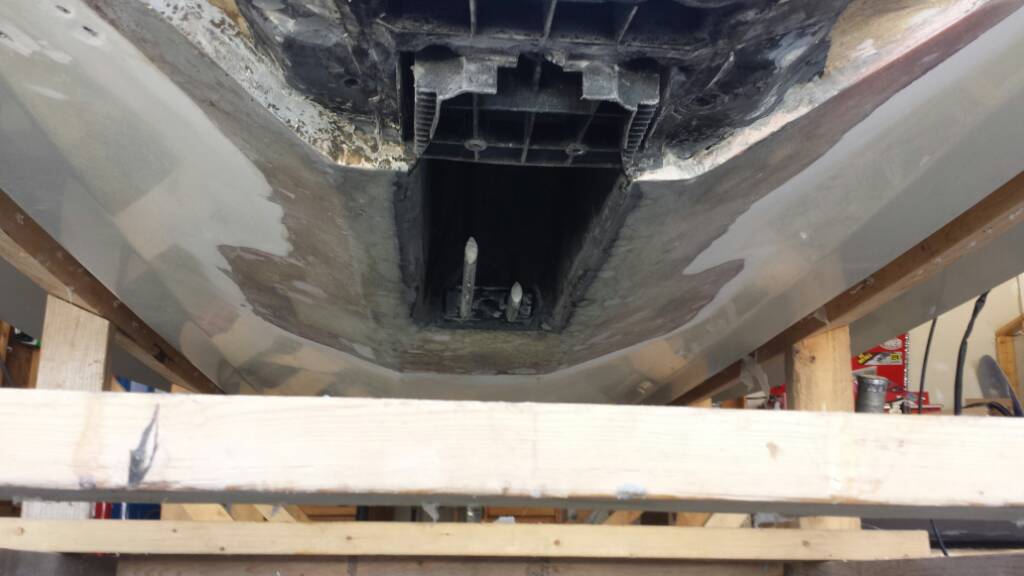
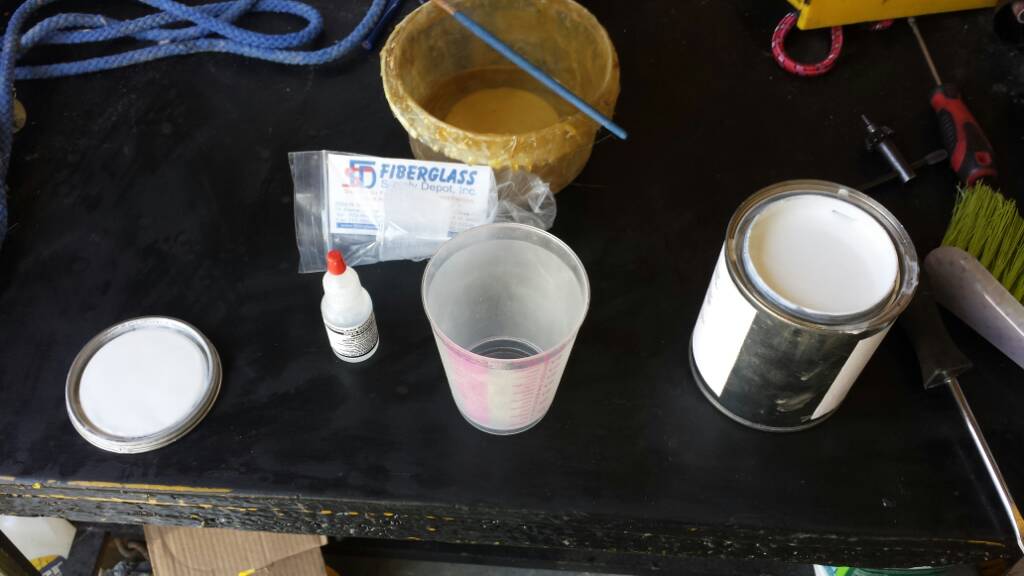
Anyway, yanked the motor last night to start prepping for the final steps. First thing I did was fill this extra void under the tank. Now that my front mount is in place, this compartment will become a place for water to collect so I filed it worth polystyrene and epoxied over.
208.jpg
209.jpg
Remember kids, polystyrene and polyester (general fiberglass) resins don't mix! I used PS instead of that liquid expanding foam you can get at the Depot because PS is a closed cell foam, where as the other stuff isn't and can get water logged.

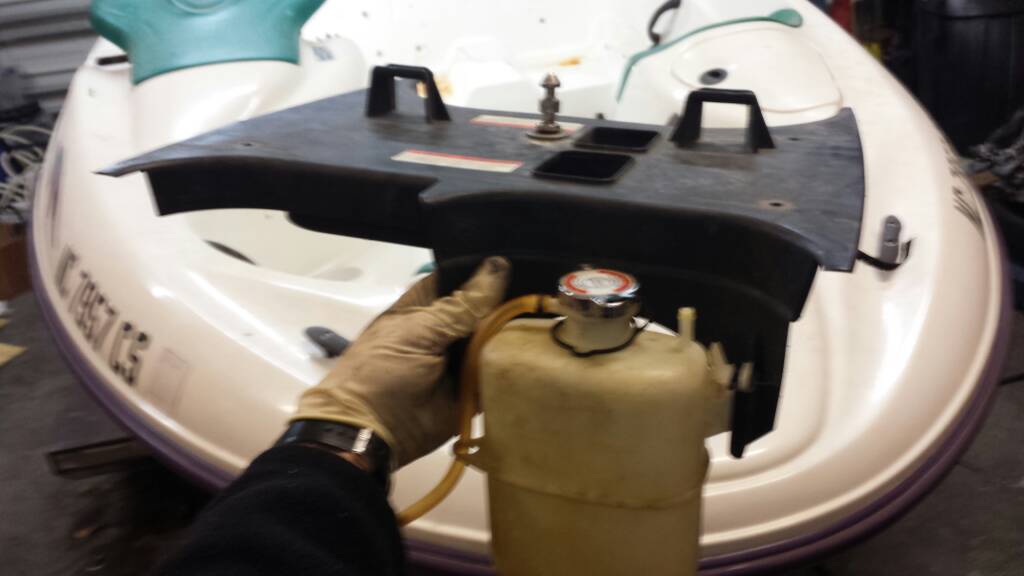
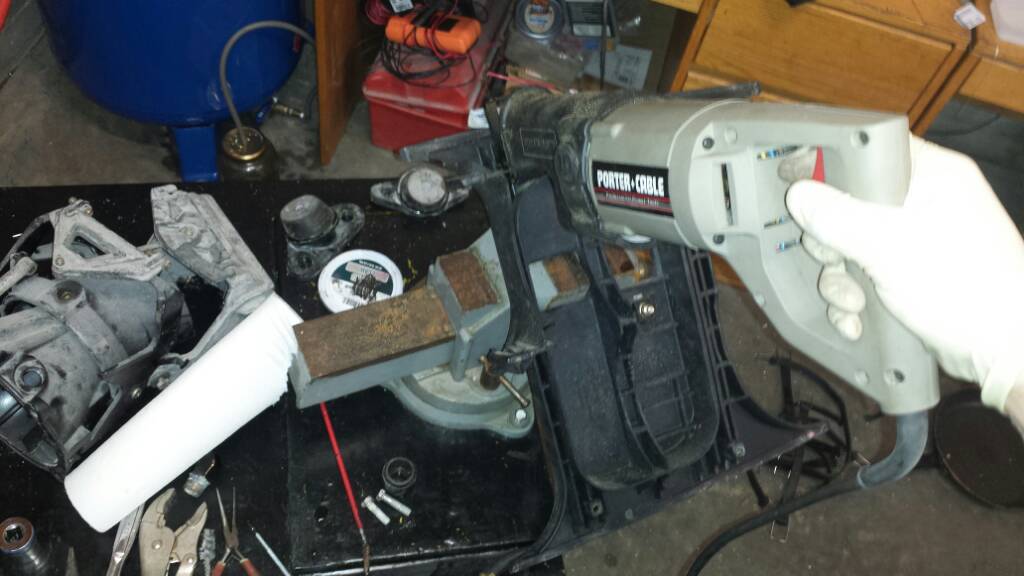
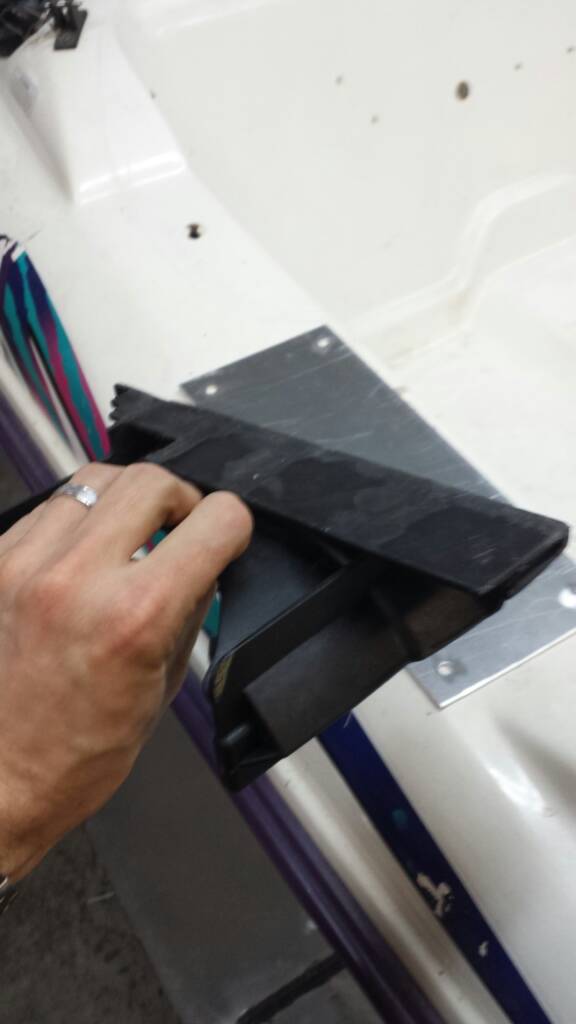
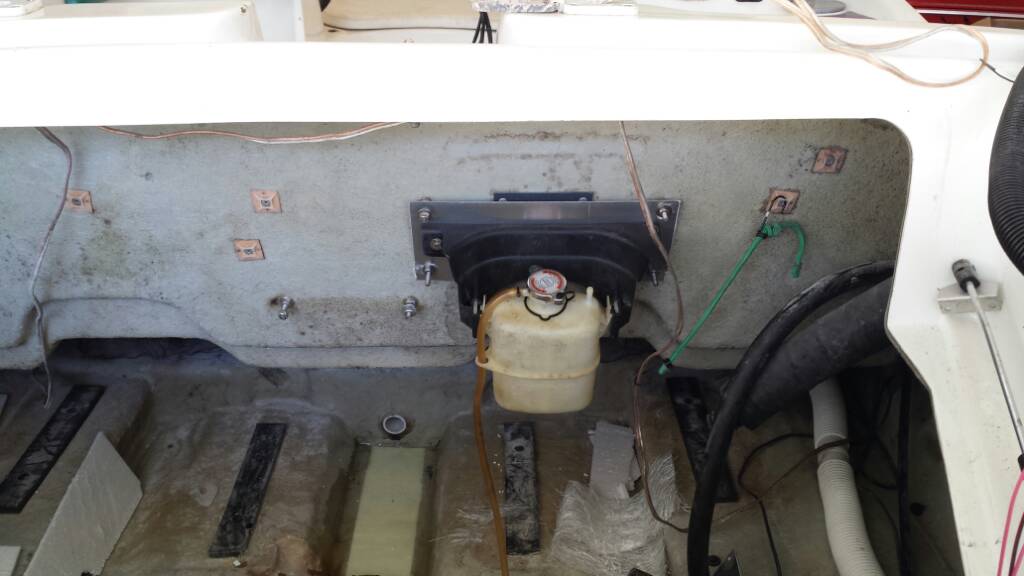
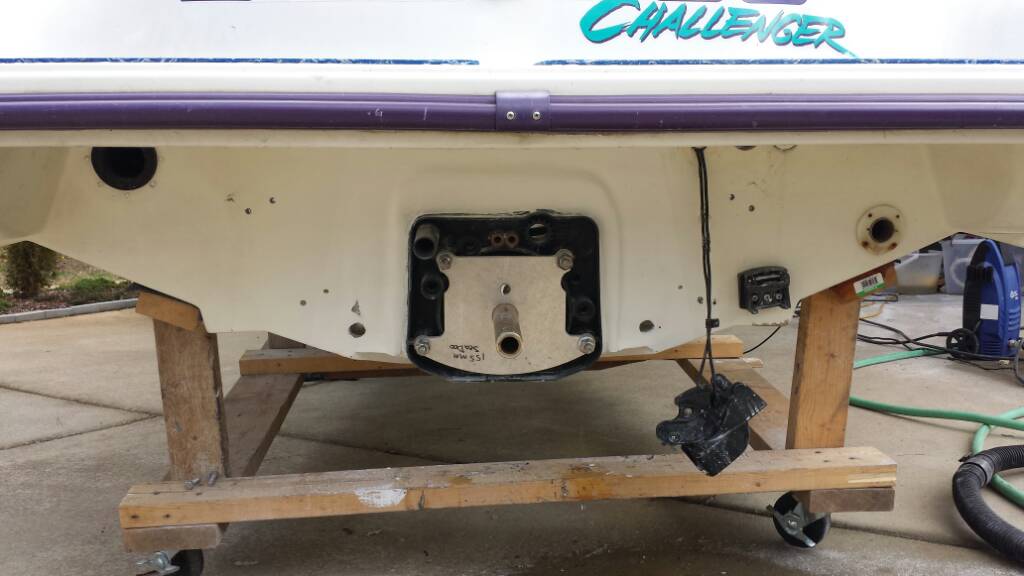
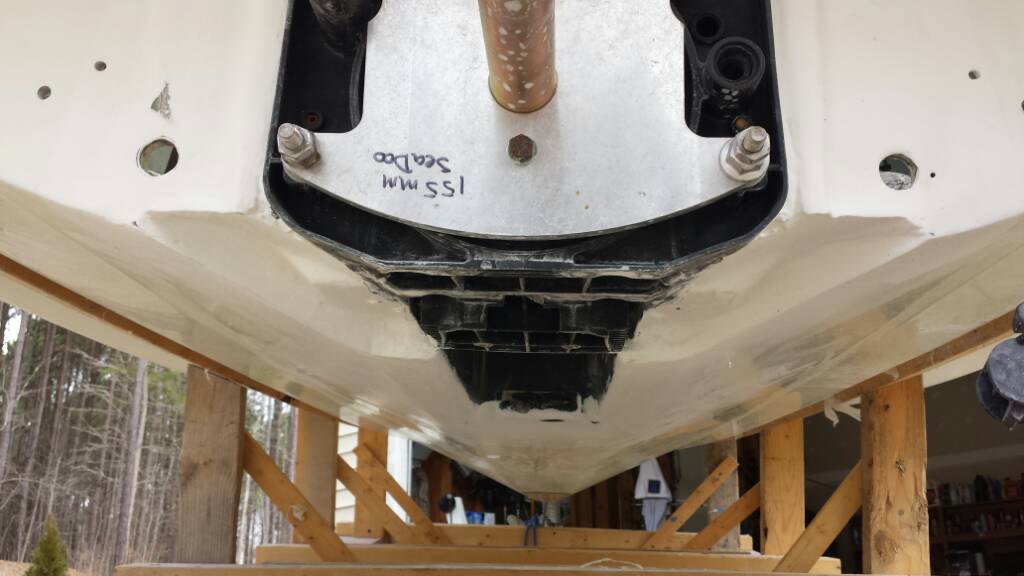
Next I went to town on the cooling system. Decided to make the mount for the coolant reservoir. I took the plastic jet ski mount
210.jpg

and cut it along the straight line formed by the second row of plastic reinforcement, as indicated in my next pic:
211.jpg

212.jpg

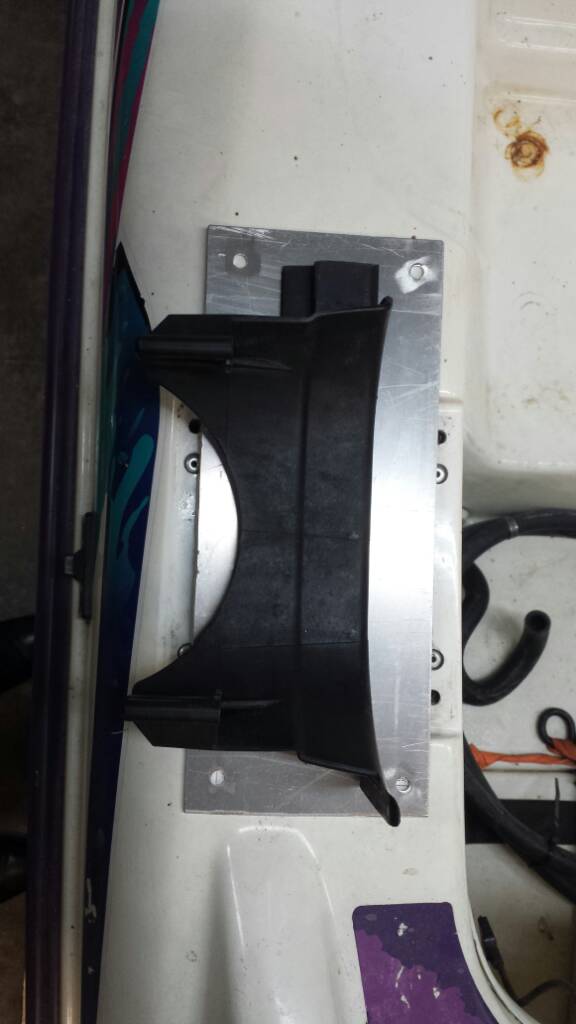
Here is the plastic piece.
213.jpg

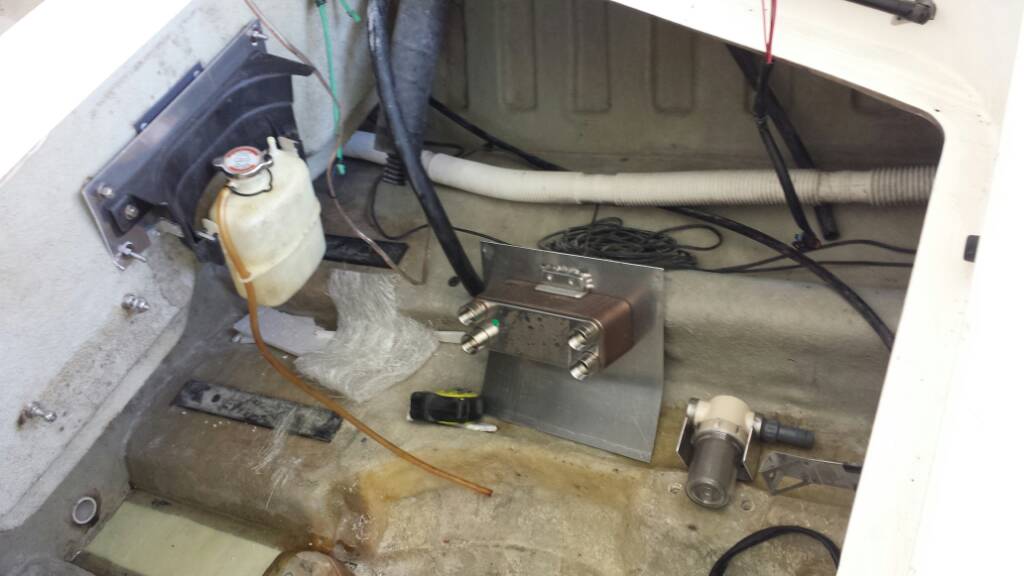
Next I'll mount it to this aluminum plate I made to attach where the old e box hung. I will drill and put two more bolts in to hold the bottom of the aluminum plate.
214.jpg
 
Last edited by a moderator:
I can't wait to see how this baby goes! I am fully expecting it to easily outrun my 99' speedster sk. Out of the hole and top speed. Lake Harris has a drag strip just waiting for us this summer!

-Dan
 
I can't wait to see how this baby goes! I am fully expecting it to easily outrun my 99' speedster sk. Out of the hole and top speed. Lake Harris has a drag strip just waiting for us this summer!

-Dan

really? Where? I ride that lake from time to time. Actually live like a mile from it. Usually just end up at Jordan as I have my own "ramp" with the kayak/canoe ramp. The dicks at the ramp at Harris tend to get old. That and there isn't anywhere to really beach your ski at the ramp.
 
You got that right. People are dicks at all the ramps but i typically get to the lake early in the am and leave in the afternoon or late at night so i miss all the traffic. In the dead of summer forget about Harris. I love Jordan when the lake actually has water. Ive hit the bottom of jordan a few times over the years with my old boat (now sold) and a few of my skis ive had. I seem to have bad luck at Jordan. If i dont smash the bottom or hit a stump...its my battery or my wear ring or my fuel system LOL.
 
Hah, not as many times as Jan ran that Searay aground. She chewed through like 3 props that one season! As for luck, I've had worse on Harris for sure. Dan, you were there with me one of the times my engine blew on that lake. Remember? when I forgot to tighten the cooling sensor and it overheated during breakin? That was a shitty day! Harris is also the only lake I actually got a ticket on. Never knew cops rode in jon boats lol He was the nicest asshole. I've never been so politely robbed. He showed up at court too and argued the charge all the way. $280 for a damn lifejacket ticket :facepalm: There is absolutely no oversight of the NC court system.
Anyway, based on this trend, I think my maiden voyage will be at Jordan.
 
I just like that ramp at fearrington where I'm the only one on it. Granted last summer I have to drive on the sand to drop my ski in. Even still in prefer that. With all the rain and Jordan near flood levels I think we'll be fine. :)
 
Hell I think if I had my ski out I pretty much went to mpowers house at gaston last season.
 
So I mounted the coolant reservoir
256.jpg

Now I just don't know how and where to mount the strainer and heat exchanger. I'm not sure where in going to have room once everything else is in place.
257.jpg

The heat exchanger has to be the highest point, as I don't want to ever have to winterize it. I think I will mount these last. Now running the wires and painting the bottom with new gel coat.
 
I've been doing several different things lately to get this baby closet to the maiden voyage. The hardest by far has been the gel coat of the graft. I started by cleaning everything off with acetone and roughing the contact areas with 60 grit.
91.jpg
92.jpg

93.jpg

I applied three coats of raw gel coat before adding the final layer with wax mixed in. Raw gel coat doesn't harden to tack free to promote additional coat adhesion. I've worked most of it flat and noted some high and low spots. Even burned through to the glass in a couple places.
94.jpg
95.jpg

It's not very visible, but that is far from finished. I'm definitely going to run out of gel coat, and am debating on just how perfect I want to make this. The biggest discouragement is how long it takes, and how damn hard it is to wetsand under a boat. Wet ground gel coat flying off in your face, and pressing a heavy air sander against a hull for hours make for a lousy time. Besides, I'm so eager to put it all together.
I also finished a couple last hull mods to fit the new tank. It was hitting in a couple places. I ground them and glassed them over.
I also cut the hole under the seat and made a lid for the fuel pump. I'll get pics tomorrow.
All the glass grinding is done, so I brought her out to give her the first shower in over a year [emoji2]
96.jpg
 
Last edited by a moderator:
Its looking real good. I have to gel that same area under my speedster. Has some chips under it UGH. I need to do that this spring before its too hot. I need to at least make it smooth so i can paint it. Its a nightmare to sand under the boat, i agree. it gets all over your face and chest. Heck, i barely want to fix the spot up front on my Frankenstein SP.
 
Its looking real good. I have to gel that same area under my speedster. Has some chips under it UGH. I need to do that this spring before its too hot. I need to at least make it smooth so i can paint it. Its a nightmare to sand under the boat, i agree. it gets all over your face and chest. Heck, i barely want to fix the spot up front on my Frankenstein SP.
Thanks. Yea, and gel coat is hard too, kills that sand paper really quick! Takes a lot of force to shave it down, but that's just the kind of stuff we need down on the bottom of the hull, right? Something to resist all those stumps and rocks we are sure to hit on our shallow lakes here
 
Getting close on the gel coating, another coat/sanding should do it to fill in the last of the deep spots. I sanded it all down and decided to let it dry and get sunny before applying any more. Instead, I worked on my assembling my "control bundle", the combination of wires and cables that go through my "firewall rib". It's what I've started calling that little piece of styrafoam that is wedged between the seats and the outer edge of the hull. I believe Seadoo intended that to be a major source of noise deadening. I have to install that before I can install all the sound insulation, which has to go in before the fuel tank, as everything in front will be sound insulated.

Anyway, I got to working on the cables, and wouldn't you know it? The steering cable didn't even fit through the hole in that plastic pump bolt on plate. I thought about drilling it out (and still might), but I realized that the old weedless system cable might work.

I installed it, and realized that on one end it was too long, and on the other, too short. There is not enough adjustment to allow it full control of the steering nozzle SO I turn to improv. I manufactured an arm to reach the end of the cable under the console,
144.jpg

I will have to weld these two linkage pieces together to reach the last inch to the steering nozzle. it looks like I'll get full turning range of the nozzle now, and even have some room for adjustment
145.jpg
 
Last edited by a moderator:
Wow, I can't believe how long it took to put together the wiring harness for the accessories. I think I'm done routing all the stuff that will go from the back of the boat to the front console. This means I can finally bundle the wires and cables and close up that hole with sound insulation. I mostly used the wires from the original wire harness, as I won't need it any longer. I did incorporate a huge switch and battery cables to be able to connect the deep cycle audio battery up front with the starting battery in rear.

Also, I created a special mounting bracket for an oil Oil Level sensor I had laying around. It's one from an old XP or some other jet ski that is forever silenced. The sensor will set off a two-tone beeper mounted in the console, if it ever becomes submerged. The sink tests went flawlessly! :thumbsup: I don't want any more surprises, like that one time when a cooling hose popped off and flooded the boat up to the carbs. Took a looooong time with that puny 360gph bilge pump to pump out.

Also, has anyone tried the new Attwood "Silent" bilge pumps? Mine is loud as hell! Sounds like a vacuum cleaner. I noticed the blade design seems primitive. The new ones have curved blades and a dome cone. I wonder if it's worth the $20. I know lots of people who run their blower the whole time while their engines are on to battle the heat soak...
 
Ok, I need HELP. I cannot find where the dang Speedo Cable plugs in. The bad part is, I'm pretty sure I cut if off wherever it used to go to, as I believe it became part of my wiring harness this past weekend. I had found it already cut off, but I can't for the life of me understand why I'd cut up anything I'd later use... Anyway, can anyone please help me figure out where it plugs in, so I can build another connector for it? The wiring diagram just says it plugs into the MPEM...
 
Well, I have a perfectly good original one already bolted to the transom. All I need is to figure out where on the harness it plugs in. The only three prong plug that resembles the one coming off the speedo has the wrong color wires. I'm scratching my head on this one.
 
If anyone has a 4tec out there, I'd really appreciate if you looked at your ski and could help me figure out where the speedo plugs in.
 
Here is the modified control lever assembly.
211.jpg
pushing the lever fwd activates the down switch, and vice versa. I had old seadoo swithes laying around, and just used a worm clamp to secure them in place. I bought an assortment of return springs, but none worked well enough to properly return the vts lever to center. Doubling them up works, but I may still go and find a better one at the depot.
I also had to epoxy a better piece of magnet to the vts push rod to make the gauge register, the old one rusted away. However, the gauge needle doesn't quite travel right. The max and min are too low, so I'm going to try adding some resistors and see if i can shift the range.
 
Last edited by a moderator:
Which speed sensor are you using, the original or the one from the GTX? And the wiring harness going to the speedometer, GTX or original challenger?
 
Using original gtx speedometer and wire harness for the engine. The one on the challenger broke a long time ago. The gtx speedo measures water temp as well. Love that feature!
 
Status
Not open for further replies.
Back
Top