Challenger 4tec Upgrade

Status
Not open for further replies.
Awesome project! I am currently working on a 4tec re-power project myself. I see that you have an additional heat exchanger. Are you no longer using the ride plate cooler or just looking to add more capacity? I have considered abandoning the ride plate on my project and wanted your.02.
 
Thanks dbec. I am using the ride plate exchanger as just a ride plate. I did this simply because I did not want to buy an expensive Riva plate, but needed something that would bolt up flush. I am not using it as a heat exchanger because I don't want more hoses going through the transom. My 30 plate liquid-liquid exchanger should provide plenty cooling capacity for this engine. And it cost less than 100bux! I will use a strainer to keep it clear of debris. I have a pic of it a page or two back.

What are you repowering? Got a thread going yet?
 
Last edited by a moderator:
I had the same thoughts on my project, glad to see someone else had the same idea. :) I can take a look at my GTX's speed sensor connections tonight if you haven't got an answer already.
 
Im putting the 4tec and drive train into a 16ft aluminum semi v with hopes of making a family oriented small river boat. I haven't started a thread yet but currently in process of rebuilding the engine(purchased with blown supercharger).
 
Im putting the 4tec and drive train into a 16ft aluminum semi v with hopes of making a family oriented small river boat. I haven't started a thread yet but currently in process of rebuilding the engine(purchased with blown supercharger).
Nice! Ya, should make a great engine for that. I rebuilt mine too, didn't want to take chances knowing this was a salt boat, and that it had those hollow exhaust valves. Replaced the chain and flywheel bolts while I was in there.
 
If anyone has a 4tec out there, I'd really appreciate if you looked at your ski and could help me figure out where the speedo plugs in.
Here is a pic of the 3 pin connector coming from the paddle wheel to the main harness. This is on my 03 GTX sc. Hope this helps!
221.jpg
 
Aaaah, ok, I guess the colors look different when the wires are thicker. I'll take a look, I believe I saw one with those colors ob my harness. Thanks, that's what I needed!
 
Sound insulation complete for now. Must get seats in to continue, as this makes those bolts inaccessible. I have completely sealed off the seats and that hollow space between the side of the seat and outer hull.
296.jpg

297.jpg

298.jpg

With that in, it was finally time to install the fuel tank, the first step of the actual assembly process. To my huge disappointment, I realized that I had welded the vent bung in the wrong spot. It's way too close to the middle of the tank and hits the bottom of the seats. FML! So back to the welding table...
 
Last edited by a moderator:
Had to cut out the misplaced pieces, yet leave a big enough hole to suck most of the debris out.
306.jpg

While I had access to it, I went ahead and applied that fuel tank goop to all the inner seams and let it dry over night. Today I will weld it back up and retest for leaks.
 
Bad luck with tank. Welded up the bungs in the new spot only to find that the intake manifold interferes. Only by a hair too! Went back and cut a corner off.
328.jpg
329.jpg

Had to buy some metric threaded rod to secure the straps, I didn't have any bolts long enough. Here it is in its final resting place
330.jpg

Fuel pump will go here
331.jpg
 
Fuel pump installed
341.jpg

I was resting from wet sanding the gel coat on the bottom and decided to play with the engine some. Hooked a battery to the starter and checked compression. Got 150 150 and 120. That's when I realized there was a curious knocking sound. Not sure if it's normal or if it's just a result of it having no oil, but I'm worried. The compression on 120 came back after some oil in the cyl, so that's probably ok, but the noise... Could you please check it out and let me know what you think? https://youtu.be/-Dm6zGevQ0M
 
Maybe take a screwdriver or mechanics stethoscope to your ear to see if you can pinpoint the location of the noise?
 
Thanks for the replies. I threw it out onto the forum in the 4stroke section. Most people seem to agree it's a result of the lack of oil. I feel a little better about it. I think they're right.

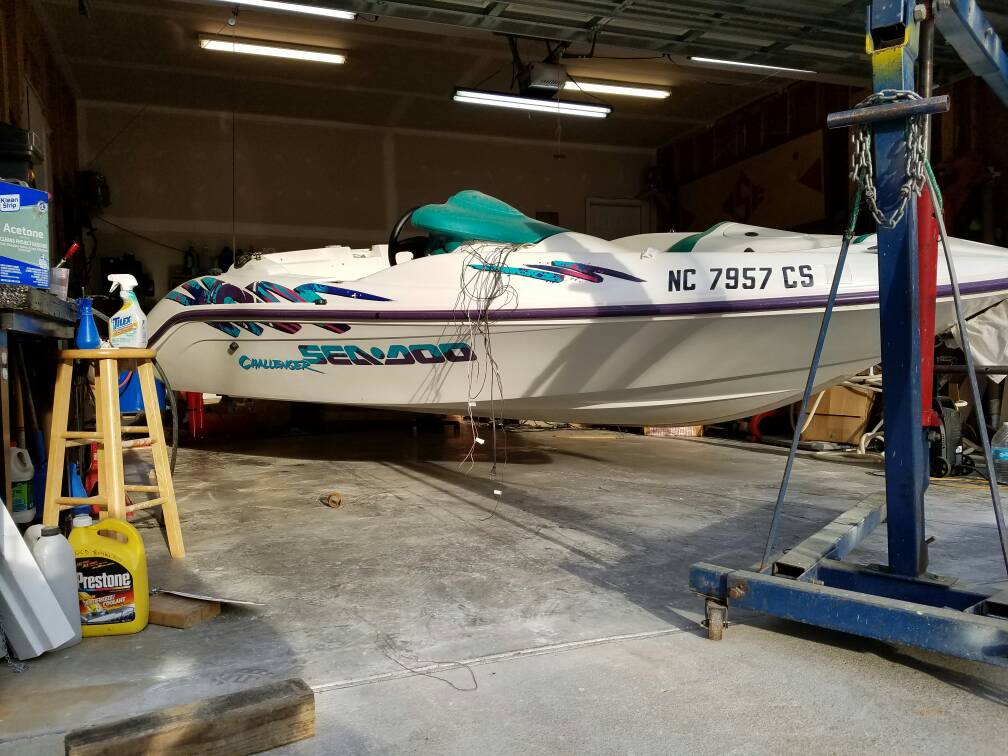
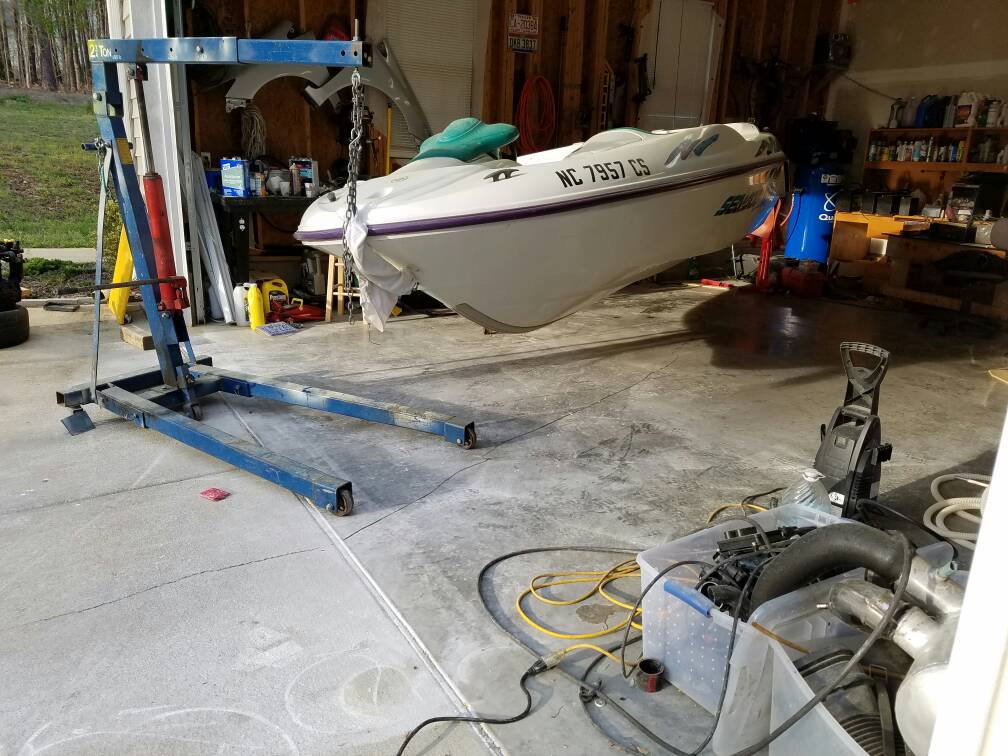
Today is the last day of wet sanding the bottom. Whether it's perfect or not, I can't take any more of that torture. My right wrist feels like it got run over, and this is just the worst activity: sanding upside down with drops of gel-coat water spraying you in the face. It sucks! It might have a few dimples, but it'll be smooth. Once I do that, I'll transfer the boat back to the trailer, hopefully for the last time.

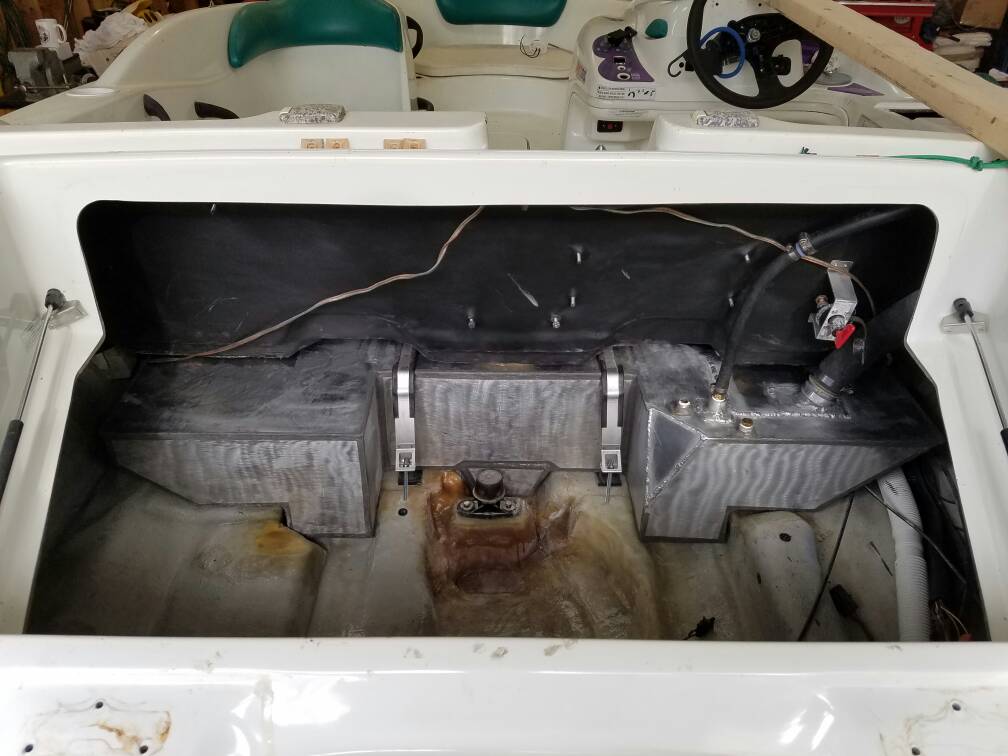
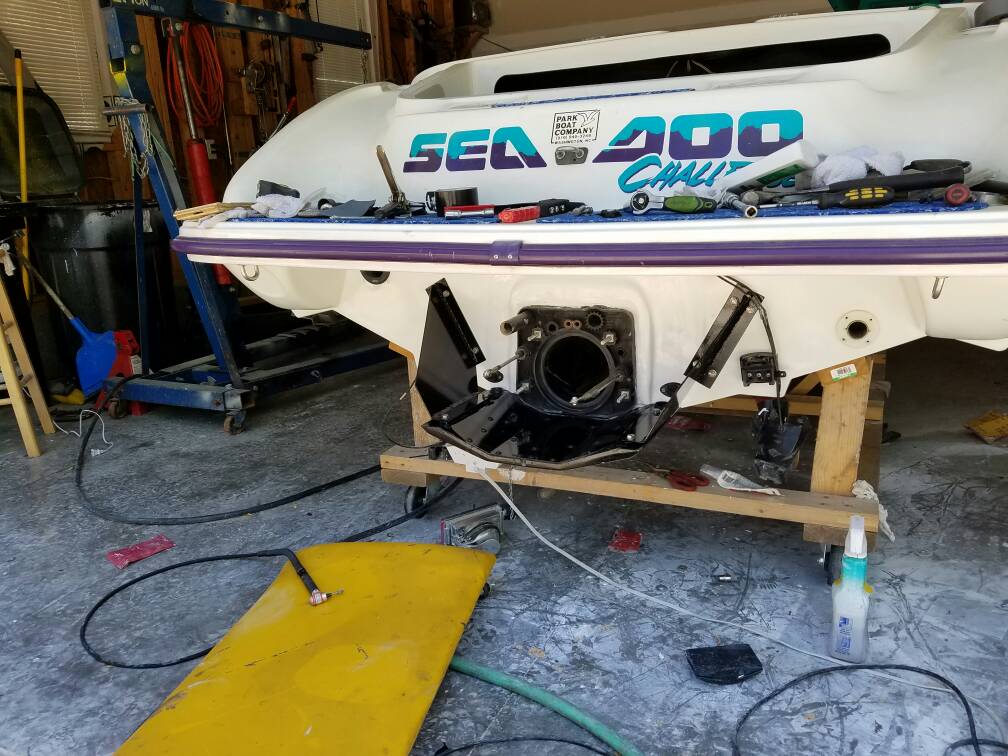
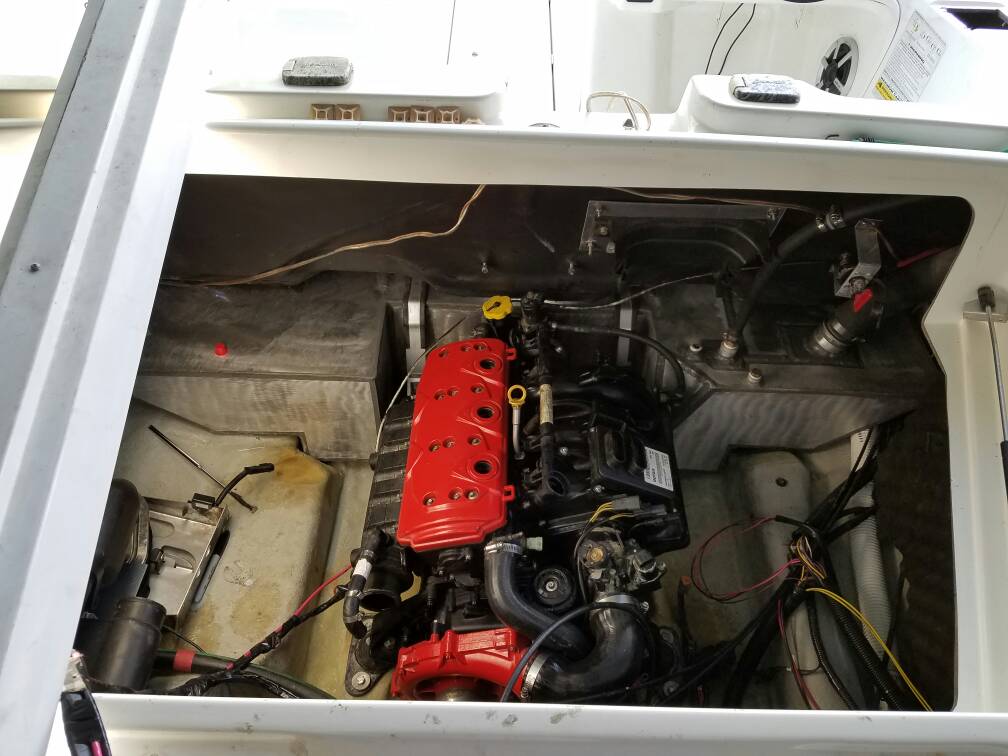
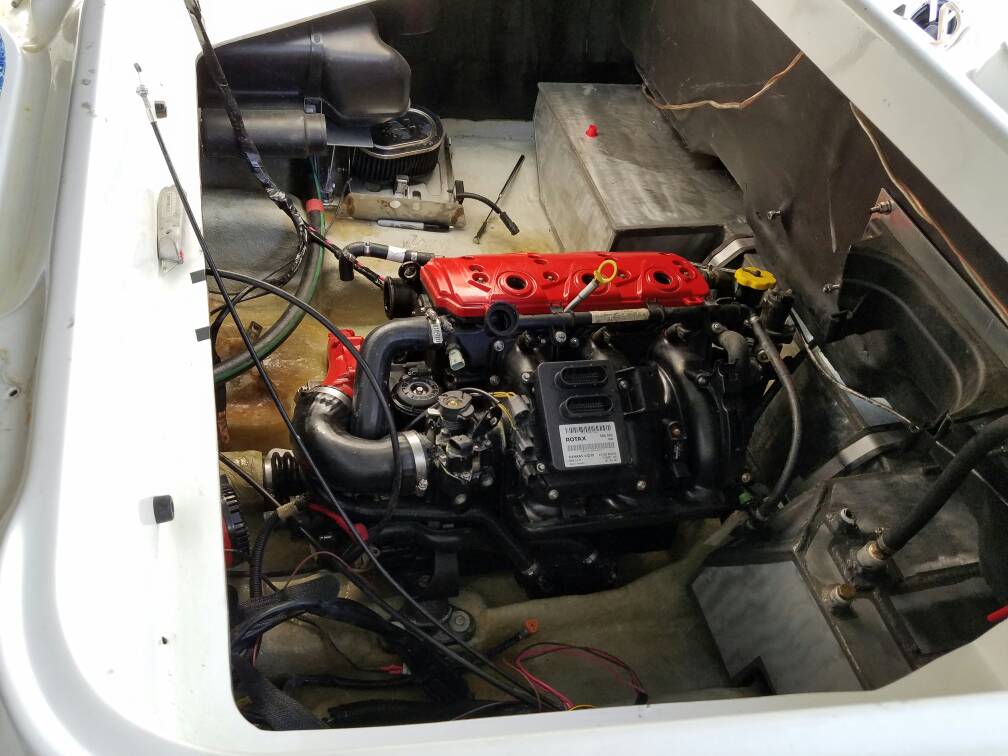
Then in goes the engine!

Got oil for it today: decided to go with the mobil 1 4T. It's fully synthetic, and I trust Mobil1. It's readily available, and I got it on sale for $9/QT. It's a motorcycle oil, specifically manufactured for wet clutches and is JASO MA compliant, so should work well with the S/C. I've read forum posts where guys have used it w/o issue. Also read that Seadoo XPS is little more than regular ol' Castrol GTX. I like knowing I have synthetic oil in there, especially since I ride in all temperature ranges.
I can't stop thinking about it as I sit here at work, staring down the clock. I want to hear that engine growl again and see how well my exhaust setup works :drool5:
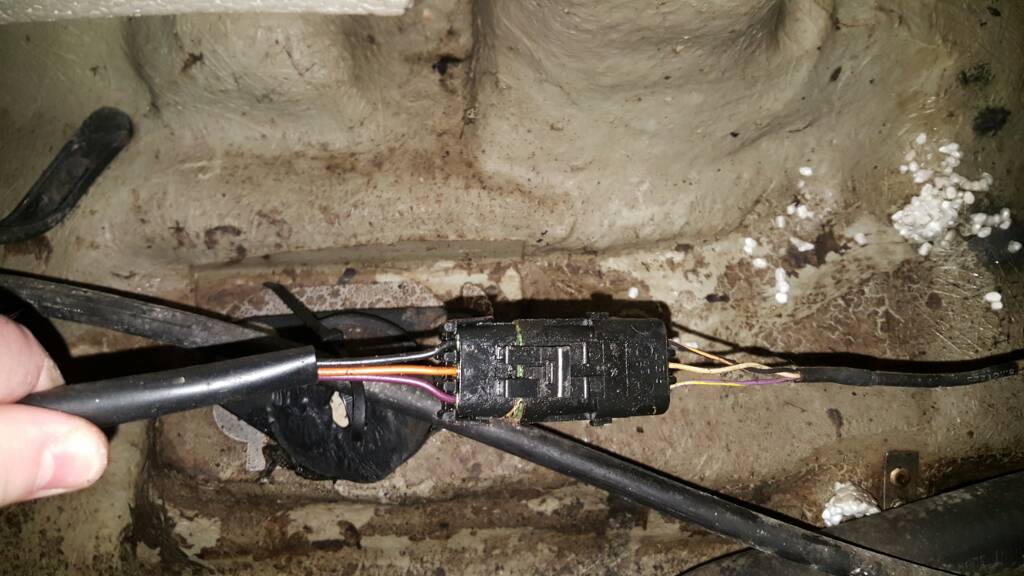
 
Last edited by a moderator:
Well, to my disappointment, I did not get to start the engine last night. By the time I painted the ride plate and supports, finished the bottom, and fixed the bunk on the trailer it was 10:30. Also today after work, my wife is dragging me off to something she wants us to do. This is the worst case of "kid before xmas" I've ever dealt with.
But at least the bottom is done.This part was extremely difficult. My advice to anyone trying something like this is to buy the big box of a good quality 220 grit sand paper.If I had to do it over again, I'd find a way to flip the boat and make the bottom perfect. It's almost there, and almost will have to do.
369.jpg
370.jpg

Compare that to some of the early photos :)
http://www.seadooforum.com/showthread.php?69006-Challenger-4tec-Upgrade/page3
 
Last edited by a moderator:
Finished installing the newly painted ride plate and supports. Later today I will move it to the trailer and install the motor.
386.jpg

I still have some more wiring to do up front before I can start it up. Things like dess, gauges, and bilge switches all need to be properly wired
387.jpg
 
Just a heads up on the Ride Plate.. A while back a a member removed and painted his ride plate. The ski overheated when in use. He used a high quality epoxy based item that did not allow for the cooling water to get cooled as the epoxy did such a good job that the heat could not be removed from the cooling water...
 
The ride plate has nothing to do with cooling anymore, I went with a water-water 30 plate heat exchanger. I didn't want extra hoses going in and out of the transom. Also, I had to add quite a bit of fiberglass bondo to make the ride plate match the boats bottom contours. Originally, the plate had a kind of w shape. With all that, I didn't figure the heat would transfer properly, and the bondo wouldn't stick long being heated and cooled like that. Maybe the pics here show what I mean about the shape incompatability. If I had to do it over again, I would have welded up a new, light-weight ride plate, but I'm too ready to get this show on the water.
http://www.seadooforum.com/showthread.php?69006-Challenger-4tec-Upgrade/page4
 
Last edited by a moderator:
I pulled the VTS motor and made a bushing for the top of the motor, as it was a bit noisy in one direction. I used a drop of JB weld on top of the armature assembly and just stuck it in place, making sure there was plently of oil all around. It seems to have solidified and taken up some slack in the old motor housing. We'll see how long that lasts. I'll probably spring for a new one at a later date, but this is working very well for now. I sealed everything up really well with silicone, and as an extra percaution, I will drill a little hole in the bottom of the vts housing for the occassion that my VTS seal ever goes bad and lets water into the housing.

More importantly, I FINALLY GOT THE MOTOR IN! It looks so awesome in there!
397.jpg
398.jpg

I spent a considerable amount of time getting it perfectly aligned with the pump, but now that alignment rod slides right in all the way to the end. I feel very good about it. Next I put 3 quarts of oil in her, and started cranking it over without plugs. Very quickly that ticking noise I was worried about earlier went away. The motor is silent as a whisper during cranking. I'm very pleased. However, that's when I noticed a problem:

I saw oil dripping out from under the driveshaft! WTF? the driveshaft bearing seal and the other seal in front of that are both new. The shaft itself is damn near new, no pitting or corrosion at all. I had the pump and the little bumper installed. The little carbon seal hat was not c-clipped in place. Does that have to be installed in order for a perfect seal around the driveshaft? I realize it would push the driveshaft deeper into the motor and keep tension on it. Could this be the reason for my leak?
 
I checked the manual, and it appears that there are two o-rings that I'm missing. I've never seen them before, when I took the old shaft out. They're labeled 26 on the manual's diagram:
Manual.jpg
I went online to see what they were, but they weren't listed for my ski!
PartsNation.JPG
What gives?
 
Shit! Turns out I ordered the wrong part number. I have the seal for the 2009/10 ski, not the earlier model. SHIT! Now I have to wait two more days for water trials :facepalm: Anyone know an NC dealer who might stock this?
 
Snapped a few pics while I was transferring her back onto the trailer
401.jpg
402.jpg
403.jpg

I wonder what she will weigh in the end...
 
Status
Not open for further replies.
Back
Top