If you are talking about the seals between the pump and hull plate they are a formed seal not an o-ring. @Minnetonka4me can set you up with them.


-
This site contains eBay affiliate links for which Sea-Doo Forum may be compensated.
You are using an out of date browser. It may not display this or other websites correctly.
You should upgrade or use an alternative browser.
You should upgrade or use an alternative browser.
Seadoo 96-97 GTX Repairs
- Thread starter etemplet
- Start date
- Status
- Not open for further replies.
Pulled the starter apart an cleaned it up. Looks good inside except the outside diameter of the Armature. the section on the brush end is worn to the insulators. that may or may not be a problem. . I reassembled. I don't understand why it won't turn the engine over with the plugs in. Sounds like it is hitting pretty hard but sure can't get over the hump. Perhaps this is not an OEM starter. I have 100% continuity (zero ohms) from the positive connection post to the frame of the starter. Is that correct? Strange to me.
Last edited:
I purchased a 325CCA AGM battery. Should be a good one.try using jumper cables from your battery to the starter. I have seen the stock battery cables cause this with internal corrosion. I have also seen brand new Walmart NeverStart batteries cause this too.
Question... I don't have the drive shaft installed. Would that cause any problem. I am thinking of inertia of the spinning prop helping the turn over the engine. Sort of like a lawnmower blade. Just a question. I am a bit befuddled by the lack of the starting system to turn over the engine with the plugs in. I am also wondering if the contacts inside the solenoid could be bad. This is weird stuff for me.
I will use jumper cables.
No, driveshaft will not make a difference. It should turn over even easier without the pump hooked up.
Try the jumper cables, try another battery, and if it's the same then it's time to rebuild the starter. I've had many of them with worn brushes or internal corrosion which would not turn an engine over fast enough to fire. Rebuilt them as good as new.
Try the jumper cables, try another battery, and if it's the same then it's time to rebuild the starter. I've had many of them with worn brushes or internal corrosion which would not turn an engine over fast enough to fire. Rebuilt them as good as new.
I took the starter apart last night and cleaned it up. Seemed OK. Got another used starter from my cousin today.... same problem. So..... I followed the ground wire to the starter and saw some tape on it. hiding under the tape was a connection bolted together. The bolt was loose. Cleaned up the joint, tightened the bolt and the engine turned over great. Now.... looks like the NEW battery is bad. So, I had a combination of things. Buying used equipment has it pitfalls. LOL Some things I would not do in testing because I don't know enough about the electronics and I was afraid to TOAST something expensive.
So now... take care of the battery, wait on rubber bushings and stuff for the jet pump then.... give her a go with some water.
So now... take care of the battery, wait on rubber bushings and stuff for the jet pump then.... give her a go with some water.
Last edited:
Well, I thought it was fixed. Same old, I don't have enough UMPH to get this motor turned over. I hate to do it but I am about the buy a new OEM starter and be done with it. I have taken starters out of this ski 5 times already and none of it fun. I can't think of anything else it could be. I put a 1000cca battery directly on the starter with jumper cables and "no go"
Difficult for me to tell. I thought is was OEM but I couldn't read the one tag. Internally the starter looks pretty stout. I cleaned it up a bit. It seems to hit pretty hard when engaged but something is wrong. When I purchased the ski, they guy had a larger battery mounted in the rear storage compartment. That tells me he was having issues. My wife tried and tried to get me to buy a brand new OEM but I couldn't do it. LOL
Pump mount to hull. I was reading that if the wear ring has a lip you put sealant in a different location, if there is no lip you put the sealant at 7 points, 3 of which are on the seals for the water flow. No pictures that I can see anything and I am not sure if my wear ring has a lip or not. I opted for the.... not. I am researching on where to put the Loctite for the pump housing to Venturi assembly. Does one just put sealant on the 2 o-rings and that is it? LOL I am getting baptism by fire with these skis. Ha ha. I hope I can get to this level with the electronics.
FWIW the Seadoo parts site calls them an O-ring which is not entirely accurate.If you are talking about the seals between the pump and hull plate they are a formed seal not an o-ring. @Minnetonka4me can set you up with them.
") I am just learning the nomenclature and can only repeat what I read from hopefully informed sources. LOL I am getting there slowly.
I am just learning the nomenclature and can only repeat what I read from hopefully informed sources. LOL I am getting there slowly. 
I'd have to say the pump housing is plastic. It sure was scary getting the 23 ft. lbs. of torque on the bolts. I stepped up gradually.Is your pump housing plastic or aluminum?
I use the $20 brush kits from eBay.
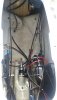
I am only 4 nuts away from taking this part back off so if I didn't get anything correct, I can easily remove the pump and drive shaft. A concern of mine is... is the drive shaft putting a thrust load on the engine? I wish I had installed the shaft and bottomed it out and marked it. I am also missing the rubber boot that goes between the flywheel and the mechanical seal. I just found that out. Boy O Boy following people is always interesting. How many jack legs worked on this ski over 20 years? One can only imagine.
snikwad003
Well-Known Member
Are you talking about the boot on the PTO and driveshat? Cause it's pretty important
I believe that would be it. It goes over the flywheel end and I would imagine the Mechanical seal. It's raining so I am not going out to check.Are you talking about the boot on the PTO and driveshat? Cause it's pretty important
It simply was not on the ski when I purchased it. I am not talking about the bellows for the Seal.Attachments
snikwad003
Well-Known Member
Osd has them and they have the clamp tool and clamps if you like having the special tools
My pump did not have a neoprene seal unless I am not seeing something. I cleaned the mating surface on the hull and it just looked like a little bit of glue on there that came off easily. Not much at all. The parts list does not say anything about a neoprene seal or any type of seal.
1997 Sea-Doo GTX, 5642 Propulsion System | Fox Powersports Sea-Doo Partshouse
1997 Sea-Doo GTX, 5642 Propulsion System | Fox Powersports Sea-Doo Partshouse
Last edited:
snikwad003
Well-Known Member
Not unusual, add one
- Status
- Not open for further replies.
Similar threads
- Replies
- 8
- Views
- 745