


-
This site contains eBay affiliate links for which Sea-Doo Forum may be compensated.
You are using an out of date browser. It may not display this or other websites correctly.
You should upgrade or use an alternative browser.
You should upgrade or use an alternative browser.
Seadoo 96-97 GTX Repairs
- Thread starter etemplet
- Start date
- Status
- Not open for further replies.
Great. I won't modify them. I have to trim the valves because of the 1mm overbore.I’m still running the smooth ones in my ski with no issues.
Great, I was a bit concerned but followed the directions. Is there anything I should pay particular attention to during this part of the rebuild. My next hurdle is getting the correct torque on the PTO flywheel and the Mag flywheel, then getting the timing correct
Well I didn't get too far along today. Tomorrow I will mount the mag flywheel. When I mount the rotor I am assuming the engine needs to be at TDC on number one piston?? I want to make sure the rotor is timed correctly for the pick up coil to do its thing. Are they any trick so getting the proper torque on the PTO and MAG flywheels? I don't like the rope trick but will comply if I have to. Advice and warnings, are appreciated. I am going slow at this point. ")
Just align any timing marks and the pickup coil can’t be mounted wrong. The flywheel is keyed too so can’t be installed wrong.
I use a round block of wood in the front cylinder and tighten the head then torque the flywheel then move the block to the rear cylinder to torque the PTO this way you can’t twist the crank.
I use a round block of wood in the front cylinder and tighten the head then torque the flywheel then move the block to the rear cylinder to torque the PTO this way you can’t twist the crank.
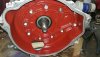
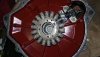
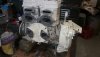
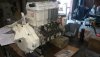
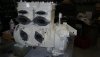
Well.... the engine is assembled pretty much but I have to do a bit more prep to paint it properly. I suppose I spend to much time on cosmetics and such but paint protects the engine and it might as well look pretty. I will do a bit more prep on the block and do some taping before I paint. Taking my time and doing it best I can.
I decided the safest way to secure the crank to torque the flywheels was to use a v-belt to direct the force toward the strong parts of the piston. It worked very well. Just my way of doing things, nothing against anyone else. I didn't like putting pressure on the crown of the piston and the V-Belt gave some nice cushion and spread the force more evenly.
I decided the safest way to secure the crank to torque the flywheels was to use a v-belt to direct the force toward the strong parts of the piston. It worked very well. Just my way of doing things, nothing against anyone else. I didn't like putting pressure on the crown of the piston and the V-Belt gave some nice cushion and spread the force more evenly.
Attachments
Why would you want to coat the internals of the exhaust? The carbon and oil will do that for you.
Did you check the welch plugs on the headpipe? Also get some clear on that purple mister!
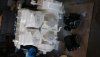
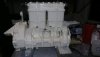
The painted purple exhaust is now cleared.
I am getting close. I purchased the Engine Alignment tool today so I am ready with that. I will remove the fuel an oil tanks to give them a cleaning, replace the fuel lines and put some fresh stuff in there.
Should I replace the seal on the pump shaft while I am doing the alignment? Is this also a good time to replace the pump oil??
Should I replace the seal on the pump shaft while I am doing the alignment? Is this also a good time to replace the pump oil??
Attachments
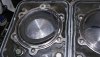
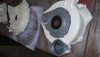
I am trying to identify the carbon seal that seals the hull. I've been to the Seadoo parts site and a not sure. What parts do I need and what is a ball park cost? My seal may be in good shape as the propeller shaft was replaced but you never know if they did a good job or half @zzed. I am not going to order the part till I look at mine. I am just trying to be prepared. Also.... if it is a good idea to change that seal just let me know. This poor ski has been abused and neglected. No reason for me to think anyone took the time to do anything in a quality fashion.
I am not going to order the part till I look at mine. I am just trying to be prepared. Also.... if it is a good idea to change that seal just let me know. This poor ski has been abused and neglected. No reason for me to think anyone took the time to do anything in a quality fashion.snikwad003
Well-Known Member
The heavy duty one osd parts has is a nice one
Once you look at it see if the carbon face is worn down or grooved. It should be flat and smooth to seal on the stainless hat. I usually replace the rubber boot that holds the carbon ring as they get old they loose tension on the stainless hat and it can leak.
I will give it a look. I see it now that I went out to the ski. I pulled the fuel and oil tanks to clean out. The Fuel sender is not working. I remember reading someone replaced a fuse in there sending unit. While I got it apart I would like to get it all working.
snikwad003
Well-Known Member
Yah it's called the f1 fuse and someone made a sweet write up with a x ray of the circuit board
snikwad003
Well-Known Member
No link posting so you need to search f1 fuse xray and it was the second one down
I cut the window and made the connection for the fuse but the sender is still not working. Lots of corrosion on the board. I sealed it back up and I am deciding if I want to purchase a used unit that works. I think having a fuel gauge is.... handy. LOLYou cut a window in the side, the top doesn’t come off.
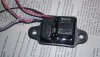
I have YET to have a single one of these Holder relays pass the test recommended in the repair manual (104 ohms across the black and purple/blue wires). The coil pulls in and makes the connection so I guess that is what counts but you are suppose to toss this unit if it doesn't pass the Ohm check. LOL
Attachments
snikwad003
Well-Known Member
You can get those orings from your local auto parts store
What I did with trimming the rave valves, I used an old cylinder an piston. Shimmed the piston for half the clearance so it would center up in the cylinder and cut a small .020" shim. I piled some spacers on the Rave Valves shaft so it would be locked down tight. Easily trimmed with a coarse half round file. A couple of cut and fit cycles and Viola !!
I was advised to change the brushes in the starter but I figured I would destroy the starter taking in apart. It spun the engine over pretty good but when I put the plugs in, the starter didn't have the UMPH to get R done. Are there any decent new starters available"" I see them for $44 and $97 on Ebay. I only see really old OEM starters.
Last edited:
- Status
- Not open for further replies.
Similar threads
- Replies
- 8
- Views
- 745