


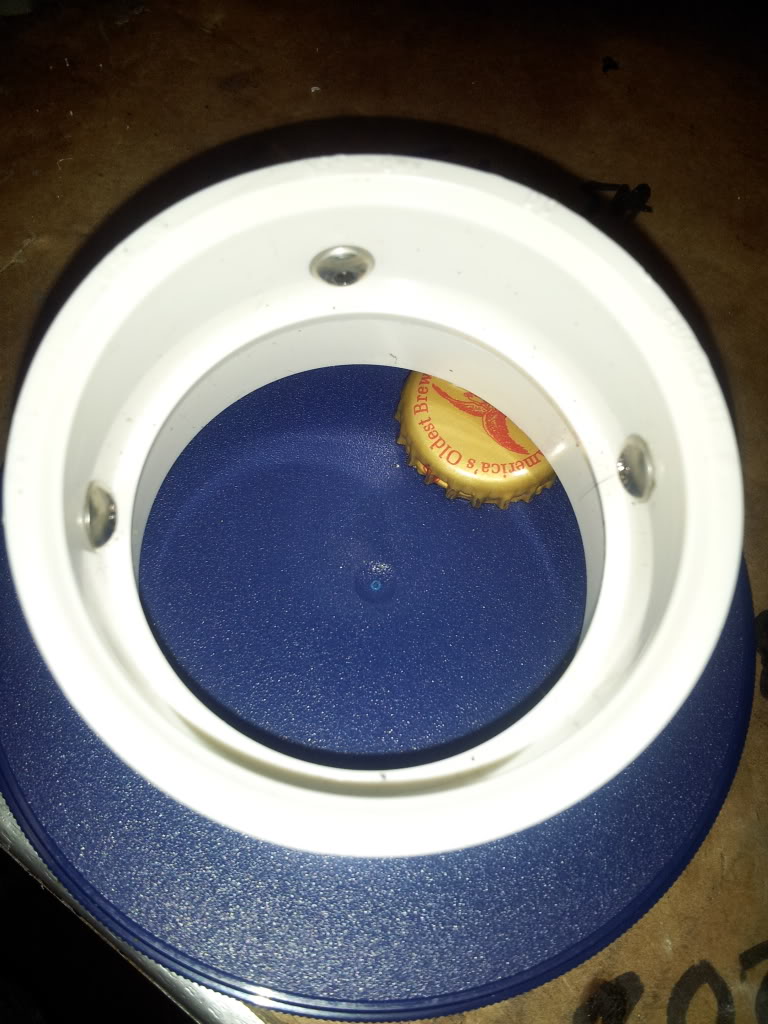
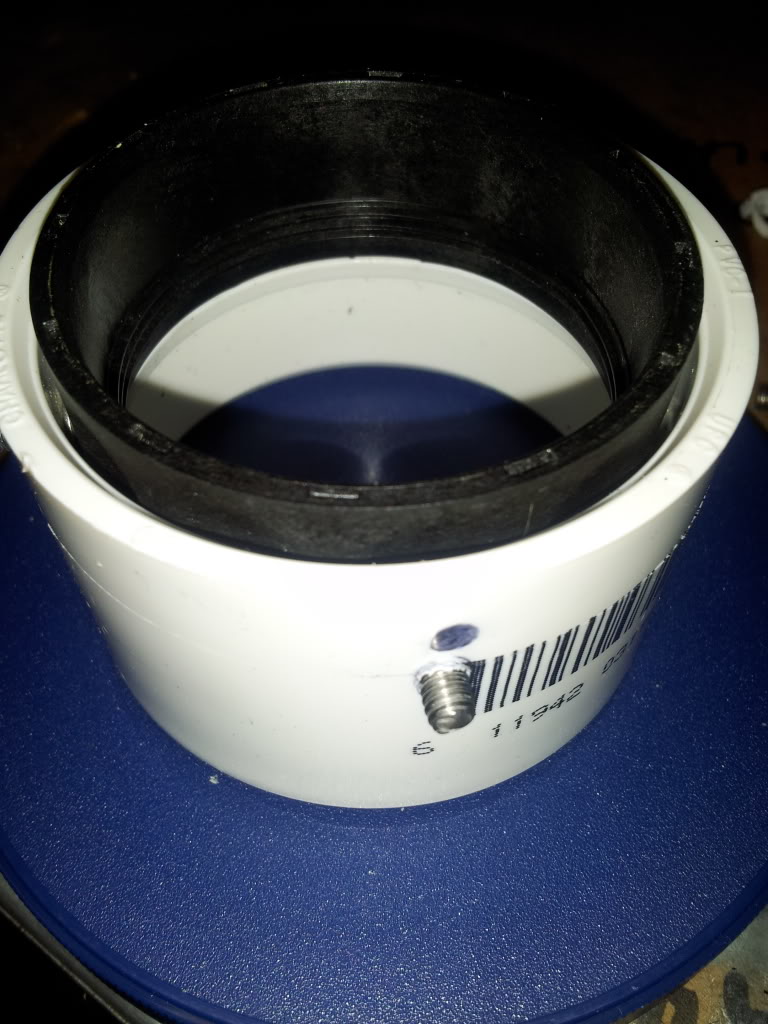
Just as the title says. The other night I was trying to get the info gauge out of my 96 XP hood. Well, my fat meat hooks(hands) weren't really conducive to twist the locking ring nut off. So I PM'd Jetskigoodies and asked how he did it, and he said you basically need to be a contortionist to get them out. Now for all the thanks to be spread, JSG made a comment about the exhaust nut removal tool that Minnetonka4me made out of PVC (Here)and how he(JSG) was going to make something like that but for the gauges. Well I just happened to be at Lowe's for some stuff for work and I swung through the plumbing department and picked up a $0.68 2" schedule 40 coupler. I then brought it home and modified it. I already had 2" PVC from another home project and I always have hardware at home from work, but I'll make a list of what you need later. So I drilled and tapped 3 holes on the coupler a 1/2" down from the edge as seen in the first picture. Then I installed three 8-32 button head screws, they have a nice half round head and will fit in the slots in the nut ring to "grab" while turning it off.
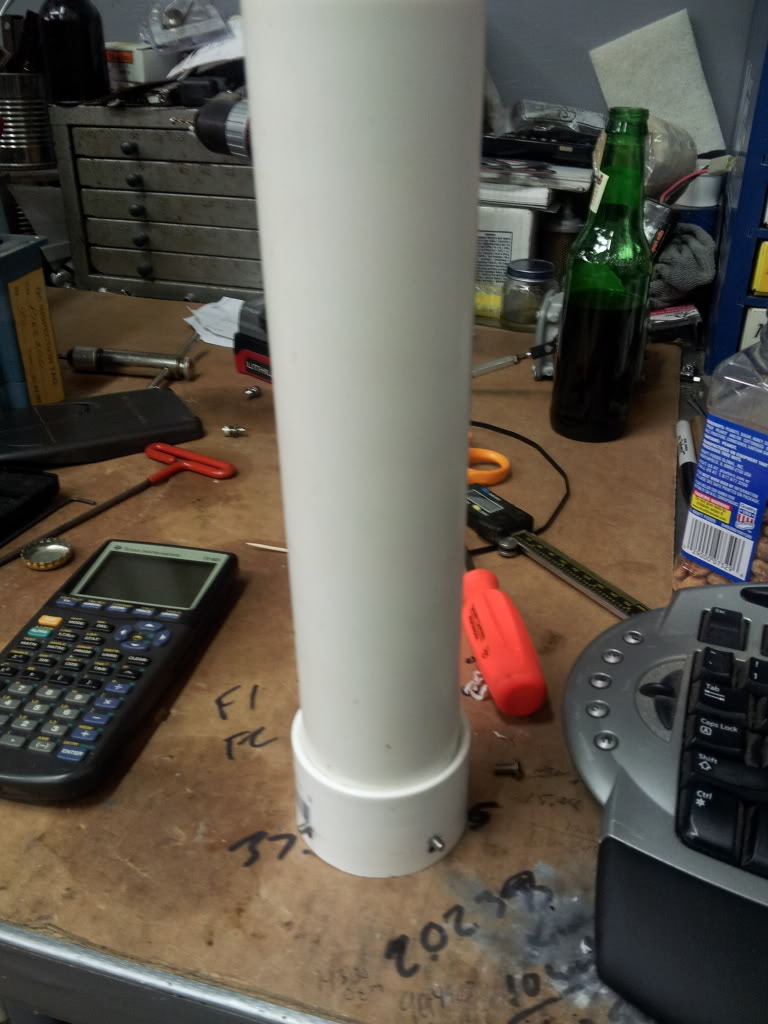
The connectors will fit through the coupler, even the fat 6 pin pack for the info gauge. From there I cut a piece of 2" PVC 10" long(the handle). Now on a three gauge hood the ring nuts are tight to each other but the PVC coupler will fit you just need to push it down. Next take the 10" piece and fish the wiring inside it and push the handle into the coupler. There shouldn't be a need to glue the two pieces together since there is a light press fit of the two PVC pieces. Plus if you angle the handle just a bit the PVC will lock against each other. Now you can get you fat hands onto the PVC handle and easily twist the nut loose, then reach in and undo it by hand. The gauges with the brass nut on them(like in the pic) will also fit you just need to work a bit of a gap to that side just until you get the handle seated. I only went with three of the button heads because 4 was way too tight, perhaps four 6-32's would have worked, but I didn't have any problems with the three.
So first off I'd like to thank Minnetonka for posting his pic and inspiring Jetskigoodies. I'd also like to thank JSG for planting the idea in my head. So a big :grouphug: to both you guys.
If anyone has any questions/comments please don't hesitate to ask, but I think the pics are pretty self explanatory.
So the material list:
1-- 2" PVC coupler
1-- 2' piece of 2" PVC(unless you already have it)
3-- 8-32 X 1/4" or longer but you'll need to trim them so you can rotate the coupler between the gauges
1-- 8-32 tap and #29 drill or .136 drill