97 GTX Mini Restoration - Keeping The 2 Stroke Alive!

Note: This site contains eBay affiliate links for which SeaDooForum.com may be compensated
Status
Not open for further replies.
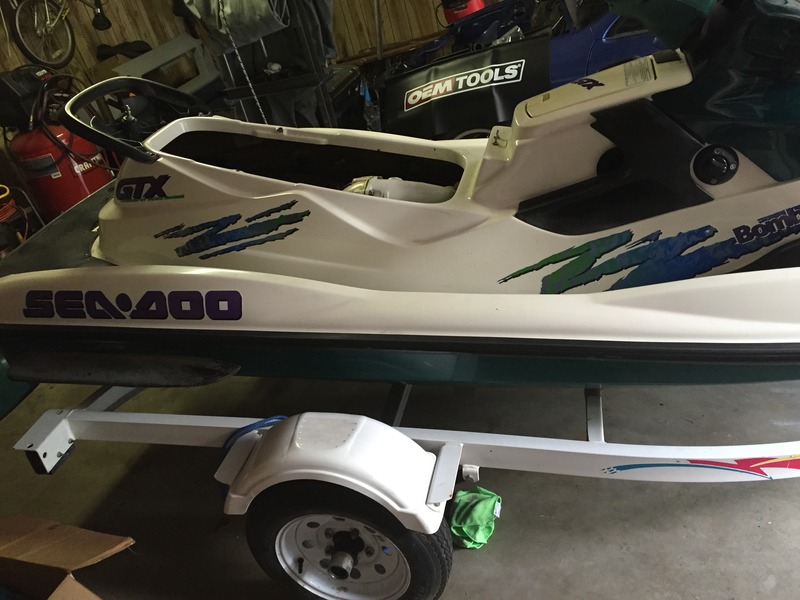
So I decided to make a build thread not only to document the work but to also be more efficient and have one common place to ask any/all questions or ask advice on task I come across. I have here a beautiful 97 gtx that we have owned since 97. It's in need of some TLC but I am hoping with some time and effort to get her running back like she did on day one. A little background on the ski

-Purchased brand new in 97 with 0 hours
-Original motor lasted until aprox 260-275 hours then the oil pump failed and the cylinder cracked
-Paid a shop nearly $2000 to install a new engine "sbt". Engine lasted aprox 10 hours and they said the rave valve broke & engine ate itself>huge loss of $$ here

Purchased a used oem engine with aprox 60 hours on it from a shop on this forum & installed the motor myself. I ran into issues with it after doing the installation myself. Long story short the carb settings were all sorts of wrong but it took 3 shops to find this problem and once I found a shop that knew what they were doing it was fixed in 30 minutes and ran great. Fast forward and I ended up winterizing the ski and putting it in storage for 2 years. I took it out this summer, replaced the battery, replaced the starter "was rusted and siezed" and it started and ran but I am having some issues.

Notes: I am running pre-mix after the oil pump incident. I don't find adding oil to the gas is an issue and I would prefer to just run-premix in the long run if I can get a few more summers out of this ski.

Known problems:
-12v low>this flashes nearly all of the time
-hard to start>sometimes the ski is hard to start>primarily leading this towards the 12v & having a bad rectifier so the battery is constantly dead
-idles low "900 rpm idle". Drives fine above 900rpm but it sounds a little ruff trying to idle that low and often dies giving gas if you drop the accelerator instead of easing into it off idle
-speed/mph dosnt work. It shows 0 mph all the time
-throttle cable broke. The plastic clip around the cable inside the handle lever broke
-studders sometimes around 4200 rpm or a hesitation at the least
-had a decent amount of water inside the ski after the last outing, could not determine if it was just from the amount of rain the ski was in while uncovered or if their is water getting in somewhere else
-floor mats are coming up
-cover is faded and torn. I patched what i could but its almost 20 years old, time for a new sea doo cover
-fuel gauge always shows empty

Now why fix her up? Well I dont owe and money on it, I am mechanically inclined and have the time now to fix it up. It ran great for a really long time when we first got it and I want to get her back up to par. When she runs its a blast to drive. After a good haul glaze back in the day the speedo would read 61-63 on a smooth evening. I dont want to put a ton of money into her but I feel I should be able to complete this project for $500 or less unless something mechnical/major were to come up.

I am not a mechanic and carbs were before my time so I will be doing lots of reading and asking questions

The plan parts wise:
-replacement rectifier>purchased
-replacement speed wheel>purchased
-replacement throttle cable & lever>purchased
-replacement ski cover>searching
-replacement floor mats>searching & considering hydro turf in molded diamond black
-pull/clean or possible rebuild carbs>also check all settings
-pulled/clean or replace rave valves
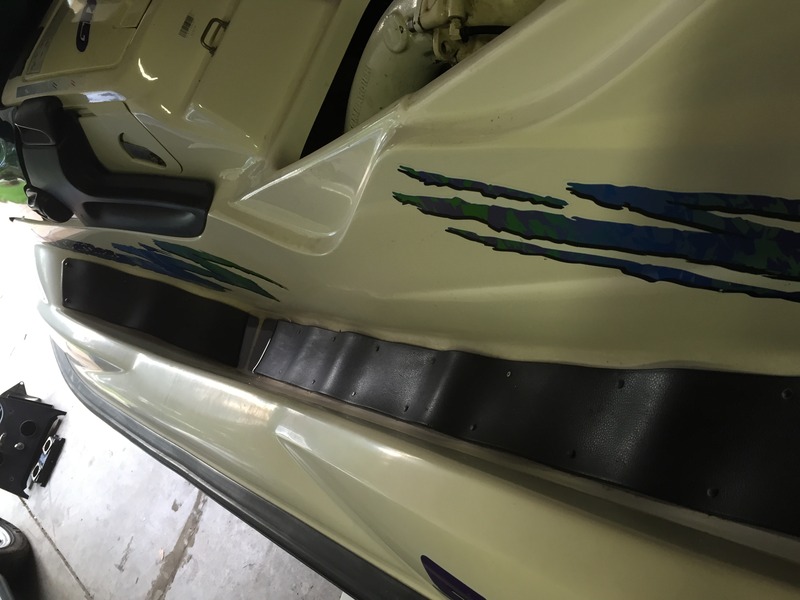
-use wipe/new on all black trim "someone used the wrong type of soap on the ski and it turned all the black trim grey a while back"
-replace fuel float>purchased


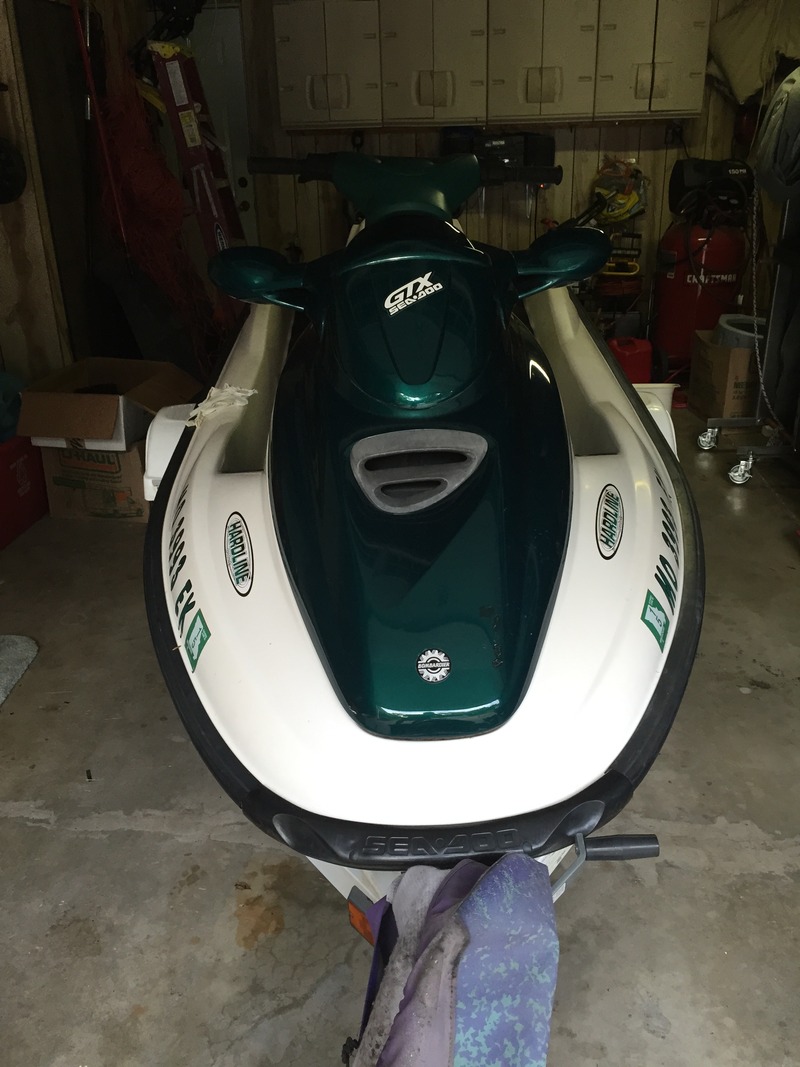
Someone used the wrong type of soap and it ate the nice finish off all the plastic :(


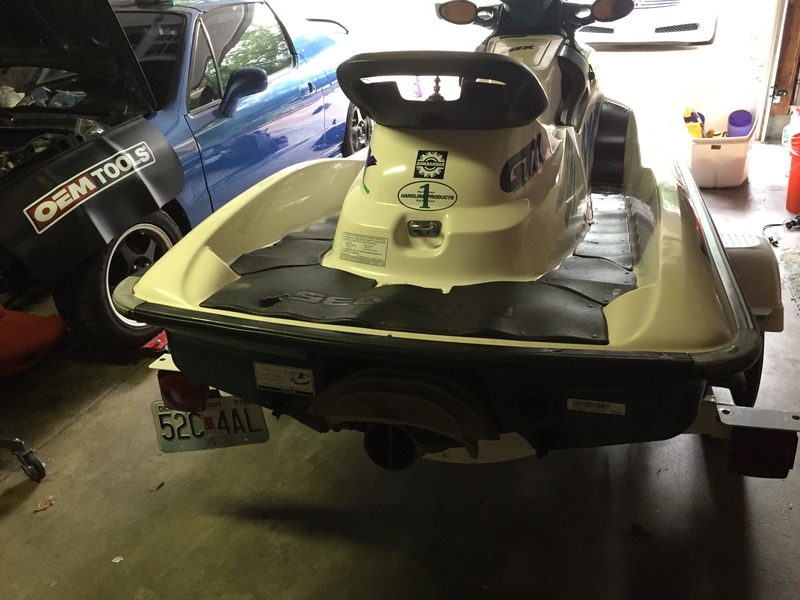
Floor Mats are raised up everywhere. I am most likely going to replace with hydro turf mats.


The good news is I like to work on car's so I have a fair amount of tools. The bad news is I have to drive 30+ minutes to my parents to use them. I moved out a while ago but have not moved my tools into the new place. A little inconvenience but could be worse.


Gotta stay organized:


Pulled the carbs:


Should there be a gasket between the carb & engine itself? There was not


Pulled the rave valves for inspection and cleaning:


Pretty sludgy, I am letting them soak in some seafoam overnight before scrubbing them again. I am using a soft bristle style brush as I didnt want to scratch them up using a wirewheel.

Should there be a gasket on this as well? This faces the carbs and houses the intake filter
 
Last edited by a moderator:
Dirty Motor :\

I also want to replace that hose shown below once I find the sizing of it. Its clear but its obviously pretty old


Better Angle:


You can also see the sbt starter installed there. It works fine but they have the worst customer service I have dealt with. Long story short they sold me the wrong starter and refused to pay return shipping & I still had to order the correct starter and pay $50 for overnight delivery as I was getting the ski running while family was down at the lake. I will avoid them going forward.


Found a grey hose to replace. I thought I replaced all grey lines a few years ago but apparently I missed one.


Flywheel cover off. I really need to dry this thing out and clean up the inside haul a bit. Lots of oil residue floating around down there.
 
Last edited by a moderator:
Is it worth upgrading the bellows to the green version?
Is it worth upgrading to the newer style rave valve exhaust housings?
Is it recommended to use some band ties on the bellow grommet at the base?

Do you think my valves below should be replaced? They were filthy but look closely on the one and there is minor pitting.


Last edited by a moderator:
-need a harness for the osd rectifier or it wont work
-need gaskets for exhaust to head & exhaust to exhaust


cleaned up the trim


replaced broken throttle cable/handle


Debating puling this piece off and painting it black...that stuff my brother used to clean the ski a while back really destroyed anything black


More back to black


Looks better but....still pretty bad
 
Last edited by a moderator:
Replaced my speed wheel sensor & used the following
-Also used this stuff for the fuel guage fix


Cut open the fuel baffle
-My float and bottom plastic piece/screen are both missing
-replaced fuse with some solder


Puled gas tank
-found the old float and bottom piece to the baffle but there is no screen on it or anywhere in the tank
-Might just order a new bottom piece as I saw the new ones have a built in screen/filer


Hull could now use some degreasing action!


Tank Clean!


Last edited by a moderator:
Motor taped up for the night


Painted the rave valve housings


I pulled the exhaust to engine part as well but I couldn't trip the white paint off, its like its powdercoat or something. Plan to paint that and the VC the same obnoxious green lol. Its 500 degree temp paint. Lays pretty smooth


Tops of pistons pic:


Not sure if/how I will tackle cleaning the rest of the engine. The white is coming off in areas and not flaking in other areas. I have no intentions of pulling the engine but am considering looking at some brush on paint options. Ill keep it white but looking at my options to clean it up without turning it into a massive project. Thoughts or recommendation's?

 
Last edited by a moderator:
Parts on Order

-custom rectifier harness for the larger aftermarket unit
-top end gasket set
-oem carb rebuild kit
-pop off tester
-jet pump oil, gasket & oring
-new oil lines
-engine paint kit...the color was on sale but I am kind of excited for the obnoxious color choice haha

I also took the valve cover & exhaust manifold to have it sand blasted. The rest I will just scuff & repaint over the factory white finish.

Took some de-greaser, water & eventually a power sprayer to clean out the hull. It is a completely different color than before!!


I am hoping to get my parts back from sandblasting this week to finish painting them & then starting putting everything back on it. I will be painting the engine while its in the ski as well using a motor paint kit w/brushes. Although I do have a paint gun & might see if I can use it for that paint as it would probably be way faster than brushing. Brushing might be less messy and require less taping off though so ill play it by ear.

I also still need to tear down the carbs but will try and knock that out this week so they are ready to go. Its my first time really messing with carbs period so I will be taking me time for sure.
 
Last edited by a moderator:
Is that piston roached or is that carbon? I can't really tell from the picture. What do the domes look like?i might of missed it but did you get a compression reading

Awesome right up though! I loved my 97 GTX, you are doing a great job and this ski is well worth saving!


96 XP800!
Keep the 2 strokes alive!
 
Your carb gaskets are still stuck to your intake manifold. Just an FYI


96 XP800!
Keep the 2 strokes alive!
 
Is that piston roached or is that carbon? I can't really tell from the picture. What do the domes look like?i might of missed it but did you get a compression reading

Awesome right up though! I loved my 97 GTX, you are doing a great job and this ski is well worth saving!


96 XP800!
Keep the 2 strokes alive!

Thanks! It's carbon build up. I did not do a compression test yet but will once I get the VC pieces back & install it. The ski ran & still screamed up top it just had a number of other issues at the time. I may try and remove some of that carbon build up off the piston I was just worried about chemicals getting down past the piston into the lower unit without a drain plug on these motors to dump the old oil out. I honestly didnt give the compression test a 2nd thought since compression was good before it went into storage and we only put a couple hours on this engine since purchase although it was purchased used.
 
Wont be much progress this weekend. Still waiting on engine paint & a few odds/ends however I did get some misc parts painted today. These pics turned out weird from the lighting and the clear is still drying but they turned out super smooth for spray-paint/can. Primered, painted, cleared. Should be rated for 500 degree's. Its a pretty bright ass green haha

The engine will be a different color along with the rest of the accents. Waiting on that paint kit to show up. I will most like spray most of that as well as I am painting the engine with it installed in the ski. Its brush-able paint but I am going to try using preval sprayers to start with. The engine paint is a enamel w/hardener so it shouldn't mystify as much and be messy like spray paint.


Last edited by a moderator:
Not much progress...I started rebuilding the carbs & the inner regulator screw stripped so I am going to drill the head off & replace it. I ordered the screws just waiting on them to show up.

I did paint some more stuff. The engine was not removed for painting so its by far a perfect paint job but its better than the nasty flaking brownish white that was all over this thing. Ill touch up some spots today.

I ordered a gasket kit from jet ski plus however I am nervous about it..all the orings including the rave valve orings seems really small compared to what was on the rave to begin with. It looks like the wrong durometer :(

Before Engine:


After:


Yea, it wasnt my immediate color choice but it was $20 cheaper and I figured why not. I wanted something bright so I could see any leaks etc easily and did not want to go factory white. Its a budget build so saving $20 here and there add's up to more parts :)

The color actually grew on me really quick....its a watermelon under the seat :)
 
Hahahahahah pink gotta love it.. I'm shocked you didn't pull the engine considering how stripped down you got it.. I know I'm hesitant on pulling a motor if i don't have to.. Good work.
And those carbs look GREAT. Which is why I'm surprised that that screw stripped.. (Mine stripped on an old carb because it was a salted mess)
Cannot believe how clean that thing looks now. Good job on the tank


Sent from my iPhone using Tapatalk

I thought about pulling it completely but I didn't have anyone else to lend me a hand pulling it out & I also don't have the alignment tool. If I ever run into an issue again I will pull it completely and spray it on a stand but it turned out pretty clean for painting it pre-installed with minimal prep work. Yea the carbs are relatively clean besides the filters but that screw just would not budge. Thanks!

Ill be looking for torque spec procedures today so I can hammer out putting all the little stuff back together this week. I also need to track down a hose diagram as my labels wore off from the degreaser etc I used to clean the hull. Mostly the hoses on top of the fuel pump.
 
Got some wrench time in today. Finished tidying up some things & installed the new external rectifier. Mounted to the side of the starter noid box. Replace a couple hoses & am going to install the rest of the exhaust & raves tomorrow.

I do have some questions regarding the rave valves though. The bottom of the bellow..is that suppose to be over the lip of the housing? I heard people talk about using orings to hold the bellow in place but were they talking about the bottom or the top in replacement of the spring? Just seems odd on mine the bottom of the bellow dosnt really go over that housing lip all the way.

Also my pop off tester has the fittings backwards. The bottom line is suppose to be air in and the 2nd line is suppose to be to the carbs and then finally the top fitting is the air release. They put the fittings on super tight but ill try and swap them tomorrow to finish my dang carbs already.

I took the water regulator apart and the clip holding the bellow was so rusted it pierced the bellow. New bellow is on the way!


See, I am fairly certain the bottom two fittings are reversed.


Have a little clean up to do here as well as finish painting the flywheel cover


Ignore the bad lighting, my overheads lights are burning out one by one so I was using a handlight to work most of tonight.


Installed the external rectifier w/custom harness by OSD.


I might throw some sealer on the holes around the inside where I drilled through just in case but I dont think water should really ever get that high to begin with and with the washers+pressure I doubt water would seap in that way.

 
Worked on it more tonight...

Got the exhaust installed & torqued down to spec. I actually did not use a tq wrench for the top part, the allen heads wont fit w/the design of the pipe but the rest of them are all torqued to spec. Took some time as I installed the exhaust pipe before the manifold so it actually had to be loosened & moved a little to fit the exhaust manifold and then re-tightened. My biggest struggle was installing the top piece of the exhaust pipe. The gasket likes to move, its heavy and I had to clamp the two pieces together. I had to get an extra set of hands in to assist w/that one.

Can someone confirm this rave valve is facing the correct way? Top facing the valve cover and the cut end of the housing facing the carbs?


This weekend i will need to figure out the hose situation. Lots of hoses and all my tags washed away so it will be a pita I am sure :)


Anyone know if this bottom lip should be over that on the bellow?


Its been a little while but put some time into again this weekend.

-Rebuilt the water regulator valve. There was a small hole from the clip rusting inside the regulator, I replaced the bellow & clip. I also may go back and add a washer to this as there I believe was one actually inside the cap but I am not sure where/or when it was added.


-Installed the rave valves but I am unsure about the play between the valve and housing. I feel like the rebuild kit uses much smaller orings so maybe its normal but I attached a video regarding it

Video:


Rave Valve Install: "TOP Faces the SKY"
Note: You need to remove the cap & install the screws and then put the cap on


For the fuel baffle hosing I did as follows:

Baffle "ON" - Bottom Port on fuel Switch/ON
Baffle "RES" - Top Port on fuel Switch/Reserve
Baffle "Ven" - Assume this meants VENT so ran hose to the "3" way splitter that has two hoses to venting postions
Baffle "RET" - No idea where the hose should go to from this port? Any suggestions?

PS: If you remove the fuel baffle and coupler apply some heat with a air dryer to get it back on. It was a real pain in the butt putting the seal/gasket back on the top of the baffle until I hit it with a heat gun to loosen it up!

Misc Hosing Questions: Can you confirm these are correct?


Small hose from left over nipple to bottom water regulator port


Finger to Finger:


Here to back of ski shown in 2nd pic:


My last but not least question is that is it ok for me to cap off the end of the line on the oil tank fitting at the top of the tank? I am running pre-mix however this line was removed and it is just "open" to air. I heard this is some sort of check valve that may allow air inside to work properly but ultimately I have been confused as to whether or not I can just cap it. I will take a picture. Its the fitting that is on top of the oil tank and drops down inside. There are "2" lines coming off of it one in each direction but one of them is going to nothing now so planned on just putting a vacuum cap on it.
 
Last edited by a moderator:
Hope people are not getting tired of my sub threads with questions. I will post the info in here as well for tracking purposes but its harder to get responses in here than each issues own thread so sorry for the duplicates.

Anywho its carb rebuild time.

Pop off goal is 30-33 psi
Test results show the following
PTO: 36PSI
MAG: 26PSI

-both 1.5 valves & silver springs
-installed new replacement valves & same results
-ordering some spring options tonight to tinker & try to get them on spec


115 gram = gold spring
95 gram = dull silver spring
80 gram = black spring
65 gram = shiny silver spring

115 - Mikuni Reference Number 730-03030
95 - Mikuni Reference Number 730-03033
80 - Mikuni Reference Number 730-03027-T
65 - Mikuni Reference Number 730-03027

While waiting on springs I am stripping the old black paint off that was chipping away anyways


Replacing stripped screws inside the carb


Can be found at home depot

 
While waiting on springs I am also looking at my pump options. I want to replace the wear ring/bearings while the ski is down but also contemplating replacing the impeller for a little more oomph. Last time I rode her she was struggling to plain although she had a heap of issues at the time it seems like a good time for a subtle upgrade.

I was leaning towards the 17/22 skat trak with a worx intake grate. I am unable to find any used skat trak's though and brand new they run around $265+$100 for pump rebuild kit w/wear ring & another $70 for the install tool's for everything.

I did find a member selling a pump fully assembled with a solas impeller but am still looking into that brand and searching reviews. I liked the reviews on the skat because they said you lost nothing up top but gained a noticeable amount down low and mid range which is great to get this big ole 3 seater scooting!
 
Great thread. More than a mini resto! Just to let you know, the carb screws really are metric JIS and not 8-32. The 8-32 may work, but it is not the correct screw. The countersink angle is likely different, along with a different thread fit.
 
Great thread. More than a mini resto! Just to let you know, the carb screws really are metric JIS and not 8-32. The 8-32 may work, but it is not the correct screw. The countersink angle is likely different, along with a different thread fit.

Thanks! Dang really? I checked the screw in the thread checker at Home Depot and it seemed loose in the metric option in comparison. I see the angle of the head is ever so slightly different and length is also off about 2 turns short but didn't think it would cause any issues. The screws seems snug when installed. Think it would be an issue? I ordered replacement screws online and they sent me the wrong sizes entirely so i figured I would avoid waiting for another online purchase. Its my first carb rebuild so I would like to do it right the first time but I am having a hard time getting the right parts to show up buying stuff online :( . I did find an oem parts retailer that had the actual oem screws...they want $9.99 a screw...I refuse to pay $40 plus shipping for something so simple lol!

I could try and measure the length from a stock stripped screw and check out mcmaster but it may be hard to find that particular angle head design in there massive catalog of options.
 
Last edited by a moderator:
Status
Not open for further replies.
Back
Top