RESTO 1999 Speedster SK

Note: This site contains eBay affiliate links for which SeaDooForum.com may be compensated
Status
Not open for further replies.

riffe723

Active Member
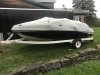
Hello everyone! I'm back again with another post. The restoration season has began here in Upstate NY. I believe our low last night was around 42*, YIKES. With that being said, I likely won't be using the boat much more this year aside from maybe dropping it in the water for one last night ride before it gets shrink wrapped. As in my previous post in the MODIFY section, I have added a few large additions to the boat since first purchasing it, in an all stock state, NOT EVEN A STEREO. Anyways, its got some nice touches now. This is going to me by long running restoration post. Anything that I'm doing along the way will be updated on this post. One thing that is going to happen very quickly is painting the boat. I plan to get this boat shrink wrapped for the winter in hopes of keeping it in such nice shape so I've got to get it painted ASAP. Some other things that are happening hopefully soon are new seat covers. The boat will be left white but we are losing all the yellow. The rear hatch and yellow part on the sides of the boat are going to be painted black. We will be using Interlux Brightside paint with the Interlux 333 roll and tip thinner. I have seen some great successes with this paint so I'm excited to try it myself. As for the accent color, we are going with a green accent to set the black off. We plan to have the seats covered in gray instead of Yellow and I have someone thats making me all new decals for the boat, in green instead of yellow. Another thing I plan to do is update the graphic. In the 90s everything Sea-Doo had was tribal so I'm going to try and update the graphic to look more like what they are using on modern SeaDoo PWC again with the accent color green with some hints of gray, stay tuned for that.

With that all being said, I hope this post brings some ideas to people with the older Seadoo Boats to restore theirs if they had intentions at first but have moved away from it. Attached are a few pictures of a couple things I have added since my last post, as well as a little teaser of the color scheme as I have already started adding some green to the cockpit of the boat. Stay tuned until this evening when it gets darker for more interior photos. Thanks for looking and have a great day.

Speaker Grills are DS18 Pro Grilles
Floor Lights are 3/4" marker lights
Dual Switch Panel
LED Cupholders
LED Strip Navigation Lights
LED Navigation Light estimated delivery is Wednesday 9/12

Some will ask why I did the LED Stips and an LED navigation lamp, the answer is i wanted to do just the strips but there would be a nice sized hole right there in the front so and the old lamp was broken by the previous owner.IMG_2222.JPGIMG_2223.JPGIMG_2224.JPGIMG_2225.JPG
 
Last edited:
Can’t wait to read along as your project progresses!
I want to do most of what you plan to do myself, but I have some functional upgrades I want to take care of first before I start with the cosmetic stuff.
So when you get started, DETAILS please!
:)
 
Sweet deal. I just ordered some Lime Green Carbon Fiber vinyl wrap, as I plan to vinyl wrap some things. Two main things i want to wrap is the black dash cluster and the driver and passenger seat buckets.
 
I definitely want to know how you get along with that, my 96 speedster has some minor dings/scratch’s on the gelcoat that I want to take care of first, but I’ve been wondering if painting or vinyl wrapping would be easier/look nicer when done by not a professional.

You want to vinyl wrap the seats? Or reupholster?

Reupholster the seat cushions yes. But in the 98+ speedster the driver and passenger have an aluminum bucket seat that the cushions go in. I’m wanting to wrap the aluminum buckets in a matte black carbon fiber I think.
 
Update of today’s progress. Was interrupted non-stop today. Did however get the chance to move around the boat and start stripping stickers and old turf mat from the hatch. Also got some taping done today. I received my Interlux Brightside paint today, and my 333 brushing solvent.

Removing the stickers wasn’t an issue, kind of a pain in the ass because they were old and brittle but I made quick work of it. The turf mat removal on the other hand was a complete disaster. My girlfriend pulled the mat off and the sticky mess began. Either way used a couple different things trying to get all the sticky off, but we got it. Thank god. Literally took the most time to remove the two pieces from the hatch. My new hydroturf will be ordered soon, have some sweet plans for it, but that is to come in a later post.

Did some measuring on the seat buckets and decided we wanted to wrap the aluminum buckets with matte black carbon fiber. We will likely do that when we get our new seat covers. Have plans to wrap some other things in the Black carbon fiber, and some plans to use some lime green carbon fiber wrap for some other things. Should be some nice touches.

Wrapping up the day today I got some wax remover on the engine hatch and got it roughed down with a sander and some 220 grit. I got the fenders off the trailer so I had more access. I’m planning to order some new black fenders and some premium alloy trailer wheels and tires. I bought a set for my enclosed trailer and they looked sharp, they are also cheap enough on eBay, it’ll be a nice touch for the whole package. Also plan to get some new LED marker lights for the trailer, I have recently changed the trailer lights to LED but didn’t do the markers.

The hatch is ready to paint. I will probably wash it and scrub it down another time before painting. All about that prep they say. I attached a few pictures from along the way today. Enjoy and stay tuned.

IMG_2229.JPG

IMG_2231.JPG

IMG_2232.JPG
 
Update of today’s progress. Was interrupted non-stop today. Did however get the chance to move around the boat and start stripping stickers and old turf mat from the hatch. Also got some taping done today. I received my Interlux Brightside paint today, and my 333 brushing solvent.

Removing the stickers wasn’t an issue, kind of a pain in the ass because they were old and brittle but I made quick work of it. The turf mat removal on the other hand was a complete disaster. My girlfriend pulled the mat off and the sticky mess began. Either way used a couple different things trying to get all the sticky off, but we got it. Thank god. Literally took the most time to remove the two pieces from the hatch. My new hydroturf will be ordered soon, have some sweet plans for it, but that is to come in a later post.

Did some measuring on the seat buckets and decided we wanted to wrap the aluminum buckets with matte black carbon fiber. We will likely do that when we get our new seat covers. Have plans to wrap some other things in the Black carbon fiber, and some plans to use some lime green carbon fiber wrap for some other things. Should be some nice touches.

Wrapping up the day today I got some wax remover on the engine hatch and got it roughed down with a sander and some 220 grit. I got the fenders off the trailer so I had more access. I’m planning to order some new black fenders and some premium alloy trailer wheels and tires. I bought a set for my enclosed trailer and they looked sharp, they are also cheap enough on eBay, it’ll be a nice touch for the whole package. Also plan to get some new LED marker lights for the trailer, I have recently changed the trailer lights to LED but didn’t do the markers.

The hatch is ready to paint. I will probably wash it and scrub it down another time before painting. All about that prep they say. I attached a few pictures from along the way today. Enjoy and stay tuned.

View attachment 37884

View attachment 37885

View attachment 37886
 
What’d you use to get rid of the sticky from the of the old hydroturf?
I know it sounds dumb but that’s my only reservation for pulling the trigger and getting some myself. I just don’t want to have to deal with the headache if it doesn’t hold up well
 
The hydroturf itself holds up great. 10+ years easy. I used goof off to get the stick off. I used goof off with a plastic razor blade. Slides off easy but it’s so sticky and messy
 
We love our new hydroturf in our SK.

I also ordered a small extra piece to cover the front step in front of the hatch. Kit didn’t come with that for some reason. “Weird”

Here is a thread about our install last year
New hydro turf in the 99 speedster SK
 
Last edited:
Here’s a small thread update. We got around and got the first coat of paint on today. It looks sharp so far, but still some yellow so we should have another coat or two on in the next day or so.

IMG_2234.JPG
 
Cold temps are approaching! No real update today other than the painting is FINISHED! Wow what a job. Way more than just slapping the coat on. Either way looks real sharp. Anyway, went through winterization process today, and I wanted to make a post mainly to document something I wondered the whole time. “Will the cover fit with tower folded down?”

Answer is YES. Take a look at the pic, works well. I can’t speak for all towers but the Vulcan and/or Big Air Ice tower, when folded down, the cover will still fit. That’s all I’ve got for today. Didn’t get as far is the restoration as I wanted but I have two new projects to work on over winter. 95 xp 720, and a 97 spx 800.

Coming in the spring, decals will be scraped, new decals will be here by then, hydroturf, new upholstery, and jet pumps get rebuilt with Solas impellers. From there the boat is ready for the water, but I will be putting new black fenders, LED clearance lights, and black alloy wheels and tires.

Do you have any pictures of your SK with the cover on and tower folded down? Interested to see how the cover still fits even when folded.
 
Well I posted the picture with the post and it didn’t show up. I’ll have to post from the computer tomorrow morning.
 
Jealous of the midship cleat! Wish they had them in ‘96!

The deep Vee’s came with them. Never owned the 14’ seadoo but I’ve heard others say they aren’t fond of rough water. Would like to experiment with one, although I’ve got my hands full of winter projects right now. My girlfriend loved the boat, and we mutually decided we wanted some PWC too, so we went out and grabbed two cheap seadoos that need work.
 
I definitely want to know how you get along with that, my 96 speedster has some minor dings/scratch’s on the gelcoat that I want to take care of first, but I’ve been wondering if painting or vinyl wrapping would be easier/look nicer when done by not a professional.

You want to vinyl wrap the seats? Or reupholster?

I don't have a pix, but a friend bumped a pier with my GTX, and caused a thumb size gouge in the gelcoat. I ordered some nice graphics for the ski, and covered it up. looks awesome now, and there is no water damage taking place.
 
Winter was a long one but in the past few days I've pulled the cover off the boat. Looks way better than I was expecting and in stoked about that. Where we stand with this build, I have a few things left to do those are:

Finish paint
Graphics
Seat covers
Hydroturf

To finish painting I just need to finish the back hatch and clean up some detail. Wet sand, buff, then wax.

Graphics were ordered the other day and they are basically an OEM replica set with a twist to match my green color combo, stay tuned for that.

Seat covers are my very last concern, especially while crawling all over it finishing it. I don't mind if I get the boat finished and use it before getting the seat covers done. The yellow will look silly but it will come in due time.

Hydroturf. That is next up for order. I previous bought a square sheet of what I was going to use and cut out some pieces on my own since they dont come with the SK kit. I finished that and got them stuck down this evening. I left a picture of that.

Anyways, I'm excited to get going on this and get it back in the water. As some of you know I had to PWC builds over the winter, which tied up my time. Now that spring is here, I have a little left to do on one of those builds, but at this time, my time is focused on this boat.

Enjoy.20190425_183843.jpeg
 
Nice work on the front with the hydroturf! I need to do that with my SK

Any advice on cutting it out to the right shape?
Did you go right over the top of the factory traction mats?
 
Nice work on the front with the hydroturf! I need to do that with my SK

Any advice on cutting it out to the right shape?
Did you go right over the top of the factory traction mats?
I peeled the old ones up. I ordered the sheet on Ebay months ago. Either way, I used a long sheet of paper and traced the pieces before I removed them. The center piece from seadoo is actually split down the middle into two pieces so I just made that center piece one large piece. Looks better in my opinion. Anyways, I traced them on the paper, cut them out then traced them on the back of the turf and cut with a pair of scissors. The edges aren't perfect but I'm sure you couldn't even tell without looking very closely. I used 3M super77 to stick them down. It's a spray adhesive and it works incredibly well.
 
Status
Not open for further replies.
Back
Top