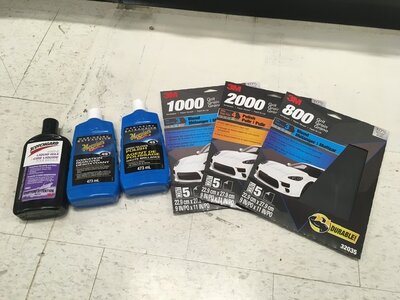
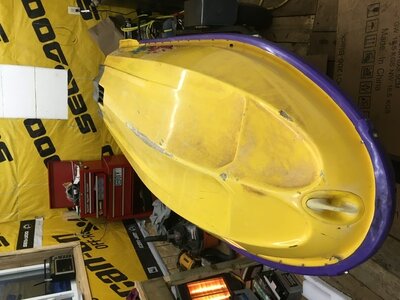
-
This site contains eBay affiliate links for which Sea-Doo Forum may be compensated.
You are using an out of date browser. It may not display this or other websites correctly.
You should upgrade or use an alternative browser.
You should upgrade or use an alternative browser.
1995 HX Project
- Thread starter burtshaver2021
- Start date
- Status
- Not open for further replies.
Thank you, have a good night
Yes, just be careful as 320 scratches take quite a bit to get out. Easier to go slow but time consuming.View attachment 61439Thanks Miki, got it all. 320 grit ok for shaping the gelcoat repairs? I will make sure not to touch the existing gelcoat with that 320. Will take it down with 600 or 800 as I get close to same level as old gelcoat.
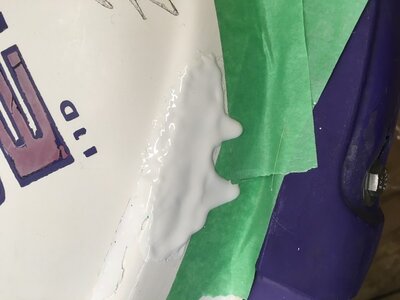
After wet sanding to remove the wax I’ve put my second coat of gelcoat on. Little 250ml bottle of gelcoat which is about 8 ounces will do a lot of repairs if you don’t mix way more than you need. Of course my first attempt at a gel coat repair would have to be on a partially vertical surface and have a body line right through the repair. I think my repair is above the rest of the body now, I will carefully block sand it tomorrow and see, if I need to build it up a little more I will.
Should mention to wipe clean repair with acetone after sanding and before any additional coats
Good tip.Should mention to wipe clean repair with acetone after sanding and before any additional coats
Also when you start the wet sanding and polishing you want to wash the entire ski with dish soap between each step to remove the abrasives for each finer step.
Thanks Miki, never read that. Luckily I have a little spray bottle of soapy water from when I was testing crankcase pressure
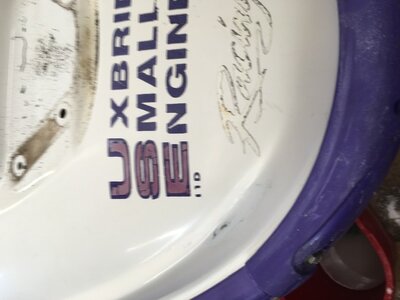 That’s after 2 coats of gelcoat, shaped it down till I was close to body line with 320, then 800 till I was real close, probably hitting the old gelcoat sometimes, then 1000 grit, then 2000, rubbing compound, polish. Not sure where the little dark spots came from, they are right in my patch area so not from rubbing off gelcoat. I did mix the gelcoat in an old Timmies cup and second batch in the lid, want to get some 2 ounce paper cups to keep it clean. Still 3 or 4 indentations that could use another coat of gelcoat but I’m pretty happy with the results overall.
I think I should have done a better job of grinding down the fibreglass, that must be my dark spots. I can always grind it back out at a later date if I want to, but doubt that will ever happen
I have a replica OEM decal kit from pwcgraphics.com I was planning to take some measurement like from the tip of the old decal nearest the back, another measurement from the front to the tip of the decal, and again from bottom and top. Is this the best way to ensure new decals go in the same position? Or do you know of a better/easier way. Or maybe I’m overthinking it? Maybe just take pictures and then line it up while looking at the picture?
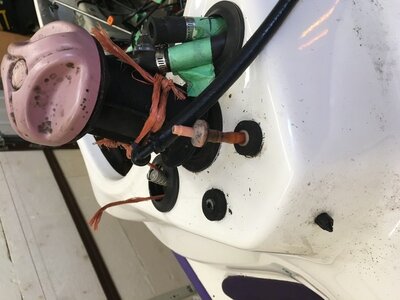 I didn’t take any valves or anything out of the grommets on the left or the 1 beneath the pointing towards seat. Any idea what should be going to these 2? I will have a look at manual later tonight, I’m thinking if anything either a pressure relief valve or make up air valve for fuel tank or possibly oil tank
This would be a good time to take the ride plate off and check the clearance from impeller you wear ring.
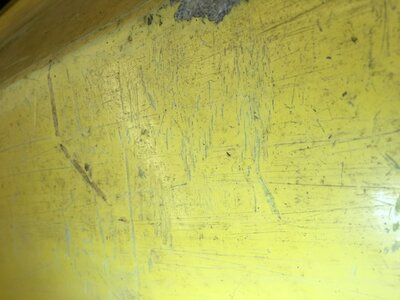 There’s just a thousand little scratches everywhere. I know the right way to do it would probably be to spray the gelcoat but I don’t think I’m up for that. If I did spray I could just use a pneumatic automotive paint sprayer which I have? Thin the gelcoat with acetone? Otherwise if I don’t spray does sanding the really bad spots good with what? 800 grit? For adhesion. Then just bruh the gelcoat all over and do the sanding process. Thinking it might be good to end where I’m brushing it all at a hard corner
Those are some rough looking claws
Your right, just thinking how nice it would look if it looked like it was brand new, but yes, there’s more import stuff to spend my time on. Maybe someday.
Any suggestions on a product to take off the little bit of adhesive left after taking the decals off?
I haven’t been spending a lot of time lately working on it but I did get the decals off the hull, about the only thing I can do until the gelcoat comes in from gelcoat.com and parts come in from seadoo warehouse is sand the hull. My plan was to sand it only with 1000 grit and then use the 2000 grit after the gelcoat repairs are done. Should I be sanding in one direction? Or circular? Should I pretty much try to avoid the spots where the decals were with the sandpaper? The gelcoat is super shiny there. Any rough idea of how long I should spend in one spot with the 1000 grit? Just sand till it looks uniform in colour?
- Status
- Not open for further replies.
Similar threads
- Replies
- 6
- Views
- 769
- Replies
- 4
- Views
- 500


