


-
This site contains eBay affiliate links for which Sea-Doo Forum may be compensated.
You are using an out of date browser. It may not display this or other websites correctly.
You should upgrade or use an alternative browser.
You should upgrade or use an alternative browser.
The Seadoo Carb Rebuild Thread
- Thread starter mikidymac
- Start date
ronn!e
Active Member
Is venom a reliable brand for rebuild kit?No, pipe can stay on.
noviceskier
Active Member
buy the oem kits, needles, and seats.Is venom a reliable brand for rebuild kit?
treimche
Member
I found a Venom rebuild kit with needle and seats as well as gaskets I included?
Is this a reliable brand
No. You need to buy OEM parts. Don't cheap out or you'll end up doing the job twice.
ronn!e
Active Member
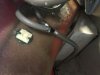
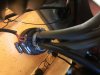
So sorry for this, so looks like 1 vent line going into this unit.
1 going to carb I changed to the new black line.
The 2 going to the shut off valve should be changed as well?
Attachments

ronn!e
Active Member
Yes I just ordered a new one!There is only 1 vent line out of the tank and that can be left gray. All other lines need to be replaced.
I hope you are replacing that fuel valve as there is a lot of corrosion on it.

dr00andrew
Well-Known Member
I have these parts installed on the carbs. And still cant get the pop off much further than low 20s, whats my next move?
https://www.ebay.com/itm/Genuine-Mi...e=STRK:MEBIDX:IT&_trksid=p2057872.m2749.l2649https://www.ebay.com/itm/SeaDoo-Mik...e=STRK:MEBIDX:IT&_trksid=p2057872.m2749.l2649https://www.ebay.com/itm/Genuine-Mi...e=STRK:MEBIDX:IT&_trksid=p2057872.m2749.l2649
https://www.ebay.com/itm/Genuine-Mi...e=STRK:MEBIDX:IT&_trksid=p2057872.m2749.l2649https://www.ebay.com/itm/SeaDoo-Mik...e=STRK:MEBIDX:IT&_trksid=p2057872.m2749.l2649https://www.ebay.com/itm/Genuine-Mi...e=STRK:MEBIDX:IT&_trksid=p2057872.m2749.l2649
arsenic
Member
Hello my friends,
A French traduction is alvailable here :
http://www.mediafire.com/file/9zjvly4m5s30n45/Carb_Rebuild_Seadoo_Fran%C3%A7ais_FR.pdf/file
Thanks to Mikidymac for this tutorial !
A French traduction is alvailable here :
http://www.mediafire.com/file/9zjvly4m5s30n45/Carb_Rebuild_Seadoo_Fran%C3%A7ais_FR.pdf/file
Thanks to Mikidymac for this tutorial !
It could be the needle and seats as those are aftermarket and not Genuine Mikuni.I have these parts installed on the carbs. And still cant get the pop off much further than low 20s, whats my next move?
https://www.ebay.com/itm/Genuine-Mi...e=STRK:MEBIDX:IT&_trksid=p2057872.m2749.l2649https://www.ebay.com/itm/SeaDoo-Mik...e=STRK:MEBIDX:IT&_trksid=p2057872.m2749.l2649https://www.ebay.com/itm/Genuine-Mi...e=STRK:MEBIDX:IT&_trksid=p2057872.m2749.l2649
ronn!e
Active Member
Good morning and happy Labor Day weekend.You don't need to replace the vent lines or the little accelerator pump lines if your ski has an accelerator pump.
I did my rebuild as well as new fuel lines.
I did a start up and machine running at like full throttle? Only will reduce if I pull choke?
Not sure why I did follow all the correct steps.
noviceskier
Active Member
air leak somewhere probably, did you install new carb base gaskets? whats the idle screw set too, etc etc.Good morning and happy Labor Day weekend.
I did my rebuild as well as new fuel lines.
I did a start up and machine running at like full throttle? Only will reduce if I pull choke?
Not sure why I did follow all the correct steps.
Good morning and happy Labor Day weekend.
I did my rebuild as well as new fuel lines.
I did a start up and machine running at like full throttle? Only will reduce if I pull choke?
Not sure why I did follow all the correct steps.
Either air leaks from carb base gaskets or the throttle or oil cables are too tight.
ronn!e
Active Member
I don’t believe cables are tight.Either air leaks from carb base gaskets or the throttle or oil cables are too tight.
How do I test air leakage?
noviceskier
Active Member
carb base gaskets? fuel selector valve? some of the more common places.I don’t believe cables are tight.
How do I test air leakage?
k_dog345
Member
And inside is just an o-ring seal and another filter that on this ski was plugged also.View attachment 34561
Now on to the cleaning....
I like to get all the parts laid out and ready to go and throw away all the old parts that will not be reused.
View attachment 34587
This is what I threw away but be aware if you use the OSD kit you will need to reuse the spring arm, large o-ring and shaped o-ring, the rest can go in the round bin.
View attachment 34588
For the rust on this one I used a pick and a small brass wire brush and just take your time and scrub and use the brake cleaner. I didn't take a lot of pictures of this but make sure all parts are clean and blown out with air. The rusted screws and retaining plates were cleaned with the brass wire brush.
View attachment 34589
Notice the gloves now? The brake parts cleaner is very harsh on skin.
Here you can see the main jet was plugged, if the brake cleaner will not get it clean pluck a wire from your wire brush and use it to get it clear then more brake cleaner. DO NOT use a drill, welding torch cleaner or file or you will change the flow of the jet.
View attachment 34590
Nice and clean.
View attachment 34591
You can see the pilot is plugged too. This ski would have never run like this.
View attachment 34592
And clean too.
Next is one of the most important parts of cleaning the carb. In the pilot circuit there are three small hols and one large hole that meter fuel into the carb at idle and just off idle and it is typically the three small ones that get plugged. This will cause a poor idle and a stumble or hesitation off idle when you start getting into the throttle.
View attachment 34593
This is looking into the carb from the bottom with the butterfly held open.
View attachment 34598
Here you can see the cleaner starting to flow out of the large hole at the 10:00 position and a small stream out of the three small holes at the 11:00 position just below the "8" stamping. IF you don't get any flow put the low speed adjuster screw back in about 1 full turn once the threads catch.
View attachment 34595
Now we have a good strong flow out of all four holes. Now remove the low speed screw and blow everything out with air.
Where are you spraying into to check? Is the high speed screw supposed to be in at this point?
Similar threads
- Replies
- 10
- Views
- 678
- Replies
- 4
- Views
- 106
- Replies
- 14
- Views
- 80