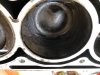
Do I need to use a crank locking tool to take the head off
Cant I just put the motor on Cylinder No 1 on TDC compression stroke and then use the cam locking tool
The only place I can get a crank locking tool is from the other side of Australia which will take over a week to receive
Once I take the head off I will need to turn the motor over to check the bores so the motor will get moved anyway
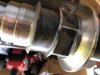
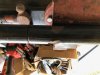
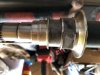
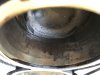
I have attached photos off the drive shaft that was in the 2009 wake jet ski with this motor
The floating ring looks like it has to unscrew?
It cant push back like the manual says because the plastic cover stops it
This is very different to the one in the manual both 2008 and 2015 and all the videos on you tube
Even the new shaft don't show the drive shaft with a plastic cover
Do you think this has been running out of line because of the damage to the cover or is that normal
Cant I just put the motor on Cylinder No 1 on TDC compression stroke and then use the cam locking tool
The only place I can get a crank locking tool is from the other side of Australia which will take over a week to receive
Once I take the head off I will need to turn the motor over to check the bores so the motor will get moved anyway
I have attached photos off the drive shaft that was in the 2009 wake jet ski with this motor
The floating ring looks like it has to unscrew?
It cant push back like the manual says because the plastic cover stops it
This is very different to the one in the manual both 2008 and 2015 and all the videos on you tube
Even the new shaft don't show the drive shaft with a plastic cover
Do you think this has been running out of line because of the damage to the cover or is that normal