


-
This site contains eBay affiliate links for which Sea-Doo Forum may be compensated.
You are using an out of date browser. It may not display this or other websites correctly.
You should upgrade or use an alternative browser.
You should upgrade or use an alternative browser.
RESTO 96 xp stock restoration
- Thread starter Jetskigoodies
- Start date
- Status
- Not open for further replies.
Jetskigoodies
Well-Known Member
I ordered the complete set from 5 different places. Had to piece the set together. They were not cheap. However pwcgraphics.com has a replica set for I think $200. That is the site that is reproducing these 96 graphics.
Jetskigoodies
Well-Known Member
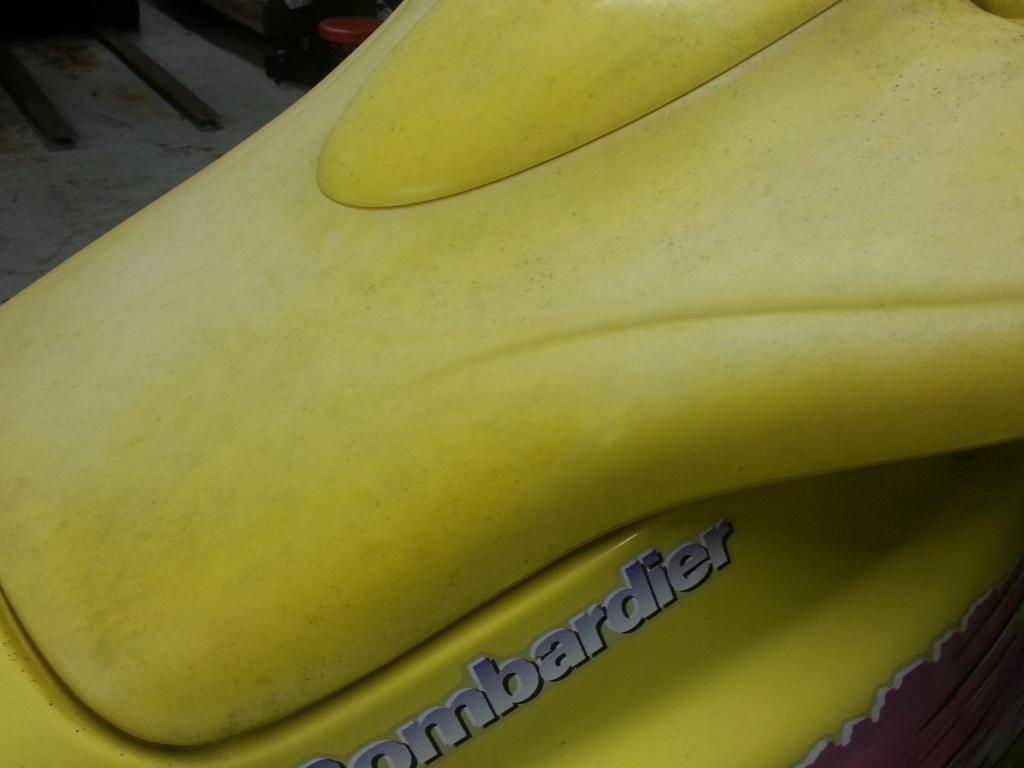
That was me. It's all over my ski.
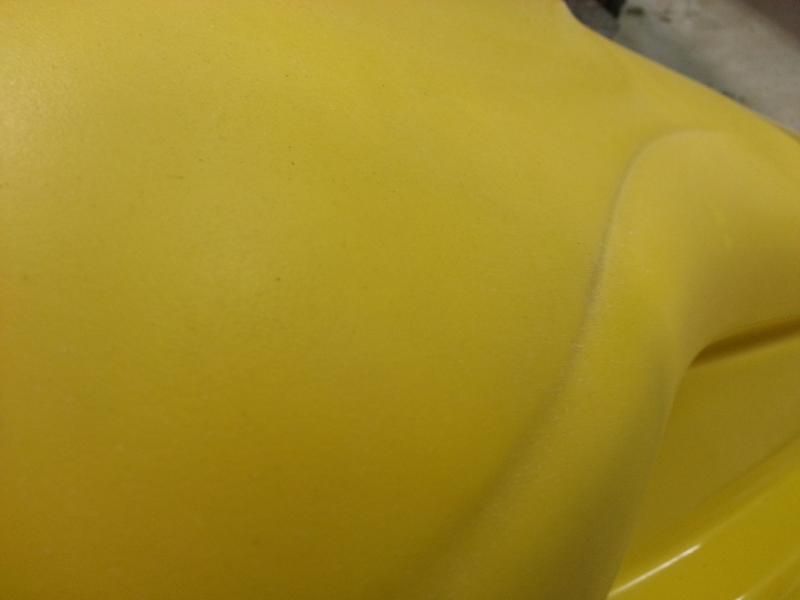
Same with this one. It is nice and shiny yellow though. This is the first time I came across this.
Last edited by a moderator:
Jetskigoodies
Well-Known Member
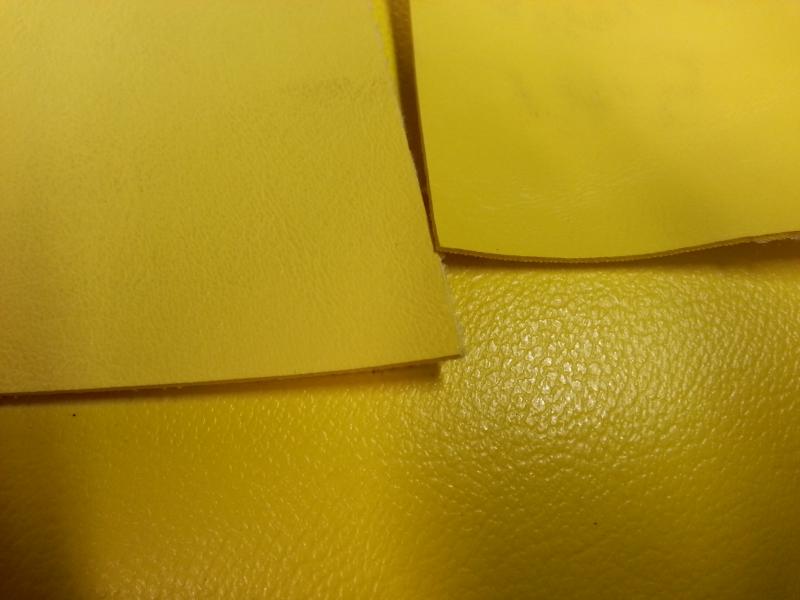
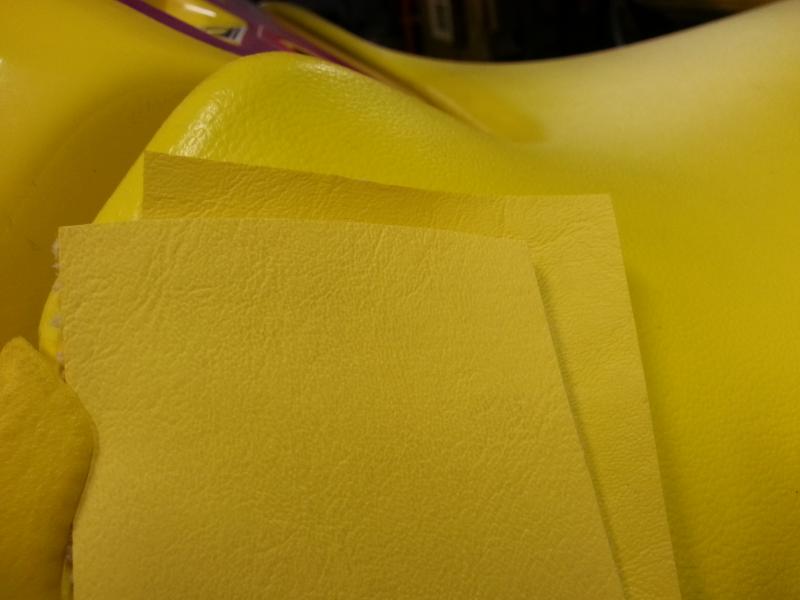
We received some vinyl color samples today. We found one that is close in color but the grain is off. I have a few more coming though. I will post what one we find is the closest.
Jetskigoodies
Well-Known Member
Got a few things done on this tonight.
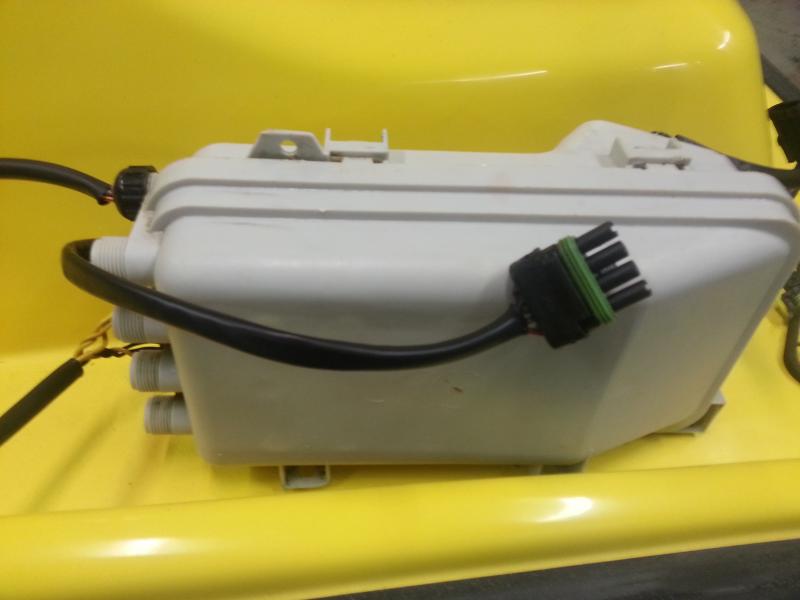
First cleaned the ebox. It was filthy but forgot to take a before pic. Here it is after it was degreased and wiped
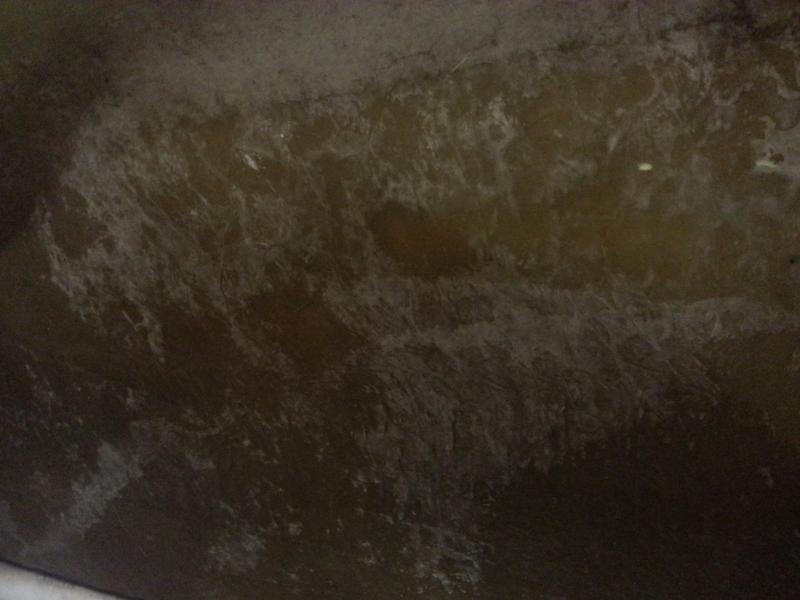
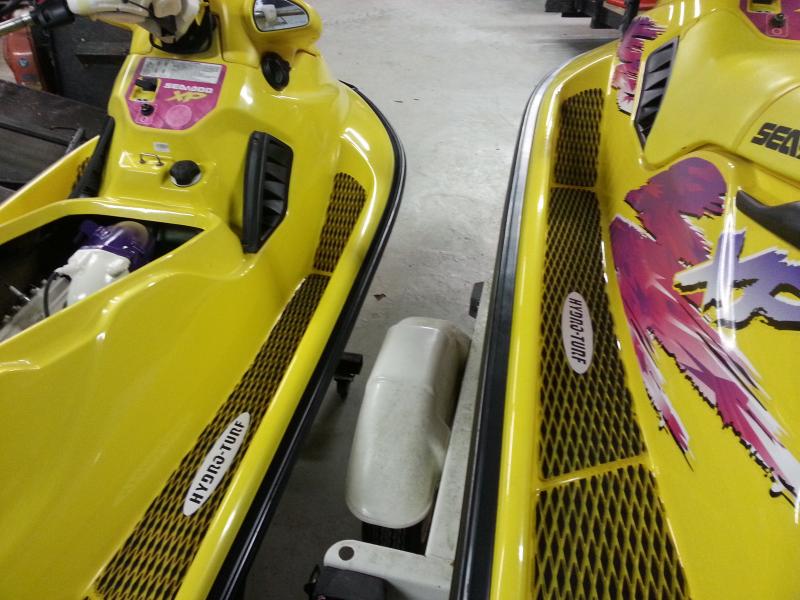
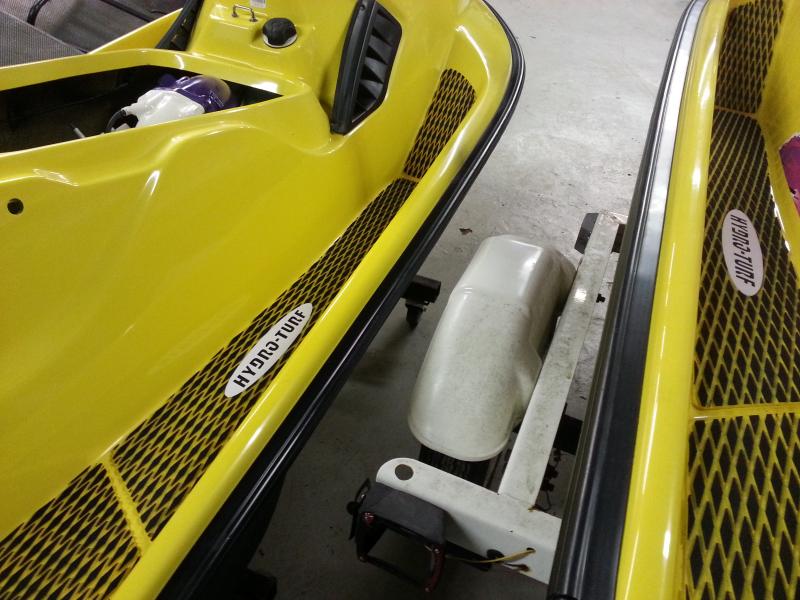
I also noticed the inside of the hulls fiberglass was chalky looking so I wiped it down but as soon as it dried the hazy chalky film was still there.
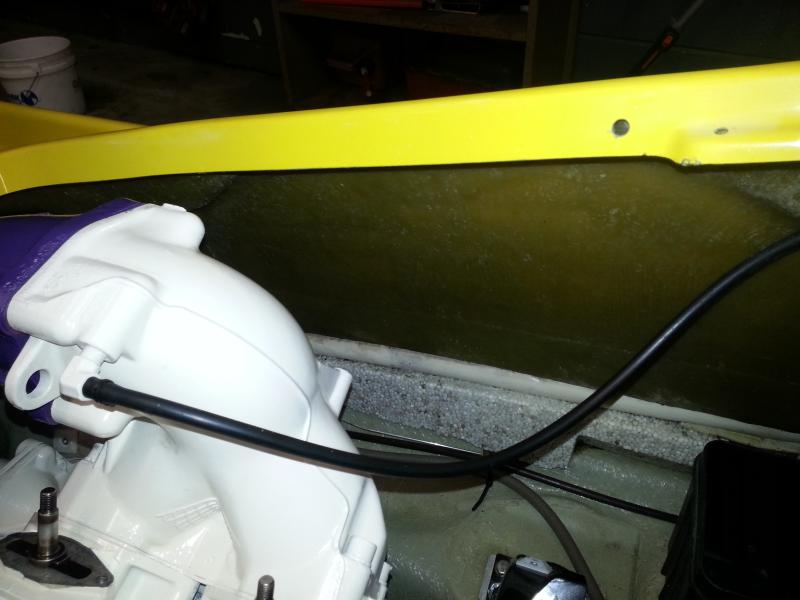
So I took a scotchbrite pad and some 3m superduty compound (which we just tried recently) and scrubbed the area.
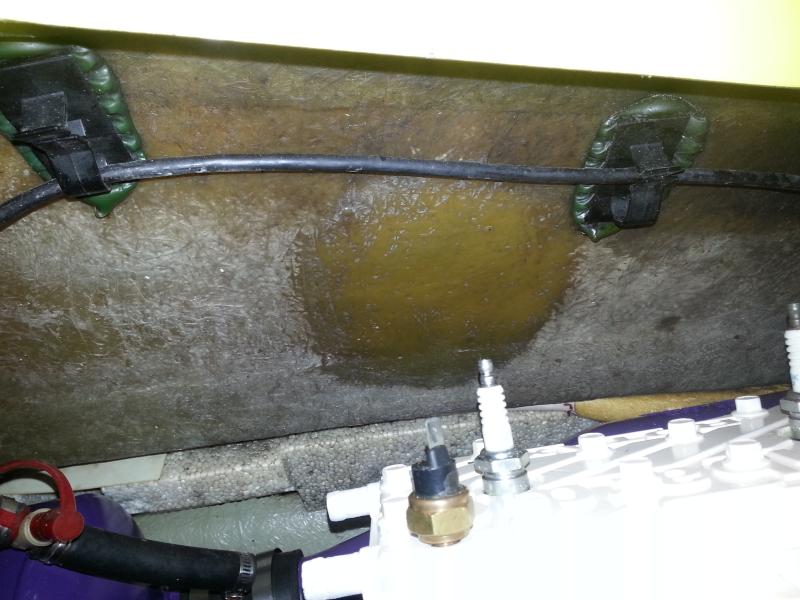

We still need to work on it a little more but the hazing is gone.
We also got a few samples of yellow vinyl in, the grain is not right and the colors are off too. I have a few more samples that are on the way though.
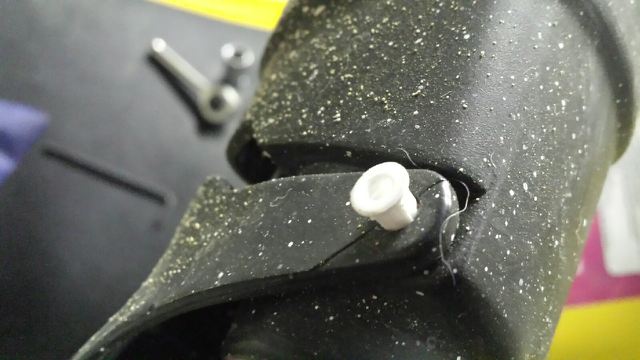
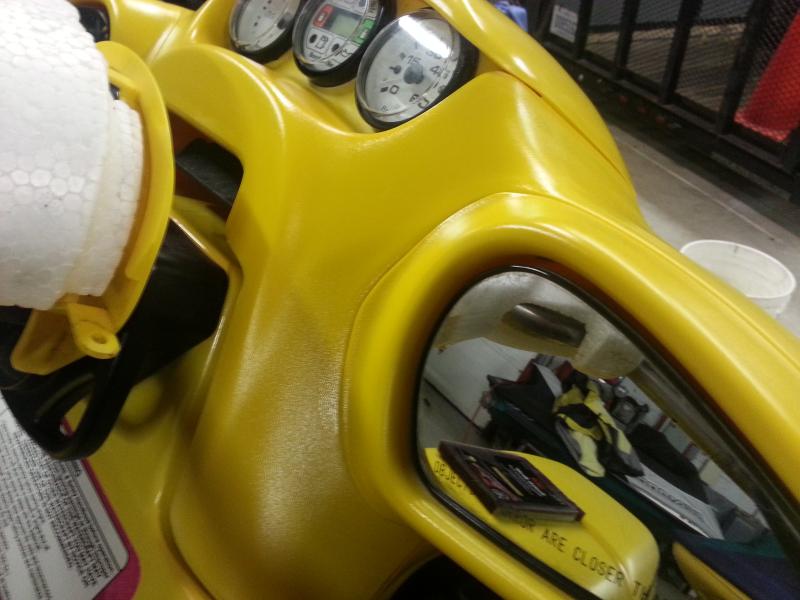
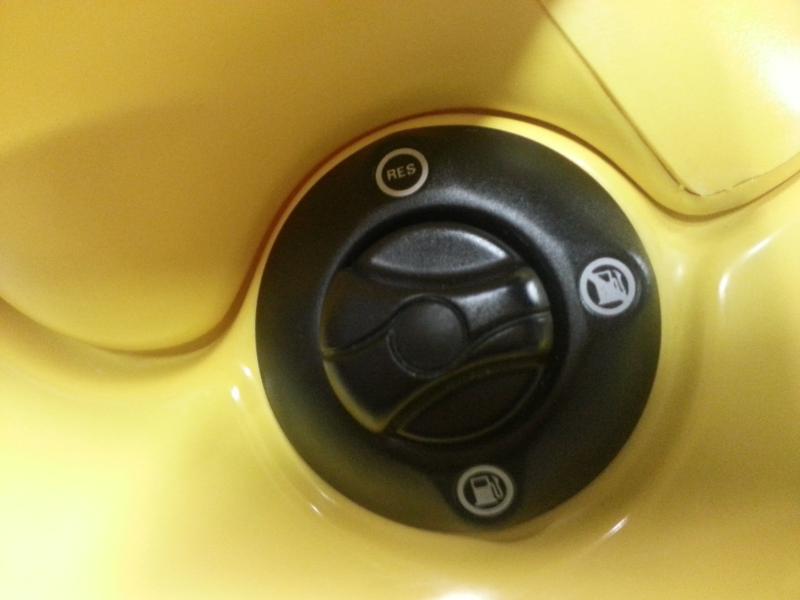
We also replaced the broken mirror. There was silicone over the cracked mirror
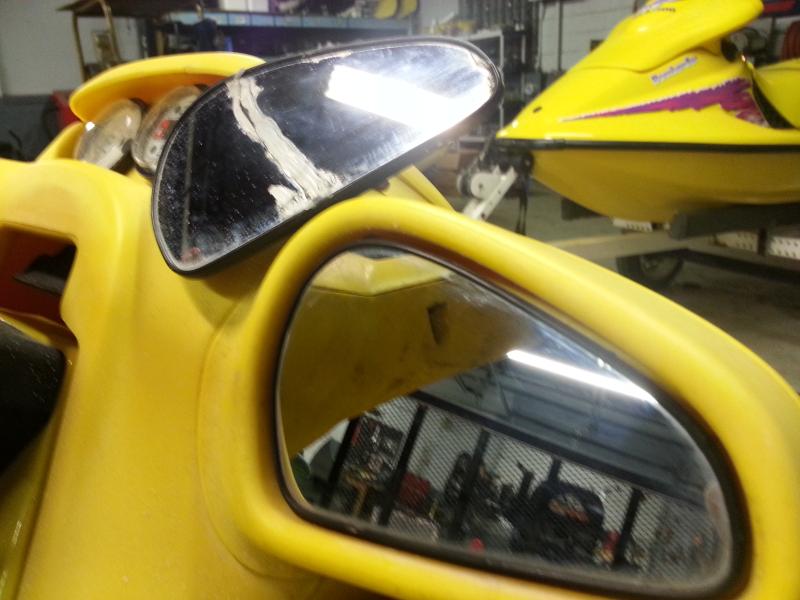

Also just a side note to anyone that needs to replace a mirror. It is very easy and the hood does not need to come off or be split. All you have to do is take off the access cover under the hood. Then reach your arm up into the mirror area. There is a wing nut. Unscrew that and the wing nut and a spring will come off. Then just pull the mirror out. Very simple.
First cleaned the ebox. It was filthy but forgot to take a before pic. Here it is after it was degreased and wiped
I also noticed the inside of the hulls fiberglass was chalky looking so I wiped it down but as soon as it dried the hazy chalky film was still there.
So I took a scotchbrite pad and some 3m superduty compound (which we just tried recently) and scrubbed the area.
We still need to work on it a little more but the hazing is gone.
We also got a few samples of yellow vinyl in, the grain is not right and the colors are off too. I have a few more samples that are on the way though.
We also replaced the broken mirror. There was silicone over the cracked mirror
Also just a side note to anyone that needs to replace a mirror. It is very easy and the hood does not need to come off or be split. All you have to do is take off the access cover under the hood. Then reach your arm up into the mirror area. There is a wing nut. Unscrew that and the wing nut and a spring will come off. Then just pull the mirror out. Very simple.
Last edited by a moderator:
Jetskigoodies
Well-Known Member
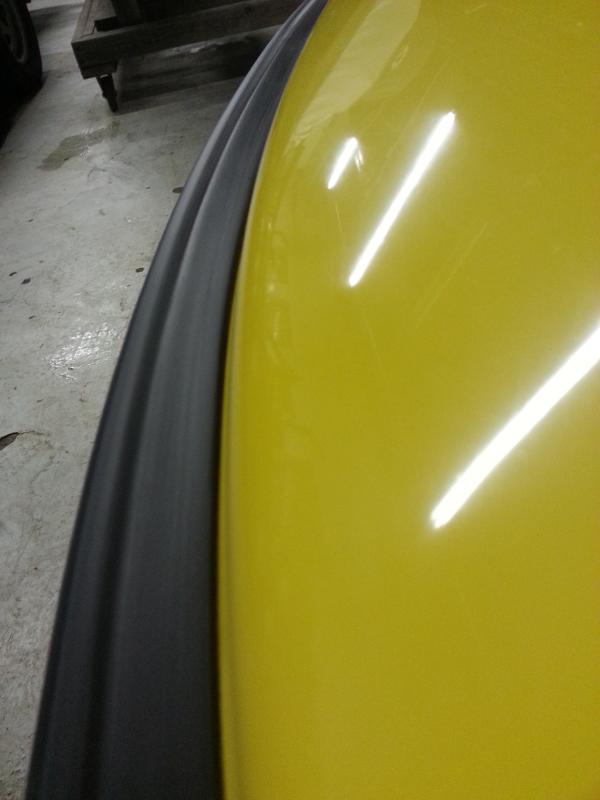
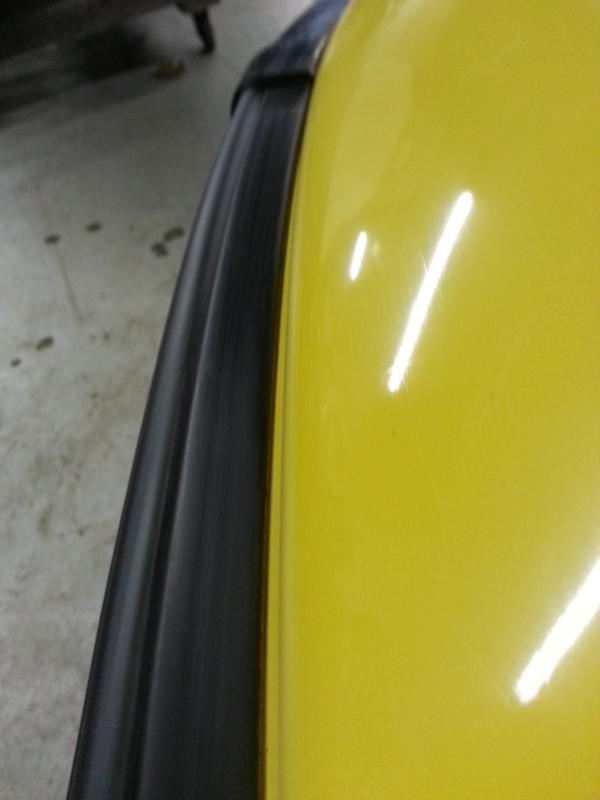
So today we went back at it. I did the final buff with swirl remover. After that I started to clean all of the trim. I used acetone, I know racerxxx used laquer thinner and it cleaned it up nice. I did not have any but had strip kleen acetone. We tried that and it worked great.

Jetskigoodies
Well-Known Member
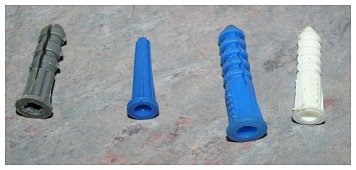
We also are replacing the thumb throttle. Can anyone guess what he used as a quick fix?

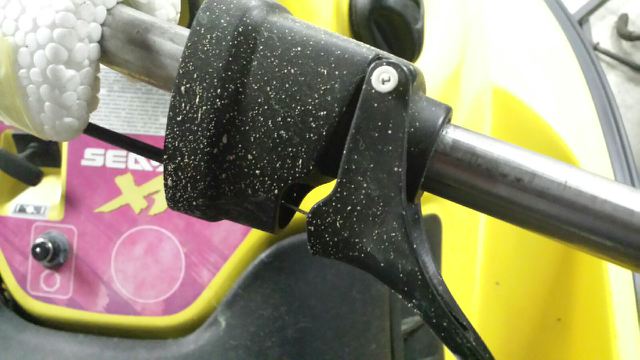
We are also replacing the grips. I would say they are toast
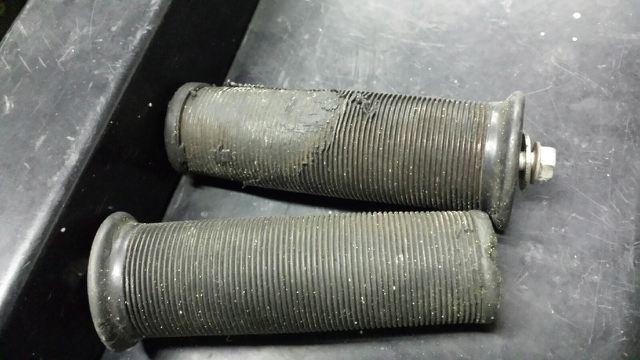
We are also replacing the grips. I would say they are toast
Bonmotwang
Well-Known Member
That is amazing cleaning. Did you buffed the exhaust pipe too? They are so white! I was cleaning the pipe on my 97spx, but the yellowish spots are still there. What is your trick? Can't wait to try.
Sent from my iPhone 6 using Tapatalk
Sent from my iPhone 6 using Tapatalk
brian0516
New Member
You are committed jetskigoodies. 3:45 am?We also are replacing the thumb throttle. Can anyone guess what he used as a quick fix?
We are also replacing the grips. I would say they are toast
Haha I think you nailed it.
JSG I like the clean up on the inside of the hull. I've seen that many times and now I will think "you can do something about that" when I see it. I also like the acetone rub rail trick. I've only been using it for prep.
JSG I like the clean up on the inside of the hull. I've seen that many times and now I will think "you can do something about that" when I see it. I also like the acetone rub rail trick. I've only been using it for prep.
Jetskigoodies
Well-Known Member
You nailed it. It was a wall anchor lol. I was going to mix up some fiber glass resin and coat the inside. That would make it look brand new but I didn't want to get it on anything. Tonight the motor will be aligned. Mats will be going on. Hood will be coming off and be getting the...soft scrub....meguiars.....wipe new... treatment. Plus some other stuff.
Bonmotwang
Well-Known Member
You nailed it. It was a wall anchor lol. I was going to mix up some fiber glass resin and coat the inside. That would make it look brand new but I didn't want to get it on anything. Tonight the motor will be aligned. Mats will be going on. Hood will be coming off and be getting the...soft scrub....meguiars.....wipe new... treatment. Plus some other stuff.
Wow. New fibreglass layer for the inside? So the whole ski will be factory brand new. I have seen this on furniture restorations. But not a jet ski.
Sent from my iPhone 6 using Tapatalk
Jetskigoodies
Well-Known Member
Not a layer of fiberglass. Just a coating of resin.
Jetskigoodies
Well-Known Member
I did not buff the exhaust. We painted the motor and exhaust.
Jetskigoodies
Well-Known Member
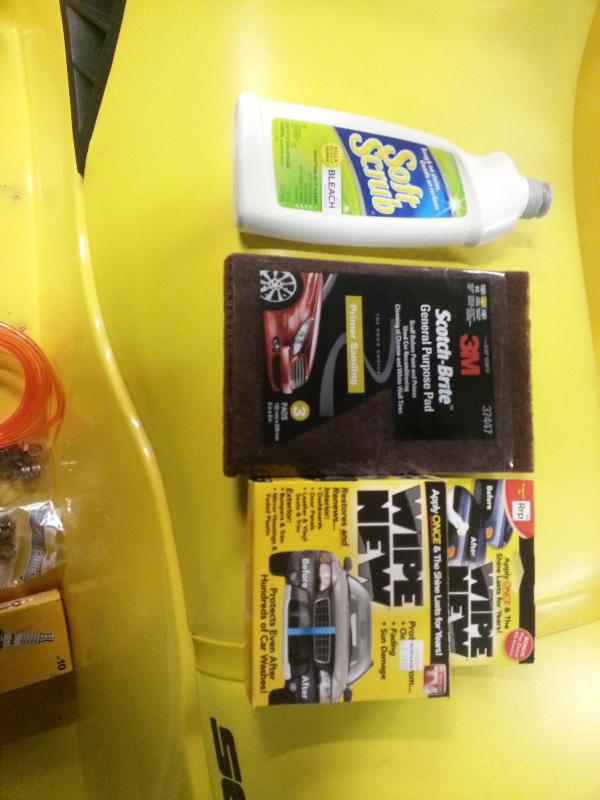
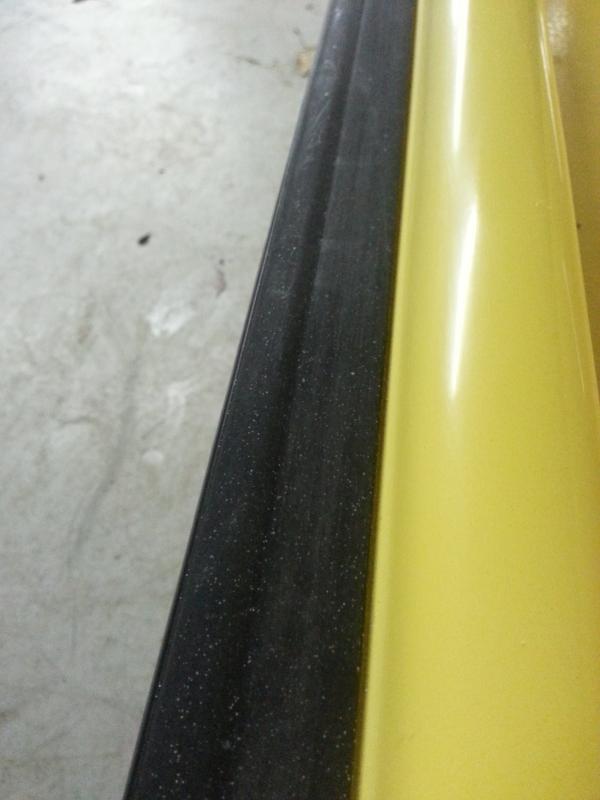
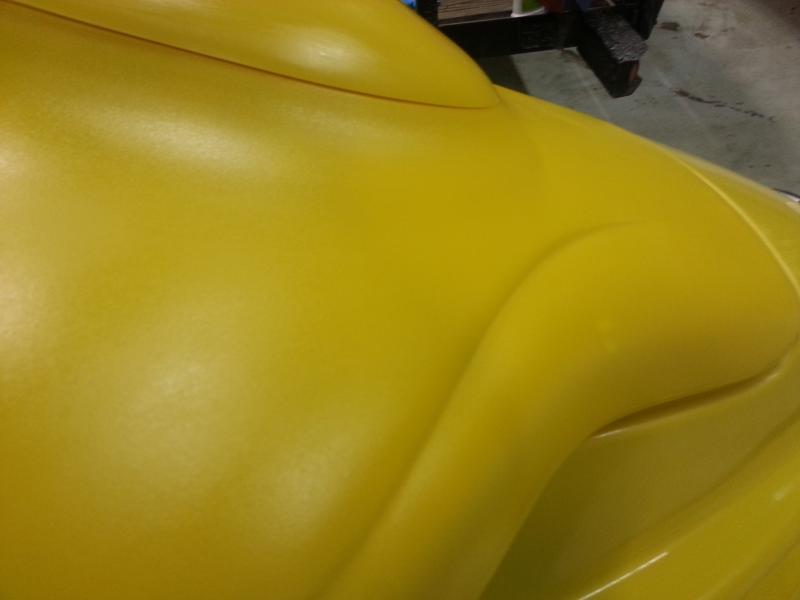
Tonight we cleaned the hood.
We used soft scrub with bleach, we scrubbed the hood with a red scotchbrite pad. We then rinsed the hood. I towel dried the hood and then took the air hose and blew out all the water from all the grooves. We let it dry and then used the wipe new.
We already cleaned it once before but it still had faded areas and alot of rubbing compound from buffing on it
Remember it started out like this

And this

We also used it on some of the other trim pieces

Last edited by a moderator:
Jetskigoodies
Well-Known Member
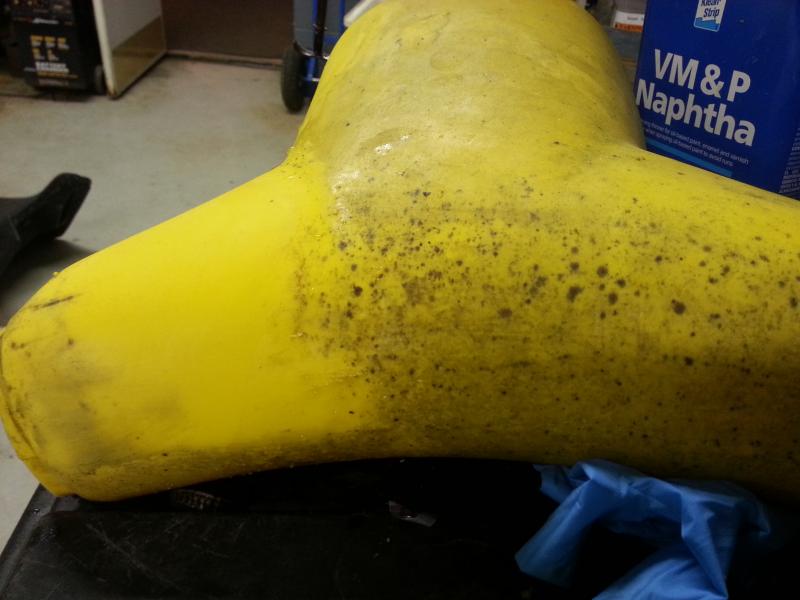
A little naptha action on the handlebar pad


still not done but it is coming along......
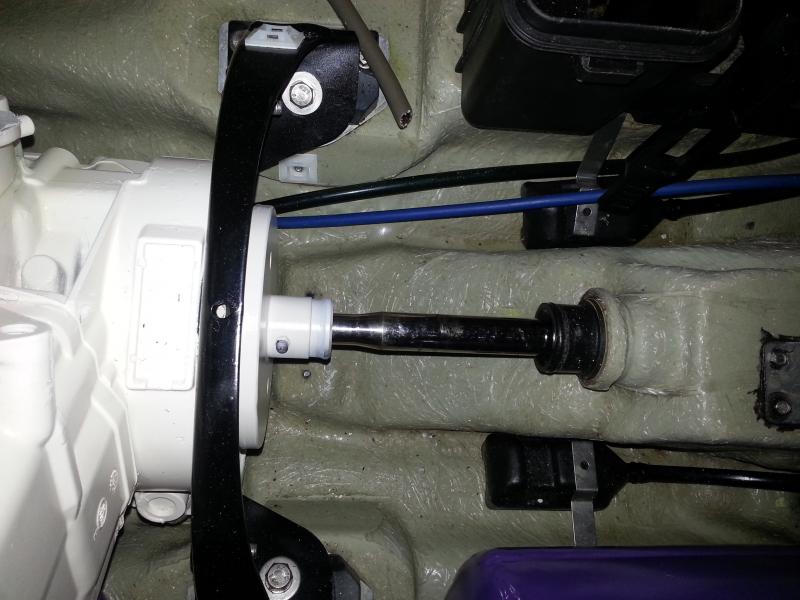
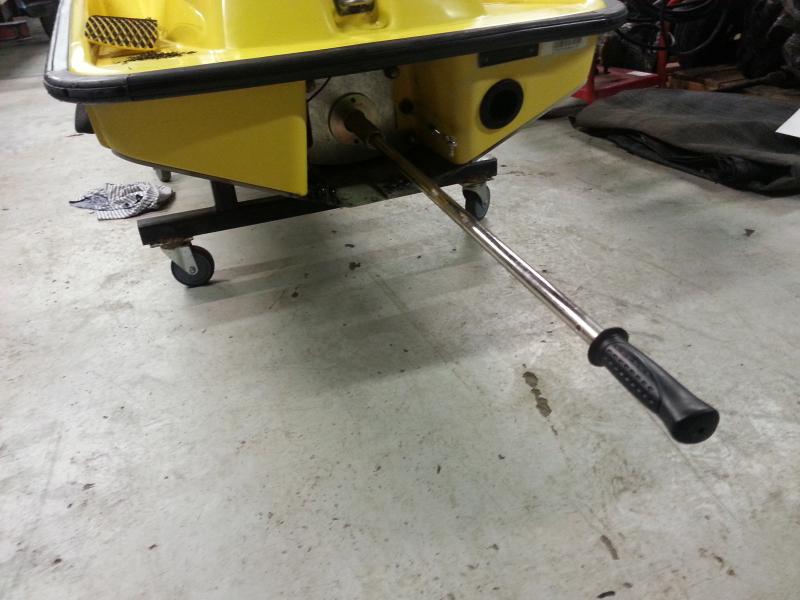
the motor was aligned
And put the mats on
still not done but it is coming along......
the motor was aligned
And put the mats on
Bonmotwang
Well-Known Member
Is Naphtha the camp oil? The cleaning result is great. Any steps after that or that is it.
This is my handle bar.

It is the only place needs to be cleaned on the exterior of my 97 SPX.
Sent from my iPhone 6 using Tapatalk
This is my handle bar.
It is the only place needs to be cleaned on the exterior of my 97 SPX.
Sent from my iPhone 6 using Tapatalk
Bonmotwang
Well-Known Member
Did you wax the hull. They look so shiny. Or just your camera LOL.
Sent from my iPhone 6 using Tapatalk
Sent from my iPhone 6 using Tapatalk
Yeah your way over the hump on this. Can't tell the cherry from the beater anymore if it were not for the decals. Fantastic work as always.
I have already bought the Wipe New but now I'm fired up about using it. I don't think you could ask for a better result.
I have already bought the Wipe New but now I'm fired up about using it. I don't think you could ask for a better result.
Jetskigoodies
Well-Known Member
Matt you are going to love the stuff. I was trying to find anything to use it on. I used it on the dess post ring, the vents, all the caps. I am pretty impressed with the stuff.
[MENTION=68537]Bonmotwang[/MENTION] read the whole thread and you will see where the shine comes from
[MENTION=68537]Bonmotwang[/MENTION] read the whole thread and you will see where the shine comes from
Last edited by a moderator:
Bonmotwang
Well-Known Member
Matt you are going to love the stuff. I was trying to find anything to use it on. I used it on the dess post ring, the vents, all the caps. I am pretty impressed with the stuff.
[MENTION=68537]Bonmotwang[/MENTION] read the whole thread and you will see where the shine comes from
Finished the home work. Again, very detailed workmanship. A+++.
I thought the surface of the hull is a layer of clear coating. But according to work you have done, it has some thickness to be sand down a little?
What is the white foam on the handle bar? Is it what inside?
Sent from my iPhone 6 using Tapatalk
- Status
- Not open for further replies.
Similar threads
- Replies
- 27
- Views
- 581
- Replies
- 7
- Views
- 287
- Replies
- 6
- Views
- 828