RESTO 96 XP Resto Project: Clapped out

Note: This site contains eBay affiliate links for which SeaDooForum.com may be compensated
Status
Not open for further replies.

racerxxx

Moderator
Moderator
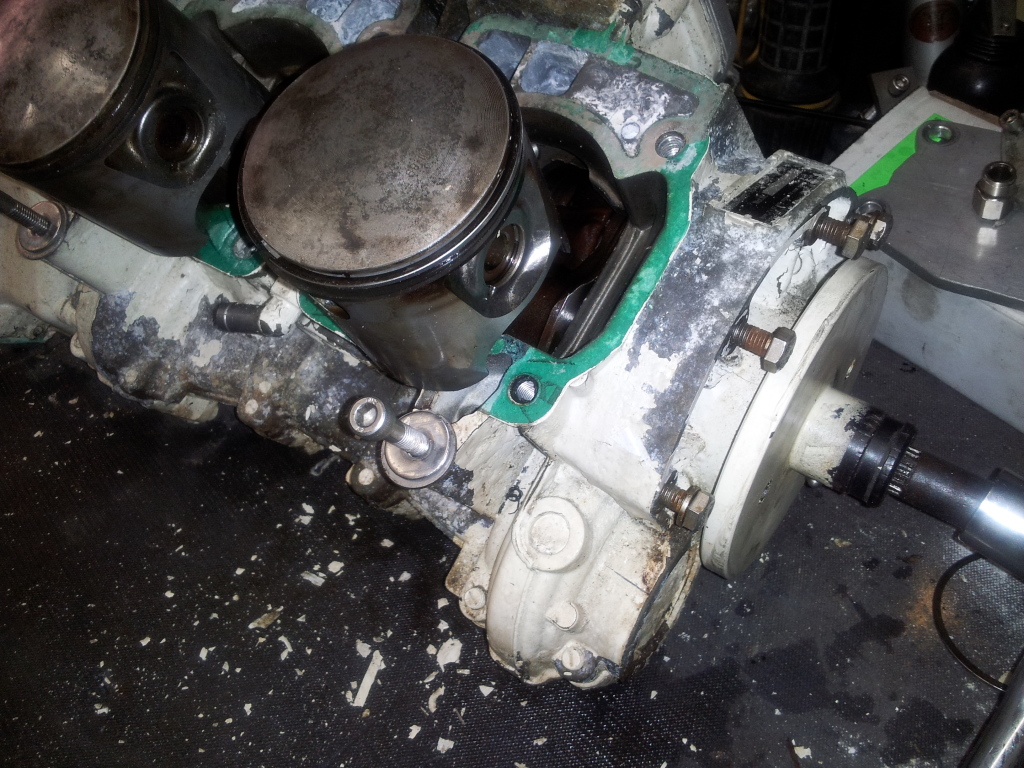
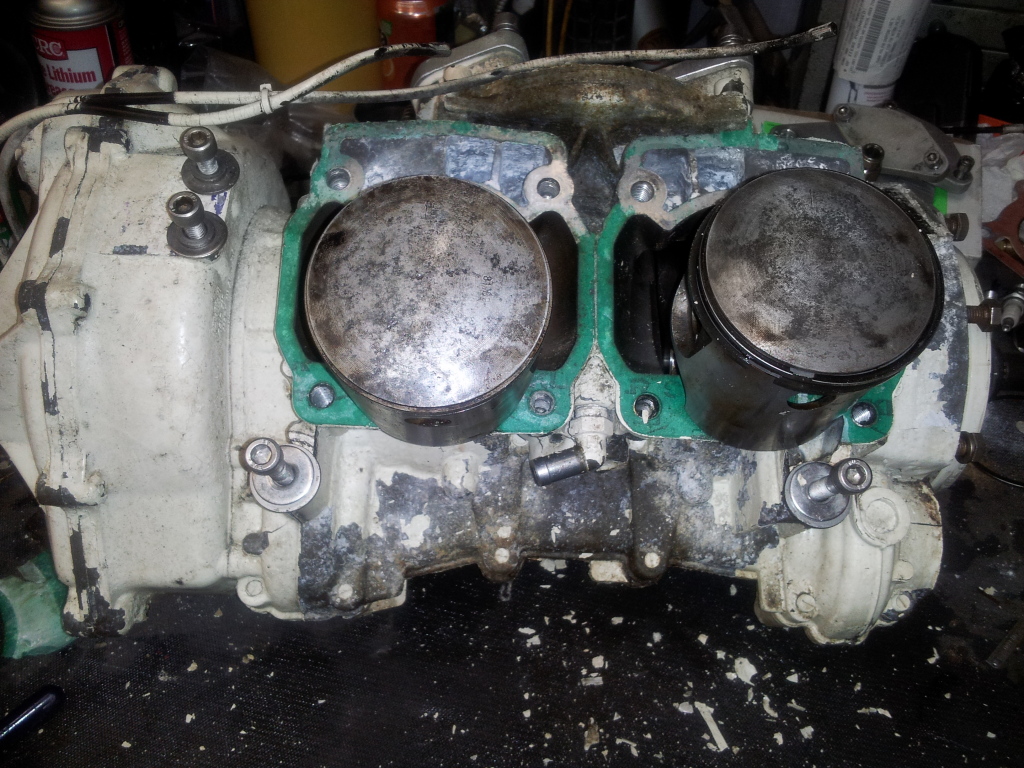
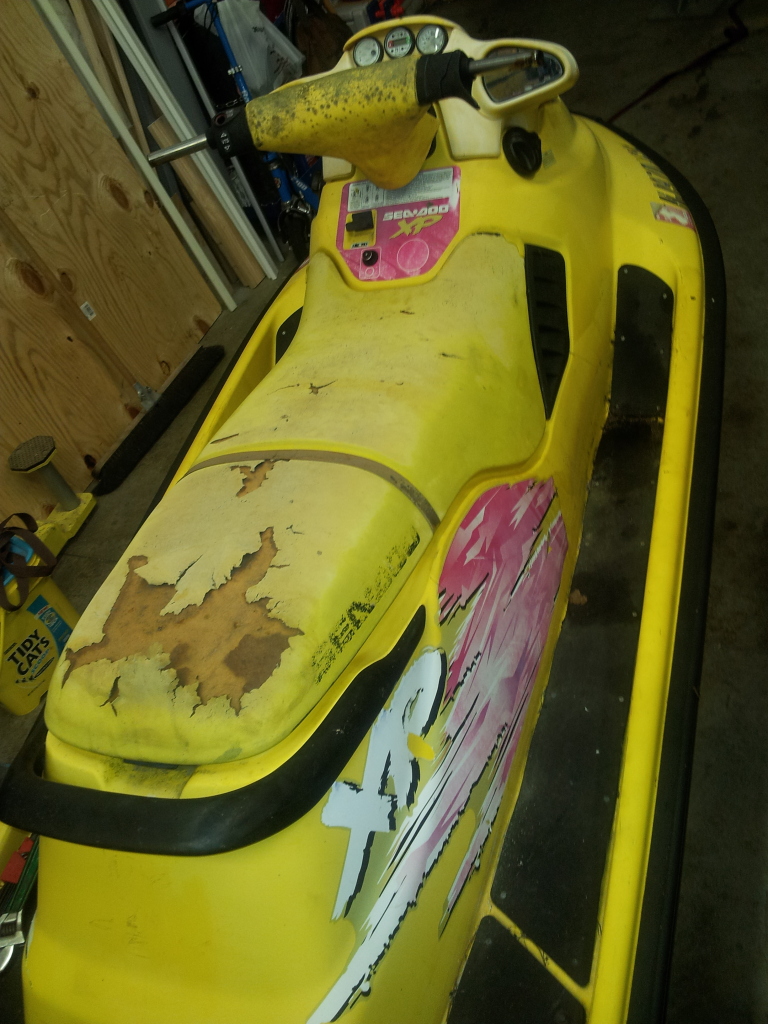
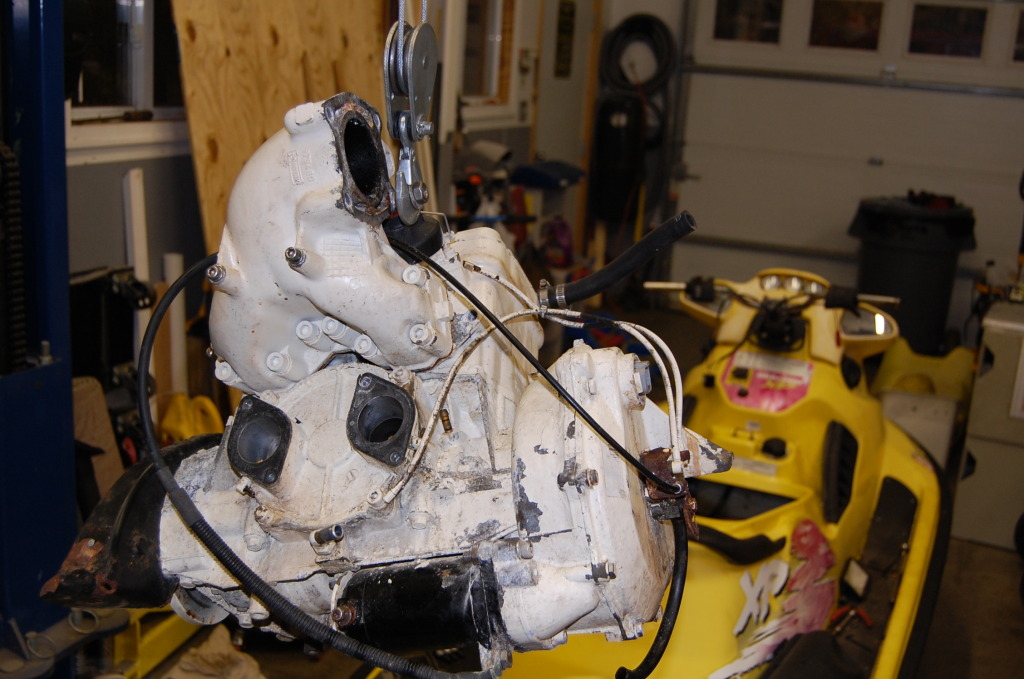
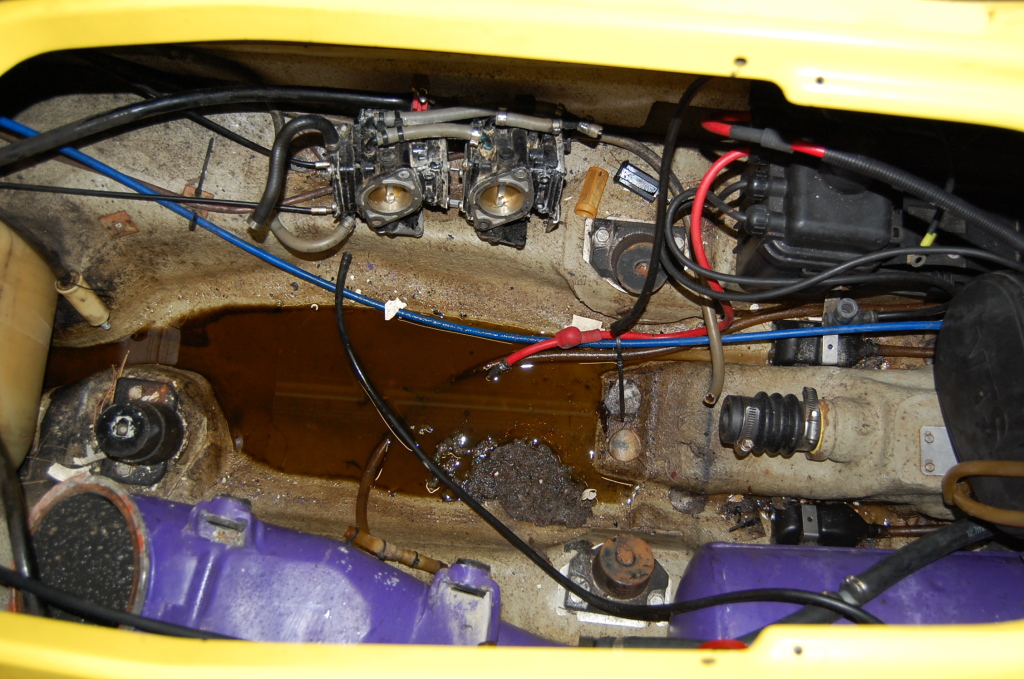
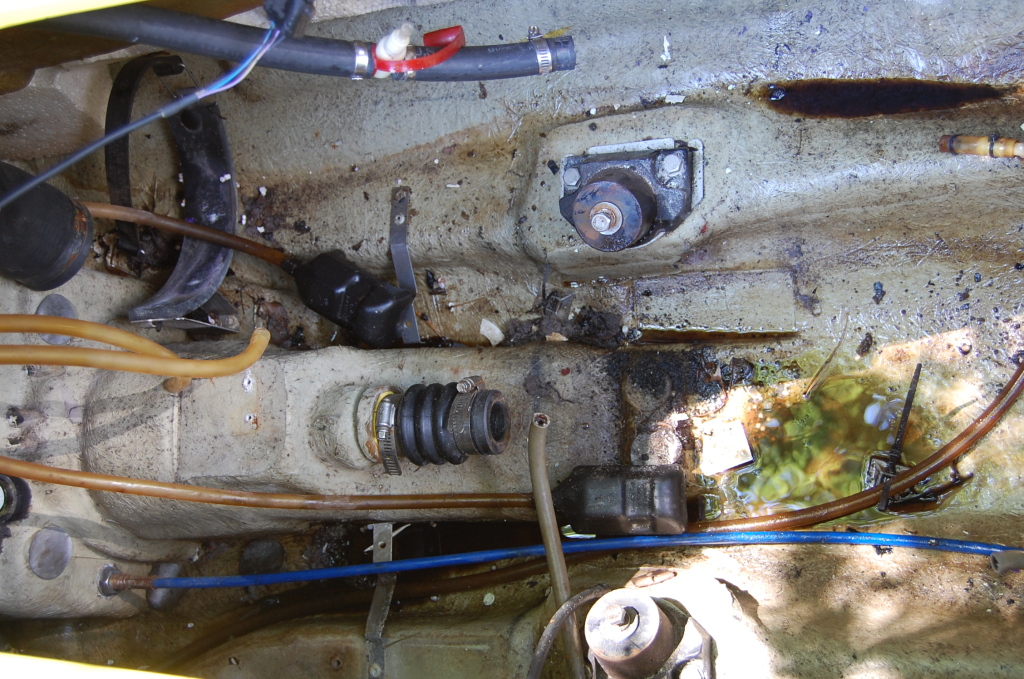
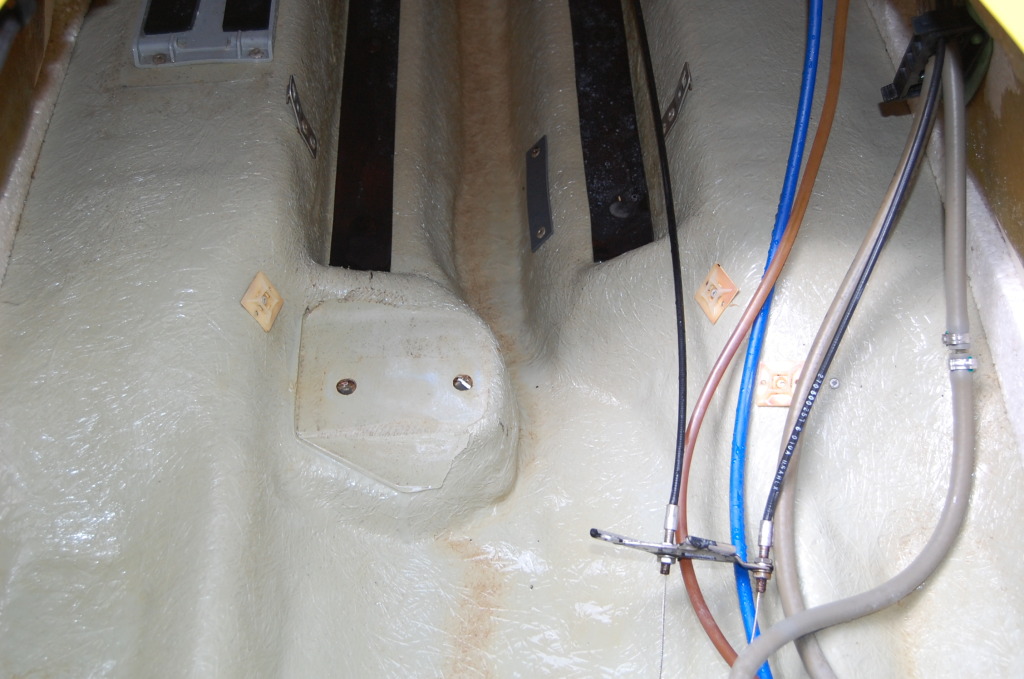
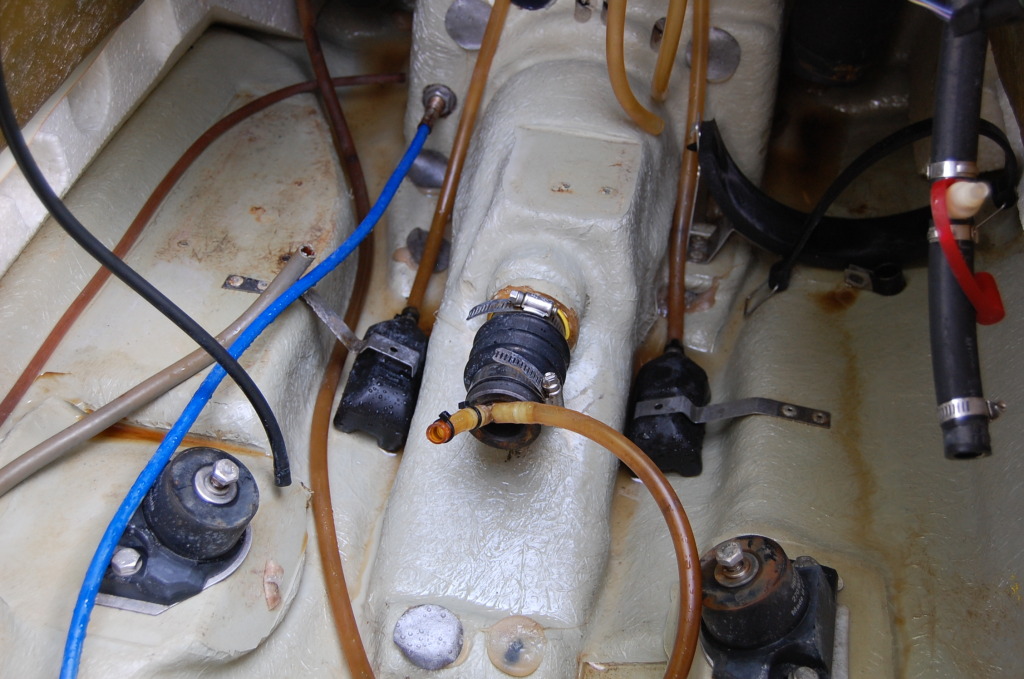
Alright, here it is, now that it is in my legal ownership(that was seedy at best) I can start the thread. I picked this XP up in the beginning of August, got nothing but a registration card, not in the sellers name, nor the seller to him, but the seller to him---did you get that one. But it all came back to me registered and titled in my name. It was tattered, well it was Clapped Out to say the least. It looks like it sat uncovered for who knows how long, engine looks like it spent time at the bottom of the ocean, it would barely turn over by hand. But hey, I was up for a project. So I got it home and tore into it to see just how bad it really is. Well, it's pretty sound just neglected. So, I yanked the engine, and stripped the hull internally. Then had at it with the Castrol Super Clean, the inside now looks like new. The project turned around at that point, next the outside of the hull. Stripped the graphics---that was tough for me to let go of. I think I may be the only one who actually likes them. I had new 96 XP's back in the day, they were the first NEW skis I bought. I'm also a bit of a purist when it comes to things original. So let the resto process begin. I'll post up as things progress.

230.jpg

231.jpg

232.jpg

233.jpg

234.jpg


235.jpg

236.jpg

237.jpg

238.jpg
 
Last edited by a moderator:
Now on to the inside of the hull. Down right nasty, full of oil and other liquids. But almost a gallon of Super clean and she's like new again!


Before shots
239.jpg

240.jpg

241.jpg

242.jpg

243.jpg

244.jpg

245.jpg


After Shots
246.jpg

247.jpg

248.jpg

249.jpg

250.jpg

251.jpg
 
Yep, that's it. Oh, and a plastic bristled brush. Spray it on, and on, and on. And not until it looks real clean do you wash it out with water.
 
Engine tear down

Very sad looking for sure. Everything will be new using OEM parts only. Reman BRP Crank, Pistons, Rave Valves, Rave housings, Rotary valve, Seals and gaskets. Added the oil fill and drain. What's so amazing is the bores were flawless, so I measured them and they are in spec and still had the hatch marks, so they just got the dingle-berry hone ran through them. All the engine parts got bead blasted to raw aluminum. The Magneto and stator, SMOKED. Scored some good used one that are like new. Crusty Flywheel, all fixed. I used Evapo-Rust, dunked it in for a few days and it eats the rust, then I bead blasted it, then painted it. About a cup of corrosion came out of the starter hole-nasty. Broke almost every screw on the MAG cover and three days of constant spraying it to penetrate the crud. It has been a ton of work to get to this point, but the pay off will be awesome.

253.jpg

254.jpg

255.jpg


Crusty flywheel and Magneto
256.jpg

257.jpg


After the Evaop-Rust treatment
258.jpg


Here's a half dip so you can see how well it works--no, I'm not using that mag, you can see the new one.
259.jpg

260.jpg
 
quite a project, nice work so far...

still laffing at the dingle berry hone, I call it that too and got a kick out of it :)
 
Assembly time!

Threebond 1211 to seal the cases up. And Loctite 515 on the threads and a little Dow Corning 111 synthetic grease under the heads of the screws.

268.jpg

269.jpg

270.jpg

271.jpg


Coming back together
272.jpg

273.jpg

274.jpg


Now to the pistons
275.jpg

276.jpg

277.jpg

278.jpg
 
There was a lot of broken bolts through the process, from head bolts to exhaust bolts, but all taken care of with the milling machine, then a broken drill in one of the cylinders. Had that EDM'd out--there have been many set backs along the road.

Almost whole again!! I can hear the BRAPPP

279.jpg

280.jpg

281.jpg


Then the unthinkable--some how I got silicone all over the engine and the paint was running away from itself. Fish-eye city. What to do???? Yeah, why not-block everything off and toss it back in the bead blaster. You read that correct, back in the blaster, COMPLETE!

282.jpg

283.jpg


Almost painted--just a few more coats. Until the next post! Gotta find some other pics.
284.jpg
 
Subscribed! Did you machine those blockoff plates for the raves and exhaust? You are doing some great work for sure

Thanks for the compliment, I always try to do a solid job.

Quick and dirty--Saw cut on the bandsaw then dressed on the belt sander. Here's the pressure tester I made. All done on the band saw and drill press just used a gasket as a template.


212.jpg
 
jeez those look like a factory part. I wanted to make some of those to pressure test my engine, but didnt have the tools to do it so im just riding as is :). 20 years from now you will still be ripping it up on a 36 year old jet ski, and having more fun than all those people on their hovercrafts lol
 
very nice. like the idea of those plates, officially stealing it :)

Steal it, I did, it's in the service manual. The way I look at it is, if you don't pressure test it your playing Russian Roulette. Chances are your good to go. But I paid good money to have the one engine in my Speedster rebuilt because it burned the MAG piston. So off goes $1,300's for a guy to do it, at a dealer that I know the dude. 6 hours later-DONE same cylinder. Paid another guy 2G's for the same job but was told I needed cases and a crank too. 6 hours later-DONE same piston. No fault warranty all fixed up. 5 hours later-DONE. Now I'm DONE, and out $3,300, I can do the work, I have the skills, know how, and the machine shop, money was easy to come buy at the time. Found out, I got my same cases back, and my original crank--Oh yeah I was twisted and cut my loss. Sent my cylinders out to Perry Performance Group, first oversize with OEM pistons, OEM reman crank, rebuild CB shaft, new raves and housings. Built the engine myself---damn thing wouldn't hold pressure. Can you guess where the leak was??? MAG CYLINDER but between the main cases, No one pressure tested it the last three times I'll bet!!!!!!!!!!!!!!! Now, I trust NO ONE but myself, that is the main reason I'll never buy a reman engine from anyone nor recommend one---I want to see and know EXACTLY what is going into it. Using the recommended Loctite 518 on the case halves wouldn't work to seal it, so I called Group K and asked them what they use to seal the case halves, Threebond 1211--and was told to not use the Loctite. So tear it down, 1211 it, build it, pressure test it held 5 PSI for 6 hours. 4 years later that engine is still bangin' and hasn't skipped a beat. Sorry for the rant.
 
I want to buy those plates you made and your old pistons. I love the job your doing on the ski....now that's a keeper(now).
 
Nope, on the 787 your supposed to use the manifold. The 720 and smaller engines your supposed to use a plate. I think the manifold would be fine on all of the engines.

Sent from my SGH-T989 using Tapatalk 2
 
Last edited by a moderator:
just for future reference..........if you wanna save alot of elbow grease...........take your ski to the car wash with no seat on and no front bin........and just use tire/engine cleaner setting an powerwash the insides.......so easy , so sparkly clean........then you just unhitch it and dump it all out the back holes and down the drain in the carwash lol.
 
just for future reference..........if you wanna save alot of elbow grease...........take your ski to the car wash with no seat on and no front bin........and just use tire/engine cleaner setting an powerwash the insides.......so easy , so sparkly clean........then you just unhitch it and dump it all out the back holes and down the drain in the carwash lol.

i'll have to try that, (the tire stuff) i have a dirty hull that needs love after I pull the engine, , but honestly i'm not confident you can get it all out in the 5 minutes allocated... I use a pressure washer, a squirt bottle of purple power or super clean, a toilet brush, and get the same results, parked on an incline with the plugs out but i put a LOT more water in than the plugs drain out,,, it takes a solid 45 minutes, including wet vac'ing out a few gallons of crud every few minutes. then squirt the cleanser and start over, suck out the crud with the vac, then repeat about 5 times.. if your relying on the two little drains to get all the crud out, your going to be disappointed..

after I do it all those times then i park it flat or nose down and do it again, so I get the last of the crud thats in the back by the drains to run forward so I can suck it up with the vac... it gets pretty nasty down there from the bailers back. (thats where the stank comes from)

but i could be wrong :) i've cleaned out about a dozen hulls just like he described above with same results, but never tried the car wash tire stuff.
 
Last edited by a moderator:
just for future reference..........if you wanna save alot of elbow grease...........take your ski to the car wash with no seat on and no front bin........and just use tire/engine cleaner setting an powerwash the insides.......so easy , so sparkly clean........then you just unhitch it and dump it all out the back holes and down the drain in the carwash lol.

No need for the car wash, I have a 3000 psi pressure washer, I thought about it but don't want to jack up the glass. That project was about an hour job and cost me $8.00. And the 96's have one stinking drain, and it all went out that little drain, no shop vac. Glutton for punishment I guess, every extra dime I spend going somewhere takes away from the end result, the car wash is a few gaskets worth of savings. Micro management!

Sent from my SGH-T989 using Tapatalk 2
 
Status
Not open for further replies.
Back
Top