I’m just spit balling but the sandpaper would add to the circumference of the old piston, it definitely wouldn’t be an exact measurement though. How much does the manual say to take of? .010?


-
This site contains eBay affiliate links for which Sea-Doo Forum may be compensated.
You are using an out of date browser. It may not display this or other websites correctly.
You should upgrade or use an alternative browser.
You should upgrade or use an alternative browser.
1996 Seadoo GTX 787 losing a cylinder? Cant find pressure leak!
- Thread starter Travisgg
- Start date
- Status
- Not open for further replies.
Wha size of piston are you putting in? Is it the first size over standard? If it is then you wouldn’t even need to shave the rave valve
Travisgg
Active Member
Yeah good point!I’m just spit balling but the sandpaper would add to the circumference of the old piston, it definitely wouldn’t be an exact measurement though. How much does the manual say to take of? .010?
I’m Looking forward to finding out the answer. I may keep looking in the meantime
Travisgg
Active Member
Post in thread 'How much to shave 951 RAVE Valves?' How much to shave 951 RAVE Valves?I’m just spit balling but the sandpaper would add to the circumference of the old piston, it definitely wouldn’t be an exact measurement though. How much does the manual say to take of? .010?
This guy seems accurate. Just wasn't sure again on the tip of the rave or the whole face.
Yes, that makes sense to me, I’m going to grab a pen and do the math, I know it’s simple math but I’m getting old.
Read a little further into the link you sent and Racerxxx did the math for you. .010 off to get to minimum clearance of .015 or .015” off valve to get factory clearance of .020. Now the question I have is how do you measure that? You have a caliper? I’m thinking since it’s not going to be an exact science anyways you don’t necessarily need a mitutoyo caliper, just a cheap caliper from canadian Tire would work, just take .018 off which is right in the middle and gives a little leeway in both directions?
Sorry .012 off for a little leeway
You have to read down a ways but I believe it’s Chester on this thread says you are only taking off of the point
Any chance you have a spare guillotine around, if it where me, I would want to try a test run first
It’s post number 12 by member ski-Doo
Boring out cylinders - 787cc
Not sure if you found this thread or not but Mechanix mentions using a straight edge and feeler gauges to measure the clearance. Anyways sorry for all the replies, you may have to re post your original question to get an answer from someone now, lol. Best of luck, I think you got this
Not sure if you found this thread or not but Mechanix mentions using a straight edge and feeler gauges to measure the clearance. Anyways sorry for all the replies, you may have to re post your original question to get an answer from someone now, lol. Best of luck, I think you got this
Don’t forget to chamfer the ports if it hasn’t already been done
Travisgg
Active Member
Nope this is good! Thank you!Boring out cylinders - 787cc
Not sure if you found this thread or not but Mechanix mentions using a straight edge and feeler gauges to measure the clearance. Anyways sorry for all the replies, you may have to re post your original question to get an answer from someone now, lol. Best of luck, I think you got this
Travisgg
Active Member
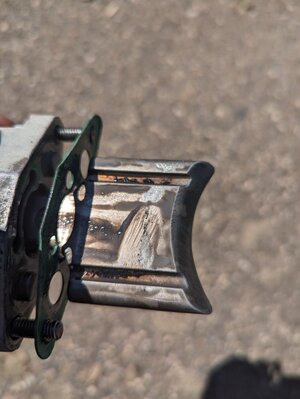
Heat cycle time  !!!! Noticed a little gray sludge on rave and side of piston after first cycle. Spark plug had it on there too. Seemed a little better/less second round. There was lots of lube and fogging oil in theirs and it's super humid today so maybe related? I'll keep monitoring with my inspection camera after each round... Just never really saw the gray film in my two stroke career. And not in the mood to rebuild again LOL. This is the rebuilt side with shaved rave
!!!! Noticed a little gray sludge on rave and side of piston after first cycle. Spark plug had it on there too. Seemed a little better/less second round. There was lots of lube and fogging oil in theirs and it's super humid today so maybe related? I'll keep monitoring with my inspection camera after each round... Just never really saw the gray film in my two stroke career. And not in the mood to rebuild again LOL. This is the rebuilt side with shaved raveAttachments
Hey Travis, how did you end up machining rave valves down? If you could post a couple pics and explanation of how you did it, I would sure appreciate it.Yeah seems to have cleared up after a good run. I was just being a wuss
Travisgg
Active Member
Yeah just used a round file and kept running it on the edges and measuring it. The metal is so soft it comes off real quick. I'll post a pic but yeah it was pretty easy. I think I would do that sandpaper on piston thing next time so it's a little more accurate... You sent me that link earlier to the guy who did it that way...Hey Travis, how did you end up machining rave valves down? If you could post a couple pics and explanation of how you did it, I would sure appreciate it.
Travisgg
Active Member
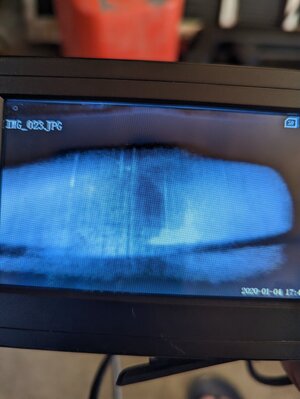
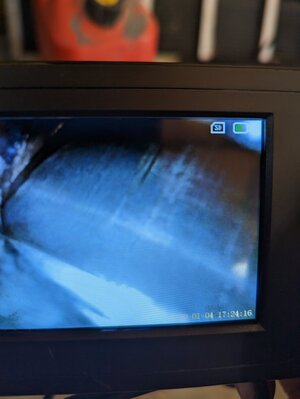
Well just looking through the Rave valve port now at the side of the piston... There's definitely some vertical lines (up and down) on the piston. I put a pointy screwdriver down the valve opening just so I could gently feel it but there isn't any depth to the lines(cant feel them) , but there's definitely lines. I got a picture with my inspection cameraYeah just used a round file and kept running it on the edges and measuring it. The metal is so soft it comes off real quick. I'll post a pic but yeah it was pretty easy. I think I would do that sandpaper on piston thing next time so it's a little more accurate... You sent me that link earlier to the guy who did it that way...
Ill get posted out here in a bit. The other Piston still looks flawless however it doesn't have that black coating on it that the new piston does. It's factory BRP piston.
Travisgg
Active Member
And I think I'm even at 0.060 shaved compared to an untouched rave.... Didn't mean to go that far but it comes off quick when you shave it. Shoot me! I'll try and get some HD pics here but you can get the idea from these ones. Probably looks worse in the picture but you can't feel them or anything they're just very visible.
Attachments

Last edited:
Thanks Travis, did you go strictly on measuring? Or Were you fitting the rave valve in and then turning the engine over to see if it would hit?
You ever here of using ammonia to clean the carbon off the valves? I guess put them in a sandwich bag wrapped in ammonia soaked rags or paper towel and the next morning wipe clean
Travisgg
Active Member
You ever here of using ammonia to clean the carbon off the valves? I guess put them in a sandwich bag wrapped in ammonia soaked rags or paper towel and the next morning wipe clean
I was just measuring as I already had the top buttoned up. I know I wish I would have visually inspected that when I had it apart. And as for cleaning them up just used a wire wheel....Thanks Travis, did you go strictly on measuring? Or Were you fitting the rave valve in and then turning the engine over to see if it would hit?
- Status
- Not open for further replies.
Similar threads
- Replies
- 8
- Views
- 586
- Replies
- 2
- Views
- 274
- Replies
- 1
- Views
- 552
- Replies
- 12
- Views
- 996