Nice of them not to put all the bolts in...very nice.
That snap ring looks pretty beat...i dunno maybe its the angle but it looks pretty corroded.
Great more bolts I have buy.


Nice of them not to put all the bolts in...very nice.
That snap ring looks pretty beat...i dunno maybe its the angle but it looks pretty corroded.


Looks like the O-ring broke and the brass gear shifted back and the gear mesh was mis-aligned and it ate the brass gear.
As far as the previous owner replacing the gear, you can only remove it with the cases split, that is not a serviceable shaft while assembled.
Id' VERY carefully spray the crank seals off with starting fluid, or WD-40 to rid the brass, it was at least contained to right there, so don't spread it outside that zone. Then get a CLEAN (NEW washed and dried) 5 gallon bucket and fill it partially with Kerosene and wash the crank 1/2 at a time while spinning the bearings. The dry/blow it off and lather it as much as you can with WD-40 and put some 2 stroke oil in the bearings and give them a spin to make sure they are nice and smooth.
I can also see this was a reman engine before by the crank bearings and the welded crank pins and the jap bearing in the rotary valve shaft in the case. I also LOVE the cheater job on the RTV on the outside diameter of the crank seals--shady! I'd heed that warning right there, so when you put it back together you better put RTV in the case grooves for the crank seals. And make sure you use something like Threebond 1211 or Yamabond, Hondabond etc... something that is fuel safe. Hopefully you can salvage her back together, but that is a bummer for sure!
What's RTV mean?
Should I replace the gear or the whole shaft?
Does anyone know how to remove the gear and shaft or do I need special tools?
I'll to try a socket tomorrow, not sure about what you mean by bolt, but think you mean to insert it in the center of the socket and try to push it or tight it throught until the shaft pulls out. Is that right?Many guys here have different tricks for that. Once the retainer is removed, I used a few different sized sockets that fit over the gear & a couple different length bolts to thread into the shaft. I have seen a few methods on this site. (besides the correct tool)
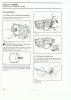
Be sure to get a long enough bolt, so you can use a nut to tighten up & pull it out, just like is shown in the picture.
I don't understand how a socket over the gear and sticking a bolt through the center of it will pop it loose?Yes, just make sure the surface that is touching the rotary surface is smooth. El Toro used a pvc cap that he drilled a hole in. Remember to remove the snap ring. To save yourself the headache buy the shaft already rebuilt. before you remove the old shaft wash the case out there is an open face on the bearing, you don't want to get any brass in there.
Sent from my SGH-T989 using Tapatalk 2
Here's what the inside the crack case looks like, I'm so glad I listen to you guys about making sure theres no metal shaving in the case.
View attachment 16263View attachment 16264View attachment 16265View attachment 16266
The PO said he replaced the gear already, why would it strip again?
Shoud I just replace the whole rotary shaft or just the gear?, not sure if he told me the truth about the gear.
Any easy wasy to remove shaft and gear, or do I need specail tolls also? don't want to screw up again like the cylinders!
Does anyone know the best way to clean the crank shaft,all the bearing seem to be fine?
It does look off center. Hopefully just the seals are slid over? Or maybe its just the angle of the photo? Here's a good picture of what it should look like.
")
Yes, it could be moved back in place, but I don't have the equipment or access to it either.
There is a threaded hole in the center of the gear. You want a bolt turned into this hole & bottomed out. Then, the bolt needs to be long enough where it extends through the socket & you can have a washer & nut on the threads. This way you can hold the bolt that is threaded into the gear from turning, & as you tighten the nut, it will pull the bolt out along with the gear shaft. I would avoid using just a bolt into the shaft, without the nut method. Good chance of ripping out threads. I hope this makes sense. a picture would be worth 1K words here......
I really like the idea of racerxxx's mention of a plastic PVC cap. never would have thought of that...
The two gold rings on ether side of the rotary gear both slide back and forth. Is this a problem and can anyone fix that without buy a new rebuild shaft?
Would you happen to know what size pcv cap, bolt size and length is needed?

No they should slide side to side.
I measured the size socket that I used push the assembly back in. And that was a Craftsman Deep 15/16 socket, which measures 1.246"(31.66 mm) and the bearing is 1.259"(32 mm). I stress the size of the socket because it has to the the shittiest way of inserting the assembly, meaning you need to tap it in on the seal, and pay close friggin' attention to the shaft going into the bearing in the opposite side of the case. If you don't you'll punch the inner race right out of the bearing. Yeah, then your pooched and you'll need to go buy another tool to remove that(internal bearing puller). This is just another one of those critical parts in assembly. Also this size socket just clears the bore in the case.
Anyway, back to the PVC cap, you need one that will clear the rotary gear and be on the outside of the seal in the case. I'd guess 1-1/2 slip cap like this:

Make sure it's schedule 40 also try to get a domed one, and you'll need to drill a hole in the center use an "F", "G", or 17/64 drill bit. If it's domed there might be a dimple on inside of the cap real close to center. Now go back down to the hardware department in Lowe's and get your screw.
The only thing I'll disagree with 68Rag on is bottoming out the screw in the rotary shaft. If you snap the screw in the shaft you'll have a better chance extracting it NOT being bottomed out.
As far as the length of the screw, take a toothpick and stick it in the hole, use a sharpie marker and mark where it sticks out of the shaft. now measure that, then measure the height of the PVC cap, add the two together. Pick up 3 or 4 washers for the screw, if you take you measurement and go to Lowe's you'll need a 6mm screw, take you measurement and measure from under the head of the screw for the correct length. Heck a head bolt might even be the correct length--if that is too long put a nut or two under it to take up the slack. I like to use washers under the head of the screw with grease on them so they slip against each other. Take you case with you to make sure you get what you need the first time. I have taken my trike differential and a pair of dial calipers into Home Depot before so I could "make a tool", the guys in the plumbing department look at me like I have 6 heads.
Now to pic#3. YOU NEED TO TREAT THE PARTS LIKE A NEW BORN. It looks as if you have the crank partially removed from the case and just laying in there on the seals. All you need to do is tweak one of the crank seals and you'll be in a whole 'nother world of hate. Like I saw with the pics of the ruined jugs, they were rust free in one pic yet later in the thread they were trashed with rust---you can't do that you have to keep the stuff oiled or you'll ruin the whole shooting match. Hose it down with WD-40 or something and put the stuff in a plastic bag. Sorry for chewing you out, but this stuff isn't cheap and while it can take a punishing, one small slip you ruin a $15 crank seal and your out $400 for a crank-BE CAREFUL, I hate seeing good stuff wasted.
I'm wondering if this was an SBT reman, I noticed the welded crank, any stampings on it?
Do us a favor and slide the crank seal towards the bearings and take a pick like 68Rag posted---CLEAR, so we can see if the gear shifted like El Toro posted--if so your gonna munch another brass gear. I'll say it now, if it needs a crank too, put all this stuff back together and order a reman engine from someone, and that ain't my bag.
I really want to see you get this mutt back together, but we need to have good clean pics and carefulness!
Whew, now that that is done, next question SS