Full 951 Rebuild - Rusty flywheel, stator and pickup - 1999 GTX

Note: This site contains eBay affiliate links for which SeaDooForum.com may be compensated
Status
Not open for further replies.
You need to replace the rear crank seal also.
Clean the crank and cases with gasoline in a well ventilated area and it is flammable/explosive so be careful.

And as we keep saying you really shouldn't reuse the crankshaft but do as you will.
Thanks for the tip on the cleaning. Just wanted to know the logic out of not using the crankshaft if it's clear of debris and bearings are easily spinning. The previous damage to the piston and cylinder looks like it happened due to major carbon buildup due to the previous owner not using the right kind of oil and also because of all the other usual suspects (grey gunky fuel lines, oil pump probably clogged, etc) if the crank is clear of rust and contaminants why can't it be reused?
 
Thanks for the tip on the cleaning. Just wanted to know the logic out of not using the crankshaft if it's clear of debris and bearings are easily spinning. The previous damage to the piston and cylinder looks like it happened due to major carbon buildup due to the previous owner not using the right kind of oil and also because of all the other usual suspects (grey gunky fuel lines, oil pump probably clogged, etc) if the crank is clear of rust and contaminants why can't it be reused?
You can use whatever you want. Experience tells us 1-the cranks are fine until they grenade all it takes is one of the bearings on either the crank or counter balance to fail and then you need a crank, counter balance, cases, cylinder, pistons 2- by the looks of whomever had this ski before you it wasn't taken care of. Are you going to trust an engine turning 7k rpm that hasn't been taken care of?
 
Unless you look at the bearings under an electronic microscope, its impossible to tell how good or bad they are.
If you think the bearings sound good, clean them and see what kind of noise they make. Oil hides alot of noises and holds alot of debris.
From experience a perfectly looking and feeling crank has failed me. I couldn't find a problem with it. Add to that wrong oil and the fact that its a 951 with a melt down and its only a matter of time before that crank fails.
I mean how much is 10 hours worth to you? If that. When you could spend $500 more and have 200 hrs of fun instead.

Any engine that I've worked on with a damaged cylinder or piston meant there was debris that had landed on the bearings and is now impeded in there. So its only a matter of time before failure. Once debris gets into crank bearings there is no way to allow it to exit. So all the debris gets crushed into the bearings and that becomes abrasive.
Spot on brother !! I've rolled the dice based in experience but you gotta know how difficult the "point" is to make. LOL 951's.... I don't trust. Sneaky SOBs. :D
 
Alright, cleaning the crank this weekend and will dry and listen. Took the crank to an authorized seadoo place here in AZ and they said it looks good and should still be usable, but I'll still follow your guys advice and see. Still doing the upper engine with oversized pistons and reboring. Will follow up with an update.

Thank you all!
 
Update!

So after a constant battle with wire brushing all the stainless steel bolts and parts that were rusted, I finally got to cleaning the crankshaft. Gave it a gasoline bath and air compressed the bearings (three time cycle) and I'm ready to reseal the lower part of the engine. Quick question, I saw that people lube the outer bearings with grease. Will Lukas "red and Tacky #2" work for this? Recommended? I saw a video of someone unsealing the counterbalance bearings and packing it with this stuff. Also read on other forums that the outer bearings on the crank is recommended.

Just about ready to seal it with the yamabond 4 and also wanted to know if I should put some of the yamabond on the seal rings (in between the balance gear and other seals.

Thanks!
 
Replace the counterballance bearings.
Do not just repack them.
Also if you are planning to pack any bearing on any brp crank use isoflex.
Look up what they do on skidoo cranks. Great stuff. Very expensive but it won't fix worn out or pitted.

A good quality case sealant is important.
I use 3 bond. But hondabond and yamabond are up there in quality. The crank seals are always clean and dry during buildup and don't require sealant.
Look at the crank bearing pins the middle ones go in the opposit direction of the outer ones.


The right way to to this is to replace the crank and counterballance bearings and seals etc...
The wrong way to do it is trust what you see on YouTube and slather it with sealer or believe what someone that doesn't know what this crank has been through tells you.

From experience all of us that have rebuilt 951's have done the same and messed up and wished we didn't learn the hard way.

I hope it works, I really do, I highly doubt it will from all my gut feeling and experience. And really I'm only saying all this again because I've screwed up a few times learning these things.
 
Never grease any engine bearings on a Seadoo.

Just pre-lube them with 2-stroke oil.

The inner seal lips that touch the crankshaft get marine grease. The outer seal casing goes in dry.

Case halves get ThreeBond 1184, Yamabond, Hondabond etc.
 
Last edited:
Alright, completed the seal and the splits are bonded together with yamabond and torqued as per sequence on the shop manual.

I have another concern now. I was going to put the newly bored out and honed cylinders and install the pistons and in the SBT piston kits, there was a "warning" to "file down" the "power valves" - is this referencing to the RAVE valves? How would I know to file them down "0.15 thousandths" would I measure from the square part of the metal part of the RAVE valve to the corners of the Cresent part?

Would suck to do all this and damage the pistons from the RAVE valves....

20210524_083222.jpg
 
Cut a thin (,015") shim so you can bend it on about a 30degree angle. With the cylinder on the bench, slide the piston into the cylinder (no rings on the piston). Position the piston where you can insert the shim in between the rave blade and the piston outer diamter. You'll need a flashlight or good lighting. You can just push down on the rave valve and check the clearance. A course half round file works great. Try to file the rave blade parallel to the bore. It won't really matter but I like to have a wider cross section that a sharp edge.
Push down on the rave and when you can't feel the (.015") shim dragging on the piston or rave your are good to go. It doesn't take much filing. Pay attention to they width of the rave where you are filing... that will help you visualize that you are not taking too much aluminum off one spot.. I rock the rave a bit when I'm measuring just to make sure I don't drag on the edges. If you go to much don't get too excited about it. LOL Take your time it's easy peasy. Good Luck.

If you can accomplish this task with not issues then it is safe for you to use the Q-Tip INSIDE your ear. LOL
 
Easy way, take the piston and wrap it it in 400 grit sandpaper. Hold the rave at the same angle as it would be in the cylinder and use the piston as your sanding block.
Measure the blade, sand and measure again.

To confirm its good put the piston with rings into the bore and install the rave.
Move the piston up and down and see if the rings catch while you rock the valve side to side. Make sure it doesn't snag the rings in any way.
 
Before just blindly replacing parts, TEST them. Get the shop manual (free download) and follow the procedures.

Of course, clean up everything.

Aftermarket starters are JUNK, re-built OEMs are better (replacement brush kits are inexpensive and relatively easy to install).

It is a myth to cap the oil injection system and switch to pre-mix for longevity.....you'll just end up spending more on oil and you'll never get the mixing proportions consistently correct. The oil injection systems are pretty robust on the Seadoos....there is no logical point to going pre-mix.
Agreed, aftermarket starters are junk, and OEM brush kits are very inexpensive and easy to install, the OEM armatures rarely fail,
 
Question:

So I attached the pistons and I'm ready to place the cylinders after sanding down the RAVE blades and checking clearance.

Upper gasket kit came with 3 gaskets for the crankshaft to cylinder area. Do I use all 3? Just one? Use the permatex copper spray on it (minor gouges and scratches on the aluminum from cleaning)?

Seems like the black gasket on the left is the thinnest, the middle is thicker and the right is the same as the middle but has a line of something in the middle.

Suggestions?

20210529_153532.jpg
 
Also, the new (used) head I got from a jet ski mechanic shop here gave me a head that is slightly different from my original (see pics)... he said it was the same, but different head for the 951 engine and should lower the compression for longevity of the engine...true?

20210529_153628.jpg20210529_153644.jpg
 
That head is junk. One base gasket a thin coat of threebond. But first you need to measure squish that means dry assembly no gasket and squishing a piece of soldier between the piston and head and measure it afterwards
 
That head is junk. One base gasket a thin coat of threebond. But first you need to measure squish that means dry assembly no gasket and squishing a piece of soldier between the piston and head and measure it afterwards
Can you elaborate why it's junk so I can return it to him and get the right one? Can't do a squish test without a head......
 
The dome area has been cut too deep probably to clean up detonation. The matting surface looks terrible getting a good seal will be a problem
 
This is an unmolested one on ebay
 

Attachments

  • Screenshot_20210530-101036_eBay.jpg
    Screenshot_20210530-101036_eBay.jpg
    100.2 KB · Views: 14
20210603_222541.jpg20210603_234622.jpg20210603_234608.jpg

Well, it's coming along to being reassembled!

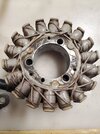
Anyone know if this will be an issue with the stator once I put it back in? Got a little bit too excited with the wheel brush to get all the rust out of the flywheel chamber and it took some of the coating off of the stator, noticed the wire closest to the stator is also a bit corroded. Can I place any enamel paint or something on the wires of the stator to protect from shorting?
 
Well, figured I would share if someone is following lol

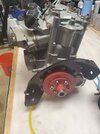
Covered the exposed wire on the stator with epoxy. All bolts loctited and torqued to spec. Oil lines purged from air and primed! (Thank you etemplet for the video post!) Engine is complete and ready to put back in the beast!

Will follow up once it's ready to fire up!
20210606_204352.jpg
20210606_204315.jpg
 
Status
Not open for further replies.
Back
Top