Bowser
Active Member
Ahoy SeadooForum,
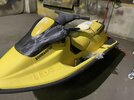
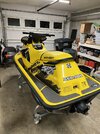
This build thread serves to archive the trials of my first water craft, a ’95 SPX. It was purchased in March 2022 with a known issue of fuel not getting to the carburetors. I am a first-timer at fiddling with two stroke engines but find forums a wealth of info, so here I am.


Structurally the hull is great; what I expected for a 25 year old ski that has changed owners a couple of times. Previous owner intended to restore this craft but lost interest- I did not get much history on it otherwise during the sale. The PO said he replaced the solenoid, mpem, and spark plugs.. the motor fired up manually with premix squirted into the cylinder + START pressed. To get it functional again I intend to replace fuel lines/ filters, replace pulse line nipple at the crank case, and properly rebuild the carburetors. There are signs of previous entry in the carbs, a la damaged screw heads, that may take some extra effort to correct.


I’ve been documenting the repair process & to-do list building. Intending to keep this thread updated as I go as well as post questions for repairs, replacements, etc.
Proud that I bought this SeaDoo as my first; BRP makes wicked vehicles and I’ve come to find this SPX is a perfect project for me.
This build thread serves to archive the trials of my first water craft, a ’95 SPX. It was purchased in March 2022 with a known issue of fuel not getting to the carburetors. I am a first-timer at fiddling with two stroke engines but find forums a wealth of info, so here I am.
Structurally the hull is great; what I expected for a 25 year old ski that has changed owners a couple of times. Previous owner intended to restore this craft but lost interest- I did not get much history on it otherwise during the sale. The PO said he replaced the solenoid, mpem, and spark plugs.. the motor fired up manually with premix squirted into the cylinder + START pressed. To get it functional again I intend to replace fuel lines/ filters, replace pulse line nipple at the crank case, and properly rebuild the carburetors. There are signs of previous entry in the carbs, a la damaged screw heads, that may take some extra effort to correct.
I’ve been documenting the repair process & to-do list building. Intending to keep this thread updated as I go as well as post questions for repairs, replacements, etc.
Proud that I bought this SeaDoo as my first; BRP makes wicked vehicles and I’ve come to find this SPX is a perfect project for me.