• This site contains eBay affiliate links for which Sea-Doo Forum may be compensated.

Bad vibration at 1/4 throttle

Status
Not open for further replies.

jimmaki

Active Member
Hi, I'm going through a '98 SPX that has been sitting unused for a long time. Cleaned out the fuel tank, changed all the fuel lines and filters and installed a new battery. I went through both carbs and found the internal filters were partially clogged so I cleaned them. I checked the needle valve and the popoff was 37 on the MAG carb an 43 on the PTO. I pulled fuel into all the new lines with a vacuum pump connected to the return line at the tank. I started right up and idled with no issues. As I cleared the no wake zone and gave it some throttle there was a hesitation. I found if I pumped the throttle it would accelerate through the hesitation to full throttle. So it appears to be lean in the transition from idle to full throttle. At some point the engine started to vibrated very badly in the transition from idle to wide open. The vibration got worse and worse and finally the engine died and would not restart. I thought I threw a rod or bent the drive shaft. Any ideas?

I don't know if this is related but when I was going through the carbs the PTO check valve assembly screws were so tight I cammed out the phillips slot head screws so I was not able to check the jets or the check valve in that carb. Any experience getting those screws out. There was corrosion in that area and both screws looked "rusted" or corroded. I don't know if they are s.s. or not.

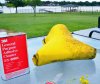
One final unrealated question. The SeaDoo sat on a lift outside for years so the gelcoat has lost it's gloss. I have buffed a lot back but some of the other parts are made of materials I'm not sure of and don't know how to restore. The steering pad cover is riddled with black spots (looks like black mold) and I have not found anything that will clean them off. Also, the hood has turned a milky white but rubbing compound doesn't seem to bring it back. I'm thinking of just painting the hood and steering pad cover. Is there a known source for SeaDoo yellow paint that sticks to whatever those parts are made of? My first thought was to ask a body shop if they can color match some of the kind of paint the use on plastic/rubber car bumpers. Anyone tried this or found another source?\

Thanks!
 
On the hood, try any of the ”black renew" type products, I personally use "trim shine" but you probably won' t find it.
On the steering cover\ rear grab handle, I used 3m specialty adhesive remover- it softens up the "rubber" so you can take a razor blade and carefully scrape off the top layer of gunk. Be
Careful tho' it takes some skill, good luck
 
Thanks for the suggestions on the detailing. I called the local O'Reilly's and they have Stoners Trim Shine for $6.99 12 oz aerosol can. They said I should mask off any areas where I don't want the stuff. ok. on the 3M adhesive remover, I already had a can so I'll give it a try. Can you elaborate a little on how you are using a razor to scrape off the top layer of gunk? Do you hold the blade perpendicular to the surface or drag it at an angle, or ....?
 
I haven't figured out the vibration problem yet but as far as your suggestions on the detailaing, both worked great! Thanks! Here's a shot of the cleanup on the steering pad cover. I just did half of the bottom first to show a before/after comparison in one pic.
 

Attachments

  • Sterring Pad cover.jpg
    Sterring Pad cover.jpg
    395.9 KB · Views: 33
I haven't figured out the vibration problem yet but as far as your suggestions on the detailaing, both worked great! Thanks! Here's a shot of the cleanup on the steering pad cover. I just did half of the bottom first to show a before/after comparison in one pic. I left the shaving's on the table so you can see I didn't need to take off much, maybe a couple thousandths in some spots. It's probably just my poor technique or the razor blade I'm using the scraping action leaves a series of "flat spots" on the outside radii. It reminds me of the effect you see when a low resolution computer graphics image is depicting a curved surface. I wonder if there is a way to smooth them out? Sandpaper maybe? Or a wire brush? Hmmmm. Or maybe I'm just too fussy and need to just go get a new one. :-):lol:
 
Update on vibration at 1/4 throttle

I've eliminate some possible causes of my vibration problem.

1. The impeller, wear ring and pump in general all look good. No nicks or dents and the gap measures within spec.

2. The motor mounts feel solid good after yanking on the pipe in all directions.

3. Out of the water I was able to start the engine and get it past 1/3 throttle. As it got past 1/2 throttle things smoothed out dramatically. Since the boat was on a trailer and I wasn't riding it, I was able to stand there and watch the drive shaft and listen to the bearings and carbon seal. No unusual noises and the driveshaft and bearings were running smoothly and true above 1/2 throttle.

4. The MAG plug looks normal, brown/black. The PTO plug looks like a new clean plug dusted with a little light brown. Both plugs were only installed before the last time it was in the water less than 10 minutes running time. I think wide open both cylinders are running ok, but anything above idle to 1/3 throttle, the PTO cylinder acts like it is lean. So much so it appears the engine is only running on one cylinder from idle to 1/3 throttle. I confirmed this by disconnecting the PTO spark plug wire and it starts up and runs about as rough as it does with both plugs connected, which is very rough. I thought I threw a rod at first. With the MAG plug disconnected and the PTO plug reconnected the engine will not start at all.

Both carbs were just gone through, internal filters cleaned and all passages and lines blown out with carb cleaner and compressed air. The needles were checked and held pressure for 30+ seconds and both popped off within spec.

The only difference between carbs is that I could not get the check valve housing screws out to remove and inspect the jets. (or the check valve for that matter) There was evidence of water corrosion in both carbs, especially in the area around the check valve housing. Those screws were corroded and looked like they were rusted. What's the best way to get those screws out? I didn't try heat since the check valve looks like it's made of plastic or mylar. I tried penetrating oil and a hammer driver. The screws with the rusted heads cam'd out on the first blow. I'm thinking of using a dremel with a carbide cutoff disk to try to put a slot in the top of what's left of the screw heads so I can put a regular screwdriver to them. I hate those phillips head screws. At least they ought to use s.s. so they don't rust.

I ordered OEM rebuild kits from OSD with Viton needles and new internal screw sets. Anything else I should check as the carbs come off for the second time this week? I cleaned the tank, changed all the fuel lines and checked the filters and all check valves.

Does anyone know of an angled or swivel fitting for a compression guage? Mine is to big to fit between the motor and side of the boat. It has a hose accessory but it's too stiff to bend and turn at the same time and start the threads in the spark plug hole. The engine runs great wide open when I can get it there. Right now I can't get past 1/3 throttle in the water. On the trailer it will rev right up to max rpm.

[EDIT] I just thought of something that might be pertinent to this problem ... is there a way to check and/or clean those tiny bypass holes in the low speed circuit? I sprayed carb cleaner and compressed air and although I see spray coming out those holes, it's difficult to tell if they are all the way open and if they are letting enough fuel through during transition, plus most of the fluid comes out the larger low speed hole when blowing the circuit out with carb cleaner or compressed air. I hate to try to stick something in those tiny holes. Is there a way to backflush them?
 
Last edited by a moderator:
Sorry for talking to myself (replied to my own message), but I tried a few things so I wanted to let you know what they were and what happened. I opened the low speed adjuster a quarter turn at a time and there was little to no change. That T-handle is the hardest thing to get to and turn unless you have steel fingertips and x-ray vision! I started with the low speed adjuster at `1-1/8 turns open and went in quarter turns to over 2 turns out. Things did improve but transition still blows and I don't think the back cylinder is kicking in any sooner than 1/2 throttle.

I checked the accelerator pump, check valve, tubing and nozzles to make sure gas was being squirted into the carb throats when I squeezed the throttle lever to up throttle. Both sides were getting a shot of gas.

Since both carbs were gone through a week ago at the same time using the same tools, procedures, specs, cleaner, air, operator ... the only difference I can think of between the MAG carb and the PTO carb is I was not able to get the check valve body screws out. So I could not visually check the jets, either low or high. I also could not check the check valve.

So ... if the low speed jet is clogged, that might be my problem, but I did blow carb cleaner and air through the low speed circuit and saw it come out the low speed opening as well as bypass holes. Do I don't think that's it.

Now, if the compression on the rear cylinder is low (which I will check as soon as I can get a swivel compression fitting to get my guage in there) that could be the problem. But the ski runs to good wide open so I think it's a carb low speed circuit problem. The only thing left that I can think of is that the check valve has so much corrosion under it that it is letting air into the low speed circuit from the high speed circuit which is open the atmosphere via the inner ventury tube which doesn't have much air velocity at the 1/4 throttle opening where I'm experiencing problems. Idle is fine so I don't think pop-off is the problem.

If anyone has ideas on how to get thoroughly corroded steel screws out of an aluminum carb without trashing the carb body, I'd love to hear them! I feel like I really need to get the check valve body out to see the check valve and jets. I have blown in and out of the hole above the check valve but can't put anywhere near the vacuum on it with my lungs that the low speed manifold pressure does. Even if I had a vacuum pump I wouldn't be able to tell if it was leaking and how much leaking it would take to provide so little fuel to the rear cylinder it won't even fire.
 
Last edited by a moderator:
I put the carb in an indexing translation vice and used a drill press to countersink away the screw heads. Then I lifted the check valve housing up which left a good 1/4" of the screws sticking out of the carb body which I back out with vice grips. whew! I think the carb rebuild kit with internal scews will have s.s. screws (hopefully).

Anyway ... here is what I found when I turned the check valve housing over and looked at the check valve ...... (see pic)

PTOCarbCheckvalve.jpg

deformed check valve.jpg

PTO carb corroded check valve.jpg

In case you can't make it out, the check valve which is a thin piece of mylar or some other kind of translucent plastic is actually permanently deformed in a curled up shape holding it up and away from the valve body surface against which it is suppose to seal.

Would this cause a fuel starvation problem during 1/4 throttle transition from idle on the cylinder this carb feeds? I'm thinking maybe with the check valve just about inoperable and unable to make a seal, the low speed circuit is just sucking air from the high speed circuit.
 
Last edited by a moderator:
Well, at long last I finally tracked down the bad vibration problem at 1/4 throttle. Wasn't the carbs. The counterbalance shaft gear bearing came apart and the shaft was vibrating or wobbling so bad that it broke through the crankcase making a ventilation hole the width of the gear and four inches long. I'm surprised the engine ran at all.

engine teardown vibration source.jpg
 
Status
Not open for further replies.
Back
Top