


[MENTION=2]hfgreg[/MENTION] [MENTION=1]JoeZ[/MENTION]
If this is sticky or How To worthy, do as you see fit..
I did this as I searched everywhere for a 4-tec grease change and simply could not find anything.
4-Tec Jet Pump Grease/Oil Change (Pump removal)
I used Blue Loctite on every nut and bolt. I used a wire brush to clean off the old stuff and put the new on as I installed each bolt.
Here is the Synthetic Grease that is to be used.
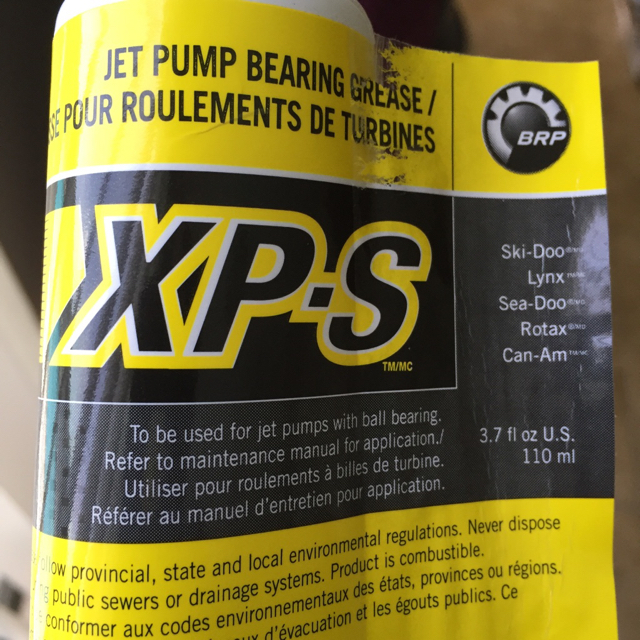
Once you get the impeller housing in your hands with all the items removed from it, check our your wear ring, impeller and bearings very well as you will not have a better chance to do so. My impeller spun very smooth with no issues at all.
I included pictures to go with the procedure in order of removal. At the bottom I included some pics that will show you what things look like apart.
The directions below are such that if you follow the order the outer nozzle will come off leaving the impeller pump still on the ski. If you would like to remove it all at once, do Steps 1 and 2, then jump to Step 5
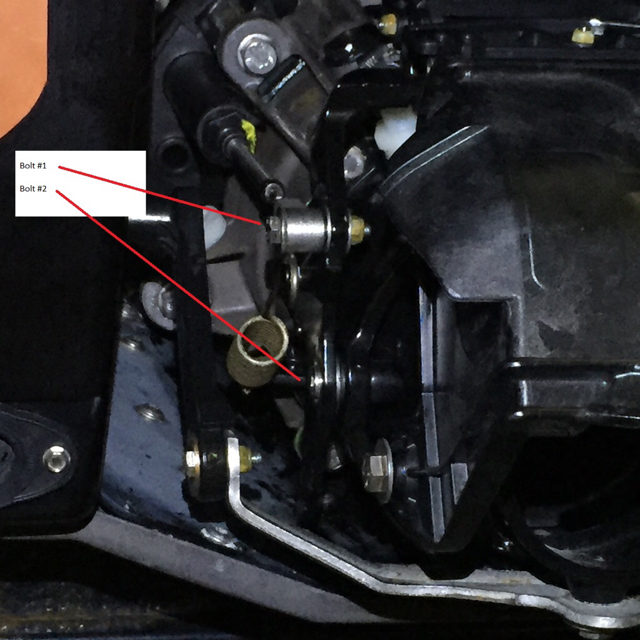
1). Remove Bolt Number 1 and 2 (10mm). NOTE: Bolt #2 has three washers, be sure to put them back as they come off. The spring you see in the picture remains in place, no need to touch it.
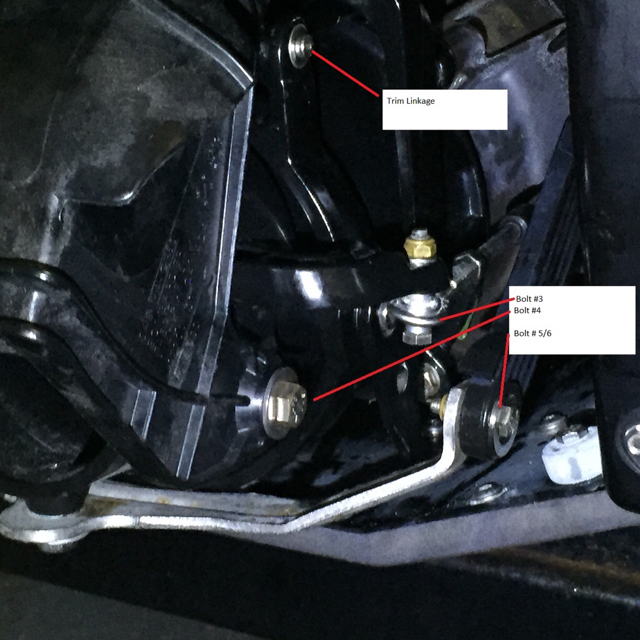
2). Remove Bolt Number 3, 4,(10mm) 5 and 6 (13mm). (6 is the same bolt on left side of ski).
Also, remove the Trim Linkage bolt if you have it. I removed the bolt in the picture and the one further up the linkage at the rear hull of the ski. Removing the upper bolt made the linkage easier to remove from the outer pivot where it is mounted. It is a 3mm Allen Head Bolt and has no nut on the backside. If you remove only the bolt near the hull you officially do not need to remove the bolt in the picture. I did as I didn't want the arm to be flopping around. I simply didn't want to harm it or where it mounts to the outer bucket.
The bucket will flop around. This will aid in removing the required nuts and bolts.
There is no need to fully remove it and no need to remove the spring that is on the left side of the body.
3). Remove hose clamp and silde hose off nipple.

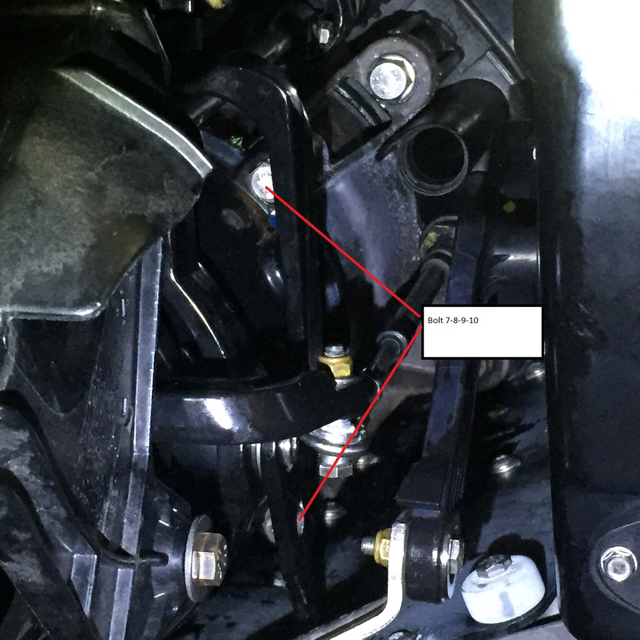
4). Remove Bolt Number 7-8-9-10 (13mm). (9 and 10 are the same bolts on the left side of the ski).
The outer nozzle will now come off the ski.
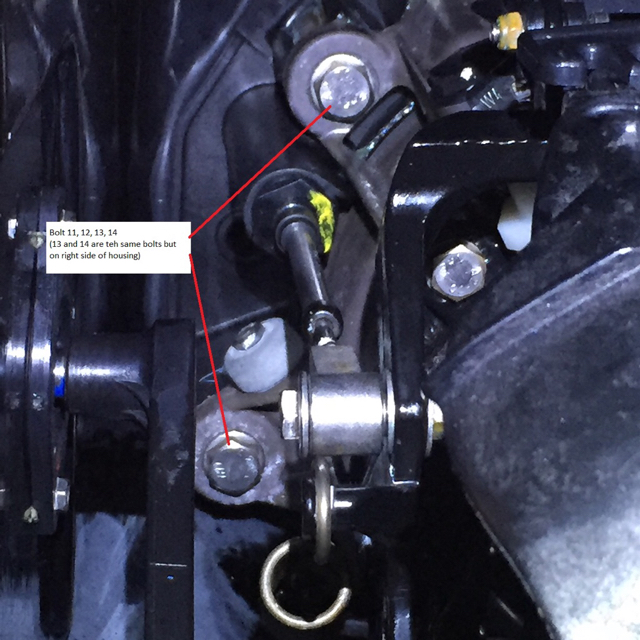
5). Remove Bolt Number 11-12-13-14 (17mm).(12 and 14 are the same bolts as 11 and 13 but on left side of ski.
The impeller pump housing will now come off.
I used two 2X4’s and placed them on the ground as the seal on the impeller extends past the housing. The 2X4’s keep the seal from hitting the ground while you work with the unit.
With the cone facing up towards you, place a piece of tape or scratch the cone as well as the housing so there is a line that tells you how the cone goes on. It ONLY fits in one position. I simply scratched the cone and had the scratch line up with the Bailer Tubes. Remove the three bolts that keep the cone in place. There are slots for flat bladed screwdriver to pry the cone up. I used two screwdrivers and worked my way around the cone. There is a good ½ inch lip that needs to come up out of the impeller housing. Once the gap gets big enough, place the body of the screwdriver under the lip as this will provide better prying and the cone will come out easier. Mine came out very easily.
Once the cone is off, remove the old Synthetic grease, (keep this if is it clean as it will be used to reinstall and coat some things). The manual says to use 23 ml or 0.8 ounces of new synthetic grease. My cone had WAY more than this amount in it. I did a lot of reading and digging and found that the replacement tubes I ordered from Sea Doo is what they use. The tubes I bought are 3.7 ounces. Based on what mine had in it, I would agree and I did use it all. I put a liberal amount directly onto the bearing top in the impeller housing and then put the rest into the cone. The manual states to use a mallet to reinstall the cone. I was able to do so using just my hands (Don’t forget to look at the line you placed on the cone when reinstalling to get it into the correct location).
Thread the bolts back in by hand using an extension. Once all the bolts are touching the cone, tap the cone a bit more with your hands to try to get it seated. I was able to get mine to seat simply by working my way around the cone tightening the bolts. When I took mine apart, one of the bolts was VERY tight, had me worried coming out. It came out ½ turn then back in ¼ turn. Kept this up until it came out. The other two were what I felt were too loose. That said, I had no water in my grease and it was in like-new condition.
I had a very small amount of corrosion where the 4 main bolts hold the impeller housing to the ski. I wire brushed them clean and used some of the old grease to coat this area. I also used the old grease on the outter bucket seal where it goes into the impeller housing.
Installation is easy as it is just the reverse of the removal.
Misc pics to better understand what you will see as you go.
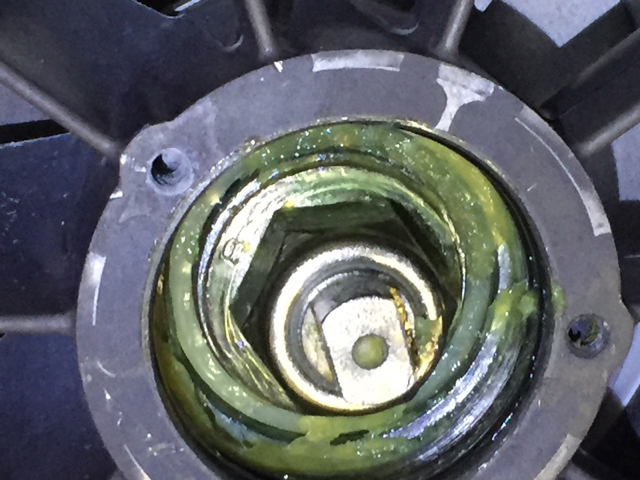
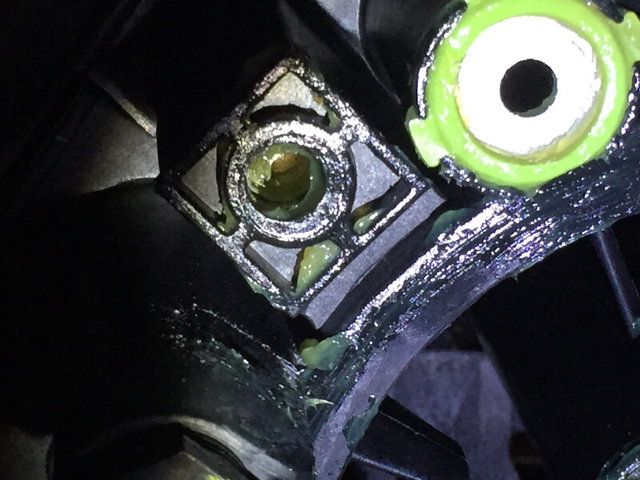
Top of impeller bearing once Cone is removed.
Inside of Cone with old grease.

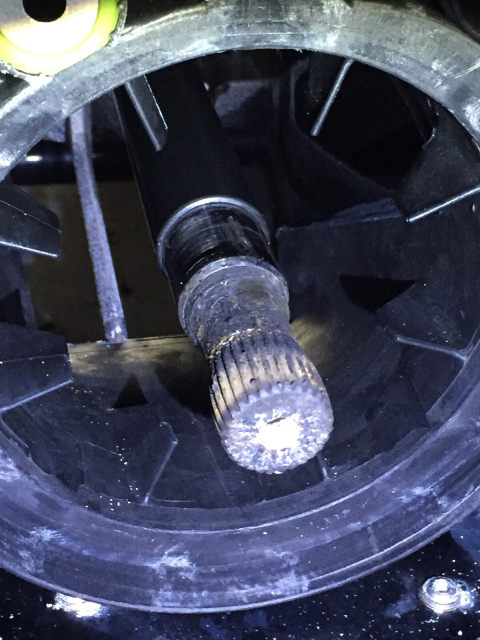
Driveshaft once impeller housing is removed.
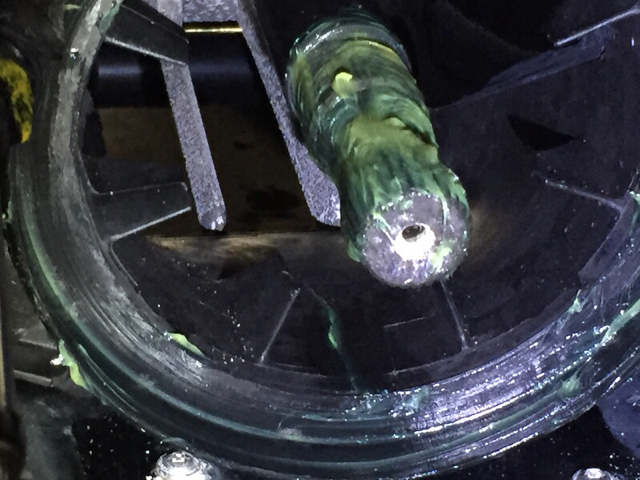
Cleaned with a wire brush and put some of the old grease on the splines and where the housing meets the ski.
Used the old grease where the Bailer tube O-rings and the mounting bolts go for the impeller. Just be careful not to get the grease on the inside of the O-rings as it could affect the Bailers performance.
If this is sticky or How To worthy, do as you see fit..
I did this as I searched everywhere for a 4-tec grease change and simply could not find anything.
4-Tec Jet Pump Grease/Oil Change (Pump removal)
I used Blue Loctite on every nut and bolt. I used a wire brush to clean off the old stuff and put the new on as I installed each bolt.
Here is the Synthetic Grease that is to be used.
Once you get the impeller housing in your hands with all the items removed from it, check our your wear ring, impeller and bearings very well as you will not have a better chance to do so. My impeller spun very smooth with no issues at all.
I included pictures to go with the procedure in order of removal. At the bottom I included some pics that will show you what things look like apart.
The directions below are such that if you follow the order the outer nozzle will come off leaving the impeller pump still on the ski. If you would like to remove it all at once, do Steps 1 and 2, then jump to Step 5
1). Remove Bolt Number 1 and 2 (10mm). NOTE: Bolt #2 has three washers, be sure to put them back as they come off. The spring you see in the picture remains in place, no need to touch it.
2). Remove Bolt Number 3, 4,(10mm) 5 and 6 (13mm). (6 is the same bolt on left side of ski).
Also, remove the Trim Linkage bolt if you have it. I removed the bolt in the picture and the one further up the linkage at the rear hull of the ski. Removing the upper bolt made the linkage easier to remove from the outer pivot where it is mounted. It is a 3mm Allen Head Bolt and has no nut on the backside. If you remove only the bolt near the hull you officially do not need to remove the bolt in the picture. I did as I didn't want the arm to be flopping around. I simply didn't want to harm it or where it mounts to the outer bucket.
The bucket will flop around. This will aid in removing the required nuts and bolts.
There is no need to fully remove it and no need to remove the spring that is on the left side of the body.
3). Remove hose clamp and silde hose off nipple.
4). Remove Bolt Number 7-8-9-10 (13mm). (9 and 10 are the same bolts on the left side of the ski).
The outer nozzle will now come off the ski.
5). Remove Bolt Number 11-12-13-14 (17mm).(12 and 14 are the same bolts as 11 and 13 but on left side of ski.
The impeller pump housing will now come off.
I used two 2X4’s and placed them on the ground as the seal on the impeller extends past the housing. The 2X4’s keep the seal from hitting the ground while you work with the unit.
With the cone facing up towards you, place a piece of tape or scratch the cone as well as the housing so there is a line that tells you how the cone goes on. It ONLY fits in one position. I simply scratched the cone and had the scratch line up with the Bailer Tubes. Remove the three bolts that keep the cone in place. There are slots for flat bladed screwdriver to pry the cone up. I used two screwdrivers and worked my way around the cone. There is a good ½ inch lip that needs to come up out of the impeller housing. Once the gap gets big enough, place the body of the screwdriver under the lip as this will provide better prying and the cone will come out easier. Mine came out very easily.
Once the cone is off, remove the old Synthetic grease, (keep this if is it clean as it will be used to reinstall and coat some things). The manual says to use 23 ml or 0.8 ounces of new synthetic grease. My cone had WAY more than this amount in it. I did a lot of reading and digging and found that the replacement tubes I ordered from Sea Doo is what they use. The tubes I bought are 3.7 ounces. Based on what mine had in it, I would agree and I did use it all. I put a liberal amount directly onto the bearing top in the impeller housing and then put the rest into the cone. The manual states to use a mallet to reinstall the cone. I was able to do so using just my hands (Don’t forget to look at the line you placed on the cone when reinstalling to get it into the correct location).
Thread the bolts back in by hand using an extension. Once all the bolts are touching the cone, tap the cone a bit more with your hands to try to get it seated. I was able to get mine to seat simply by working my way around the cone tightening the bolts. When I took mine apart, one of the bolts was VERY tight, had me worried coming out. It came out ½ turn then back in ¼ turn. Kept this up until it came out. The other two were what I felt were too loose. That said, I had no water in my grease and it was in like-new condition.
I had a very small amount of corrosion where the 4 main bolts hold the impeller housing to the ski. I wire brushed them clean and used some of the old grease to coat this area. I also used the old grease on the outter bucket seal where it goes into the impeller housing.
Installation is easy as it is just the reverse of the removal.
Misc pics to better understand what you will see as you go.
Top of impeller bearing once Cone is removed.
Inside of Cone with old grease.
Driveshaft once impeller housing is removed.
Cleaned with a wire brush and put some of the old grease on the splines and where the housing meets the ski.
Used the old grease where the Bailer tube O-rings and the mounting bolts go for the impeller. Just be careful not to get the grease on the inside of the O-rings as it could affect the Bailers performance.
Last edited:
