My new 96 XP project

Note: This site contains eBay affiliate links for which SeaDooForum.com may be compensated
Status
Not open for further replies.

Major Woody

Active Member
Hello all!

Love this forum and really appreciate those of you who take the time to share your knowledge. As I learn more, I hope to do the same.

I've been enjoying my '97 GSX for a few years now but have wanted to add a 96 XP to the stable as I like to play/jump. Knowing it would be a buyer's market during the dark days of winter, I recently picked up this XP off the local Craigslist for $500 with trailer. Seller bought it last year but is not a PWC guy and jacked the wiring all up when he could not get it to start.

At some point in the past, somebody really loved this ski. It has custom airbrushed "Calvin & Hobbes" graphics (which I suspect were painted by John Dady of Blowsion here in the Portland area), R&D trim tabs and R&D grate. The impeller is a mystery, and other than the oil pump delete, the engine appears to be all stock.

IMG_0282.JPG

IMG_0287.JPG

IMG_0284.JPG


It was stored outside for one winter under a tarp. Was it winterized? Who knows, but last winter wasn't that cold so fingers crossed that there's no freeze damage. The gas is tinted blue and the guy said he was using "marine 2 stroke" in it, so I'll be dumping the gas. (RAVE blades look ok though they could use a cleaning). The ad said it ran and the seller claimed that it ran great for him when he first bought it, until it suddenly wouldn't respond to the key anymore. However, when I got there it was on a charger and the wires to the start button were completely melted. It appears that when he couldn't get it to start, he decided to wire the start button directly to the solenoid using house wiring and those crimp-on wire tap splices they sell at the car stereo store.

IMG_0251.JPG

It appears he must have fried the MPEM because the battery had 14 volts and the buzzer is good and all the fuses (front and back) are good but I get no beeps, no gauges, no signs of life whatsoever (can't get it into diagnostic mode and nothing happens when pressing the start button with the key off).

I removed the front electrical box and tested the MPEM using the guide from here; all the combinations of wires test "open circuit" (no resistance at all). Is it fair to presume that the MPEM is toast?

I disconnected the DESS post and checked continuity. It checks out properly with and without the key. The key is clean and looks fine. Putting the key on the post results in a closed circuit so I think the post is unlikely to be the issue.

The solenoid is new, as is the battery and the starter (he replaced those first with OEM when it first developed the starting issue).

The fuel lines are new.

I did do a compression test by arcing the solenoid with a screwdriver and got 150/150. The engine is painted silver so based on that and the compression being strong, it looks like it may have been a fairly recent SBT rebuild?

I already replaced the fried start button and redid the seat (black friday sale).

IMG_0289.JPG

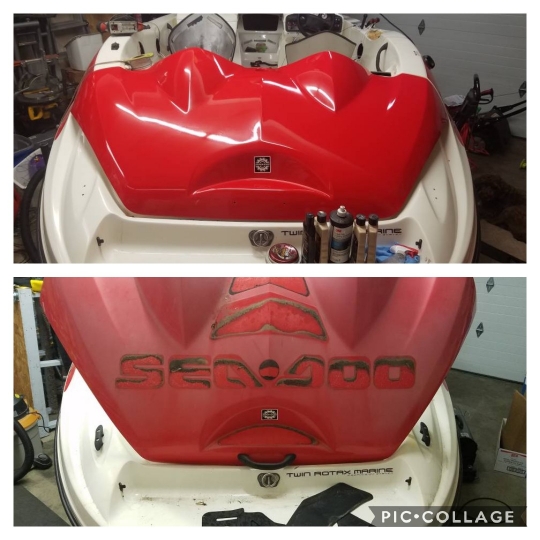
My plan is to remove the dated/damaged but funny graphics, wet sand and buff the hull, add Blacktip mats, deal with other cosmetics issues, add a single gauge hood (multi-gauge only), check and if necessary replace the VTS control (motor works on 12v but is disconnected from rest of harness), pull the engine and drain any oil from it (who knows what is in there--the lines have some mystery blue stuff), have the carbs rebuilt/popoff set as a precaution, put the oil injection back on, change the pump oil and drive the piss out of it.

Is there anything else I should go through before trying to start it, based on what I know about the ski?
 
Last edited:
Looks like a fun project.

I think its fair to say he fried the mpem, but i would get all the wiring replaced first and then try again to see what you've got. I'm not familiar with the ski market in your area, but i'd be on the lookout for another 96 non-runner as a parts donor. Around me you can get those for 200 or so and then could swap the entire mpem and wiring harness.

As for the engine its tough to say without a pic. If its an SBT, youll see a serial # sticker on near the front of the Mag cylinder as well as a circular heat detection sticker on top of thehead. Most rebuild places use gray paint so it could be one of many or done by a previous owner.

Your list of tasks seemes to be on point, I would just add replacing all fuel lines and the fuel selector. The selectors dont clean well and have an inner o-ring that can go bad causing it suck air and develop a lean condition.

Good luck on the project!
 
Last edited:
I like to see these XP threads but makes me wanna keep the one I have in the yard and start work on it even though it would be very extensive. Good Luck with the ski. It looks pretty darn good !!
 
I like to see these XP threads but makes me wanna keep the one I have in the yard and start work on it even though it would be very extensive. Good Luck with the ski. It looks pretty darn good !!
Thank you Gene. The pics make it look better than it is, but there is nothing here that can't be fixed.
 
If ya'll need pictures or anything just holla. The one I just finished kicked my butt pretty good. :) We boldly went were few have gone. LOL Talk about weird issues. Hit 57 on the GPS on my last test. Tweakin done !!! I'm ready to ride this one. :) Must have pictures though. :D
 
Last edited:
I think probably around that speed. I'm not sure how many people do GPS but I don't trust the speedos. I'd guess 55mph is about the minimum for a good running XP. The Gurus will know better than me.
 
Inside the hull is pretty gross for a fresh water ski, at least by my standards. The airbrushed graphics are what worry me the most...that and whatever blue oil they used to lube the rotary shaft and bottom end.
I assume there is no way to get that oil out of there without pulling the engine?
The graphics look like they were done with proper automotive paint, so I'll need to find something that will remove it without attacking the gelcoat. I have read that methylene chloride attacks gelcoat so I need to find the strongest stripper I can but which doesn't have that ingredient in it.
 
To get the old oil out of the rotary shaft cavity you can just splice a "clean" hose on the end of the feed line under the carbs to blow air into. Then just redirect the drain line from under the exhaust on the other side into a small container in the hull. It doesnt take much pressure to blow that stuff out and i just use my mouth lol.

If you are really picky you could blow it out, put good oil in and blow out again to try to get as much as you can out of there.

If you want the inside of the hull to be shiny and clean like new, then i'd take the engine and everything out if the hull.
 
so I'll need to find something that will remove it without attacking the gelcoat.

Just wet sand it with 400 grit, then work up to the finer grits of 1500-2000 before you polish and wax. This ski looks like the one I remember seeing on the FB forum earlier this year. I'm not positive, but I seem to remember the guy had just got the ski and lost the DESS key. Buying a new one he didn't get it programmed, lost patience and started making a mess out of the wiring trying to make it work without getting it programmed. I think he sold it shortly afterward.

I wouldn't give up on the MPEM, just send it to Nick at Westside Powersports and let him ck it out, you may just need a DESS lanyard programmed. He's fair, he'll check it out and let you know, quick turn around.
 
Thank you! I want the inside of the hull to be clean, but I don't have an alignment tool and would prefer to skip the hassle if I can. I'll just remove the pipe and water box, tip the ski up and attack the bilge with parts cleaner and then Super Clean. Everything is coated with sticky goo but that should take care of it.

To GGuillot--Which FB group? There are a couple. It would be nice to be able to go back and see what was going on, if this is the same ski.

How soft should the exhaust hose be? This one seems really soft--way softer than my GSX, especially right after the water box.
 
Exhaust hoses are softer on the xp than whats on my 97 GSX also. Wetsanding sucks but produces great results. This is my GSX resto from 2 winters back. It was a dullish yellow from the sun in many areas, but 10+ hours wet sanding and buffing it still shines like brand new today. Same for a 98 speedster i did the winter prior to the gsx.

I've gotten to the point where ill pay a premium for a non running ski in good cosmetic condition as id rather rebuild an engine than wetsand and buff! Plus you can't really ever trust a running 20+ year old ski anyways.


80e6bf30f222b37177f24fb526b7af78.jpg
637935f7d4577fe766ac5fc9835ee083.jpg
 
I've gotten to the point where ill pay a premium for a non running ski in good cosmetic condition as id rather rebuild an engine than wetsand and buff!

You got that right bother, I tracked about 55 hours of work just on the topside doing a re gelcoat application, wet sand and polish on the 96' GSX build. The GTX the year prior was brutal, more area to cover, months and months trying to get that one looking good. There's a reason nobody wants to do gelcoat work anymore and they'll always push just to paint it. The amount of labor is really nothing when painting compared to gel coating.

20190518_104015.jpg
 
I would not blow air into that rotary chamber. It is not meant to be pressurized and you could blow the crank seals, then you will be building the engine. I use a siphon canister (kinda like a metal syringe) on the end of the hose and pulled the oil out. It doesn't have to be perfect. If you want to flush it once or twice with the proper oil that will help clear the old stuff out.
 
Exhaust hoses are softer on the xp than whats on my 97 GSX also. Wetsanding sucks but produces great results. This is my GSX resto from 2 winters back. It was a dullish yellow from the sun in many areas, but 10+ hours wet sanding and buffing it still shines like brand new today. Same for a 98 speedster i did the winter prior to the gsx.

I've gotten to the point where ill pay a premium for a non running ski in good cosmetic condition as id rather rebuild an engine than wetsand and buff! Plus you can't really ever trust a running 20+ year old ski anyways.
Spot on there bro. Agreed on all counts. lol The uglies take lots of time and effort.
 
That GSX looks SWEET. Very nicely done. My GSX was in very good condition when I got it and required only moderate effort with a rotary buffer to bring back the shine. Love the colors, graphics, seat, mats you chose...good job.
 
I clean a lot of skis and will not pull the engine without good reason. "Needs a crankshaft" is a good reason. LOL I drain as much junk as I can out and spray with the hose. Then I head to the carwash and use the engine degreaser mode. let is soak a bit and use the suds and clear water rinse. If there is oil in there I bring buckets to put under the drains. Generally I get it all out though with my pre-wash procedure. Less than $5 at the car wash.
 
I would not blow air into that rotary chamber. It is not meant to be pressurized and you could blow the crank seals, then you will be building the engine. I use a siphon canister (kinda like a metal syringe) on the end of the hose and pulled the oil out. It doesn't have to be perfect. If you want to flush it once or twice with the proper oil that will help clear the old stuff out.
I have a Harbor Freight fluid transfer pump, like what you might use to pump gear oil into a transmission. I will try using that to remove/flush the oil.
There are two oil lines going to the engine--the supply and the return. I only see oil in the supply line; the return is empty. I assume I should try sucking the oil out the return line?
How does the counterbalancer shaft get its oil? Might it also have the wrong oil in it? Can I drain/fill that cavity without pulling the engine? You can tell from my questions that I have never had one of these engines out of the ski or apart...
Thank you.


I removed the oil and fuel tanks yesterday. The fuel sender had already been operated on to deal with the blown fuse but was missing the float and its bottom plate completely. They weren't in the bottom of the tank either. Tank appears to have been replaced by one made in 2010, according to the sticker. So the old recalled tank is gone. I need to buy a good used sender.
 
Easy Peasy on the rotary valve oil. Connect your pump to the low side/supply side and suck out the oil. It won't be much. Then don't worry about it you're good. Connect the lines and check for leaks after you refill. Oil supply line is under the carbs.

Counterbalancer - some engines have a little plastic cap to add the proper amount when you assemble the engine. You can't drain it. I don't know much about that works during engine operation.

As I stated, I never pull and engine for no reason but that's me. :) Good Luck.
 
Every time I dig further into the wiring, I find new surprises. One of the prior owners of this ski was a big believer in electrical tape. Electrical tape does not belong there, and it was a sticky mess. Unfortunately he didn't appear to have a utility knife or wire cutters. Instead it seems he must have had a butcher knife or machete, or maybe a light saber. Unfortunately he had not completed his Jedi training--every place the wiring had a tie-wrap on it, the loom is hacked. How hard is it to cut just the tie-wrap?

Also had a chance tonight to investigate why the VTS was disconnected yet "worked."

The VTS motor itself works just fine but the module is fried; pops 15A fuse in no time when in use, even with the motor disconnected from the sliding shaft/gear assembly and turning freely. There was sand and grit inside the VTS housing but the motor shows no sign of water intrusion and the boot is good. I think they may have taken this out on the water with the VTS cover off entirely; that would explain the grit.

I have ordered a DEI 451 current-sensing relay and a 5A automatically resetting circuit breaker which fits in the VTS fuse socket in the rear e-box. Total cost $12. I'll relocate the new relay and all other wiring into the front e-box where I understand Seadoo moved some of it on later model skis anyway. There's plenty of room in there. The circuit breaker will protect the electronics in the event someone holds down the VTS button when the unit is already fully up or down.

The electronics built into the VTS housing will be abandoned in place. The potting material is incredibly strong and there is no way to get the old circuit board out, nor is there any reason to. Fortunately I will not need the gauge wiring as I am going with a single gauge hood.

For now I have gotten everything cleaned up and hacked away enough of the potting material over the circuit board so that I can make all my connections in a waterproof way. I did not need to remove this much, but I kept thinking eventually the whole board would let go along with all the potting material underneath it. It did not! I'll replace it with a layer of silicone caulk when I'm done with the wiring. After removing the potting material, I drilled down to where the wires leave the board and enter the sealed part of the housing to connect to the motor. This way I can run my new wires through the same path as the factory did.
IMG_0310.JPG
I know the picture looks terrible but there is no delicate way to perform this operation.

I am going to have a really good understanding of the electronics of this ski by the time all is said and done.

Digging around in the hull, I found the SBT serial number sticker on the mag side of the jugs. So it has a completely rebuilt SBT motor of unknown vintage. I guess that's good news, and it explains the strong compression.
 
Sheeeee .... good job !! That potting material is rough. I had to hack my way through 2 ECMs to find a diode that I didn't know exactly where it was. LOLSPI MPEM ECM (3).jpg
 
Working away on the electrical. Both tabs were broken off the rear e-box cover, which is a lot of work to replace because of all the wires that pass through it. Got a new lid and a new wire sealing nut which was also broken and allowing water in. Finishing up and was missing the orange grommet thing that seals one of the fuse holders to keep the fuses dry. I don't even know what this thing is called and it doesn't have a parts number. Robbed one from the fuse holder on my MPEM, which is going to be replaced anyway.

ebox seal.JPG

Also, if anyone needs to replace one of the terminals on the battery or starter wires, they are 6 ga.

Making slow but excellent progress on removing the horrible painted graphics. Using a very slow acting stripper that is safe for gelcoat. Everything looks great underneath, luckily.

Got carb rebuild kits, new needles and seats, gaskets, removed the whole exhaust system, removed the RAVE valves. One has been leaking so I got a pair of rebuild kits. The water regulator on the waterbox also had a blown diaphragm which had been 'repaired' with silver caulk and electrical tape and then reassembled totally wrong.

The PO must have had a lot of water in the hull because the tie-wrap anchor that holds the bailer hoses up was gone and the bailer hoses were just laying in the hull letting water flow in. It's a miracle he didn't sink it.
 
Last edited:
Status
Not open for further replies.
Back
Top