• This site contains eBay affiliate links for which Sea-Doo Forum may be compensated.

Help installing my new 951 engine!!

Status
Not open for further replies.

garrettb

Active Member
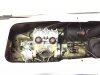
I bought this 2000 GTX with a blown motor, I had it rebuilt, and just put all the goodies back on it. Tonight I dropped it into the ski, and ponder what to do next. In what order should I install the exhaust and carbs to incur the least amount of stress and frustration? I have never done this before and the manual wasn't much help.

On a side note, I messed with my new alignment tool, and found that the rear sits too low. The alignment shaft hits the top side of the PTO shaft, but the rear is already shimmed. Am I just out of luck? Thanks in advance!
 

Attachments

  • IMG_1715.jpg
    IMG_1715.jpg
    927.4 KB · Views: 58
I am sure many have different areas they hook up first to some respect. But I would first put the bottom exhaust pipe in before locking the engine down. I see in your picture it is not there. You will not fit this in later. But I would have bottom exhaust pipe in before I even put engine in. I first hook things up on the bottom such as starter an hoses on bottom of engine (both sides). Then I would do the alignment. Once Alignment was done I would hook everything up to the carbs then attach them to the engine. Exhaust is the last thing I would do. Just make sure the bottom exhaust pipe is already in the ski before putting the engine in. This is my way of doing it. Others may do something a little different. I am no expert but I have installed my fair share of 951's. Just did one today. Always work your way from the bottom up. Not easy getting to things low when you start from the top.
People here are very helpful. Even while I knew how to install an engine I still missed one detail on a recent install when I had to switch a magneto. I was not aware it had to be put on a certain way and people were quick to help. A little lesson I was taught. I had to do this again helping a friend today and the install went perfectly. Fired right up and ready for the water. In a very short time I have learned so much from this forum that I can almost fix my own ski's (Except the DI) with my eyes closed now. But I give all credit to others here and if I was not much help someone here will walk you through the whole process with ease.
 
Last edited by a moderator:
Permatex Ultra Copper between the two halves of the exhaust if I separate them?

Any tricks for accessing the bottom nut on the exhaust manifold? The carbs seem like they will get in the way.

The shimming still makes me nervous. I think I can only install a max of 1.4mm of shims, and it looks like I'll need more to raise the rear of the engine up. Can I try re-positioning the rear engine mount bracket, or is there another trick that works better?
 
Drop the motor in and then install the exhaust and carbs last. IF you have separated the 2 parts of the pipe you will have to install the lower part first just to start the bolts, next install the upper part and get the clamp lined up. After everything looks good you need to tighten the upper pipe, mid bracket and then lower pipe. Last tighten up the clamp. The special wrench for the nut on the underside of the pipe works wonders as well as the ball in head allen wrenches.
 
I am going to try avoiding separating the tuned pipe. That seems like diving in deeper than I'd like. I can actually fit the entire exhaust assembly in with the engine installed. It's super tight, but doable. My plan is to use a crowfoot 15mm adapter for the nut so I can still achieve the required torque, then install the carbs.

I think my rear engine mounts have compressed over time, because it appears I will need an additional 2.4mm of lift in the rear for the alignment shaft to fit into the PTO. Is this unheard of? I don't have anything to compare it to. Because I am limited in the amount of shims I can use between the engine and mount, I am going to attempt to shim more between the hull and the mounts. That seems like a more secure way of doing it.
 
or you may need to remove a shim from the front which will also raise the rear of the engine up to get the correct angle if you know what i mean. remove shims from the front or add some to the rear, in the end when all said and done, the alignment tool should s slide in the pto easily all the way without binding. in other words, adding shims to the rear may not be the desired angle. you just have to play with it a bit until it is right. i wouldn't be afraid if there are already a few shims in place as long as there aren't a huge amount. when you get it right, torque them to specs and recheck.
 
first, make sure your negative ground cable is bolted on to the bottom of the motor, next while lowering the motor in, connect the clear exhaust coolant line on lower right side of motor, set motor down but don't bolt, bolt starter cable to starter, zip tie vacuum line for rave solenoid, put carbs in ski and make all connections, then just let them sit/hang/rotate in bottom of ski, connect small ground wires in front of carbs and oil pump hookup and prime, put exhaust pipe in ski(if you don't bolt the motor down you can move the motor around to make this easier and don't split the pipe, not necessary), align motor and bolt down, follow torqueing sequence on pipe and bolt down(the key to torqueing the hard to reach nut down is not have the carbs in your way, simple with them not attached, no need for crows foot), attach coolant hose on underside of pipe, mag connector, rotate carbs back into position and bolt down, install air box and air intakes and rubber flaps, pipe leak joint rubber piece, make all your other top side connections and tubes, water inlet to head, etc.

the manual tells you how much you can shim the motor up, you can also put shims UNDER the rear motor mounts but don't recommend because you can lose the side to side alignment from the factory. you'll probably have to shim the front up as well. the alignment tool should slide all the way in and rotate freely without binding. make sure the alignment bracket at back is bolted on perfectly flush without any dirt or stuff behind it.
 
Last edited by a moderator:
I wanted to give an update and tell you what worked for me. In order to keep my engine alignment, I had to slide the engine back, put the pipe in, tie it to the side, then proceed with my alignment before installing the exhaust. The pipe wouldn't fit with the engine bolted down, no matter how much I tried.

There was no getting around installing 2.5 mm of shim under each mount, I did use loctite 243 on the mount bolts and torqued to specification.

I ended up having to split the exhaust though, the last mount behind the engine wasn't lining up, and the pipe had to be rotated slightly. That's a job I could comfortably say I'd never want to do again!

Now I have to figure out how to get the airbox installed! I hope that wasn't supposed to go in before the exhaust. :facepalm:
 
Status
Not open for further replies.
Back
Top