


DavesNotHereMan
Active Member
Summary:
- The PreVal worked fine
- I got a LOT of Orange Peel
- Blending is a bi$&*h
In another thread, some forum members were interested in the results of my repairs for some dock damage on my 2011 GTI LTD 155. It is Marina Blue, which is a metallic gelcoat. This was my first experience with gelcoat. I was warned about blending issues with metallics.
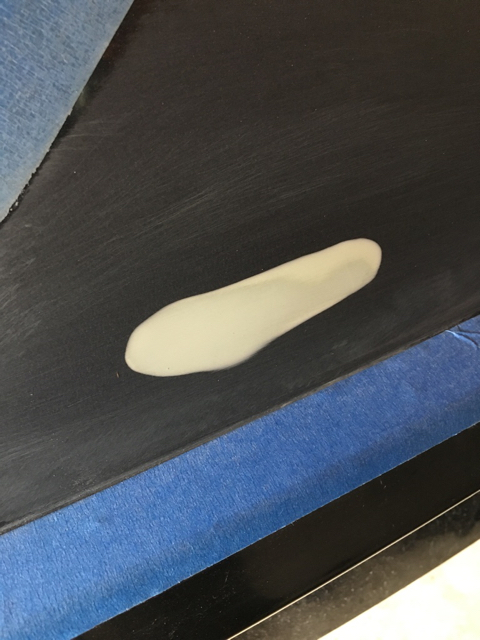
Here is the original damage. There are two areas of damage.
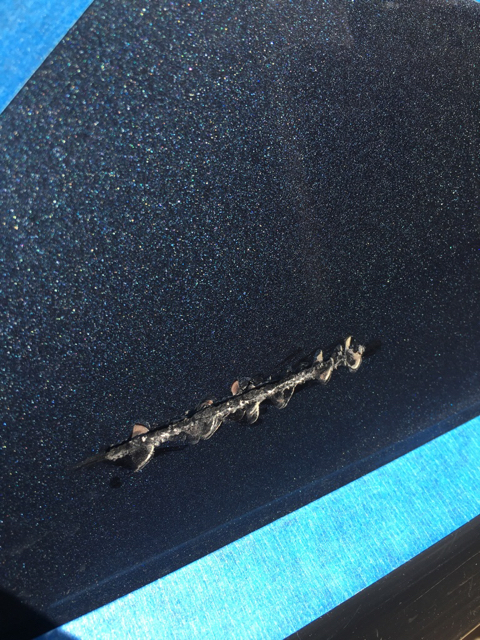
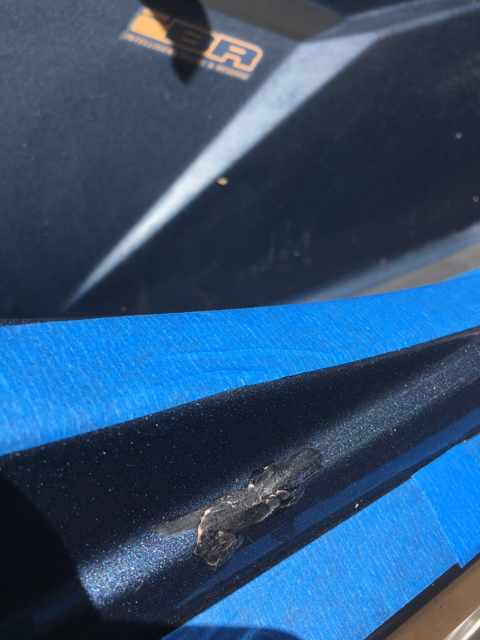
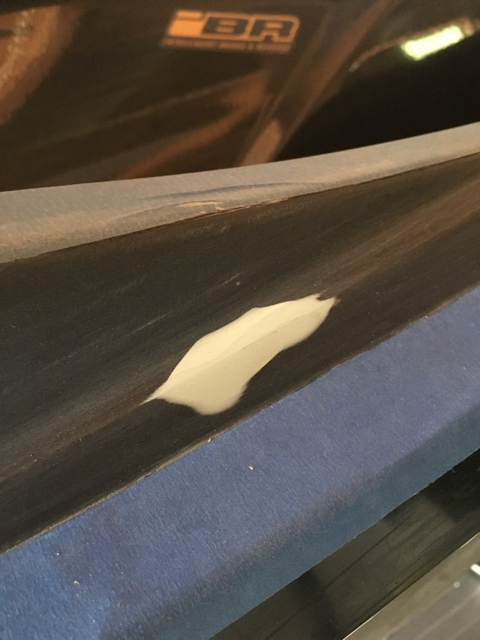
That gash is about 3 1/2 " long and is .020 to .037 deep. You can see the jagged edges. The second picture is edge damage about 1 1/2 " long.
I used a Dremel and carbide bits to clean up the jagged edges and followed that up with 120 grit dry paper in a detail sander:
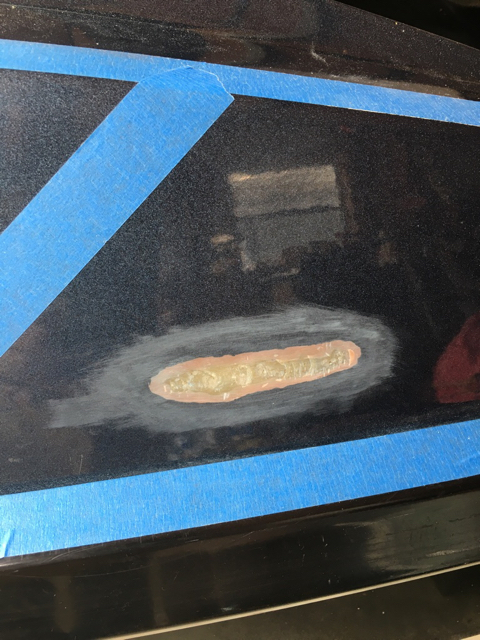
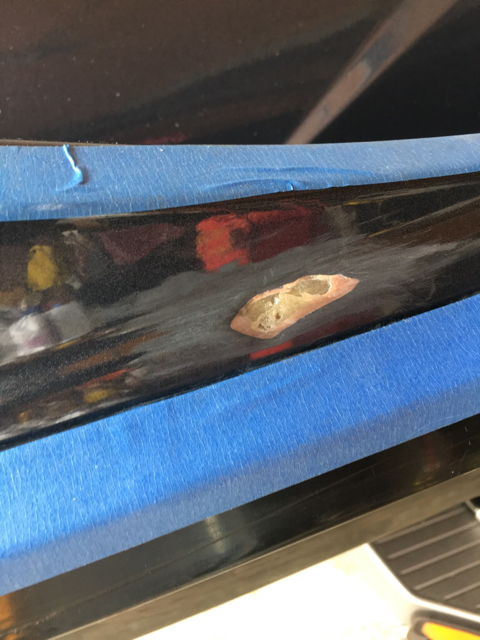
I filled the area with 3M Premium Marine Filler:

I used a heavy fill coat, sanded it with 120. Did a skim coat, sanded it with 120. Did a second skim coat, sanded it with 120, then 180. It looked like this:
It is perfect. Run a finger across with your eyes closed and it is a perfect fairing.
I cleaned the entire area with Acetone, masked it off and used a "rolled edge" technique to help with blending. That did not work well as you will see later.
Ok. Ready for Gelcoat.
I ordered the Gelcoat directly from Gelcote International. Gabriel was a great help. Here are the materials:
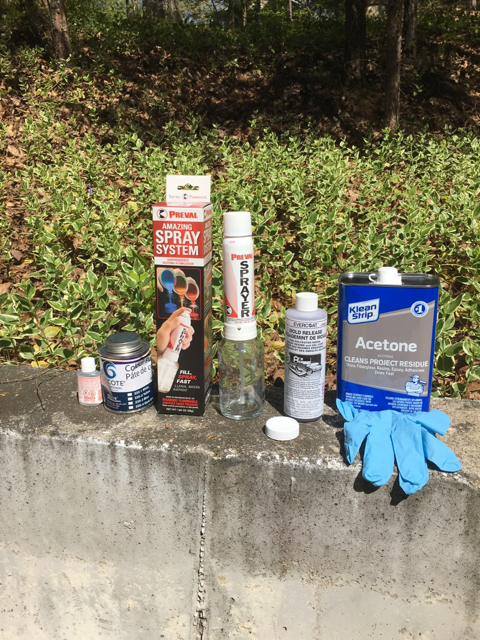
The gelcoat and MEKP hardener. 2 PreVal sprayers (Home Depot - < $5 each). Evercoat PVA (from Amazon). Acetone, because I literally could not find Styrene. Blue nitrile gloves (Harbor Freight); gelcoat is sticky. I also used a cheap plastic painters tarp to cover the entire ski to make sure nothing got hit with overspray.
Ready to spray:
The PreVal sprayers have a glass bottle for material and it is graduated in ounces and Milliliters. I used 10 drops of hardener per ounce of gelcoat. I also could not get a good spray with about a 10% thinning with Acetone. I would guess I was closer to 15 - 20%. There is a filter on the bottom of the draw tube that can be removed, but I did not.
I sprayed on a piece of scrap until I got a good spray pattern. About 2-3 seconds. I sprayed a light coat directly over the repair area. It goes on thick - like spraying Latex paint. DO NOT SHAKE like a rattle can. It sprays "clumpier" if you do that.
The gelcoat material I used is not waxed. It is laminating gelcoat. That means it will get tacky but will not cure, so you can put on multiple coats. It took nearly 10 minutes to get tacky. After reading everything I could about gelcoat, I learned three things: 1) Tacky is measured by poking a finger into the gelcoat and when no material transfers to the nitrile glove, you can apply another coat. I touched the overspray on the masking tape. 2) You will get orange peel. Expect to wet sand after curing. I let it cure for 3 days. 3) you must use PVA over the last coat in order to seal the gelcoat so it can cure. You can also mix a wax additive in the final coat, but I bought a 2nd PreVal and sprayed it on. That was a piece of cake and worked perfectly.
Waiting between coats, though, creates a second problem. As the gelcoat catalyzes on the ski, it also begins to set up in the bottle. I was able to get the second coat on, but had to clean and remix before the third. Also, it was only about 60 degrees when I started, so I warmed the area with a shop halogen light before I started. It was recommended that the temp be 70 degrees.
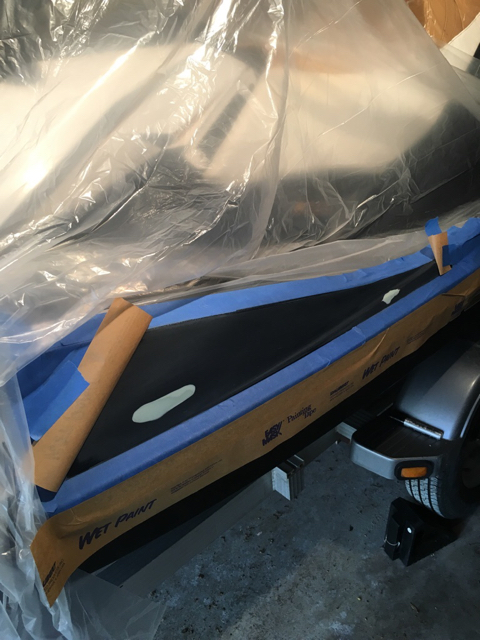
Ok, 3 coats then a misting and a heavy coat of PVA:
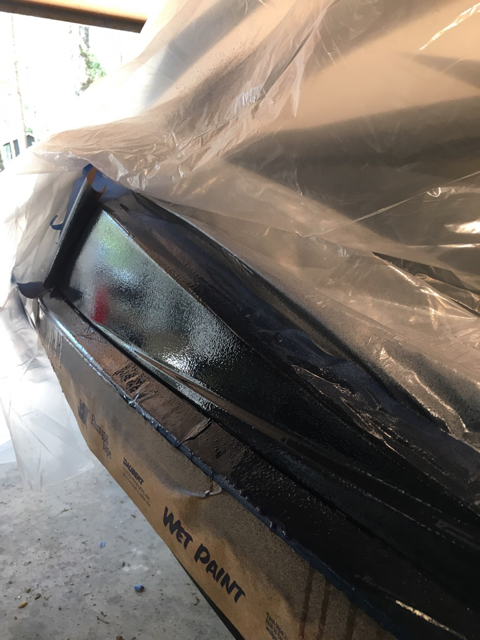
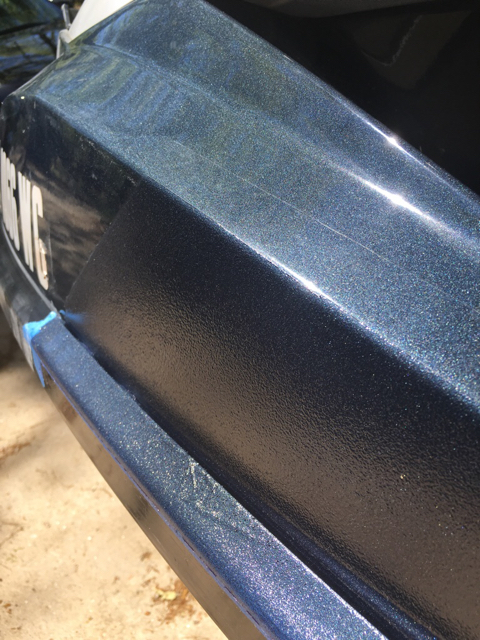
I pulled off some of the masking and let it sit for 3 days. Here, you can see my first mistake. The blend line was too close to the tape and I got a sharp line. This created a problem later. And check out that Orange Peel - a little scary.
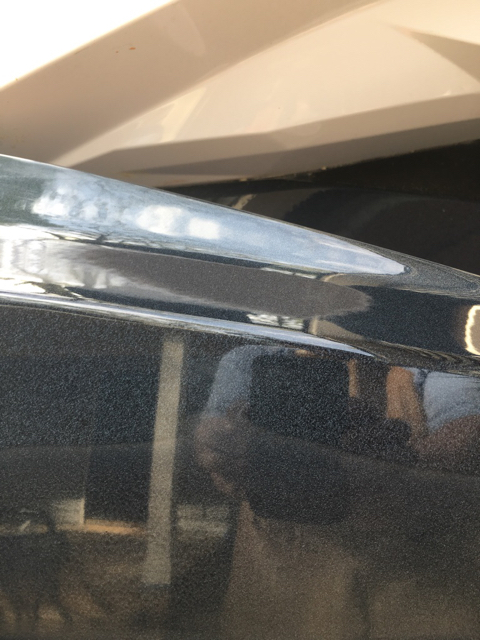
So, today I cleaned off the PVA, it is water soluble so it came right off. Then I got to sanding and polishing. 5 hours worth. I used 120 to knock it down. Then 180, then 220, then 220 wet, 320, 400, 600, 800, 1000, 1500. Then Meguiar's medium cut with a wool pad, then Meguiar's Marine Polish, with a foam pad, then a wax. The finish is spectacular. What is not so good is that blend line. I am not happy with that at all. I was warned about blending with metallics and tried to get a blend. With a slight color difference (the aged gelcoat is slightly darker, combined with a sanded blend line that looks like it is thinner than the metal flake specs, because it looks like a blue line).
Here is the final product:
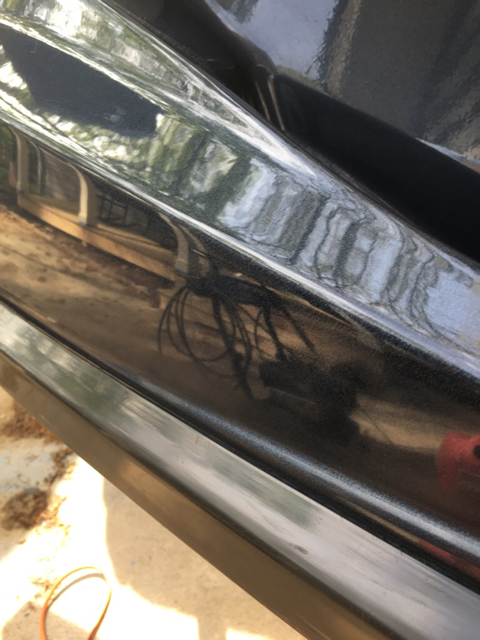
And here is the blend line: you can see my reflection and I held up a bottle of the polish to attempt to show the refraction that occurs. You can only see it straight on in bright sunlight.
It bothers me enough that I may go back and extend the blend line. I also took off so much material with the sanding that I have a little witness in the smaller repair. 6 coats would be better.
I think the Orange Peel was more textured than I expected. It could be the sprayer, it could be the temperature, it could be the extra thinning I needed to get a good spray or all of the above.
Hope it helps and if anyone has any suggestions, I am all ears.
- The PreVal worked fine
- I got a LOT of Orange Peel
- Blending is a bi$&*h
In another thread, some forum members were interested in the results of my repairs for some dock damage on my 2011 GTI LTD 155. It is Marina Blue, which is a metallic gelcoat. This was my first experience with gelcoat. I was warned about blending issues with metallics.
Here is the original damage. There are two areas of damage.
That gash is about 3 1/2 " long and is .020 to .037 deep. You can see the jagged edges. The second picture is edge damage about 1 1/2 " long.
I used a Dremel and carbide bits to clean up the jagged edges and followed that up with 120 grit dry paper in a detail sander:
I filled the area with 3M Premium Marine Filler:
I used a heavy fill coat, sanded it with 120. Did a skim coat, sanded it with 120. Did a second skim coat, sanded it with 120, then 180. It looked like this:
It is perfect. Run a finger across with your eyes closed and it is a perfect fairing.
I cleaned the entire area with Acetone, masked it off and used a "rolled edge" technique to help with blending. That did not work well as you will see later.
Ok. Ready for Gelcoat.
I ordered the Gelcoat directly from Gelcote International. Gabriel was a great help. Here are the materials:
The gelcoat and MEKP hardener. 2 PreVal sprayers (Home Depot - < $5 each). Evercoat PVA (from Amazon). Acetone, because I literally could not find Styrene. Blue nitrile gloves (Harbor Freight); gelcoat is sticky. I also used a cheap plastic painters tarp to cover the entire ski to make sure nothing got hit with overspray.
Ready to spray:
The PreVal sprayers have a glass bottle for material and it is graduated in ounces and Milliliters. I used 10 drops of hardener per ounce of gelcoat. I also could not get a good spray with about a 10% thinning with Acetone. I would guess I was closer to 15 - 20%. There is a filter on the bottom of the draw tube that can be removed, but I did not.
I sprayed on a piece of scrap until I got a good spray pattern. About 2-3 seconds. I sprayed a light coat directly over the repair area. It goes on thick - like spraying Latex paint. DO NOT SHAKE like a rattle can. It sprays "clumpier" if you do that.
The gelcoat material I used is not waxed. It is laminating gelcoat. That means it will get tacky but will not cure, so you can put on multiple coats. It took nearly 10 minutes to get tacky. After reading everything I could about gelcoat, I learned three things: 1) Tacky is measured by poking a finger into the gelcoat and when no material transfers to the nitrile glove, you can apply another coat. I touched the overspray on the masking tape. 2) You will get orange peel. Expect to wet sand after curing. I let it cure for 3 days. 3) you must use PVA over the last coat in order to seal the gelcoat so it can cure. You can also mix a wax additive in the final coat, but I bought a 2nd PreVal and sprayed it on. That was a piece of cake and worked perfectly.
Waiting between coats, though, creates a second problem. As the gelcoat catalyzes on the ski, it also begins to set up in the bottle. I was able to get the second coat on, but had to clean and remix before the third. Also, it was only about 60 degrees when I started, so I warmed the area with a shop halogen light before I started. It was recommended that the temp be 70 degrees.
Ok, 3 coats then a misting and a heavy coat of PVA:
I pulled off some of the masking and let it sit for 3 days. Here, you can see my first mistake. The blend line was too close to the tape and I got a sharp line. This created a problem later. And check out that Orange Peel - a little scary.
So, today I cleaned off the PVA, it is water soluble so it came right off. Then I got to sanding and polishing. 5 hours worth. I used 120 to knock it down. Then 180, then 220, then 220 wet, 320, 400, 600, 800, 1000, 1500. Then Meguiar's medium cut with a wool pad, then Meguiar's Marine Polish, with a foam pad, then a wax. The finish is spectacular. What is not so good is that blend line. I am not happy with that at all. I was warned about blending with metallics and tried to get a blend. With a slight color difference (the aged gelcoat is slightly darker, combined with a sanded blend line that looks like it is thinner than the metal flake specs, because it looks like a blue line).
Here is the final product:
And here is the blend line: you can see my reflection and I held up a bottle of the polish to attempt to show the refraction that occurs. You can only see it straight on in bright sunlight.
It bothers me enough that I may go back and extend the blend line. I also took off so much material with the sanding that I have a little witness in the smaller repair. 6 coats would be better.
I think the Orange Peel was more textured than I expected. It could be the sprayer, it could be the temperature, it could be the extra thinning I needed to get a good spray or all of the above.
Hope it helps and if anyone has any suggestions, I am all ears.
")