


-
This site contains eBay affiliate links for which Sea-Doo Forum may be compensated.
You are using an out of date browser. It may not display this or other websites correctly.
You should upgrade or use an alternative browser.
You should upgrade or use an alternative browser.
A Look into Racing!
- Thread starter Kingsspeedshop
- Start date
- Status
- Not open for further replies.

Thanks for the tips there. I have heard that the FPP chamber has to be dented with this conversion bracket. I have the short(race) chamber which I hope minimizes the needed alterations/altercations. There is another guy on FB that was offering Zach another conversion option that may allow better clearance. We might have to look at that option again.
I took the cases to the local machine shop and he bid $200-$250 to clean up the RV surface. I called Harry at GroupK and he was a reasonable $120. But Dan at Full Bore took some time with me and explained how he preps his. I have the tool and I'm gonna take it on myself. I'll practice on some stock cases first.
I took the cases to the local machine shop and he bid $200-$250 to clean up the RV surface. I called Harry at GroupK and he was a reasonable $120. But Dan at Full Bore took some time with me and explained how he preps his. I have the tool and I'm gonna take it on myself. I'll practice on some stock cases first.
My grooves are not that deep. I forget all they fancy words he used but basically I'm gonna cut in a bunch of smaller circles.
Zum I'm no glass man
Zum I'm no glass man
With what?My grooves are not that deep. I forget all they fancy words he used but basically I'm gonna cut in a bunch of smaller circles.
Zum I'm no glass man
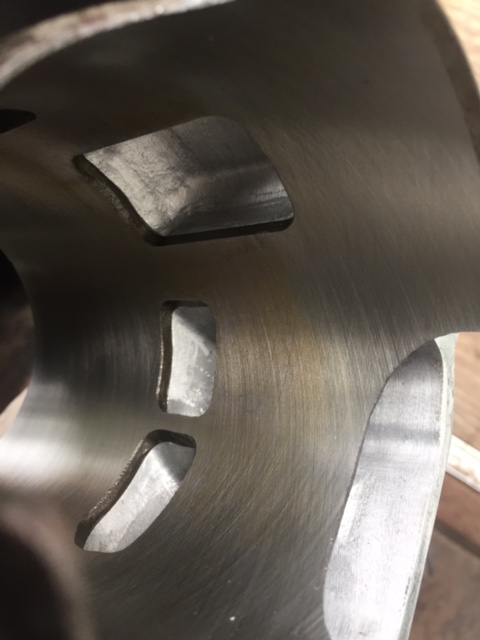
Gasket remover for rotary tools, burgandy color. The air drill was a bit much so I ended up going slower with an electric drill and then I wet sanded the second set of cases by hand as well.
I started with this other set of ported cases I got cheap because they ate something. Here is the before...
And the after. Remember If the gap is too great I can remove some from the ring on the outside to drop the intake manifold. This could use some more detail sanding.
Now here are the monster cases I want to use. I took my time here and did not have to take that much. You can see the before pic earlier in the thread but I'll put it here again
Finished
I started with this other set of ported cases I got cheap because they ate something. Here is the before...

And the after. Remember If the gap is too great I can remove some from the ring on the outside to drop the intake manifold. This could use some more detail sanding.

Now here are the monster cases I want to use. I took my time here and did not have to take that much. You can see the before pic earlier in the thread but I'll put it here again

Finished

Last edited by a moderator:
dgoodwin10
Active Member
Gasket remover for rotary tools, burgandy color. The air drill was a bit much so I ended up going slower with an electric drill and then I wet sanded the second set of cases by hand as well.
I started with this other set of ported cases I got cheap because they ate something. Here is the before...
And the after. Remember If the gap is too great I can remove some from the ring on the outside to drop the intake manifold. This could use some more detail sanding.
Now here are the monster cases I want to use. I took my time here and did not have to take that much. You can see the before pic earlier in the thread but I'll put it here again
Finished
That looks great Matt. Unless there already is one, I'd love to see a 'How To' thread on this.
The tool in the drill was like this http://www.ebay.com/itm/Lisle-22500...319229?hash=item4d4d1e647d:g:GGMAAOSwZQxW49Bx
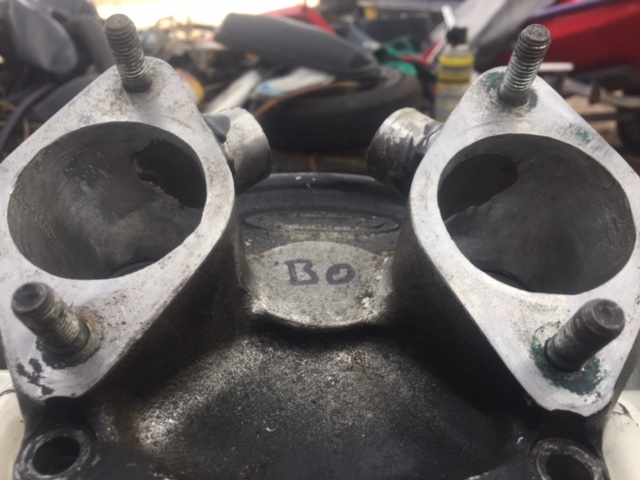
Here is my trusty sanding block and some other tools. I looked all my ported intakes over again and ended up choosing a R&D. You can see where someone had a boost bottle setup on it at one time but now it's filled in.
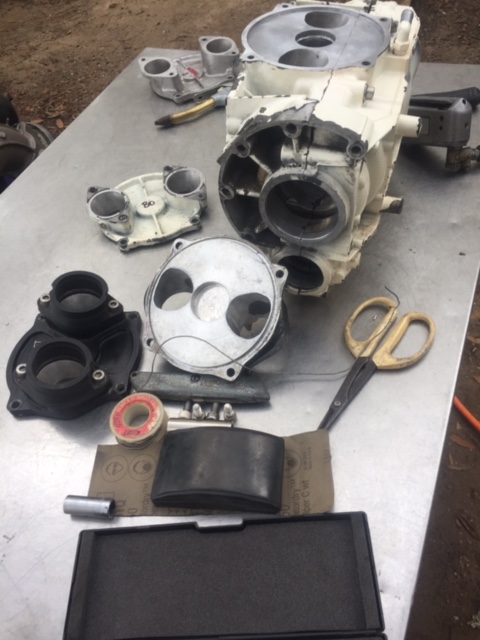
I checked the clearance and I'm in spec
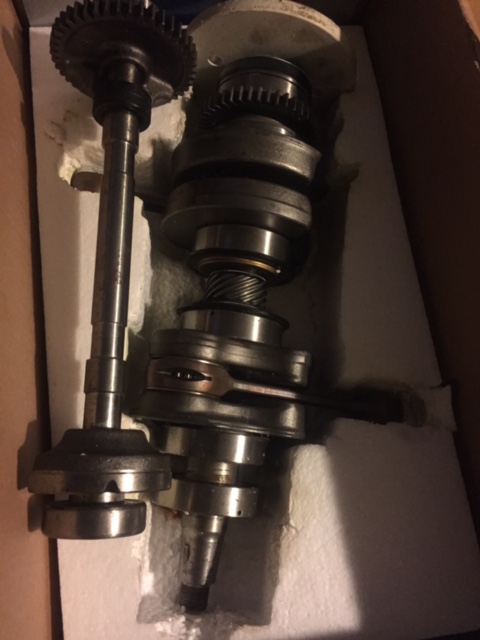
Here is a rebuilt crank and counter balancer to go in. I'm not sure who rebuilt them it's just stuff I've gotten a deal on along the way.
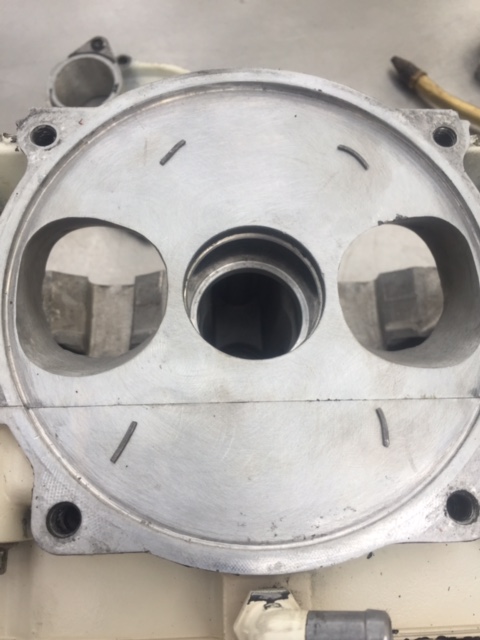
Now I have a rv picked out for it. The inside has been trimmed so it does not block the porting. To keep things in perspective I've set a stock rv and intake up in this pic
The stock one is underneath so you can see what had to be removed.
Here is my trusty sanding block and some other tools. I looked all my ported intakes over again and ended up choosing a R&D. You can see where someone had a boost bottle setup on it at one time but now it's filled in.


I checked the clearance and I'm in spec

Here is a rebuilt crank and counter balancer to go in. I'm not sure who rebuilt them it's just stuff I've gotten a deal on along the way.

Now I have a rv picked out for it. The inside has been trimmed so it does not block the porting. To keep things in perspective I've set a stock rv and intake up in this pic

The stock one is underneath so you can see what had to be removed.

Kingsspeedshop
Active Member
The two intakes side by side give you a really good idea of how ported this thing is..almost twice the size of stock lol!
I don't like boost bottles. They reduce the vacuum of the incoming fuel and air so your required to run a lot larger carb jets.
critracer
Active Member
"There is another guy on FB that was offering Zach another conversion option that may allow better clearance. We might have to look at that option again."
Hey Matt that guy on Facebook is me. Trying to see if I have time to make another set. I had time back in the beginning of December, when Zach and I first talked. I'll let him know today or Thursday as I want to change the outside shape slightly for more clearance. I'm trying to get my own 787HX conversion done.
Hey Matt that guy on Facebook is me. Trying to see if I have time to make another set. I had time back in the beginning of December, when Zach and I first talked. I'll let him know today or Thursday as I want to change the outside shape slightly for more clearance. I'm trying to get my own 787HX conversion done.
glsmohio
Well-Known Member
"There is another guy on FB that was offering Zach another conversion option that may allow better clearance. We might have to look at that option again."
Hey Matt that guy on Facebook is me. Trying to see if I have time to make another set. I had time back in the beginning of December, when Zach and I first talked. I'll let him know today or Thursday as I want to change the outside shape slightly for more clearance. I'm trying to get my own 787HX conversion done.
can we see some pics of this? im thinking this might be my next winter build....


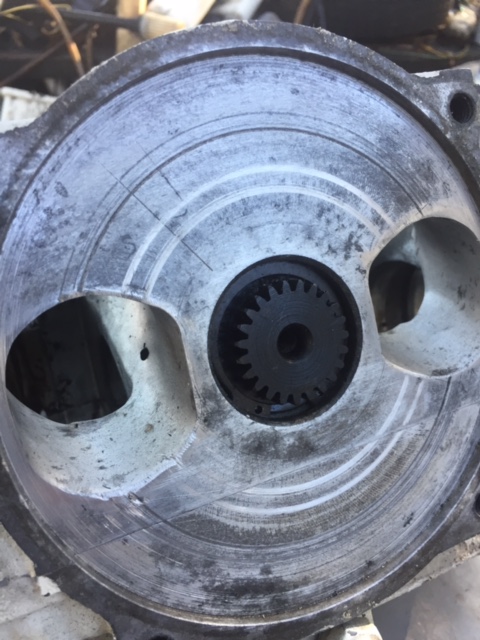
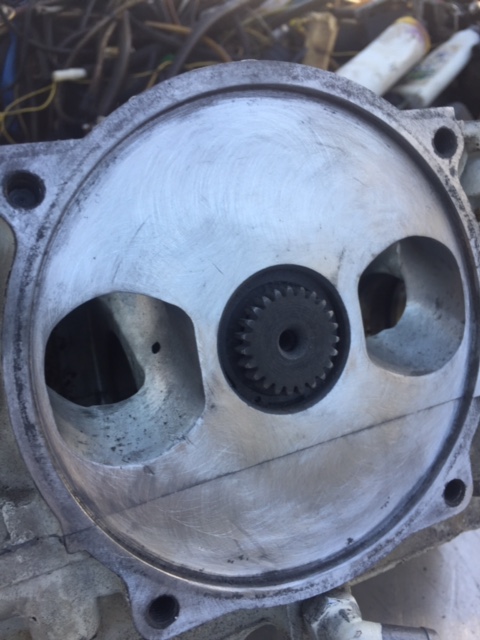
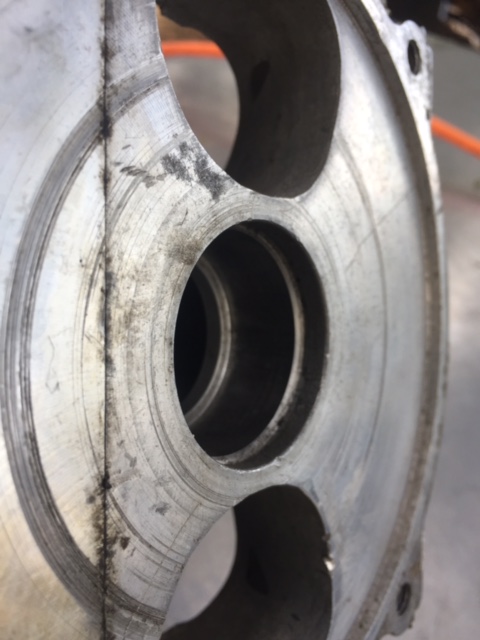
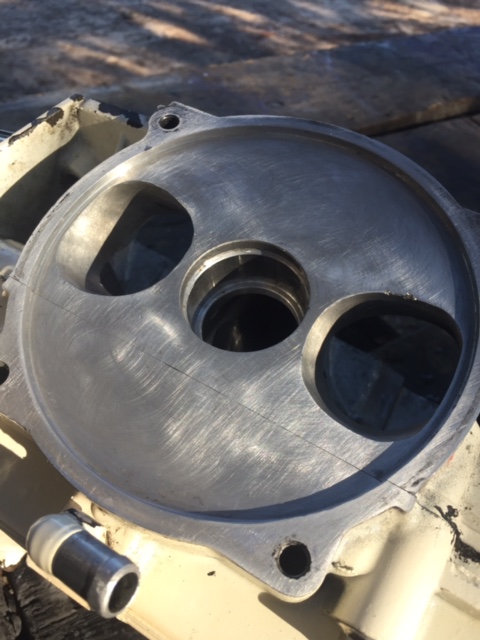
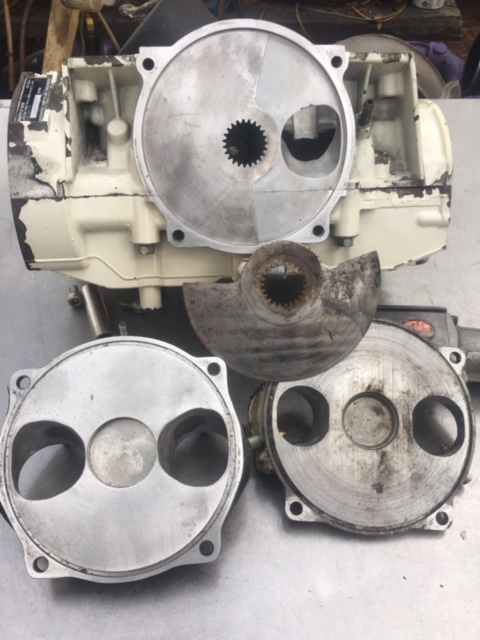
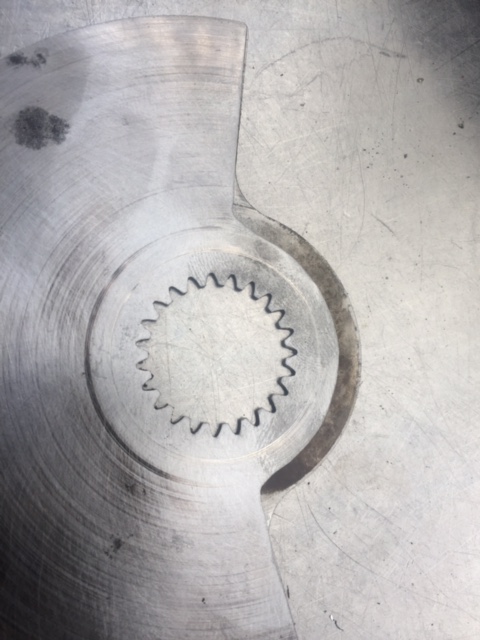
Mock up pics. The 95 shaft lines up perfectly in the PTO.View attachment 38730View attachment 38731View attachment 38732View attachment 38733
I don't want to Hijack this thread so if more info is wanted I can start a new thread.
that looks really good. are the plates stainless?
Thank you Critracer for chiming in. I guess at this point Zach has got a hold of you and commissioned one. I like your design especially after hearing Zuminzax's experience with the bracket.
Zuminzax my RV surface is pretty flat. I'm using an intake that has not had it's surface altered and I get a consistent .013 with the solder test found in the manual. That's still in spec and with the light swirl marks on everything I'm expecting instant starts and quick acceleration.
Glsmo we are planning 2 to 4 races at this point. Pensacola and Panama City (rounds 1 and 2) are right here in our backyard, we could not be luckier. Then I was thinking if things are going well we could hit that lake Hartwell, Ga race and maybe the finals for the tour in south Fl. Once we get the boat dialed in though Zach could drive it anywhere and race it.
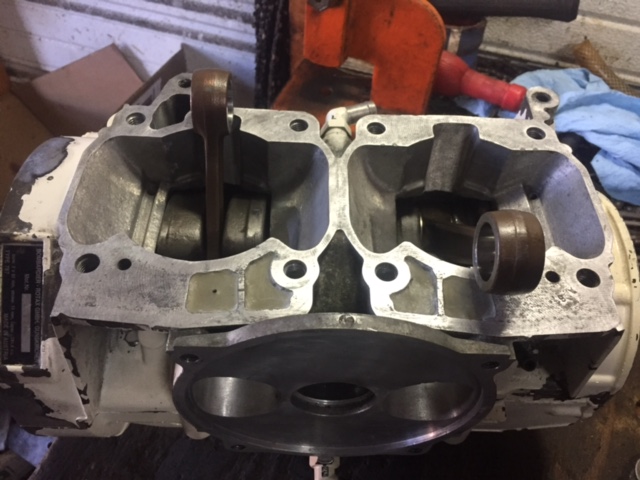
Today I got the bottom end cleaned up inside and put together. The crank looks to be SBT because its welded and I like that. It had a Jap bearing on the rear for some reason. I like the welding because I don't want it twisting. This is not going to be a high hour engine just a very fast one.
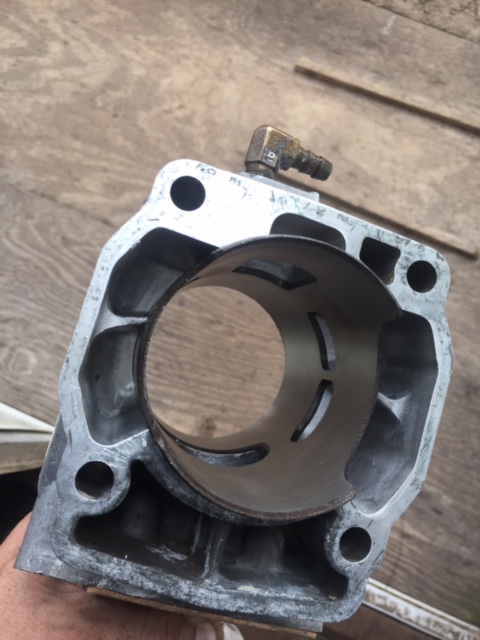
The ported cylinders I had bored went back to the machine shop that bored them. There was only a .005 piston to cylinder clearance and that won't work with Wiseco's. They swell more then other brand pistons and need .007. That way they are not so prone to cold seize. Here is a set I found in another motor. This is what I don't want this engine to do.

Zuminzax my RV surface is pretty flat. I'm using an intake that has not had it's surface altered and I get a consistent .013 with the solder test found in the manual. That's still in spec and with the light swirl marks on everything I'm expecting instant starts and quick acceleration.
Glsmo we are planning 2 to 4 races at this point. Pensacola and Panama City (rounds 1 and 2) are right here in our backyard, we could not be luckier. Then I was thinking if things are going well we could hit that lake Hartwell, Ga race and maybe the finals for the tour in south Fl. Once we get the boat dialed in though Zach could drive it anywhere and race it.
Today I got the bottom end cleaned up inside and put together. The crank looks to be SBT because its welded and I like that. It had a Jap bearing on the rear for some reason. I like the welding because I don't want it twisting. This is not going to be a high hour engine just a very fast one.

The ported cylinders I had bored went back to the machine shop that bored them. There was only a .005 piston to cylinder clearance and that won't work with Wiseco's. They swell more then other brand pistons and need .007. That way they are not so prone to cold seize. Here is a set I found in another motor. This is what I don't want this engine to do.

mcycleski
Active Member
Not sure..I got it from a guy from the seadoo parts page on Facebook. It's brand new and was never used.
Theres my old cradle for the 720/800 conversion .....nice to see it being used,good luck this season with racing ,I have tons of 800 motors and carbs if you need parts
The cylinders are back and looking good.


- Status
- Not open for further replies.
Similar threads
- Replies
- 16
- Views
- 1,061
- Locked
- Replies
- 6
- Views
- 654