Paul Bretz
Active Member
Maybe i was just lucky


")
I never had an issue using the special tool and a little heat on the pto. Sometimes even having a 6ft bar on the pto and no twisting of crankshaft.
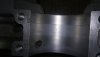
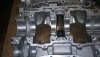
I don't need a perfect engine but it's gonna be right when I get R did. I have never seen a set of cases that had bearing surfaces like that. It looks like someone media blasted them at some point. They should be a smooth machined surface. I wouldn't run those if they were mine.
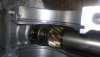
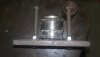
Also that inner rotary valve bearing is not OEM spec, it should be a shielded bearing not open like the one in your picture.
Someone has been in that engine before.
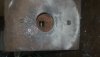
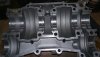
I'd like to paint the cases. Perhaps after assembly would be better. How do you guys paint prep ??LOL, I am too anal for that but I will try. A fair amount of paint still on the engine. I want to get all the flaky stuff off before I paint.Degrease then just rattle can and clear. Nothing fancy and doesn’t have to be high heat or engine paint.