98 Speedster rattle drive shaft fail

Note: This site contains eBay affiliate links for which SeaDooForum.com may be compensated
Status
Not open for further replies.

lithium2g

Active Member
Heard some weird noises in my L side engine the other day while out on the water. It was a low pitch squeal. Sounded like something wrong with the pump. I just shut it off and went back home. There's a bit of an initial grumble/grind when I cranked engine but otherwise ran ok once idling while boat on the trailer.

Figured its the jetpump bearings dying because of recent issues I had with water leaking in through the impeller cone. I was looking to rebuild the pumps once I get a shop press and the impeller tool. I already ordered the rebuild kits and new wear rings from USA but I just wanted advice before I proceed further.

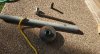
I pulled the pumps and discovered several things.

1. There was no neoprene seal on both wear rings. Should there be?
2. I could push/pull the impeller shaft which i thought was suppose to be tight.
3. The impeller spins rather smoothly and the wear ring only has superficial damage on it.


- video showing you what im looking at.

I cant take the impeller off yet until the tool arrives but what am I really looking for in terms of identifying a fault with the bearings? or is that something I wont know until I take the impeller off?
 
1. The neoprene seal goes between the pump and the hull. The plastic pumps supposedly don't need it. The first time I took my pumps off they weren't there, either. They don't seal the water from the boat though. They seal the pump to the hull. So you're not talking about the boat sinking with a bad seal (such as commonly believed), you're talking about loss of pump efficiency. I've been putting neoprene seals in every time since but they are not pictured or called for in my shop manual.

2. You don't need a press. The bearings and seal can all be easily installed and removed with a hammer and a bearing pusher tool. It will be getting the impeller off that will be the hard part.

3. There is always some forward / backward play in the shaft but there is a pusher in the cone that is supposed to push against it to take it all up and push it all against the thrust bearing. So when you push in/out to feel the travel, you should be having to push against the sprung pusher, which it would appear you aren't. So I would say there's at least some pusher damage or your pusher is missing. If you had water intrusion I would bet you need new bearings and seal, if not possibly a new shaft as well. The overall amount of play you have is hard to tell, but does not look insanely abnormal to me. Mainly the fact that there is obviously no pusher action going on is the alarming part. Also, the noisy pump seems to be spinning with more difficulty than the quiet one, which would be another indicator of bearings damage.

4. The bearings and seal are pretty simple. They're just roller bearings. Before installing new ones though you need to read about proper spacing in the manual. They make an expensive installation tool to get the spacing perfect but it can be done without it if you read the manual and understand the purpose of the spacing.

5. This job is difficult or impossible to do without the correct removal pusher tool. It's just a round bar machined to the correct length and size. And old / spare prop shaft and bearings can be rigged to make a pusher tool as well.
 
Sorry, I realize my use of the term pusher is confusing, but there are 3 pushers I'm referring to:

1. The bearing removal pusher, which can also be used for bearing installation if you handle your own spacing.

2. The bearing installation pusher, which is expensive and can be done without. It's main purpose is to take the guess work out of spacing during installation.

3. The sprung plastic pusher inside the nose cap of the pump that pushes the prop shaft against the thrush washer. I believe the primary purpose of this is just to prevent the prop shaft from moving in and out while the boat is out of water as, when it's in water, there is plenty of thrust doing way more pushing than this little pusher could ever do. Basically, it's just to keep the prop quiet when out of water, which may explain that rumbling you described if your pusher is missing / damaged.
 

Hey thanks for responding heph. Im still waiting for an impeller tool, the australian supplier didnt have it in stock so I had to order it from the usa as well :< as such im yet to progress any further.

Today I put everything back together just to see how it goes, i got tonnes of pump oil. I was considering swapping the L top R pumps over to see if that would help isolate the origin of the strange noises.

I snapped a video of what im hearing. You can hear like a deep sounding rumble alongside the buzz of the engine. If you listen carefully when engine shuts off.... for a brief moment the impeller sounds exceptionally loud/vibrating as it stops spinning.

I really hope its the bearings. I feel equipped to deal with that but I'd hate it to be anything sinister.
 
It's really hard to tell from your video. I don't have great speakers either. But at the end of the first part of the video, that little rumble could be bearings. It definitely sounds like it's coming from the pump / impeller, which is kind of a good sign since the pumps are so mechanically simple.
 
I swapped over the jet pump and the vibrations/sounds persisted. So its probably safe to eliminate the bearings being a problem.

Im thinking the drive shaft might be out of alignment or possibly the carbon ring has an issue
 
My carbon rings will sometimes make a chattering noise if run dry / out of water. Also one time I forgot to tighten the hose clamp on it and it made the same chattering noise.
 
Lads, I found the problem. Should have looked here earlier.

The rubber boot is completely shredded. It looks like some ghetto mechanic previously tried holding it in place with wire instead of the proper retaining clamps.shareddedpic.jpg


Is it just these parts I need to replace the old one with, or should I replace other parts as well?

3 293650021 CLAMP OETIKER
4 272000001 RUBBER BOOT
5 293650067 OETIKER CLAMP


Thanks so much for responses and advice thus far
 
You've got bigger issues than that boot. The shaft shouldn't spin like that. (Notice how the other side doesn't.) Either the PTO is stripped, the shaft is stripped, both are stripped, or the shaft is broken. I'm betting that both the PTO and shaft are damaged/stripped.

Your rumbling noise is the loose shaft spinning in the PTO and the prop barely turning as a result.
 
This could happen from years of engine misalignment wearing out the splines or from something getting caught in the prop. Also worn out prop bearings allowing the prop to catch the wear ring could cause it. You showed in/out play in the prop shaft but is there any side to side play?
 
You don't need those oetiker clamps when you do repair the boot though. They require a special crimper to assemble that no one wants to buy. Most just use zip ties or regular hose clamps instead.
 
Theres very little side to side movement on the shaft. But I now understand the severity of the problem if the splines are wrecked on the pto fly wheel.... no splines = very difficult to remove it. To some degree the splines do catch because the impeller still spins on the other end as shown when it was cranked over yesterday... it also rotates when when i rotate the pto fly.

Would it just be the PTO flywheel and drive shaft that needs replacing? which im having trouble finding a replacement part. I think theres a 2nd hand ones on ebay but thats about it...
 
Yes I'm guessing you need a new driveshaft and PTO. But there's no point in taking all that apart without a driveshaft rebuild kit at the same time.

But you need to find out why it stripped in the first place or you might just be dealing with it again soon. I can only think of 3 reasons it would strip like that. Bad alignment, bad bearings, or you sucked something up. Only one of those 3 resolves itself without your input.

Your next step is to remove the pump and driveshaft to visually check for damaged PTO and shaft splines.
 
Btw, one of my engines was badly aligned when I got my boat and the splines were almost stripped out on it. So it definitely happens.
 
Bad alignment, bad bearings, or you sucked something up. Only one of those 3 resolves itself without your input.

Your next step is to remove the pump and driveshaft to visually check for damaged PTO and shaft splines.

You're talking about pump bearings right? and I'll guess I have to suss out this engine alignment thing but im 90% its because I sucked up a few rocks the other week.... damn river lever is low thanks to no rain.

I managed to get the drive shaft out, that was an effort in its self. The splines on the shaft do not look as prominent as the pump end and probably needs to be replaced. Looking inside into the flywheel from the back of the boat I can see the internal splines look shredded.


The cost of replacement parts is the annoying bit. Its like $450 usd for new driveshaft, flywheel and carbon seal kit with postage inclusive. The killer bit is cost of postage to australia is $120 usd no one place stocks all that gear.. I normally buy from bay area powersports since they got mostly everything but not a drive shaft for a 787 apparently.

Once again, thanks for your assistance, it is much appreciated. I learn something new every time something breaks
 
Yes, your shaft splines don't look great. See how they're rounded on the drive side of each spline? That's about how mine looked when I replaced it. My PTO wasn't much better but my shaft wasn't spinning in place yet like yours is.

Yes, bad pump bearings could cause the prop to move and bite into the wear ring that would cause similar resistance as sucking something up. But honestly, that would most likely strip the splines clean and cause a lot more wear ring damage than you've indicated that you see. Your splines look more like they wore over a long period of time which would point more towards bad engine alignment. Have your engines ever been out that you know of? Have you checked your motor mounts?

Your feelings are going to be even more hurt when you look at the cost of an alignment tool. I've tried to home brew my own and found that it really can't be done properly without the official tool.

I do feel bad that shipping eats you up so bad. I wish there was some way I could help you out with that.

You're also going to need a fairly strong breaker bar and a huge cheater pipe to get that PTO off. That and the impeller are tightened on with ungodly force from years of being tightened by driveline torque along with permanent loctite from the factory. (Which it is generally advised to use anti seize on the threads instead when you put back together, despite the manual stating to use loctite again.)

You're at the point now where rebuilding the pumps seems like a worthwhile expenditure since they're out and in question anyway. I know this seems like a snowball effect of repair costs. There's not really any way of sugar coating it. It just is.

I bought my boat for us 2000 and immediate dumped another 7000 into fixing it up. Boats are money pits.
 
Yeah I got pump rebuild kits coming so im going to do that.

Im just having trouble finding a replacement PTO flywheel. The part number listed for the 98 speedster is

Clutch-Flywheel Includes 23 - 24. 290958057

Can't find this listed anywhere. Its not on SBT, ebay or amazon.

Theres a slightly different part # for what appears to be a similar flywheel here....

https://www.amazon.com/Sea-Doo-Whee...M#+290958056,+420958057&qid=1580085017&sr=8-1
Am i just looking in the wrong place?

And im scared of trying to get the dam thing off in the first place. It looks extremely difficult even with the correct equipment. Apparently a chain wrench around it can work?

I watched this guy here, he goes through the process pretty well

Here's some eBay PTO's:

https://www.ebay.com/sch/i.html?_fr..._TitleDesc=0&_osacat=0&_odkw=seadoo+420958057
Getting yours off is going to be a huge challenge, the hardest part of the project most likely, especially if the internal splines are stripped so bad that the PTO / impeller tool you're waiting on spins inside like your driveshaft is. You are for sure going to need to use the rope in the cylinder trick along with a massive pry bar. I suspect 4-6'. The impeller is on tight like the PTO and I had to use a 5' pry bar on my impellers and even then it was a strain. I actually fabbed a jig to bolt my motors to and then run over with my fork lift to hold to the ground and then lift up on the pry bar with the forks to unscrew mine. But the engine has to be out for that.
 
Heat tends to help get the PTOs off. When I did it I had the crank in a big vise, attached to a 8ftx8ft work table, still took a 1/2inch breaker bar with another 2 feet of cheater and the mapp gas torch before it finally busted loose. Hopefully yours is not THAT tight.
 
The main issue is the permanent loctite that the factory used. I don't understand why they used it because the natural rotation of the prop tightens the PTO and prop. So there is no conceivable circumstance where engine rotation would loosen either. That is why many suggest using anti-seize when you put it back together instead.

Loctite cites heat as the way to loosen that permanent stuff. I've used it before on other parts in the past. When you heat it hot enough it turns to a pink powder and lets go. The problem is that if you heat it too much you can damage your crank seal and cause more issues.

I once was working on an ATV clutch that used that permanent Loctite on a set screw. I didn't realize it at first. I broke 2 allen wrenches and and allen socket trying to loosen that screw, which was less than 1/4" dia. Then I read on the net about the Loctite, heated it up, and it came out with finger force. So when they say permanent, they mean it!
 
AIght lads, im stock piling parts and making progress. Just waiting for 1 more shipment which should arrive tomorrow.

my newly acquired impeller tool fits really snug into the PTO flywheel. If it fits so well do I really need to replace it? I dont really like the idea of sticking a rope down the spark plug to lock the piston up.

I now have access to a vice and impeller tool and got the impeller off to discover the bearings to be functioning well. The only thing that looked out of order was the thrust washer which was 1ml smaller in depth compared to the new one so will probably only replace that. The impeller had a pretty big deflection on one of the blades. I just beat it with a hammer back into a similar position.

The pump housing and new wear ring went into the freezer for a few hours. Switching out the wear ring was a simple process I felt.


Thanks guys.
 
I would probably just see how your new driveshaft fit and felt and go from there. But the way the old one spun it would be hard to believe that your PTO splines are in tip top shape.
 
You can’t just hammer the impeller blades either. They need to be exact or your going to get bad cavitation.

Also a better way to remove the PTO’s is with a chain wrench. The impeller tool can damage the PTO splines because they can be on so tight.
 
Well that didnt take long. Got it off. Definitely wasn't as difficult as described... I suspect someone else has had it off at some point.

The splines are definitely gone. Thanks for the good advice.

I couldn't find the remnants of the driveshaft bumper. Only the small insert was still in the old shaft, it probably got shredded up.

Just waiting for my other package with the new flywheel and carbon ring
 

Attachments

  • 84341728_592792181268162_8322276013979467776_n.jpg
    84341728_592792181268162_8322276013979467776_n.jpg
    205.1 KB · Views: 21
  • 84474118_1459647407542218_3156858218769022976_n.jpg
    84474118_1459647407542218_3156858218769022976_n.jpg
    417.1 KB · Views: 21
Status
Not open for further replies.
Back
Top