• This site contains eBay affiliate links for which Sea-Doo Forum may be compensated.

96 GTX Gray Fuel Line Replacement

Status
Not open for further replies.

Titaniumboy

Active Member
I have a bone stock 1996 GTX except for a boarding ladder and a mat kit. The ski has maybe 110 hours, but has not run since 2015. An independent shop removed the carbs, cleaned and replaced the diaphragms, and cleaned the internal filters back in 2010.

Before firing this puppy up, I want to replace the original Tempo gray fuel lines.

I think I need the following:

20 feet of 1/4” fuel line
5 feet of 5/16” fuel line
1 fuel selector switch
1 clear Fram G2 fuel filter
Appropriate SS clamps (already have an Oetiker plier)


Is this kit from eBay seller brynhard worth considering?
Sea-doo 96 97 GTX GTI full tune up overhaul kit fuel / oil lines gaskets carbs | eBay

Thanks for any thought or ideas.
 
This site contains eBay affiliate links for which Sea-Doo Forum may be compensated.
You only need 1/4" fuel hose for your ski.
I don't recommend the aftermarket fuel filters as they can restrict flow, I prefer the factory water/fuel strainer.
After 11 years you really should be rebuilding the carbs with new genuine mikuni parts.

I think that ebay kit is a little overpriced for 90% of the stuff you can get at a local auto parts store.
 
Thanks for the reply.

I’ll be getting a couple of the Mikuni rebuild kits you reference in your epic Carb Rebuild thread. I’m not a mechanic, but I can follow directions. Looks like most of the rebuild kits are $50-$60? Is there any preferred supplier that supports the forum?

And I will need a JIS screwdriver.

Would it be preferable not to bump or run the engine at all until the carbs are rebuilt and the fuel lines replaced? Or would it be useful to run the ski for a couple of minutes on the hose to get a baseline for comparison?
 
Last edited:
I’ve got 25 feet of 1/4” A1-15 marine hose on its way. I know this may be overkill, but my long time friend who is a boat mechanic insisted that I get marine rated hose. In his experience he says that the fuel line from NAPA or any auto place just is not lasting long term like the marine rated hose. At $2.30 per foot it is not going to break the bank.

I also found 25 Oetiker 14.5mm clamps for only $9 on Amazon. I think I only need 16 clamps total.

I have a JIS screwdriver in the way also. It is blue and made by Vessel. $10 from Amazon.

Regarding the fuel selector switch - is aftermarket acceptable or is Seadoo the way to go?
 
I say only OEM on the selector. There were some junk Chinese ones floating around causing issues before.
 
What are people using now that Seadoo has discontinued the fuel filter 275500089 as of 2019? OSD says the only option is to buy the Canister Filter Assembly 275500358 for $24.99 which includes the now discontinued fuel filter.

Did Seadoo change part numbers for the fuel filter assembly? I have a fuel filter assembly package purchased in 2010 that has the part number 275500088.
 
Last edited:
I just ordered a couple and am waiting for them to come in. Yours uses the **88 number, which is the entire housing and everything.
275500088
Fuel Filter Ass'Y | Includes 15 to 17
MSRP: $26.99
Dealer Price: $26.99

The $11.12 #275500089 is just the internal element. Since the $7.27 #o-ring needs to be replaced I have just always bought the entire thing for $8 more.
 
Where did you find 275500088? OSD is saying it is discontinued.
https://osdparts.com/index.php?main_page=product_info&products_id=987

OSD is saying the 275500358 complete assembly is the only way to get the 275500089 filter element.

I’m sure there are other water separator/fuel filters out there that could be made to work with the 6mm lines. The trick, I think, will be finding a fuel filter element that has a screen that has the fine mesh like the Seadoo.
 
I ordered two from Pro Caliber Parts but hasn't arrived yet. They didn't say it was discontinued though.
 
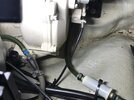
While taking off the air silencer and flame arrestor housing to to get access to the carbs (and to make the fuel line changeout easier), I spied this in the bottom of the ski.

2DF7887C-305F-4138-AFCB-6B52431EAC0E.jpeg

I’m guessing that the clear fuel filter on the left is not original and should be removed?
 
And I will need a JIS screwdriver.

Well, it's preference to reuse the old screws, once you get it apart, I recommend a stainless screw set for the carbs, which are allen head screws, except the little screw holding the needle pin down. If you ever need to get back into them at a later date it becomes a breeze.

I'll try and find the link, but a guy on ebay sells the ss screw kits for about $9 per carb. Also, I believe OSD has some stainless replacement options.
 
I removed the inline fuel filter that was added in 2010. I have also replaced all of the fuel lines, along with the fuel filter assembly and fuel selector switch.

I replaced the vent line from the fuel tank baffle assembly to the tee barb fitting up in the front compartment. Do I also change the two other lines that go from the tee barb fitting to the hull fittings? If yes, how the heck do you get access to those Hull fittings in order to remove and then replace the hose clamps?

Should that tee barb fitting be replaced, or can it be reused?. Same question about the wye barb fitting on the return line on the back end of the PTO (rear) carb - can it be reused or should it be replaced?
 
The lines to the hull fittings are generally fine unless you just want it to match I leave them alone.
The barb fittings and the return barb fitting should be fine as long as they aren’t cracked or damaged. Just get them clean
 
Leaving those two original vent lines will certainly make life easier. I still have no idea how you supposed to access those hull fittings to order to remove and install vent lines. Also great news that I can reuse the tee and wye barbed fittings.

I’m going back out and see if the fuel system will now hold pressure following the shop manual test.
 
And now that the fuel lines have all been replaced, what about the oil lines? I have the 3/32” Tygon tubing kit from OSD but what about the larger oil lines to and from the oil tank? Leave or replace?

And is the old oil in the nearly full oil tank ok to leave?
 
And now that the fuel lines have all been replaced, what about the oil lines? I have the 3/32” Tygon tubing kit from OSD but what about the larger oil lines to and from the oil tank? Leave or replace?

And is the old oil in the nearly full oil tank ok to leave?
As long as it’s the correct oil it’s fine to leave.

Other oil lines you can get from OSD but it’s typically not required. I normally just pull them off and clip the ends as long as there’s enough slack in the line to do so. I normally only replace them if I drain the oil tank to replace the grommets
 
So I can leave the old oil lines and the old oil. That will save some time and let me get to the carb rebuild sooner. The oil is genuine Seadoo low ash oil so I should be good to go. The old oil certainly looks brand new.

Why would you clip the ends of the oil lines?
 
Last edited:
I’m going back out and see if the fuel system will now hold pressure following the shop manual test.

Ok, I guess I don’t understand what the fuel pressure test is doing in the shop manual. The shop manual wants me to disconnect the “air inlet hose of fuel tank from the body” and to pinch off the “fuel tank vent hose”.

Wouldn’t you want to leave those two items in the system for the fuel pressure test? The “air inlet hose” is the check valve that prevents a vacuum and therefore should be able to hold pressure during the pressure test.

Similarly, the “fuel tank vent hose” is a pressure relief valve that should be able to hold some amount of psi without leaking.

Why would the shop manual procedure not want to test the check valve or the pressure relief valve?
 
Leaving those two original vent lines will certainly make life easier. I still have no idea how you supposed to access those hull fittings to order to remove and install vent lines. Also great news that I can reuse the tee and wye barbed fittings.

To remove you need to remove the black shield for the rear one and the other one up front just reach from inside the hull. I'd at least remove them and spray brake cleaner in them and blow them out with compressed air. Over time they can gum up and stick. To remove spray a little penetrate on them from outside the hull and push the center with a phillips head screwdriver, they should push right out into the hull.
 
The old oil certainly looks brand new.
Is it red? You don't need to remove the old oil feed lines, though later if you ever need to remove the engine doing a rebuild that's a good time to do it. Make sure to prime or bleed the oil pump after installing the new 3/32" injection lines. Couple ways, you can loosen the little 8mm bleed screw to remove air to the pump, then when you start hold the arm open til it smokes. Be careful the cable can come off. Or another way, remove the pump and spin it counter clockwise with a drill. I like to do the drill and use my camera scope to see it pulse. That way when I reinstall the oil pump fully primed and I start I'm focused elsewhere, like adjusting the idle and cking for leaks on the hose.
 

Attachments

  • IMG-0234.jpg
    IMG-0234.jpg
    286.7 KB · Views: 15
Status
Not open for further replies.
Back
Top