1997 Challenger single 787 Carb rebuild?

Note: This site contains eBay affiliate links for which SeaDooForum.com may be compensated
Status
Not open for further replies.

TheYeti

Member
Ordered a carb kit for the new to me 1997 Challenger with a single 787 rotax. I've never rebuilt a carb in my life and the closest I've even ever come to it was spraying carb cleaner in the throttle body of an old truck years ago before buying my first diesel and never looking back. I cant seem to find any manual for my particular model (maybe because I haven't figured out how to navigate this site yet I duno) So, I there like a sticky or FAQ or even better a 'how to' on this exact model? Any specifics to this year and engine on how to set it up? I am just going to replace everything with the kit I found that is specifically meant for a 97' Challenger with a single 787. Then I know its all fresh. How do I go about this and how do I set up the jets(?) Or whatever needs setting to this specific model? Honestly any help at all will be appreciated.

I'm obviously no pro here but I think Im am mechanically inclined enough to figure it out with a little help and guidance.
 
Hey Yeti,

There are alot of resources available for the 787 carb rebuild. I have 1997 challenger 1800, 1996 GTX and 1996 GSX. All have the same carb. Just look up 787 carb rebuild and you should be able to find
 
I've read through a few posts. Possibly the same ones a couple times. Searched quite abit. But haven't seen anything specific to my year single engine Challenger. So being fairly new to all this I didn't want to assume anything when taking apart something thats running now and messing it up based on assumptions. I did download and print off a Mikuni carb manual, again not specific to my year/make/model that I'm aware of for sure.

So your saying the 787 in my boat should have the carb adjusted the same way you would adjust the carb in an 1800 model or possibly others? Like setting the jets 1 turn out or 1/4 or whatever I've been reading in non specific to me posts? Basically all the carbs are set the same just use different parts (like springs and stuff) based on year and model? So I'll be good to follow a quality write up and adjust screws generically? I just havent came across any posts saying that until now...
 
Last edited:
Well I'm going to post here to avoid starting another thread. Hopefully I get an answer so I don't have to...

I took the carbs off 'rebuilt' them with all the new gaskets and needles and seat I got in my kit. I did see somewhat of a 'ring' engraved around the rubber tips on the needles. So hopfully that means I didn't do this all for nothing. Anyway the springs that came in my kit (which was specifically meant for a 1997 single engine 787 SeaDoo Challenger) were shorter and longer when compared to the spring I removed and replaced. I dont have a popoff tester and am figuring out what else i need to get to make one BUT, I used the longer spring rather than the shorter one. Did I make the right choice? Also what difference will a shorter or longer spring make and what consequence will happen based on a longer or shorter spring?
 
Took it apart and have it back together now. After a little frustration. Ill leave it there for now. Anyway made my own makeshift popoff tester. Seemed like i was getting about 25psi on the one spring so i went with the other in the kit that was more like 43psi. Like I said "my own make shift" (made it out of a paint spray gun gauge some adapters and bought a cheap air blow gun then put some hose on it i use for bleeding brakes. Blew it up once, BANG!! OOPS LOL. Got the finesse down after a couple tries) air compressor builds up pressure quick. So ya "about". Anyway trouble shooting in the Mikuni manual i printed off(after the fact. Even though it wouldn't have mattered) says if you can't rev it up from idle your popoff pressure is too high. So. FML, murphy's law again. Ill go put the shorter spring in and put it back together again I guess. I don't trust using the spring that was in there because its a 24 year old boat. And I know the carb can't be factory untouched after 24 years. After taking it apart and installing the kit i got (and adjusting the looseness in the throttle with the nuts on the cable at the lever itself) it doesn't die when i oit some throttle in it from an idle. So that oroginal problem is fixed at least. BUT npw it wont rev up. Soooo... Hopefully a spring change will cure that....?
 
Where. Can i find genuine Mikuni parts? Seems everything for this boat is discontinued. So where would I find a Mikuni brand kit?

Also. That is a great read. Wish I had it before getting started lol. Somehow in all my searching that one never came up. Oh well, looks like I did it correctly for the most part anyway. Great reference for going back in now though too.
 
Last edited:
Out of stock and international shipping suspended apparently. Ill keep that for reference in the future for hopefully one day soon when the world isn't such a mess I guess. I don't even know what part # my carb is to search for Individual parts either so. Ill try the other springs i have for now reassemble again and see how it turns out. Guess my batteries dead now so charging it so I can start and test the throttle once more before taking it back apart for no reason.

Thank you very much for the help and links. It is much appreciated. Im finding searching for this particular boat to be much more difficult than any other vehicle or anything I've ever had to work on. Seems the 1997 is like right in between. But I'm guessing its more similar to a 96' still unsure of a lot of things on this boat tho which makes it hard to find correct info.
 
Yes sir. Ill be doing this job for the 3rd time im sure in the near future. Put it back together and it started just fine. The next morning the motor is literally full of fuel. pumped it out with my brake bleeder, N doesnt want to start. Took the carb back off n found a bunk 'o-ring' (the weird shaped one) in there. Looked like everything else seemed ok for now. Changed the springs out to the other one in the kit bYes sir. Ill be doing this job for the 3rd time im sure in the near future. Put it back together and it started just fine. The next morning the motor is literally full of fuel. pumped it out with my brake bleeder, N doesnt want to start. Took the carb back off n found a bunk 'o-ring' (the weird shaped one) in there. Looked like everything else seemed ok for now. Changed the springs out to the other one in the kit because it didnt want to idle up after the "rebuild". But ya ya better order a good kit, from apparently you. Lol. Then looked like there was some kinda smoke after trying to start it again and again (please let me not have burnt out a starter somehow) so unhooked the battery. Put it on the charger. Went in for a drink. ecause it didnt want to idle up after the "rebuild". But ya ya better order a good kit, from apparently you. Lol. Then looked like there was some kinda smoke after trying to start it again and again (please let me not have burnt out a starter somehow) so unhooked the battery. Put it on the charger. Went in for a drink. I plan to hook up the battery tomorrow, then take the plugs out HOPE that when i pit the fob back in and try to turn the motor over without the plugs in it does its thing. Then put them back in after drying them amd try to start (assuming the motor does try to turn and the starter is working as normal.

I should add when i was working the starter and not too much was happening, I started pressing it for maybe a half second at most at a time (just basically tapping it quick and letting go). It would kind of almost try to turn(slightly more than just a click, like a dead battery) then stop and do nothing. So I 'tapped' it again and again maybe 10-15 times then it would almost try to start for a second or two. Then nothing again. Not sure what that might tell me...
 
It’s flooding which is caused by a bad needle and seat. Don’t use the springs in the kits as they are wrong for your model.
 
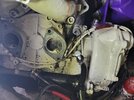
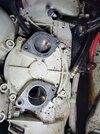
I will probably have to take it back off and put the spring that was in the when i got it back in then. But I don't know for sure if that is the stock spring or replaced over the last 24 years either. I think the gasket was the issue but when i go out in the morning i will have a better idea. Also though, the fuel line was leaking massively after second removal in to the bilge non stop until i plugged it with a bolt. The one that goes to the bottom most connection on the carb when leaning over the driver seat to the back when reinstalling it all. Pictured here with a bolt in it (if i can attach this pic) Also it was the cylinder on the left that i was able to use the brake bleeder to pump out a massive amount of fuel, after spewing tons out of butterflys while cranking with carbs back on and nothing else at first reassembly.

Also i trust you know what your talking about. I mean you obviously know a hell of a lot more than I do about this stuff. So Thank you for your input so far and hopfuly again. The seller i got it from jetskiplus i believe said it was specific for my 1997 challenger 787 single engine, but i now know that must have been bs. So much for research before buying and waiting for shipping. During covid shipping time across border too. It was the clearest description and answer i was able to get when looking. But just don't know much about these things yet. Ask me about my Duramax and we can have a conversation. My Seadoo boat Im more in to asking questions after questions after questions...

Another edit. I also had to make my own gaskets to mount the carbs back on the motor with. I did use actual gasket material. A cork type material from a well known brand. I may be wrong again(wouldn't be suprised) but seems better than the green paper type that was on there when I removed the carbs the first time.
 

Attachments

  • 20211008_130616.jpg
    20211008_130616.jpg
    325.1 KB · Views: 9
  • 20211008_130625.jpg
    20211008_130625.jpg
    369.4 KB · Views: 8
Last edited:
Do you think the motor all the sudden not wanting to turn over is just a hydrolock with fuel issue?
 
Last edited:
Pull the spark plugs and crank over to see if fuel squirts out. Be careful it’s flammable.

Also change those small 3/32” oil injection lines.
 
Forgot to edit or update here. I did and it was definately flooded and hydrolocked. Bad. Tried putting plugs back in amd starting again and it wpuld crank but not start. I think it was still flooded though and I didn't crank it enough while the plugs were out So will be doing that again in a bit. Change them out to what size? Are those factory? And how would you suggest I go about adapting a larger size hose to the "nipple" in the intake?
 
Still curious about the lines in the post above? Theres is another line thats much thicker. Ill try to get more pics later. But I've took the plugs out again and turned it over again and again and again x50 and now have it sitting with an old pair of jeans over top of it and the plugs on the bench. Letting it hopfully evaporate the rest. Not sure how long it takes to evaporate gas though especially when its getting colder lately. Im thinking (hoping) once the gas is out of there it will fire up as quick as it did the first time after the intial carb rebuild.
 
Same size just new ones. 3/32” tygon fuel lines for small engines, Home Depot or any mower shop will have it.
 
Right on brother. Thank you. Much appreciated. I've never heard of tygon lines before But I'll begin my search locally. I am going to email you through your website as Im having some trouble finding exactly what I need to put everything back 100% to stock carb wise. I'd like to purchase this stuff asap If possible and get it done and on to the next project on this unit. Temps are dropping here in Sask, fast now.

I'm sure I am going to have some more questions in the near future and appreciate the help so far and hopefully in the near future too. Going to go back out to the garage shortly and give it try again and hopefully start it. Thinking this time ill try cranking it a few times with fuel still off and no choke after putting plugs back in first. Then ill go from there.
 
Well a little update. I pulled the carbs again quick and opened them back up with the intention of putting the arms and spring back in that I originally took out as well as look at what I did a little closer. So I noticed the arms holding the spring down and lifting the needle up off the seat was NOT level with the top of the area (for lack of better words and knowledge of the name of it) where it should be. At first i bent the arms that i had in their but then decided to go with my orginal plan to put what was in there back in for now. I made sure that one was flush as it pretty much already was. So i now know after learning a little bit more about how it works, the little red nub on the diaphragm must have been holding the arms down thus keeping the needle open and not seating all the way which in turn would have allowed fuel to continually flow. So for sure you were obviously right. The needle now seats while holding a straight edge on top of the flush part above the arm and spring. Anyway. Put it back together yet again quickly then ran off for turkey dinner at my sisters. Just got back home, heated up the plugs with my heat gun and put em back in. Tried it with the fuel off and it wanted to start. So i turned the fuel on and it started then died after a couple seconds. Held the choke amd started it and it ran. Waited a few seconds and tried the throttle for a quick blip. It was still cold but it definately revved a little bit. So Im ahead of where I was last time. So Im headed in the right direction at least. Sucks though it getting cold here amd wonter is coming fast so Im not going to hook a hose up and run it anymore this year even though i would like to really test the throttle a bit now that I've tightened that up too. I need to get some O Rings and learn how to change the pump oil fast before it starts freezing up real cold soon now. Also need to get that Genuine back to OEM kit from you and replace everything in that carb one more time so my daughter, wife and I can enjoy this thing eight away when spring gets here. Happy for now I can sleep a little better for the night. Thank you so much for your help so far and once again, in the near future.

I want to add, for anyone stumbling across this in the future. Thanks specifically to mikidymac for your help here and this thread :

The Seadoo Carb Rebuild Thread

It is the best write up you could ask for when touching one of these carbs. I mean I never touched a carb in my life and now i could take it off (sorry miki [can i call ya that], credit to skimming quickly through a utube vid for the removal to make sure I wasn't missing anything after a first look) and rebuild it in 45 minutes or less taking my time and searching for tools in the tool box as i go. Im no journeyman but I do have a 60 gallon compressor and 2 full size toolboxes in the corner of my garage. Takes me some time to work up ambition to get started but its never too bad once you get goin. I need to find some part to replace the fuel and oil filter now among the previous things i mentioned first too.
 
Last edited:
So. I went out to start it and check it over again and it wont start again. FML. The motor wasnt hydrolocked with fuel this time and it wasn't flooded. Or at the very least wasnt flooded to the massive degree as before. Tried and tried and it didn't get much if any more promising listening to it while I cranked. Tried numerous times with the choke and a bit without. Not sure whats going on now or if its the same problem. Had to give up and go in and have a drink before I get amy more frustrated. I removed the plugs again and tried cranking. Some fuel blew out but not quite as excessive as previously. Left the plugs on the bench so I can heat them good and hot after work tomorrow amd try it again. It is about 10 degrees (celcius) so about 50 farenheight here today and definately always colder in the garage. Maybe that has somthing to do with it? I duno but it didnt sound like it really wanted to fire at all. I regapped the plugs to 0.021. Is that the right gap? Also set the Low screw to about 1 1/8 turns put each. Think they were more like 1 1/4 before (I forget have it written down somwhere) but again It did fire and run sunday night so I figured it was good to go but damn its gettin me frustrated now.
I guess tomorrow i will go and adjust the low screw to 1 1/4 and go from there?
 
Last edited:
So Ive been thinking. The motor is full of fuel more than ever after letting it sit this long. I dont really want to remove the carbs and let them sit around until i eventually get a replacement kit from OSD. It will be awhile Im sure cross border and all with the current situation around north america. But was thinking. Is it possible I damaged one of the rubber deals themselves or install the check valves i received upside down? Would either one of those possibilities cause fuel to continually flow through the carb and just flood the engine if was sat for awhile?

I mean Im sure I installed everything properly thats the only thing I can think of. Also not sure how the fuel keeps flowing through the carb when i have the shutoff valve turned to the off position either...?
 
So.... another update(as if anyone care but me haa). I put an order in for a back to OEM kit plus a few things from OSD $330 later(Canadian, Not bitching about OSD, just the cost of things in general these days). Im sure it won't ship til somtime next week hopfuly and will take a lot longer to cross the border and get to me but I digress.
Anyway, I got it running. For now. It wouldnt run after cranking fuel out with plugs removed still again amd again. But sputtered for a second with fuel off. So i remived fuel filter and cleaned even though it was already clean, pinched of the fuel line and then regapped the plugs, again. Had them at 0.021. I now regapped them to more like 0.028 and it fires right up. It ran until i shut it off. Tried it again a couple times after while fuel line is pinched off amd it will still fire right up and run. Dont want to run it for more than 10 or 15 seconds just sitting in the garage. Im sure there is still some fuel left in the motor amd the fumes are ridiculous in the there too. Line is not completely 100% pinched shut but damn near with a hose pincher. Fuel valve is also shut off. So not sure if the motor was actually hydrolocked with fuel or maybe oil, or possibly both..??? Looks pretty dark for just fuel but definately smell gas. Anyway whether it needs it or not i will rebuild the carbs once again when i get the OSD parts. But why would it only run when the gap is set to 0.028 but not at the factory recommended setting of 0.021?
 
Last edited:
I believe you and the fact you know what your talking about. I just don't understand All thats happening other than that end result. Like how even with the fuel shut off it still flooded the engine sitting there. The fuel shutoff worked fine before i touched the carb. And wouldn't run unless i turned it on. Right now i pinched the fuel line near where it hooks to the carb on the bottom by the bilge pump area and oil line near filter and ill see if it still starts in the morning or if its flooded again. I just dont get it. Can't wait to get this back to OEM kit and hope its all good after that. Especially after spending money twice. Trying to understand everything.

What do the little clear disc's do with the rubber grommets holding them in place? And how exactly do they work? I assume from your carb rebuild thread they are "Check Valves" so to me that would mean they are sealing fuel most likely from the pump itself and in turn would be the 'first line of defense' from fuel coming in to the entire carb unit as a whole? Which, if I'm thinking on the right track, would cause my issue of fuel seeping in to the carb, then with the needle not seating properly, leaking through it and resulting in the motor being flooded with fuel? Would that make sense if I damaged the grommets on install or installed the "check valves" upside down(as mine had no ink marking to tell one way or the other)?
 
Last edited:
Status
Not open for further replies.
Back
Top