• This site contains eBay affiliate links for which Sea-Doo Forum may be compensated.

What wear ring in an hx

Status
Not open for further replies.

blairwill4

Active Member
So I picked up my hx. Needs a few things. The wear ring has a little more clearance than I want. Which one do I need. I see a lot of 30$ ones on bday but I've heard they're junk. Also how hard would it be to replace carbon ring while I've got the pump off. It seems a little loose . I was gonna try zip tie trick. I've never replaced one before is it hard? Thanks in advancd!
 
Ive never done a carbon seal but the one the ski has to be toast. It has tons of play up and down and back and fourth on the drive shaft. The wear ring has too much space too. I rode it the other day and its almost impossible to get it on a plane. You really have to baby it or it will bounce of the rev limiter and go nowhere. I've got the parts ordered.

First thing is, How do i replace the carbone seal? can i just slide it over the drive shaft and through the hole in the hull. Or do I need to pull the drive shaft somehow and slide it over the end inside the hull. If so will the drive shaft just pull out the back or is it stuck in there somehow.

Second question. It cavitated worse than I've ever felt before. That being said I've never seen a carbon seal that bad. And I know the wear ring is way gone as well. So I'm hoping its jsut a combination of both of those things. But In learning a little bit about these skis I know they have a two part drive shaft. My worry is that the coupler where they meet could be stripping out? Is this possible? And if so would it not go at all or would it slip for awhile? Like I said before I can get it on a plane but its not an easy task.

Thanks guys

-Blair
 
I'll try and get back to you later tonight, heading home from the shore right now.

Sent from my SGH-T889 using Tapatalk
 
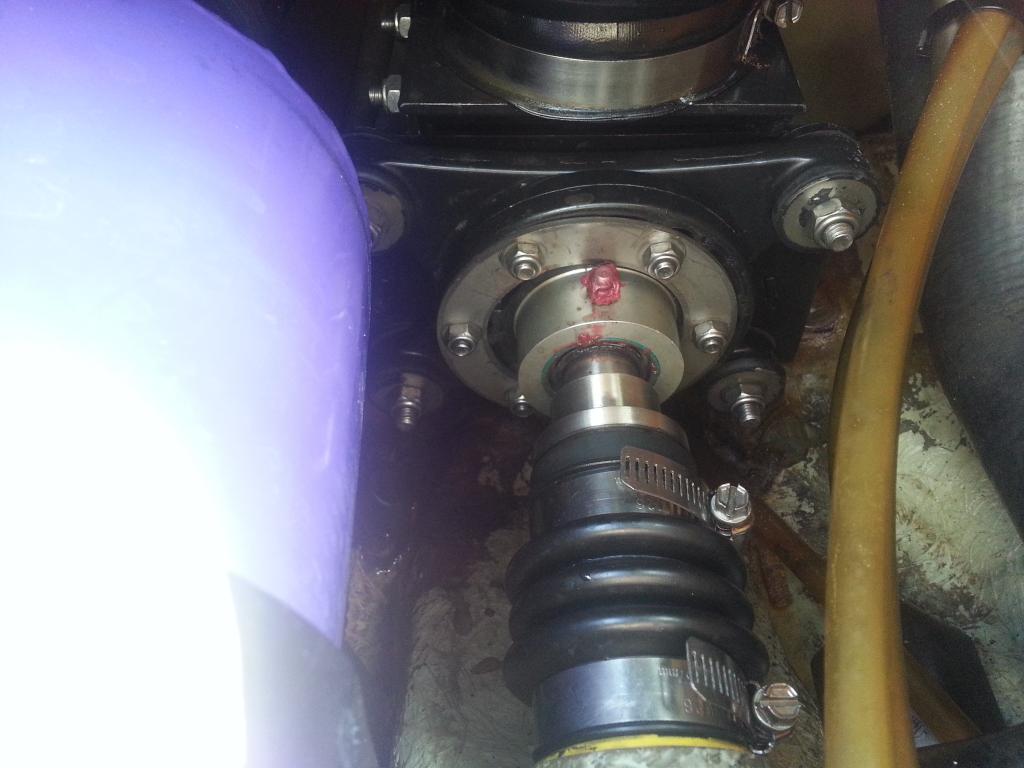
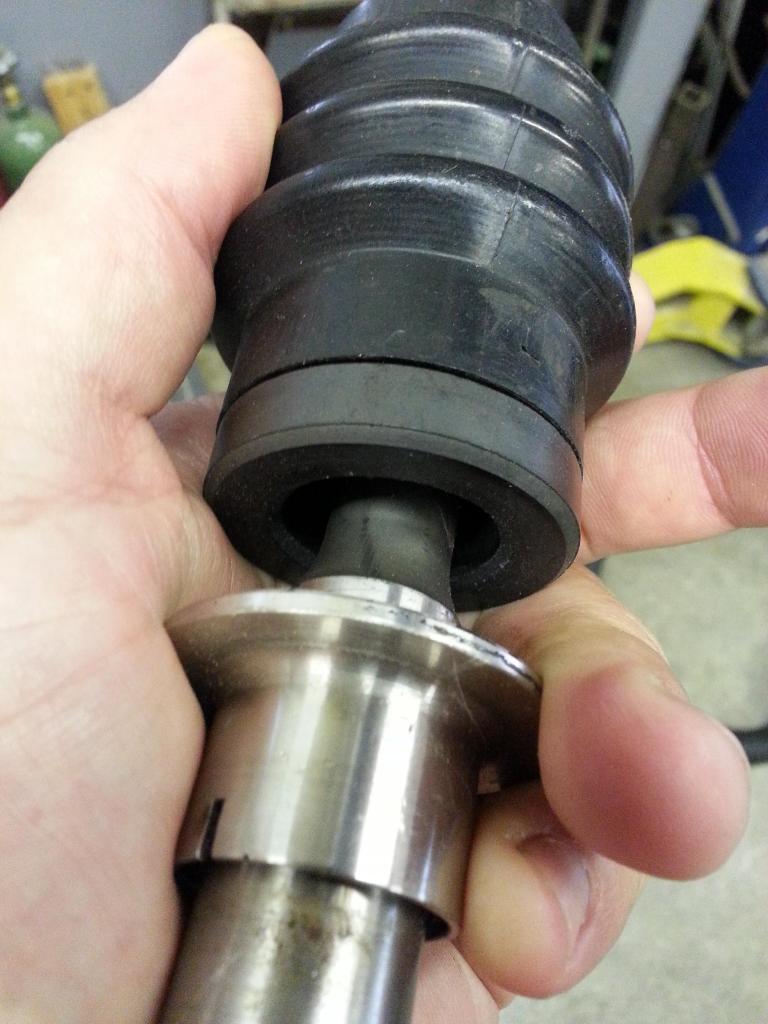
OK, here goes. The carbon ring will have up and down and side to side play normally. To change it out. Pull back on the stainless ring towards the rear of the ski to expose either the o-ring or C-Clip. If you have the o-ring, cut it--but you'll need to buy the C-clip to replace it 272000135. Once you have that loose, remove the steering cable then the entire pump. Once the pump is out you can pull the driveshaft. The driveshaft goes into the support bearing that is mounted on the shock mount. Once removed just take the hose clamps off the bellows and replace those parts--simple. Now it's time for parts inspection. The end of the driveshaft that goes into the main driveshaft from the PTO SHOULD have a plastic cap on it. That plastic cap actually goes INTO the coupler internally and the splines line up. That bushing will keep the coupler concentric to the shaft, if it's missing you may get a vibration. The one in my HX was gone. It will clip onto the ball on the driveshaft and stay there and I put a little grease on it before assembly. I also inspected the carrier bearing, to do this you MUST, ABSOLUTELY MUST have the engine alignment tool to align the carrier bearing correctly. So if you don't have that don't even touch it. When I took mine off (the 4 nuts and bolts on the X of the carrier set up), I could tell that it was misaligned, the front seal was worn on the bottom and the rear seal was worn on the top. Once you bolt the X back in you will see all the 6 nuts in a circle, to align the carrier bearing to the pump you just loosen the nuts and that carrier bearing is like a ball of sorts, you can rotate that bearing 360 degrees. so you line that up but the end of the alignment shaft has to go into the coupler too, so you need to reach around the shock mount to lift it and align it. Once you have it inserted into the coupler you can begin to snug up the 6 nuts around the carrier bearing. Once aligned, put the driveshaft and pump bank in and you should use a new neoprene seal on the pump support mount to seal the pump.


You can see the 4 nuts that mount the carrier assembly. I think I had the water box out to fit my fat arms in there.


518.jpg


You can see teh stainless ring, push that towards the bellow to uncover the o-ring. You can also see how much gap there is around the carbon seal--normal


519.jpg


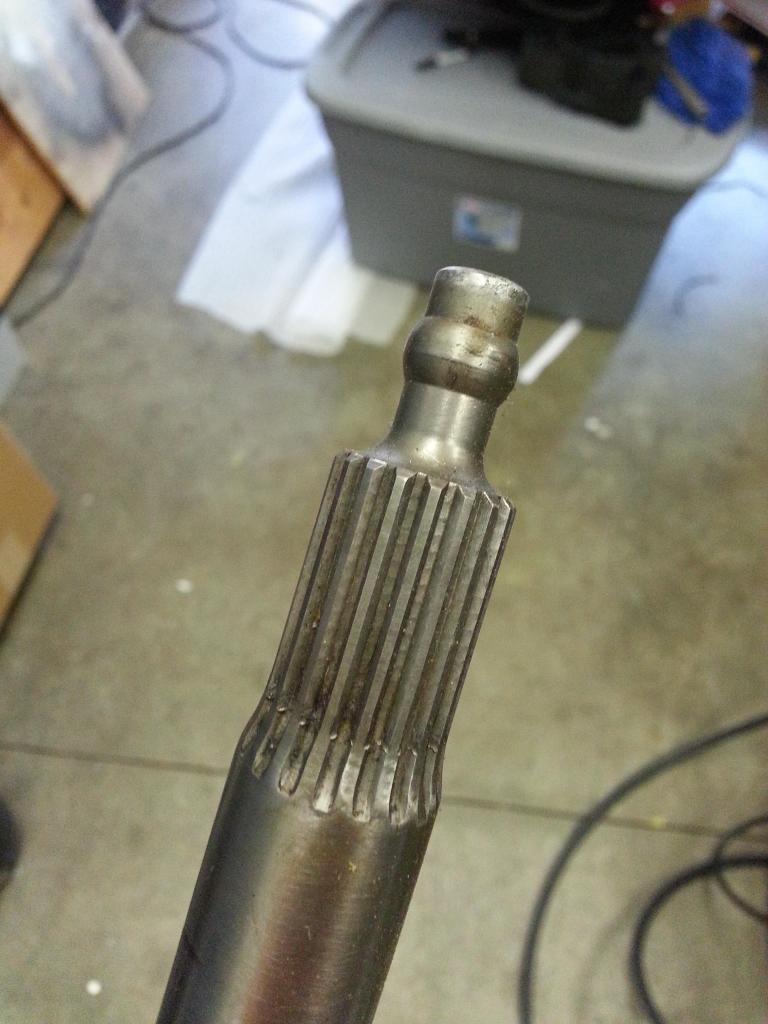
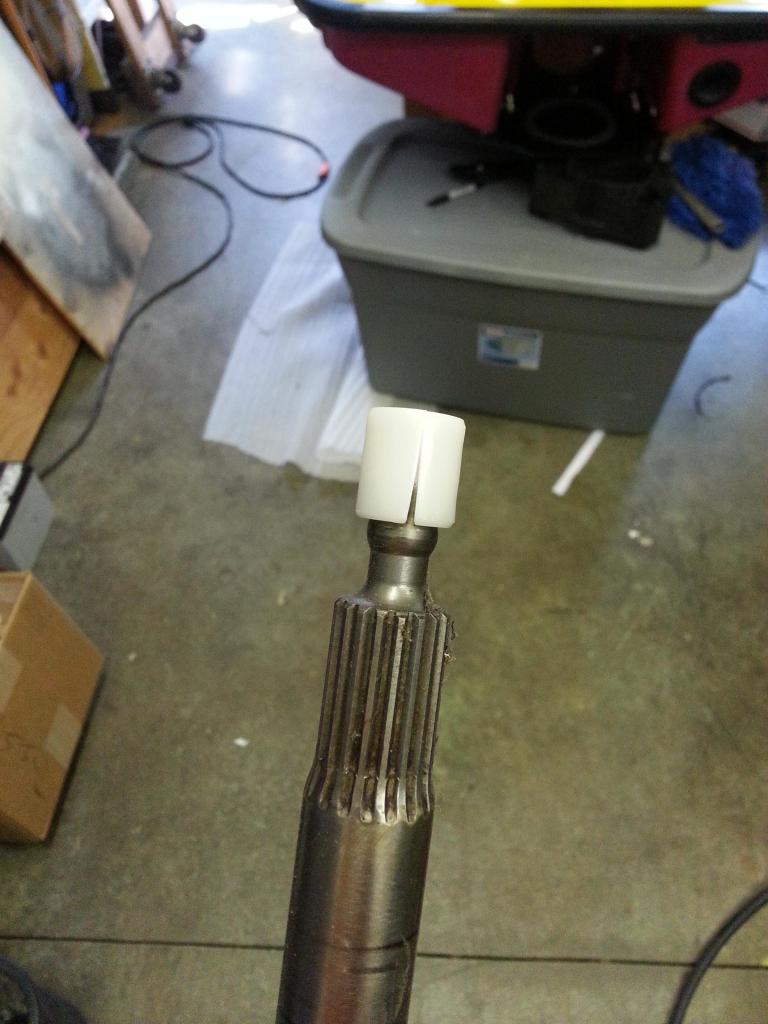
This is the end of the shaft without and with the plastic alignment bushing. I bought them for a 97 XP since the ones for the HX were discontinued, they work perfect since the driveline is almost 100% the same.


520.jpg


521.jpg


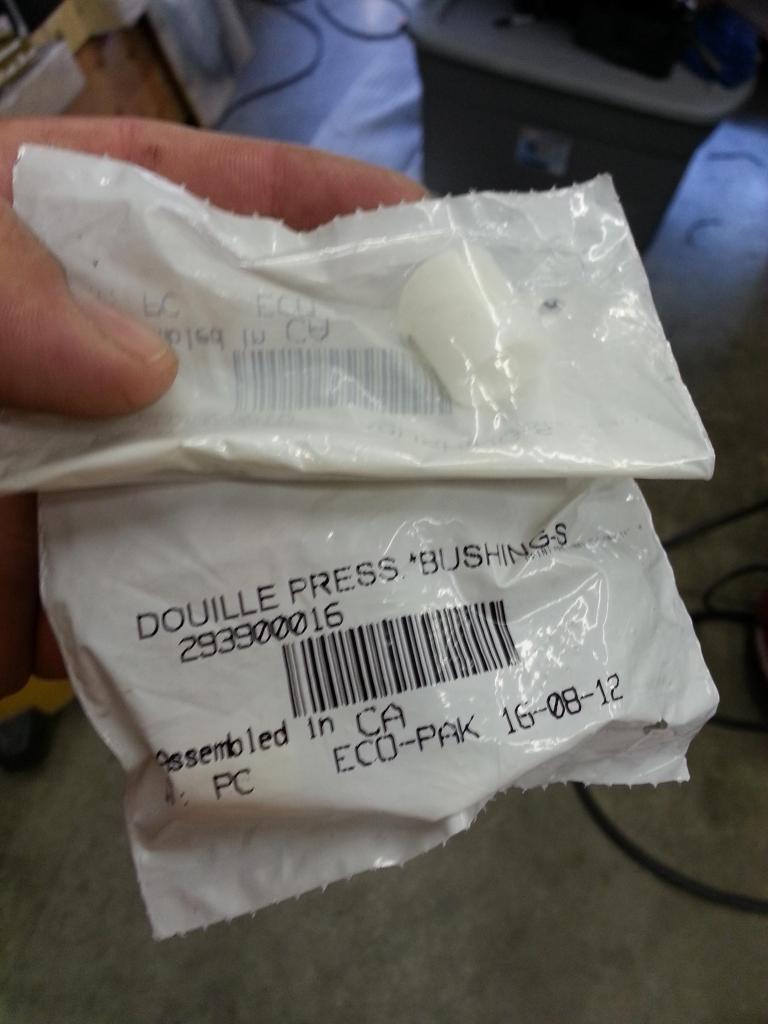
Part# for the plastic bushings, I order like 3 or 4 just to be on the safe side

522.jpg


This is what the carrier bearing looks like, just behind the zerk fitting you can see that is all cut at a radius, that is what allows you to pivot the carrier bearing as well as the loose nuts allow you to move the bearing laterally.

154.jpg
 
Amazing write up thank you Dan. So it shouldn't be too terrible to remove the rear shaft. I guess my other question is, can I try the zip tie trick to make it a little easier on myself possibly? I work a lot of hours and want to get a little ride time in before the season is done. I can always tear it apart and do it right this winter. If so how does the zip tie trick actually work Im not sure I understand how to do it right.
 
If you want to do the zip tie trick just loosen the rear most clamp on the bellows and slide the bellows forward said distance of zip tie. Wrap the zip tie around the thru hull fitting, slide bellows back to touch the zip tie, tighten hose clamp.

Honestly, you can have the pump off, replace the bellows and all that jazz in an hour. At a minimum, you need to grease the zerk on the carrier bearing. If you're replacing the wear ring you're 3/4's of the way there. You do not need to align the driveline if you just replace the carbon ring. Honestly, they are tighter than the ones on the X4's and with your new wear ring it should be good to go. My HX is a grip and ri!
 
I guess its just sit around and wait. Ive cleaned the ski up quite a bit. Started out looking like this....hx1.jpg

Then I cleaned the inside and put a little Fluid Film on everything.

SKi looks like this now...
hx2.jpghx4.jpg

Hose clamps came in today but still waiting on fuel line. I plan to go through the carbs at that point as well. Tomorrow a buddy and myself are going to put some hours into buffing the whole ski and see how well it can shine.
 

Attachments

  • hx3.jpg
    hx3.jpg
    32.5 KB · Views: 55
Last edited by a moderator:
HAHAHAHA hey now hey now thats my wife. I didnt even notice she was doing that in the pic. Maybe I'll take that one down lol
 
Lol, photo bombed by the wife, lol. Hey, is that the test tank on the right?

Sent from my SGH-T889 using Tapatalk
 
Last edited by a moderator:
Your missing part#23(down near #25), the rubber isolater between the drive couplings. You're gonna need to pull that all apart. AS I stated BEFORE--key word BEFORE---you pull your pump you need to pull the stainless rings back to reveal the c-clip or o-ring. You'll play hell trying to do it without the pump in, unless you have a buddy pushing back on the drive shaft. 293830026 is the part#

By the looks of all the powder in there, I have a feeling you're in for more than just the rubber coupling, that carrier bearing I'm sure is gonna need help. The surface on the driveshaft where the carrier bearing rides shold be nice and smooth, if not you'll torch your new bearing.

625.jpg

My question is how does part number 23 just go missing?
 
1. It's just a hunch, you'll need to confirm. But the slop makes sense.

2. You never know the reasoning of the previous owner.

Sent from my SGH-T889 using Tapatalk
 
Could this be the reason for my epic cavitation? After looking at the ring id say it is questionable yes but not blatently in bad shape.
 
How far can you push in on the driveshaft(towards the front), enough for the carbon seal to air gap? That impeller is hammered and you might as well swap back to an OEM wear ring. That entire ass end needs a through going through.
 
No I did the zip ties and now the bellows keeps the drive shaft pushed foward. When the ski is reved up though you can see the drive shaft push back on the bellows some and compress it. I have my OEM wear ring in may hands now but not on the ski yet. I'm kind of pissed about the stainless wear ring. I have a polaris slx and all polaris uses is stainless. Makes for a very expensive fix when you have to replace. The plastic wear ring was one of the many things I love about seadoo.
 
I would not use that impeller in that new wear ring. You also need an impeller boot and cone if you go with an OEM impeller.
 
Status
Not open for further replies.
Back
Top