Just purchased a 14' Challenger! This is my restoration/documentation thread.

Note: This site contains eBay affiliate links for which SeaDooForum.com may be compensated
Status
Not open for further replies.

FlyboyX

Active Member
Well, first of all, I am really excited to be a new member here. We just bought a new to us boat and I have so many questions.

First, over the course of internet searches for manuals and parts, I can never seem to find my model.

it is a 2000 Challenger 14' with twin Rotax Ybcxm engines listed on the placard as 718.3 cubic centimeters. The vin is cecb08471k900. Are these 717 or 720 Rotax engines or are they something entirely different that the company tried and failed at for only a year or so? I called the dealer. they looked up the vin, but I got the impression they are pretty clueless about a boat this old.

any search I do for a "2000 sea-doo challenger" only results in boats with a 6 cylinder Mercury 2 stroke engine. any search I do a year or two earlier only results in the 1800 model.

I've literally spent hours searching.....What the heck am I doing wrong? I know my boat isn't an anomaly.

this is my first experience with a sea-doo or a Rotax but I've had several boats in the past and I have a ton of experience fixing all things mechanical.

I have tons of other questions.....I just don't know where to begin.

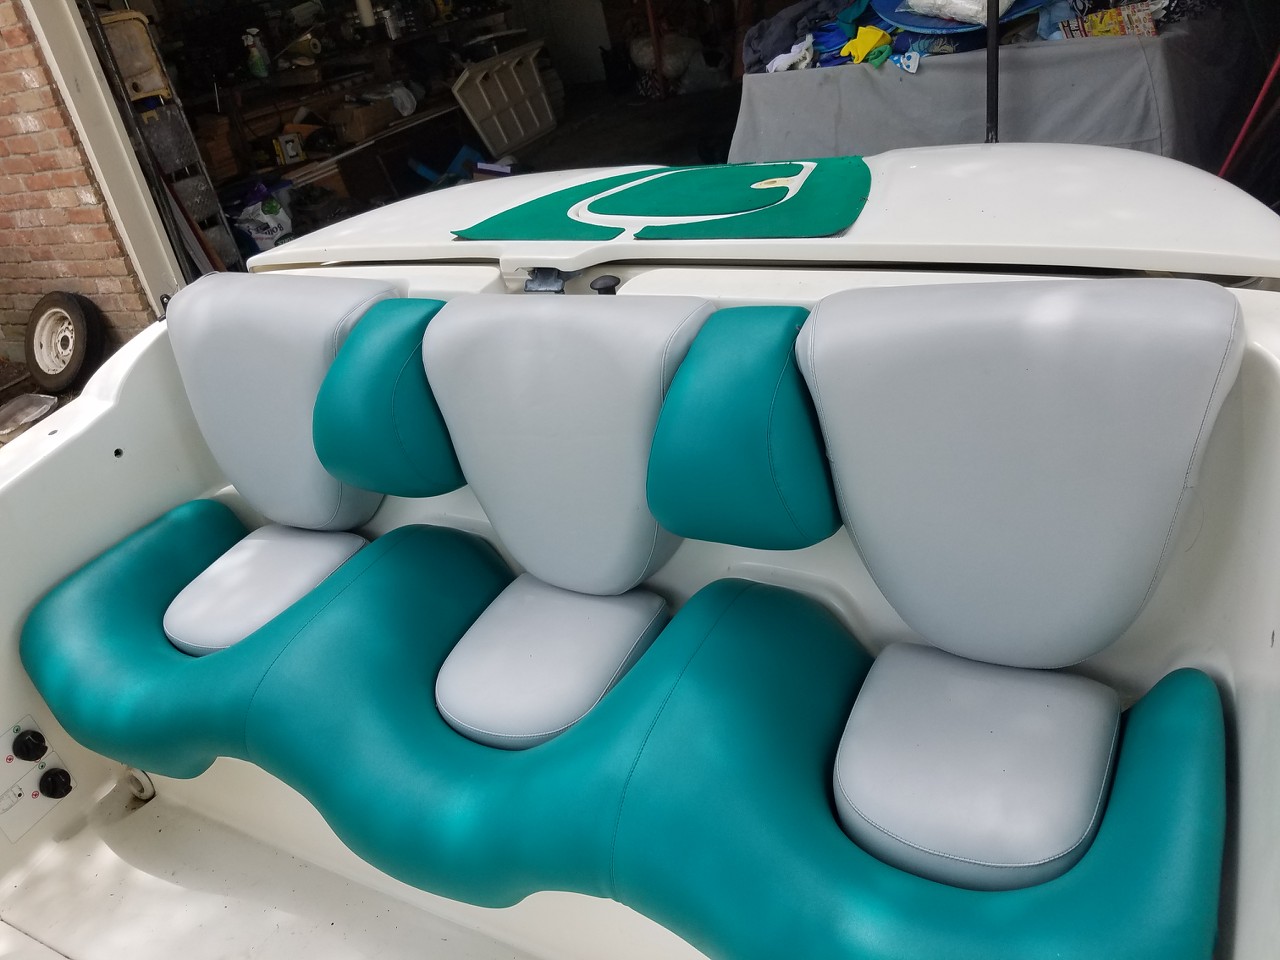
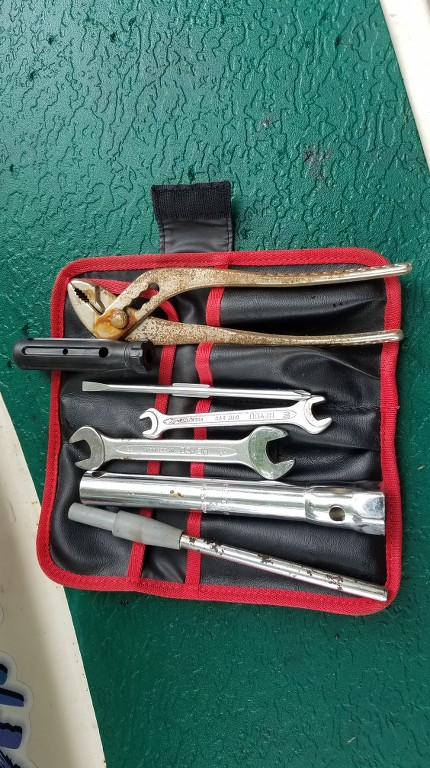
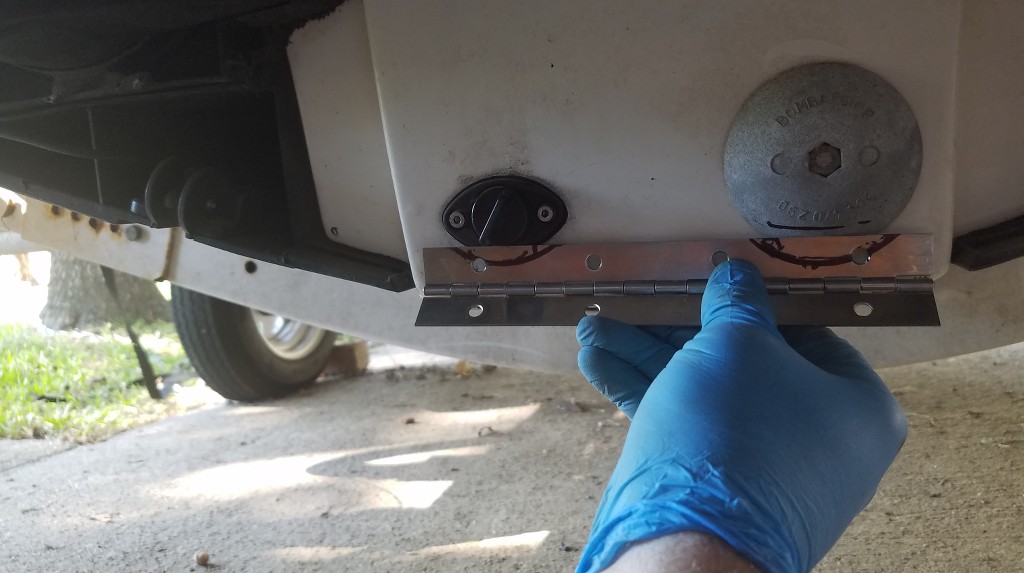
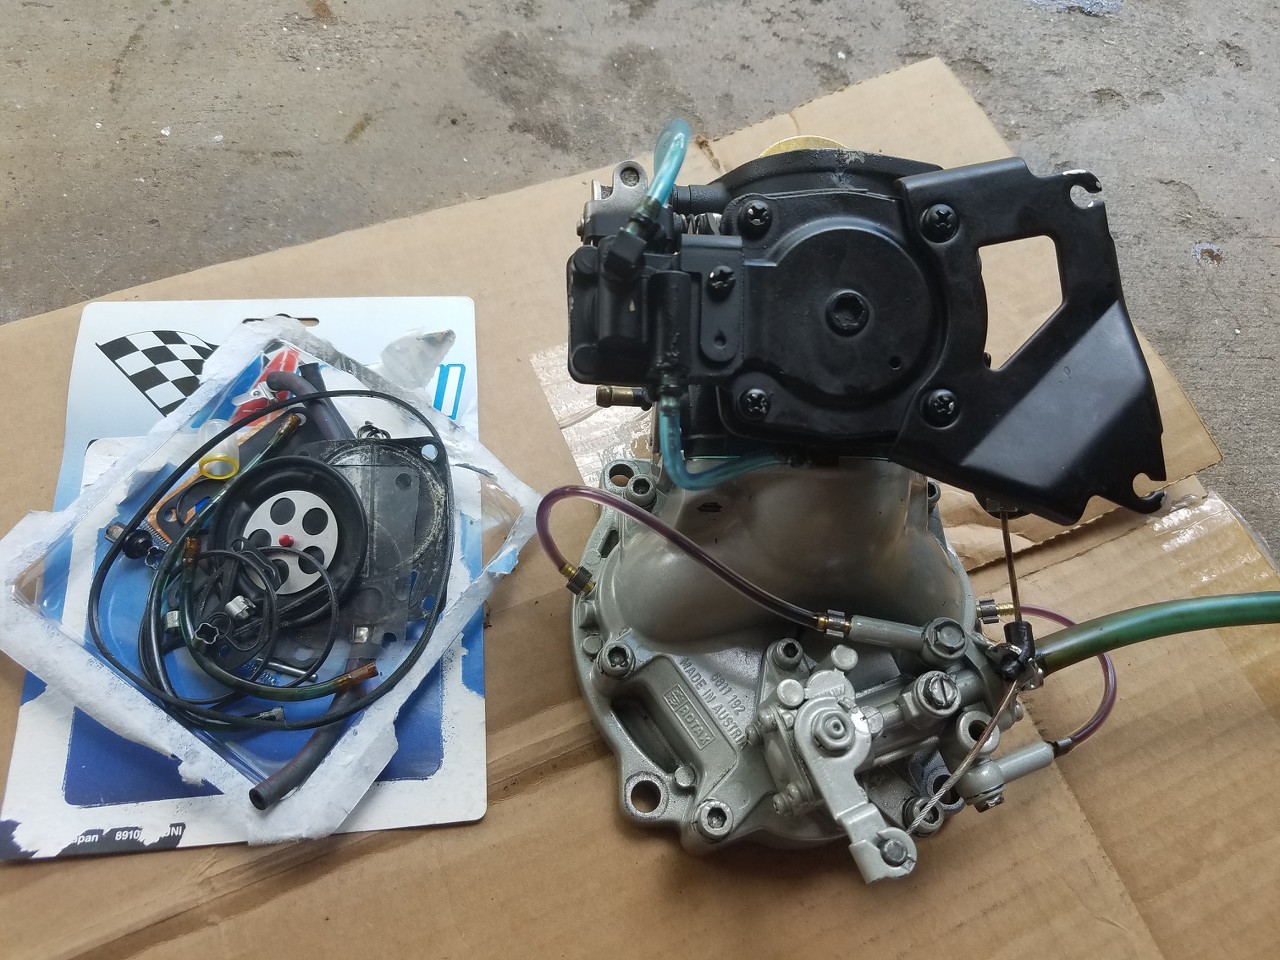
This boat has really low hours (maybe 50-100), has never been in salt, but has been sitting for perhaps 4 years. All 4 cylinders have 150+lbs of compression. they are original to the boat with shiny silver paint. they have never been taken apart but the carburetors appear to have been removed previously. so far, the carbs are off pulled off to be rebuilt. the oil tank and fuel cell have been drained. I pulled off the outdrives today and found I need a shaft protector and 2 shaft seals.

I want to replace the spark plugs and bleed the air out of the oil system since I took it apart. there are about a dozen or so minor parts I have written in my notebook that I need to replace. I just wish I knew where to look?

why is this so difficult for me? anyone with advice and a willingness to steer me in the right direction would be greatly appreciated.

regards,

Brian
 
Last edited:
Welcome to Sea-Doo life. The 717,718.3,720 is all the same motor some people call it the 717 some call it the 720. 718.3 is the actual displacement and isn't usually called the 718.3. There are lots of places to get parts, westsidepowersports.com osdparts.com seadoowarehouse.com procaliber.com/sea-doo-oem-parts just to name a few. If you've done any reading you know you need to replace your small oil lines going from the oil pump to the oil injectors and to only use OEM mikuni kits for the carbs. The shaft protector is up to you but they break alot and it's a pain swap so alot of us just cut the one off that is still there and don't look back. So...no fotos? Don't jump start the boat or use a boost box, don't hook the battery up backwards, and don't charge the battery with it hooked up. All of those things can cost you a very expensive mpem.
 
snikwad, thank you so much for your very detailed and thoughtful response. there is some good info there I was not aware of.

pictures? sure!


These are the original engines. I would be surprised if the boat has more than 50-100 hours on it in total.


so far, the only carb kits I have found are the cheapies on eBay or amazon. I have not seen a kit from the factory. only individual parts. I sadly admit that I ordered a couple of those kits, but based on your advice, I will be sending them back and furthering my search.

yesterday, I siphoned the fuel out of the tank. it and smelled really good. it has a slight blue tint so I am sure someone put stabilizer in it when it was put up.


I really didn't think it was necessary, but the reason why I siphoned it out is because a boat repair guy suggested I do so. I figure its always best to err or the conservative side.

He also suggested that I either remove or buy new oil injection pumps. it would be a shame to ruin the engines with a lubrication failure, but I haven't seen anywhere that this is a "thing"? I will be replacing the hoses though as you suggest. I'm not saying his advice wasn't sound, but this guy's attitude put me off a bit with his douchy arrogance. I felt like he was trying to scare me into throwing a lot of money at him.

is there a gasket or rebuild kit available for the oil pumps? I would like to disassemble them and do a good clean up.

I also removed, drained, and flushed the oil reservoir tank. it has been reinstalled.

you are kind of scaring me with the engine management computer. I bought the boat without seeing it run. the battery was in good shape so I used it to spin the engines over when I did a compression check. I poured a couple teaspoons of oil in each cylinder and spun it over a couple turns by hand before I cranked it.

I ordered a service manual off eBay. I cannot wait for it to arrive so I can start reading though it. unfortunately, its for a 99 which should hopefully be pretty similar. I couldn't find anything for a 2000 model year except for the mercury 6 cylinder engine.
 
Last edited:
So yours is just a 2000 model year seadoo challenger, not a challenger 1800 and not a challenger 2000, just a plain Challenger. It has twin Rotax 720 engines that are the same as any seadoo 720 jetski. Probably the most common and reliable engine seadoo ever made.

A couple items.
1. The seadoo oil injection system is the most reliable ever made and should not be removed or replaced, the mechanic was an idiot.
A) Replace the small 3/32" oil lines from the oil pump to the intake manifold you can get tygon line from Home Depot.
B) Install new oil filters, the white plastic ones.
C) Install new API-TC oil, I can see from your tank the wrong oil was used as it should never be blue as the at is the wrong TCW-3 outboard oil. I would also drain and flush the rotary chamber oil lines too.
D) Bleed the oil pumps.

2. Rebuild the carbs with only Genuine Mikuni kits and new needle and seats, See my carb rebuild thread in my signature.
3. Replace the fuel selector if it has one and the square o-ring on your fuel filter in your picture above with new ones.
4. Change the oil in the just pumps.
5. Inspect the wear rings and impellers when the pumps are beng serviced.
6. Add a couple pumps of grease to the zerk on the rear engine flywheel just until you see the driveshaft stom moving back and not more.
7. Get a rear flywheel cover for the starboard engine.
8. Never run it without an air cleaner box.
9. Install new NGK BR8ES spark plugs.

OSD Seadoo would be your one stop shopping but he is out until June 6 I think. I get all my OEM parts and seadoo oil from Pro Caliber out of Washington. I think Nick at Westside Powersports stocks all the carb kits too and is the best person for used parts and is here all the time @Minnetonka4me.

That should cover it. Ask any questions you might have.
 
hey miki, thank you for your response. I did indeed go through your carburetor rebuild thread. I used it to take one of them apart. I ordered the Japanese standard screw drivers, but I was able to successfully disassemble it without the tool and without stripping any screws. I have a snap on ratcheting screwdriver and a kit with about 150 bit inserts. I just went through the collection of Phillips like bits until I found one that fit really well. it is possible it is the correct fit anyway.

The parts guy at the dealership called me back this morning, so I made the 45 minute drive down there to order and pick up the parts they had in stock. they were extremely patient and helpful. I spent perhaps an hour+ going through my list while he looked them up in the computer. I ordered a pair of Mikuni carb kits and a bunch of little parts. nothing major, but I really knocked the hell out of a 300 dollar bill. after going through your carb thread, I called back and ordered another 120 bucks worth of parts. (4 gaskets and 2 needle jets). turns out I still need parts for the accelerator pumps. can't wait to see what those cost.

I did find out that my boat is a model 5672.

so....progress is coming along at a steady pace. the advice is greatly appreciated.

I plan to follow the directions you and snik posted. I have to say I am a little confused about #4 above. is "just pump" a typo? I guess I am not sure what this means, but I assume you are talking about the oil on the outdrives? I am going to have to figure out what are wear rings for the impellers. a manual is coming my way from eBay.

I don't have a fuel selector per se, but I do have fuel shut off switches to the right of the steering wheel.
 
Last edited:
Sorry, yes jet pump. You remove the rear cone and nasty smelly oil will come out. I replace with Klotz Jet pump oil from amazon but a lot here use Mobile 1 synthetic gear oil.
 
Awesome!

So I just called the dealer back to order accelerator pump kits for my carbs. He told me I was out of luck. He said the parts are NLA, but when they were available, he said you had to buy the complete assembly at around 200 bucks a pop. I am assuming there must be a way to get aftermarket consumables for this? Since they are working fine, perhaps I should just leave them as they are?
 
THe only serviceable part is the rubber pump diaphragm and they are typically fine. Just set them aside when cleaning as the carb cleaner can destroy them. Just spray the body and inner check valve with carb cleaner. Also there is no reason to replace the small accelerator pump lines.
 
I spent the last couple days pulling all the seats and hardware off the boat so I could buff out the gel coat. normally I would get the boat to run first, then take care of the cosmetics. these challengers have a curious issue that almost precluded me to work in this order however. its that darn rear seat bottom. I don't know how in the heck you could get it out with the carburetors installed. since I don't want to do them twice, I ended up buying the seat upholstery kit from Keith in Florida. also with the seats out, it seemed like a good time to buff. I think the finish turned out pretty well. I did compound on the entire boat above the rub line, then polishing compound, then polymer "wax". I have to say I believe it turned out rather well. perhaps the finish is about 8/10ths of what it was when the boat was new.

still waiting for parts to come in. I am going to work on rebuilding the carbs tomorrow.

I do have a question: once I get the motors back together, I plan to run them to make adjustments or whatever. I have read that they shouldn't be ran for more than a minute out of the water because of the carbon seal on the drive. I am pretty sure I will need to run the engines for more than a minute at a time. so, I am wondering what to do in order to avoid this issue?

Brian
 
They should be fine for a couple minutes. The best way is to pull the boat to the ramp and run it with it still strapped to the trailer.


rebuilt the carbs yesterday. I used your thread miki. thank you again. there is a procedure in the manual to bench test the oil pumps. basically, you use a power drill to spin the pump counter clock wise to fill the new lines up with oil. this is obviously a pic of the port setup but I did the same with both.


today I changed the oil in the jet drives. this is a pic of me doing a pressure test on one of the units.

tomorrow, I plan on to reupholster the rear seat and install the carbs. my goal is to get it running by the end of the day.
 
You really don’t need to test the oil pump.

When you get it back together hold the pump wide open and you should see the oil pumping through the clear hoses towards the manifold.
 
thank you miki. thats what the manual said too. I wanted the peace of mind to know I wasn't going to destroy an engine by starving it. also, I wanted to fill the new small feed hoses up with oil so the engine wouldn't run for a time without lube. I have to admit, it was really satisfying to watch fresh oil pulsing through those hoses at regular intervals for the first time.
 
I busted my butt on this boat today. I accomplished all of my goals I set for myself in entry #12.

I thought I would post photos of re skinning the bottom seat. I've never done upholstery before and I have to say this was very challenging.


the biggest problem was getting staples to hold the inner horseshoe area. they either pull back out of the hard plastic shell or they have a tendency to pull through vinyl. my solution was to cut 1.5" wide strips of the covering from the old seat, fold it in half, and then staple through that.


here is a pic of one of the places where the staple pulled through before I started using the vinyl strips. needless to say the cussing that ensued would make a sailor blush. I found that every time I shot in a staple, I had to hold it in while turning the seat over to bend over the protruding staple to keep it from pulling back out. in some of the photos below, you can see all the staples in the horseshoe are bent over.


this is the finished product. well...almost.


there were a coupIe of modifications. i added a #8 screw with washer in each corner on the back side where the fabric is bunched up. I didn't want to count on the stapes to hold it together in those areas.


I took some steps to make this seat a LOT easier to install and remove. I added studs! I went to the hardware store and bought 4 new metric stainless bolts about 2" long. I cut off the heads with my band saw, I then fouled the threads about 1/4" from the end. finally, I used red Locktite to hold the studs from spinning out.


I went with wing nuts and washers. I put tacky grease on the washers to hold them up on the inside of the hull while I install the wing nut. it worked easy as pie.


and finally, here is the bottom installed.

the good news is that I also installed the carbs, added new gas, filled and bled the oil system. SHE RUNS!!!!

it smokes like the dickens. I still need to adjust the oil injection pumps. I'll do that tomorrow. I didn't want to run the engines more than a minute or two each.

it seems my known issues are the starboard tachometer isn't working, nor is the fuel gage. I will look into those as well. I was able to score the supplement with my service manual, so all the wiring diagrams are in there.

all this for another day... ;)
 
damn. trying to fine tune the engines today. it turns out the accelerator pump on the port engine is bad. it wasn't pumping fuel for some reason. I took it off and tested the diaphragm and it was fine. turns out the outlet check valve is stuck open. I tried soaking it(without the diaphragm) in carb cleaner, blowing compressed air though it, and jamming a wire down the hole to dislodge the ball. no luck. I guess I need another one. they are nla from the dealer. a complete parts carb is about 80 bucks on eBay.....does anyone have one laying around they would sell?
 
so....I still need an accelerator pump for my port engine. anyone have any ideas where I can buy a used one?

we did take the boat out for its first sea trial a couple days ago. it did really well until eventually, the shifter froze up and I ran into the dock lightly. in pulling the shifter out of the well, I found that I reefed in it hard enough to bend the hard stainless portion of the lever end of the cable. I ordered a new one and it should be here in a couple days. what is the yellow goopy material that seals the inside of the boat hull?

my tach is fixed. turns out it wasn't plugged in at the gage. the fuel gage is still in-op. I ohmed out the sending unit and it is dead. has anyone done a repair on this or used the guy on eBay that rebuilds them for 52.00? I put nine gallons of gas in the tank and we ran for about an hour and a half. I think we are down to about 3 gallons or so. it seems to go through fuel pretty fast. I would hate to get myself stranded.

I re-upholstered the top half of my back seat yesterday. pretty happy with how it turned out. I sent pics to Keith and he was ecstatic.


if you have done this re-upholstery job or have the kit, you will know what I'm talking about here. you need to push these fabric tabs through a slot to get them through to the back of the seat. I found the best product for the job was this silicone kitchen spatula. sometimes the tab will get jammed behind the plastic. just pull it back out and try again.


I found that there was a little bit too much fabric in this area. I had to trim a little off so that it would pull down properly. be careful and go slow here. you don't want to take off too much or it will show.


I suggest pulling all the pieces over the foam before you staple anything. try to get them situated as best you can. in order to install this upholstery kit properly, you WILL need a heat gun. I used it (A LOT) in the horseshoe area of the seat bottom and I used it on the two green "boobs" on the seat back. the temperature here in east Texas is well over 90 degrees right now and its just not enough to get the wrinkles out by itself.


this is a pic of the rear side after completion. I trimmed up the excess and I think it looks pretty professional. I purchased that nail gun new specifically for this job. I have to say it is a dirty piece of crap. If you have the opportunity to buy another brand, I would do so. I had to oil it constantly to keep it from misfiring staples. once the magazine gets down to about 15 or 20, it shoots blanks, apparently because the spring isn't strong enough to push the staples into the hammer. the hammer will jam in the downward position after about 100 staples or so. I had to keep a can of silicone spray handy to lube the hammer area from inside the magazine every time I reloaded staples. total Chinese crap I say!

speaking of staples, the only box of 3/8" stainless staples I could find was 5000 pieces. as a result, I double row stapled everything. since I don't have an old Korean lady as my sweatshop boss yelling things like: "you use too many staple!", I figured I would go hog wild. I don't know how this vinyl compares to the factory material, but I assume it is perhaps not as robust. it seemed like a good idea to use extra fasteners since I have 3x more than I need anyway. better safe than sorry.


and finally, here it is installed with the seat bottom. I am pretty happy with how it looks. as I mentioned above, I had never done upholstery work before, but I am very mechanically inclined, persistent, and like to put a lot of effort into doing a good job.

a few notes about the kit: it was not easy to install. on a scale of 10, I would say the difficulty level is probably about 8+. Keith did a really good job making the parts. I can tell he put tons of thought into it and probably has re-engineered the pieces many times. however, the factory fabric was pre shaped in some sort of heat press. particularly the green vinyl for the seat bottom. without investing thousands of dollars in equipment, there is just no way to reproduce this perfectly. the truth is, you can have results that look like mine but its going to take a LOT of hard work. if you don't think you have the fortitude to make it look right, I would still buy the kit, but take it to an upholstery shop for installation.
 
so...ive been working on the boat in my spare time. I've made a few improvements here and there.


notably, I added a Bimini. the boat would have had factory one originally. the mounts are all there. this one came from Amazon and cost about 150.00 shipped. not that the factory version is still available, but it was a fraction of the cost. I had to make a few modifications in order to make it fit. we are very happy with it though.

also in this photo, you can see that I added those corner markers to the trailer. they have been laying around in my storage shed for years. I finally have a suitable project to install them on.


I had to fab up my own brackets to fit the trailer. sorry the pictures are poor. it was raining today when I took these. I was having a really hard time keeping drops off my phone when I took these.


I put together a took kit for the boat fashioned from my parts stash of OEM BMW factory tools. I still need to add a small brass cleaning brush for cleaning spark plugs. if anyone can think of anything else to add please speak up.


speaking of plugs, we have ran the boat for perhaps 3 or 4 hours. mostly at 4500-6000rpm. the one that is a little brown is from the magneto side of the engine. this one is the starboard side.


this is the port engine, the browner plug is also the mag side.

the reason I posted these is because I was thinking about leaning out the mixture a little. what are your thoughts? I've noticed that if we have been out running the boat for a while and turn off the engines, they don't start particularly well. they will sometimes stall if I don't raise the throttles up a little.


all and all, we are pretty happy with the boat though. we have been trying to get it in the water at least once a week.

I have been thinking about getting spring loaded trim tabs. with only my wife and I sitting on the back bench (300lbs combined weight), it doesn't get on plane very easily. I find the boat does pretty well trolling around at 2-3000 rpm, but from 3k-4500, it is abysmal. its kind of like this no mans land region where the boat just wallows around with the nose high in the air.

any advice on the items I have posted above would be greatly appreciated.

brian
 
I just ordered a set of nauticus 980 trim tabs with the 40lb spring. I plan to use one in the center. I will post up pics and results when it arrives and we get the chance to put the boat in. I will probably be selling the other if anyone is interested.
 
trim tab came in the mail yesterday afternoon. I did a quick install and we promptly trailered to the lake to try it out.


install was easy peasy! the first step was to use an angle grinder to remove the portion of the hinge that interfered with the drain plug and zinc.


I had to move the outboard screw in each side as you can see. the metallurgy in the hinge is pretty soft and fairly easy to work.


the directions allude that the box has a 25 degree template built in that you can cut out and use to mount the shock. they are full of crap so I made my own from a piece of thick cardboard I had laying around.


this one is me trying to hold up the template and tab while snapping a photo.


and finally, the completed installation.

I had to modify the upper mount a little because the actuator eye is too close to the bracket flange. there is no room for the lower screw to fit in there as it is made. also, it has 3 position adjustments but it is only possible to use the lower one in this installation. I think I will probably remake the top bracket at some point.


I think it is well worth it to spend the extra money for the stainless tab. there is a lot of value in not having to move the plug and zinc. no extra holes in the transom of my boat. I called Nauticus directly and this is the tab size they suggested with a 40lb shock. they were willing to ship a single tab directly from the factory for 99.00 plus shipping. I didn't ask what the cost of shipping was, but I assume about 15.00 or so. I found a pair on eBay for 125.00 with free shipping. unfortunately, those shitheads charged another 10 bucks for "tax" even though the item came from another state. this extra kind of irritated me because I had no idea I was being charged this amount until after I committed to the "buy it now" so I was kind of stuck. I think its probably just a way to hide extra cost for item without calling it "shipping or handling" or whatever.

My notes after use:

there is a marked improvement in the ride. the lake was pretty choppy yesterday. the bow stays low and it seems to glide over the top of the waves and feel much more stable with much less bouncing around. the boat comes on plane faster than before and I would say the bow runs lower at all speeds. I still have that
"no man's land" regime between trolling around and getting on plane but I would say it is narrowed to about 1000 (or perhaps 1500 rpm) instead of 2000 rpm that it was before. during that wallowing mode, the bow also runs much lower than it was previously.

The singe tab DOES make reverse slightly less effective. it still works though. its just not quite like it was before.

As to top speed, I don't know. the lake was a bit choppy yesterday and we had the Bimini up. I saw a little better than 40mph once at 7k rpm, but I didn't run at that speed for more than a few seconds.

keep in mind this stainless tab(9x8") is 2 inches shorter than the plastic(9x10"). just for experimentation, I am planning to buy a piece of 3x9" stainless to add to the back of the tab to see if it further changes my ride in any positive way. also, I presently have the shock adjusted to the furthest forward position. I think the tab will be more effective if I move the lower bracket to the furthest aft position and move the shock as far back in the slot as possible. unfortunately, this will mean that I will have to re drill the holes in the transom for the upper mount.
 
Last edited:
I made some adjustments today. I spent some time doing a wood working project and in between the time I was waiting for stain to dry, I decided to fill it with some improvements I came up with after sleeping on it last night.


first of all, I made a trip to the hardware store to buy a couple different bolts than were provided. the fully threaded shank bolt on the left along with the fiber lock nut and plastic spacer are what was provided with the kit. first of all, the bolt is too short. with the spacer and the shock installed, you cannot get the fiber lock nut threaded on the bolt far enough lock the nut on the shank. since the shock end is plastic and the spacer is also plastic, you are basically screwed. if you really torque it down, you are going to deform either the spacer or the shock end. also, the end won't be able to rotate. if only moderately tight, the fiber nut will work itself loose in a short time.

the bolt in the middle and the one on the right are 5/16" shank shouldered stainless bolts that came from the local hardware store. I also purchased an extra nut and 4 washers for each fastener. it seems like the plastic shock eye will last a lot longer riding on the smooth shouldered part of the bolt rather than the threads of the bolt provided.


this picture illustrates 3 things: first, the new hardware is installed so the bolt is tight on the bracket but still allowing the shock absorber eye to rotate. second, I had to "custom" drill the hole for the lower screw in order to install 2 in that mounting bracket. as alluded to above, there simply is no clearance to install that lower screw and the strut together. third, you can see that I had to re drill the holes I made in the transom to compensate for the adjustments I made to the tab settings. I elected to use marine epoxy to fill the holes after roughing the area up with a little 100 grit sandpaper. I don't know if it will hold but it seems to be stuck on there pretty good. my next course of action will be fiberglass resin if this doesn't work.


finally, here is everything re-installed with the new shock setting. it seems to take a good deal more force to lift up the tab in this position.

I won't be able to try it out until next week assuming the weather is good. I will be out of town for a few days starting tomorrow.

brian
 
Last edited:
I wanted to post a quick update about the tab. after the adjustments above, a buddy and I had the boat out on the water today. we spent about 2.5 hours motoring around at all sorts of speeds and regimes. Both of us combined weighed about 400lbs and we had a full tank of gas. we were in the back of the boat the entire time. (as a comparison, my wife and I are a combined total weight of about 300)

moving the strut to the far back adjustment made a huge difference in a positive way on all accounts. I can say that I am not going to bother adding a couple inches of metal to the back of the tab. it is so effective now that there simply is no reason to bother. I might almost say it is providing a little too much force at wide open throttle. perhaps the bow is now a little too low in this regime? my "no man's land" region of bow rise is perhaps narrowed to about 500 rpm. around 3500-4000 or so. the lake was fairly glassy today, so I can't really speak as to the ride in choppy water with the latest adjustment.

I can now say this accessory really was a fantastic addition and worth every penny. I might go so far as to say that the improvements have spoiled me to the point of not wanting to drive a boat like this without it.
 
Last edited:
Status
Not open for further replies.
Back
Top