Wow, 130.00 if you send him the supercharger though, that still seems cheap. Is it much work to take the supercharger off and on?There is a guy I found on Ebay that lives in Florida. He comes highly recommended and I talked with him about it. I had already ordered the WSM parts kit that has the wrenches. This guy will also just change the torque washers if you like but for the money and time it just doesn't make sense to me. He said if I send him the parts he'll rebuild it for $130 which is worth it but I'd have to tack on shipping to and from. I like the adventure.
-
This site contains eBay affiliate links for which Sea-Doo Forum may be compensated.
You are using an out of date browser. It may not display this or other websites correctly.
You should upgrade or use an alternative browser.
You should upgrade or use an alternative browser.
How to rebuild supercharger
- Thread starter burtshaver2021
- Start date
I think it was $130 but I would be supplying the parts of course.Wow, 130.00 if you send him the supercharger though, that still seems cheap. Is it much work to take the supercharger off and on?
I think the job is going to be a pain in the azz because of the IS system. Supercharger on other skis looks pretty darn easy to remove and install.
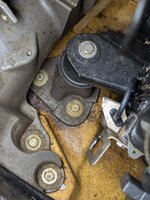
Might want to inspect your motor mounts while you are in there. My 2017 had two broken mounts, the front and one back which caused the driveline seal to leak. Bought it used, had 92 hours and I thought it couldn't be that bad...looked pretty good on the outside. As it turned out, the previous owner appeared to have not done any maintenance and probably swamped it. I've had a multitude of issues from electrical to cooling to driveline seal, motor mounts, etc. etc. Fortunately I'm retired and like working on stuff.
Attachments
Takes me about 15 minutes to remove the top deck using a battery operated ratchet and impact driver. I also have a 2006 GTI and a 2005 Kawasaki STX-15f. To me, the suspension ski's are easier to work on. Once the deck is removed you have much better access to inside components which I don't have on the older ones.Wow that's great information. Sounds like a real pain in the azz for sure.Just curious, how much would a shop charge for the supercharger rebuild and install on the suspension ski? I'm not paying... but I think the guy that sold the ski sold it for this reason. It's time.
The good thing about this ski is that the Supercharger was done at the proper interval so hopefully the parts will come out without much trouble. How long does it take to get the suspension crap out of the way? How long does the total job take? I'm gonna take pictures then when I finish I'm gonna kick myself in the azz for buying this junk.
I was curious about trying a 4-stroke so I didn't do too bad for $2500.

Good point. I looked at it your way as well, being able to get to what I needed easily. I'm gonna change the oil and coolant while I have it apart. Any words of wisdom? Where do you live?Takes me about 15 minutes to remove the top deck using a battery operated ratchet and impact driver. I also have a 2006 GTI and a 2005 Kawasaki STX-15f. To me, the suspension ski's are easier to work on. Once the deck is removed you have much better access to inside components which I don't have on the older ones.
Man you got some skis !! I stick with Seadoos, saves me from needing parts for different makes. I have a good variety... all 2-strokes.Takes me about 15 minutes to remove the top deck using a battery operated ratchet and impact driver. I also have a 2006 GTI and a 2005 Kawasaki STX-15f. To me, the suspension ski's are easier to work on. Once the deck is removed you have much better access to inside components which I don't have on the older ones.
I'll just say that I started removing the Suspension. Crap information on this and you have to find everything for yourself. I knew it wasn't going to be easy but of course some jack leg stripped some of the covers screws in the back. Sure was fun finding out how to remove the gauges too. Way to hide stuff Seadoo !! There is a suspension video that is 2:51 that shows everything apart and you can't verifyl crap either. I'm always better off on my own anyway... I must like it. I will have pictures and a little video. I don't see a 2009 Repair manual so I'm searching through different model years. I figure I'll be 3 hours removing the Suspension.
One of my Pet Peeves is that it seems there is no service manual/shop manual for newer vehicles. For instance my 2016 Ram. I had to remove the heads and replace the hydraulic lifters. No manual that I could find, only thing that saved me was a customer of mine that I had done a roof for was lead Tech at Beattie Dodge dealership and he gave me all the torque specs. Manufacturers don’t want us fixing our own stuff.
I want to hear how easy it is to get the steering cable disconnected unless the 2009 is just unique. I think I got it figured out but not certain. I didn't use the method I'm about to suggest. "I believe" you need to lower the steering wheel height adjuster to the lowest setting. I could not get the steering cable out of the slot and had massive issues reaching it. After much research and desparation... I used a die grinder to cut the plastic. This is the kinda crap that happens when information is difficult to find. I'm starting a thread on my journey.
Last edited:
With all I had to go through with the suspension the supercharge was a joke to remove. Maybe 30 minutes as I fought that backwards bolt. I'm gonna make a special wrench. Remove the airbox, a couple of hoses and you're there. Not much wiggling it came right off. I thought I'd have to move the exhaust canister but it wasn't a problem. The WSM kit looks like it came with everything, shaft and all and of course all the tools.
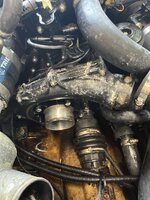
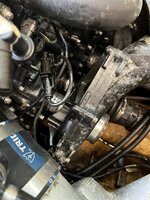
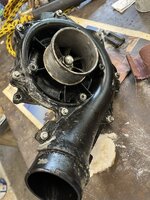
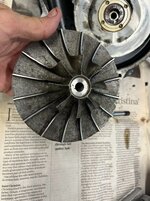
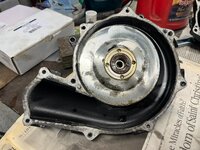
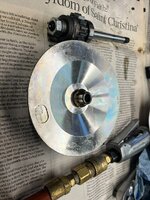


Last edited:
I think you have to do one to figure out how to do it.  WSM parts identification and instructions were so bleached out they were difficult to read. I did a lot of research, watched videos but as usual everything lacks technical aspects. I believe the Supercharger was missing a small spacer when I disassembled it so when I looked at the WSM kit I had to identify where it went and if it was needed at all. Fortunately I have a really nice Torque wrench so accuracy was assured.
This supercharger is for a 2009 RXT IS. I currently about 100 inch pounds of torque before the impeller breaks loose. I wanted 110. I was at 107 initially. I removed the torque washers and cleaned them attempting to remove any oil. After assembly the break away was lower. I don't believe there is an adjustment. I believe the "cup" spacer/washer bottoms out and you get what you get. You're in the middle of 84-124 range but I'd rather be 80%. Torque isn't going to improve it is going to decrease. I will look at it more next week.
I don't see any shims in the kit and as I mentioned the nut locks up hard and fast when it bottoms. No sign of adjustment at all. I'm not finished inspecting and checking. I plan on using loctite 518 on the partings. The product that was on the partings is some kind of RTV. I was told the Seadoo Dealer did the supercharger but that doesn't mean they did a perfect job. I'll post more as I move along. It's almost complete.
Strange but the breakaway torque is now in a more acceptable range and I didn't nothing over night. That value might just be a cold set value. Anyway, I"m going with it. I used Loctite 518 on the case. I'm gonna do a little paint and see I what I can check on the intercooler. Glad I bought a digital torque wrench last year. Used, Ebay of course. I really needed it to do the checks.
I ordered the ratchet wrench last week along with another E8 socket. I was going to weld a little rod on the E8 socket and make it into a socket head wrench and I think that is the best option but I didn't do that. I tried using the wrench at full length which didn't work very well and I had to grind down the head so it would have clearance to fit the bolt head. I had to take it down a good bit. You can see where I ground the wrench and how long it was after I cut it. I didn't like the wrench that came with the WSM kit but it worked OK for the removal and I did use it for the final tightening.That inside bolt is a pain in the azz for certain. I'm done.
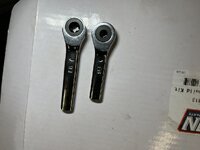

Similar threads
- Replies
- 3
- Views
- 425
- Replies
- 5
- Views
- 475
- Replies
- 0
- Views
- 255
- Replies
- 2
- Views
- 352


