


Dr Honda
Well-Known Member
Hi All,
I was asked by a few members about the gauges in my boat. I made a post in the past... but I thought I would make a new post with the info needed to do the conversion.
First... SeaDoo was nice enough to include most of the wiring needed to add a few different gauges to our boats. You can add a Tach, or speedo as an option, so adding a nice looking multi gauge from the XP is a relatively simple thing to do.
From the factory, the Sportster only had a fuel gauge with an oil light. While that is the minimum info needed to operate safe... it's nice to have a few more options. In my Sportster project, I decided I wanted more.
The multi gauge from the XP looks nicer, and it also gives you a few more "Idiot lights." This includes an engine temp, and low voltage. There is still an oil light, and a redundant fuel light.
Along with this, I wanted a tach. The one in my boat is an early XP tach, but any of the 2" gauges will work.
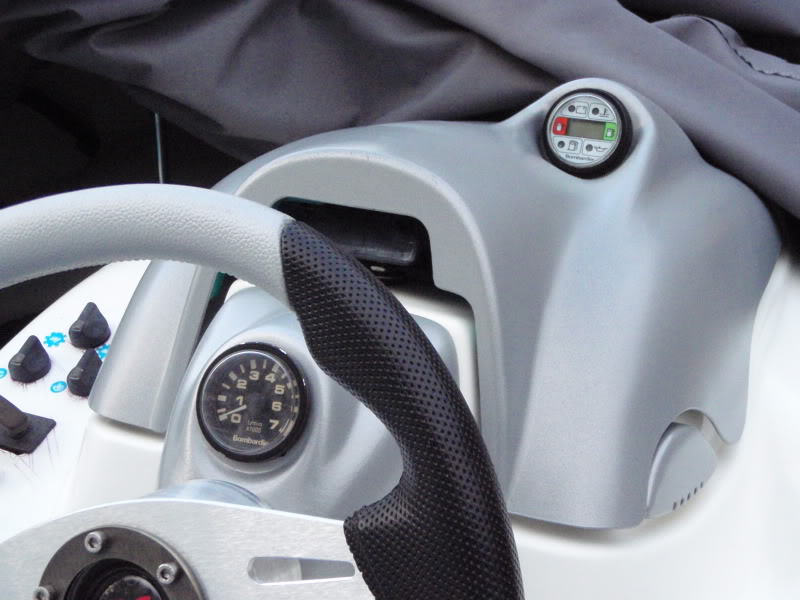
You might have noticed that I put the tack where the fuel gauge originally was. The reason for that is, the XP multi gauge is physically too long to fit into space above the steering wheel.
The tach is easy. Just put it in the mounting hole, and plug it into the wires provided. The colors wont match up, but you will find a single connector, and a 2 pin connector taped together.
The Multi gauge is simple, but it will take a little more work. The first thing to address is since you are mounting it in to the hood... the wires are going to be too short. You can either find the factory XP hood wiring harness, or, just cut the wires, and solder in about a 2 foot extension. I recommend soldering, and using heat shrink since this will get wet. If you use crimp connectors, they will eventually corrode, and fall apart.
Once your wires are extended, you will be able to plug in the main connector. That will take care of the same functions as the stock gauge. (fuel level, fuel light, and oil light)
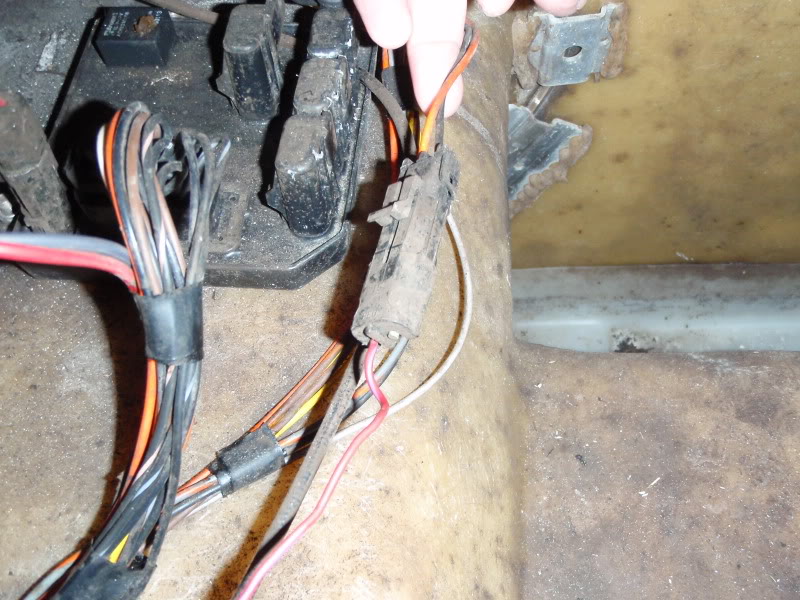
To get the Battery light to work, you need to connect the red/purple wire from the gauge to a switched 12v source. Lucky for us, there is an extra 12v plug under the hood. (it has an orange and black wire) just connect it to the orange wire. You can either solder it, or add a plug to it, and plug it in.
To get the temp light to work... you need to get it hooked to the sender on the engine. Lucky for us... the buzzer is hooked to that same sender. Just solder the Tan/Blue wire from the gauge to the negative lead of the buzzer.

If you soldered everything corecty... your gauge should now be working. BTW... the buzzers in these boats are always dead. The buzzer in the picture is a Radio Shack buzzer. It will fit perfectly into the hole in the helm, and it cost about $9. Just cut the old one loose, and solder the wires on. (negative goes to the CONST lead)
A final FYI... to make your life easy, you should get a SeaDoo pin tool so you can pull the plugs apart. That will make it easier to rout the wires. Just remember what wires went into which plug sockets.
:cheers:
I was asked by a few members about the gauges in my boat. I made a post in the past... but I thought I would make a new post with the info needed to do the conversion.
First... SeaDoo was nice enough to include most of the wiring needed to add a few different gauges to our boats. You can add a Tach, or speedo as an option, so adding a nice looking multi gauge from the XP is a relatively simple thing to do.
From the factory, the Sportster only had a fuel gauge with an oil light. While that is the minimum info needed to operate safe... it's nice to have a few more options. In my Sportster project, I decided I wanted more.
The multi gauge from the XP looks nicer, and it also gives you a few more "Idiot lights." This includes an engine temp, and low voltage. There is still an oil light, and a redundant fuel light.
Along with this, I wanted a tach. The one in my boat is an early XP tach, but any of the 2" gauges will work.
You might have noticed that I put the tack where the fuel gauge originally was. The reason for that is, the XP multi gauge is physically too long to fit into space above the steering wheel.
The tach is easy. Just put it in the mounting hole, and plug it into the wires provided. The colors wont match up, but you will find a single connector, and a 2 pin connector taped together.
The Multi gauge is simple, but it will take a little more work. The first thing to address is since you are mounting it in to the hood... the wires are going to be too short. You can either find the factory XP hood wiring harness, or, just cut the wires, and solder in about a 2 foot extension. I recommend soldering, and using heat shrink since this will get wet. If you use crimp connectors, they will eventually corrode, and fall apart.
Once your wires are extended, you will be able to plug in the main connector. That will take care of the same functions as the stock gauge. (fuel level, fuel light, and oil light)
To get the Battery light to work, you need to connect the red/purple wire from the gauge to a switched 12v source. Lucky for us, there is an extra 12v plug under the hood. (it has an orange and black wire) just connect it to the orange wire. You can either solder it, or add a plug to it, and plug it in.
To get the temp light to work... you need to get it hooked to the sender on the engine. Lucky for us... the buzzer is hooked to that same sender. Just solder the Tan/Blue wire from the gauge to the negative lead of the buzzer.
If you soldered everything corecty... your gauge should now be working. BTW... the buzzers in these boats are always dead. The buzzer in the picture is a Radio Shack buzzer. It will fit perfectly into the hole in the helm, and it cost about $9. Just cut the old one loose, and solder the wires on. (negative goes to the CONST lead)
A final FYI... to make your life easy, you should get a SeaDoo pin tool so you can pull the plugs apart. That will make it easier to rout the wires. Just remember what wires went into which plug sockets.
:cheers:
Last edited by a moderator:
")