• This site contains eBay affiliate links for which Sea-Doo Forum may be compensated.

96 GTX Jet Pump Installation

Status
Not open for further replies.
I changed the jet pump oil in the nose cone in 2010. I used the Permatex equivalent of Loctite 518 to seal the nose cone. When I removed the nose cone yesterday I found a bunch of squeezed out red goo that had never hardened.

Any tips on cleaning up that Permatex red goo?

And is the gasket maker supposed to be applied to the nose cone or the pump assembly or both? Should I make sure the o-ring is coated with this stuff or make sure that none of it touches the o-ring?

And I sure won’t be torquing the nose cone bolts to 35 lb-in like the shop manual instructs. Last time I did that in 2010, I managed to slightly crush the nose cone bolt ears with that specified torque.
 
Does the shop manual call for gasket maker? I have never used any just made sure to use a new o-ring. I have never used my torque wrench for that either just got them nice and tight. I change my pump oil every year and never found any water inside. Maybe I should start using my manual.
 
That is strange. Almost like the impeller can’t get a bite at first.

Yes, that's what it's like.

Wait, what? Why would I be replacing my pump?

I don’t seem to have a neoprene seal between the pump assembly and where it bolts onto the hull. The 1997 shop manual shows a part 28 that looks like it might be this neoprene seal, but says it is only for the SP/SPX/GTS. The 1996 GTX Parts Catalog does not show a neoprene seal either?

I meant the next time you have your pump off. Sorry. :-)

I don't have the manuals in front of me. I'm not sure if the neoprene seal is an original part or something they learned later and can be retrofitted. I think they used to use silicone before (or maybe nothing?)

The 140mm seal is $6 at osdparts.
 
Wow, I thought I had read this section in the shop manual already. Apparently not.

The 1997 GTX Shop Manual says:

18. Cover​
Install O-ring no. 27 to cover. Apply Loctite 518 on O-ring. Install cover to impeller housing making sure to properly position filler plug on top side.​

Apply Loctite 242 (blue) on screw threads and evenly tighten cover screws. Torque to 4 Nm (35 lb-in)​
When I did this last time in 2010 I only applied the gasket maker to the nose cone flat section and not to the o-ring section. This probably explains why I am seeing all of the uncured gasket maker.
 
I never put any loktite on the "O" ring,,,its a pain to have to clean out the "O" ring of the loktite,,,I never torque the bolts,,,just snug,,,you will strip the threads eventually.
 
I meant the next time you have your pump off. Sorry. :)

Man, you scared me half to death.

More info on the neoprene seal and why it's not in the shop manual:

Neoprene seal??

My saga replacing my pump:
Can't get pump back in 96 GTX with Neoprene seal

There was no neoprene seal in place on my ski when I removed the pump assembly. Since I have the original wear ring in place and the original pump assembly, and it seems to have worked for 25 years, I’m going to skip the neoprene seal for now. But thanks for alerting me to the possibility that I might need one in the future.
 
I never put any loktite on the "O" ring,,,its a pain to have to clean out the "O" ring of the loktite,,,I never torque the bolts,,,just snug,,,you will strip the threads eventually.

Interesting. Do you not put any Loctite 518 on the nose cone anywhere? How about when attaching the Venturi to the pump assembly?

I never got around to stripping the threads and went straight to crushing the nose cone bolt ears.
 
Wow, I thought I had read this section in the shop manual already. Apparently not.

The 1997 GTX Shop Manual says:

18. Cover​
Install O-ring no. 27 to cover. Apply Loctite 518 on O-ring. Install cover to impeller housing making sure to properly position filler plug on top side.​

Apply Loctite 242 (blue) on screw threads and evenly tighten cover screws. Torque to 4 Nm (35 lb-in)​
When I did this last time in 2010 I only applied the gasket maker to the nose cone flat section and not to the o-ring section. This probably explains why I am seeing all of the uncured gasket maker.

I should clarify a little here. The majority of the uncured Permatex gasket maker is not at the nose cone but is where I applied it when attaching the venturi to the pump assembly.

I also figured out where and why I was confused about applying the gasket maker to the nose cone. When I crushed the nose cone bolt ears in 2010 I knew that the nose cone needed to be replaced, and so I bought the Seadoo Anti-Rattle Device 295500542. This kit had a replacement nose cone and would also fix the annoying jet pump rattle that occurs at idle. A win on two fronts.

The Anti-Rattle Device instructions are a little different than the shop manual:

Apply a thin layer of Loctite 518 on mating surface of new cover and install O-ring no. 4.​

Install cover no. 1​

Apply Loctite 242 on threads and torque screws to 4 Nm (35 ft-in).​
I think I will try installing the nose cone without the Permatex gasket maker, but will do a pressure test on the pump assembly (which I skipped the last time I did this job).

Edit: The nose cone o-ring appears to be a standard -132 o-ring, which means a cross section of 3/32”, an ID of 1-3/4” and an OD of 1-15/16”.
 
Last edited:
I do not put the loktite on the venturi either,,,any cavitation is minimal,,once again,,,scraping off/cleaning the old loktite is a pain,,,,,BUT,,,you will have cavitation if you do not install the neoprene seal,,,that is a must,,,
 
I do not put the loktite on the venturi either,,,any cavitation is minimal,,once again,,,scraping off/cleaning the old loktite is a pain,,,,,BUT,,,you will have cavitation if you do not install the neoprene seal,,,that is a must,,,

Yes, I am still cleaning up that old Permatex. That stuff is nasty.

I need a neoprene seal? But I’ve never had a neoprene seal??
 
Yes, I am still cleaning up that old Permatex. That stuff is nasty.

I need a neoprene seal? But I’ve never had a neoprene seal??
You *may* need a seal. If you're happy with the out of the hole performance, no need for seal. Adding a seal may improve holeshots *if* there's air leaking around the wear ring hull interface.

You won't hurt the ski leaving the seal off.
 
All 140mm pumps with the plastic shoe on the hull need the neoprene seal, including your 1996.

The only ones that don't are the older ones that the pump is glued to the hull with Ultra Black RTV.
 
There was no evidence of any black RTV when I accidentally removed the pump assembly.

So to summarize, I should remove the pump assembly that I just reinstalled in order to put in a neoprene seal that has never been there before?
 
I think I will try installing the nose cone without the Permatex gasket maker, but will do a pressure test on the pump assembly (which I skipped the last time I did this job).

One step forward. I pressure tested the pump assembly, but at first I could not hold 10 psi and it would leak down to zero within 10 seconds. I found it was leaking where the pressure gauge was screwed into the oil plug hole. Tightening that connection another 3/4 of a turn fixed the leak and then it held 10 psi for over 90 minutes.

Two steps back. While I was attaching the venturi to the pump assembly, I noticed that two of the bolts did not fully tighten up. Using a mirror I found that the captive nuts in the pump assembly have somehow broken free and are just spinning along with the bolt. To add even more joy, all of these bolts were installed with Loctite 242.

How screwed am I?
 
I found that the captive nuts in the pump assembly have somehow broken free and are just spinning along with the bolt. To add even more joy, all of these bolts were installed with Loctite 242.

Evidently these captive nuts can be replaced. The diagram below shows ref 15 Nut Housing with a new part number of 269501943.

1996 Sea-Doo GTX, 5640 Propulsion | Fox Powersports Sea-Doo Partshouse


OSD has them in stock, but hopefully my dealer is doing better than he did with injection oil and synthetic grease and also has them in stock.

I assume the pump assembly needs to come back out in order to repace these elastic nut housings. The tricky part is going to be getting those two loctited bolts free from the spun nuts.

It’s almost like the universe is leading me down the path to a neoprene gasket...
 
OSD has a neoprene seal, but they say:

Our 140MM Sea Doo 2 Stroke Neoprene Seal is a little stiffer than OEM so should seal your 140MM pump to your plate better than OEM. This part should be used instead of silicone on early '90S models too. The adhesive backing makes installation easier too by holding the seal in place.​
And regarding the spun captive nuts in the pump assembly, has this happened to anyone else? How did you get the bolts free from the spun nuts?
 
Just buy the neoprene seal.

It might not be easy but pull the pump with the cone attached then you can get to the nuts with it out of the ski.
 
Two of the captive nuts on the pump assembly had spun while I was tightening the bolts. A third one decided to spin while taking it apart.

As miki suggested, taking off the pump assembly allowed access to the captive nuts. I had to break apart the three damaged nut housings in order to get some needle nosed pliers onto the nut. Luckily the Loctite 242 has not really hardened up very much.

The three nuts were really stuck onto the bolt. It appeared that the broken nut housing allowed the nut to travel far enough up the bolt to get jammed up where the bolt threads end.

The fourth nut housing did not look in good shape either.

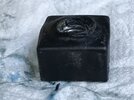
AC03A596-66BB-450E-A431-090AFF6DF211.jpeg


This is what a spun captive nut look like. I wish I had inspected these before putting everything back together, but I didn’t realize the pump assembly had these captive nuts or how susceptible they were to being damaged.

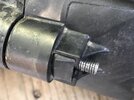
70CFA49D-5943-42F2-B494-05FC925D449D.jpeg


Part way through the nut housing demolition process. It is not clear in this photo, but the nut is jammed up against the end of the threads. The bolts that Seadoo uses have very little thread left after tightening. Any nut housing damage at all allows the nut to move just enough to get jammed up tight.

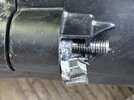
ABDD1E31-1162-4362-9D8B-22BA19365018.jpeg


The aftermath of carnage and destruction. This was a less than enjoyable experience and one that I do not want to repeat any time soon.

4E65BF34-985B-48A7-958C-31E56BBB1FDF.jpeg


Four new nut housing should be ready to be picked up at the dealership on Tuesday.

P.S. And a nice new neoprene seal will also be waiting.
 
I had only taken the venturi off once before back in 2010, and I applied Loctite to the bolts and tightened to the specified torque of 16 ft-lb.

With hindsight, I should have run a tap through the nuts to clean out the old Loctite back in 2010 and in the present. Torquing to 16 ft-lbs in 2010 with the untapped nuts probably resulted in overtorquing. This time I never even reached the bolts snugging up before the nuts started spinning.
 
Status
Not open for further replies.
Back
Top