My life is so frustrating. Every time I start working on this I get called into work unexpectedly, which is what happened tonight again. But I did install new nutserts and they seem to be holding OK. I'm not going to tighten the bolts very tight when I install the back rest JIC.


-
This site contains eBay affiliate links for which Sea-Doo Forum may be compensated.
You are using an out of date browser. It may not display this or other websites correctly.
You should upgrade or use an alternative browser.
You should upgrade or use an alternative browser.
1998 Sportster 1800 bench seat restoration project
- Thread starter H€PHÆ$TU$
- Start date
- Status
- Not open for further replies.
FINALLY a day without getting called into work!!!! I had to stop about 40 times to take work-related calls, but I can deal with that. Got the seat back and both bottom cushions done. Staples and more staples! (Forgot to take pic of larger bottom cushion alone.)


I HATE the way SeaDoo has this seat attached so I tried to come up with a way to do it without having to get in the engine compartment. This is what someone on FB did with his that seems to be holding up OK. The magnets will probably rust but I'll pay attention to them and replace them with Velcro if / when they do. I just really, really hate Velcro and the way it leaves behind a sticky mess a couple years later. The seat bottom will use lag bolts from the top to be held in and then the magnets hold the cushions in.


I should be able to get it all installed tomorrow. I have new vinyl for a couple other areas that had come un-stitched that I'll do after this.
I HATE the way SeaDoo has this seat attached so I tried to come up with a way to do it without having to get in the engine compartment. This is what someone on FB did with his that seems to be holding up OK. The magnets will probably rust but I'll pay attention to them and replace them with Velcro if / when they do. I just really, really hate Velcro and the way it leaves behind a sticky mess a couple years later. The seat bottom will use lag bolts from the top to be held in and then the magnets hold the cushions in.
I should be able to get it all installed tomorrow. I have new vinyl for a couple other areas that had come un-stitched that I'll do after this.
Last edited:
Before installing the bench, I glued some spare pieces of vinyl to the bottom of the seat to cover where the staples went though and I bent them over. This should keep them from damaging the gelcoat underneath where the seat is mounted:

It is in and finished now! And I have so much more leg room! My knees are saved!

My spotter seats were gray and didn't match anything else, so I bought new vinyl for them as well. Got started and found that I have vinyl for the two top pieces but not the bottom. I don't know if this was intentional from Jet Armor or not. I have an email into him. The cushion on the right is what I need vinyl for:

With the seats off I was also able to address several issues inherited from the previous owner. He had removed all the carriage bolts that went through the firewall along with the ski pole and the oil reservoir. (He deleted the oil injection system.) This meant that I couldn't install a ski pole or oil reservoir again even if I wanted to. So I installed the carriage bolts and ski pole from my parts boat. I also plan to freshen up the oil reservoir from my parts boat, install it, and re-run my RV case lines. I've been using a temporary make-shift oil reservoir until the off-season knowing what an ordeal it was going to be to remove the seats and install the carriage bolts so that I could put the factory reservoir in again. In all honesty, the temporary reservoir has been working so well I'm debating even bothering with the factory unit. But at least now I have the option to go back if I want.
It is in and finished now! And I have so much more leg room! My knees are saved!
My spotter seats were gray and didn't match anything else, so I bought new vinyl for them as well. Got started and found that I have vinyl for the two top pieces but not the bottom. I don't know if this was intentional from Jet Armor or not. I have an email into him. The cushion on the right is what I need vinyl for:
With the seats off I was also able to address several issues inherited from the previous owner. He had removed all the carriage bolts that went through the firewall along with the ski pole and the oil reservoir. (He deleted the oil injection system.) This meant that I couldn't install a ski pole or oil reservoir again even if I wanted to. So I installed the carriage bolts and ski pole from my parts boat. I also plan to freshen up the oil reservoir from my parts boat, install it, and re-run my RV case lines. I've been using a temporary make-shift oil reservoir until the off-season knowing what an ordeal it was going to be to remove the seats and install the carriage bolts so that I could put the factory reservoir in again. In all honesty, the temporary reservoir has been working so well I'm debating even bothering with the factory unit. But at least now I have the option to go back if I want.
rgardner928
Well-Known Member
I cant take the credit for the magnets. It was doug that told me about it months ago here.
https://www.seadooforum.com/threads...-flying-out-on-the-highway.96587/#post-624724
https://www.seadooforum.com/threads...-flying-out-on-the-highway.96587/#post-624724
rgardner928
Well-Known Member
Here is my restoration if your in the reading mood.
https://www.seadooforum.com/threads/the-finished-restoration.95969/
https://www.seadooforum.com/threads/the-finished-restoration.95969/
rgardner928
Well-Known Member
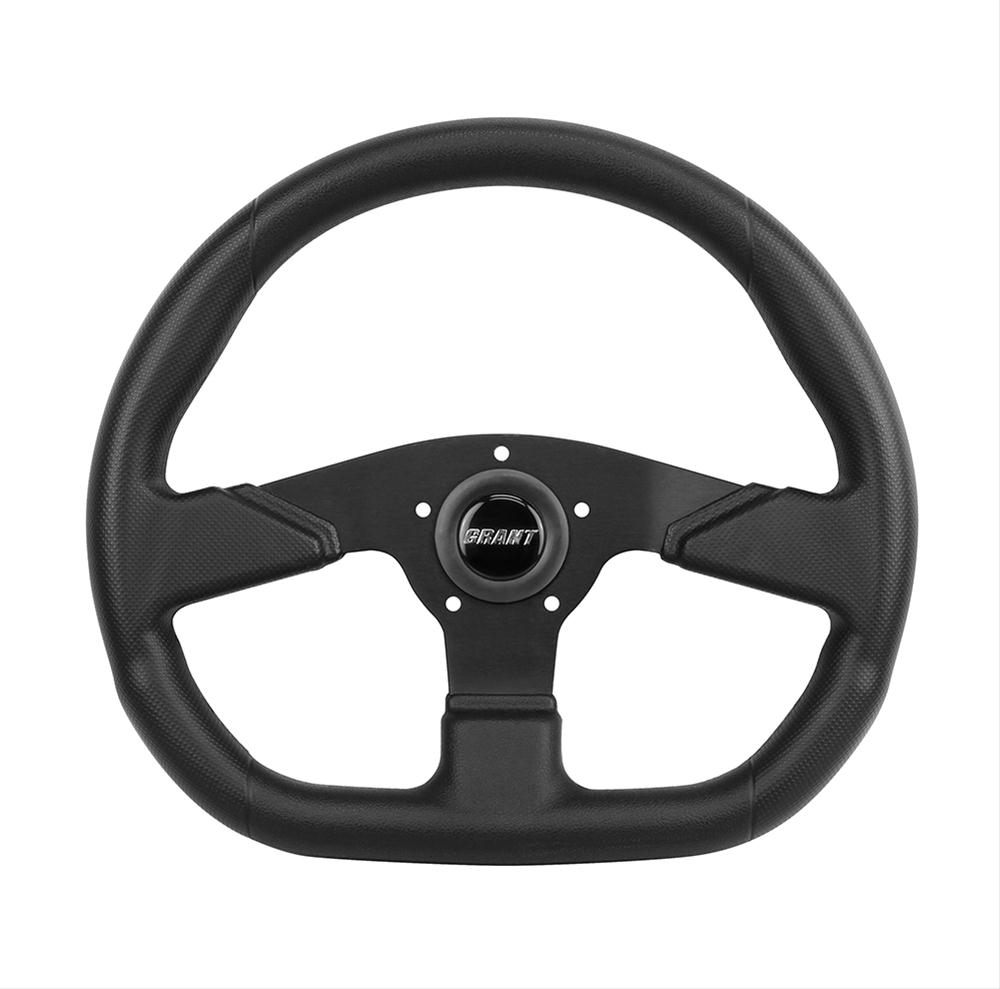
Also, I hate the flimsy plastic factory steering wheel so I'll be installing this one in the next couple days:
Let me know how this comes out. I'm going to try this next.


rgardner928
Well-Known Member
Not bad...was it easy? Also your missing a screw in the upper left side.Comparison of old and new wheels:
View attachment 45668. View attachment 45669
Installed:
View attachment 45667
Not bad...was it easy? Also your missing a screw in the upper left side.
Yeah, just a few bolts. Hardest part is getting the old wheel off. You have to apply some force with a hammer to the shaft while pulling out on the wheel.
I've got the missing screw in my wallet. I'm going to bring it to the hardware store and get 5 stainless versions of it so that they don't rust.
I ended up using a 1" spacer. Both because the wheel needed to be spaced further out for comfort and because the center hole of the wheel adapter isn't big enough for the threaded tip of the shaft. The 1" spacer makes it so that small hole doesn't have to fit over the threaded tip. I ordered a 1/2" spacer and a 1" at the same time JIC, but the 1/2" wasn't enough IMO. If I were doing it again I'd probably get a 1.5" spacer but it's not a big enough deal to me to bother ordering it at this point.
I was hoping that the wheel would feel a little more "rubbery" than it does. It's more "plastic-y" than "rubbery" but it's still 100% more rigid than the factory wheel so I'm happy with it. In truth, the "plastic-y" material will likely hold up better than rubber or vinyl in a marine environment anyway.
Did my sundeck spoiler today. I have the engine cover off because I'm painting it.

Searching for a better seat attachment solution for my spotter seats. Found these. Anyone ever use them?
FastCap Beau Clip 25 pcs Fasteners for Panels Amazon.com: FastCap Beau Clip 25 pcs Fasteners for Panels: Home Improvement
Searching for a better seat attachment solution for my spotter seats. Found these. Anyone ever use them?
FastCap Beau Clip 25 pcs Fasteners for Panels Amazon.com: FastCap Beau Clip 25 pcs Fasteners for Panels: Home Improvement
rgardner928
Well-Known Member
Did my sundeck spoiler today. I have the engine cover off because I'm painting it.
View attachment 45717
Searching for a better seat attachment solution for my spotter seats. Found these. Anyone ever use them?
FastCap Beau Clip 25 pcs Fasteners for Panels Amazon.com: FastCap Beau Clip 25 pcs Fasteners for Panels: Home Improvement
Those seam interesting. I actually think they would have been better than the magnets, had I known about them. Wonder if they make them in metal.
Personally...I "think" they would technically work. But you need to drill.a hood size hole in the fiberglass to find out. Post pictures of the install. I'd love to see how they work. I may do the same there...or under the front cushion too. That needs something better to attach and remove too.
rgardner928
Well-Known Member
Did my sundeck spoiler today. I have the engine cover off because I'm painting it.
View attachment 45717
Searching for a better seat attachment solution for my spotter seats. Found these. Anyone ever use them?
FastCap Beau Clip 25 pcs Fasteners for Panels Amazon.com: FastCap Beau Clip 25 pcs Fasteners for Panels: Home Improvement
I just found this website. Apparently they are used on yachts and other marine equipment. So there maybe something too it.
Here is a video of a guy using them on his boat. MAN I love these now!
https://beauclip.com/
Last edited:
I just found this website. Apparently they are used on yachts and other marine equipment. So there maybe something too it.
Here is a video of a guy using them on his boat. MAN I love these now!
https://beauclip.com/
Hell yes! Ordered!
The beau clips came in today and I was finally able to finish the upholstery! The clips worked great and will be my go-to for these things from now on.
So the way that the two halves of the spotter seat bottoms fasten together is with large dia. rivets that go through the bottom half's vinyl and into the top half's plastic base. I didn't like that because it makes the vinyl into kind of a structural component, which it's not meant to be, and also I don't have a source for rivets that big locally. I wanted to use the beau clips, which wasn't a problem for the top half, but I needed a rigid panel to fasten them to for the bottom half. I looked high and low for a plastic supplier to make them out of but no one had anything. That's when it hit me that I had entire spare seats in the parts boat at the shop. So I ran up there, grabbed them, tore them down, and pulled the two small plastic panels that I needed and used them as a base. So now the bottom half has plastic on it's bottom and top. Stapling the new vinyl to the top half of the seats was just more of the same as above, so I didn't take pics of that. I enlarged each of the 4 rivet holes in the plastic base to 1/2" and attached female beau clips to them.
The vinyl from for the bottom halves came in the mail last week. It was miscommunication on both our parts as to why I didn't get them in the first place. Jet Armor originally sent a numbered diagram of all the seats and I told him what numbers I needed. But the bottom half of the spotter seats is not in the diagram so I didn't know I needed to ask for them. He was super-accommodating though and sent them for free so I've got nothing but great things to say about Jet Armor. The vinyl that he sent has pre-cut holes for the factory rivets. I used these holes to locates the male beau clips by simply sticking them up through them. Here you can see both sides with the clips in place:


Then locating the new, additional plastic base was simply a matter of laying it down and snapping the beau clips into it:

I turned the piece over and used a nail to center punch the beau clip mounting holes:

I used #4 brass wood screws from Lowe's. (I live across the street from them.) I would have preferred SS but they didn't have them. Plus, some of the SS fasteners I've been getting from them must be low-grade or something because some are rusting after only a few months being installed. So even if they had them, their corrosion resistance would be in question:


Here's the two halves of one of the seats finished and ready to snap together, and then snapped together:


The beau clips are SECURE! By far the best attachment method possible for these seats. They are what SeaDoo should have done from the factory. They only pry apart with some difficulty. I have no doubt that I can do 80mph down the freeway without my seats coming out. In fact, if anyone gets them, don't test them out by assembling one without it being installed to a panel. You will nearly have to destroy it to get it apart. I will likely be replacing the magnet that I used for my bench with these eventually.
Then I turned to the front portion of the spotter seat bottoms, installed that vinyl and those beau clips. Removing the factory attachment tabs was kind of a PITA. I had to grind all the stainless rivets out and then drill the holes out to 1/2". There is not space for a beau clip on the furthest back outside attachment points on each of these so I just left them out. 4 beau clips per bottom is more than sufficient.


Reached pic limit, will post again ...
So the way that the two halves of the spotter seat bottoms fasten together is with large dia. rivets that go through the bottom half's vinyl and into the top half's plastic base. I didn't like that because it makes the vinyl into kind of a structural component, which it's not meant to be, and also I don't have a source for rivets that big locally. I wanted to use the beau clips, which wasn't a problem for the top half, but I needed a rigid panel to fasten them to for the bottom half. I looked high and low for a plastic supplier to make them out of but no one had anything. That's when it hit me that I had entire spare seats in the parts boat at the shop. So I ran up there, grabbed them, tore them down, and pulled the two small plastic panels that I needed and used them as a base. So now the bottom half has plastic on it's bottom and top. Stapling the new vinyl to the top half of the seats was just more of the same as above, so I didn't take pics of that. I enlarged each of the 4 rivet holes in the plastic base to 1/2" and attached female beau clips to them.
The vinyl from for the bottom halves came in the mail last week. It was miscommunication on both our parts as to why I didn't get them in the first place. Jet Armor originally sent a numbered diagram of all the seats and I told him what numbers I needed. But the bottom half of the spotter seats is not in the diagram so I didn't know I needed to ask for them. He was super-accommodating though and sent them for free so I've got nothing but great things to say about Jet Armor. The vinyl that he sent has pre-cut holes for the factory rivets. I used these holes to locates the male beau clips by simply sticking them up through them. Here you can see both sides with the clips in place:
Then locating the new, additional plastic base was simply a matter of laying it down and snapping the beau clips into it:
I turned the piece over and used a nail to center punch the beau clip mounting holes:
I used #4 brass wood screws from Lowe's. (I live across the street from them.) I would have preferred SS but they didn't have them. Plus, some of the SS fasteners I've been getting from them must be low-grade or something because some are rusting after only a few months being installed. So even if they had them, their corrosion resistance would be in question:
Here's the two halves of one of the seats finished and ready to snap together, and then snapped together:
The beau clips are SECURE! By far the best attachment method possible for these seats. They are what SeaDoo should have done from the factory. They only pry apart with some difficulty. I have no doubt that I can do 80mph down the freeway without my seats coming out. In fact, if anyone gets them, don't test them out by assembling one without it being installed to a panel. You will nearly have to destroy it to get it apart. I will likely be replacing the magnet that I used for my bench with these eventually.
Then I turned to the front portion of the spotter seat bottoms, installed that vinyl and those beau clips. Removing the factory attachment tabs was kind of a PITA. I had to grind all the stainless rivets out and then drill the holes out to 1/2". There is not space for a beau clip on the furthest back outside attachment points on each of these so I just left them out. 4 beau clips per bottom is more than sufficient.
Reached pic limit, will post again ...
Last edited:
Now I had to attach beau clips to the hull. This is where my experimentation will help others in the future, so READ THIS POST IF YOU ARE COPYING THIS!
I started by drilling each of the factory mounting holes to 1/2". Then I started experimenting witht he pilot hole size for the #4 brass screws. These brass screws are FRAGILE! You can put almost no torque on them before they break. Here's 4 that either broke or were about to break so I pulled them. These were what i used to determine "correct" pilot drill size:

The problem is that the correct drill size is somewhere between 6/64ths and 7/64ths and I didn't have the correct drill size. Most people probably won't:

So I used 3/32 and just wallowed the holes out a bit. Once I got the hang of it, it wasn't hard. But drilling a straight 3/32 hole the screw would break every time and a 7/64 hole the screw would fall right in without making any threads. Oh, and if you do break a screw off in the hole, you basically are stuck with it in there forever. If you do, just rotate the beau clip to drill a new set of holes in different locations.
After the beau clips were in the hull the seats snapped right into place and I'M DONE WITH STAPLE AND VINYL!


Now that I've proven that these beau clips are amazing, I have one more use for them. My sun deck cushion has always been simply valcroed in place. I hate it. The fact that it has no plastic back board makes it billow out and deform when I'm towing the boat. I plan to find some sort of plastic or marine plywood and cut a back board for it and use beau clips to attach it as well. I'll post that up when I get to it, too.
I started by drilling each of the factory mounting holes to 1/2". Then I started experimenting witht he pilot hole size for the #4 brass screws. These brass screws are FRAGILE! You can put almost no torque on them before they break. Here's 4 that either broke or were about to break so I pulled them. These were what i used to determine "correct" pilot drill size:
The problem is that the correct drill size is somewhere between 6/64ths and 7/64ths and I didn't have the correct drill size. Most people probably won't:
So I used 3/32 and just wallowed the holes out a bit. Once I got the hang of it, it wasn't hard. But drilling a straight 3/32 hole the screw would break every time and a 7/64 hole the screw would fall right in without making any threads. Oh, and if you do break a screw off in the hole, you basically are stuck with it in there forever. If you do, just rotate the beau clip to drill a new set of holes in different locations.
After the beau clips were in the hull the seats snapped right into place and I'M DONE WITH STAPLE AND VINYL!
Now that I've proven that these beau clips are amazing, I have one more use for them. My sun deck cushion has always been simply valcroed in place. I hate it. The fact that it has no plastic back board makes it billow out and deform when I'm towing the boat. I plan to find some sort of plastic or marine plywood and cut a back board for it and use beau clips to attach it as well. I'll post that up when I get to it, too.
rgardner928
Well-Known Member
Now I had to attach beau clips to the hull. This is where my experimentation will help others in the future, so READ THIS POST IF YOU ARE COPYING THIS!
I started by drilling each of the factory mounting holes to 1/2". Then I started experimenting witht he pilot hole size for the #4 brass screws. These brass screws are FRAGILE! You can put almost no torque on them before they break. Here's 4 that either broke or were about to break so I pulled them. These were what i used to determine "correct" pilot drill size:
View attachment 45828
The problem is that the correct drill size is somewhere between 6/64ths and 7/64ths and I didn't have the correct drill size. Most people probably won't:
View attachment 45829
So I used 3/32 and just wallowed the holes out a bit. Once I got the hang of it, it wasn't hard. But drilling a straight 3/32 hole the screw would break every time and a 7/64 hole the screw would fall right in without making any threads. Oh, and if you do break a screw off in the hole, you basically are stuck with it in there forever. If you do, just rotate the beau clip to drill a new set of holes in different locations.
After the beau clips were in the hull the seats snapped right into place and I'M DONE WITH STAPLE AND VINYL!
View attachment 45830 View attachment 45831
Now that I've proven that these beau clips are amazing, I have one more use for them. My sun deck cushion has always been simply valcroed in place. I hate it. The fact that it has no plastic back board makes it billow out and deform when I'm towing the boat. I plan to find some sort of plastic or marine plywood and cut a back board for it and use beau clips to attach it as well. I'll post that up when I get to it, too.
YOU ARE THE MAN!
I'M SWAPPING TO THESE NOW!
THANKS A LOT!
Where have you found the best price for these? And do they make them in stainless?
YOU ARE THE MAN!
I'M SWAPPING TO THESE NOW!
THANKS A LOT!
Where have you found the best price for these? And do they make them in stainless?
Best price I found was Amazon:
https://www.amazon.com/gp/product/B07ZJTT3D4/ref=ppx_yo_dt_b_asin_image_o00_s00?ie=UTF8&psc=1
Basically $0.96 ea. if you have Prime. I did not find any in SS, but I don't think they would work as intended if they were. The plastic has to flex a little to engage and release, which SS wouldn't do.
A little more on the brass screws, too. Watch them closely. If the head starts to turn but the shank isn't, stop, pull it out, and throw that screw away, don't try to reuse it. It is fatigued at that point and will break if you do. Also, don't even bother trying to get broken screws out of the hull. You'll screw the hull up worse than just leaving the screw and still won't get it out.
If I was doing it again and had time, I would order these instead of using the brass screws:
https://www.mcmaster.com/90294A509
They're over twice the price but the added ease of installation would be worth it to me. And remember, you'll be putting a lot of these in. Each Beau Clip will require 8. So do the entire 25-pack you would need 200 screws + a few spares JIC.
Or maybe you have a better local source for them than me. My local options generally suck for stuff like this even though I live directly on the Gulf and nearly everyone around here owns one or more boats. I'm legitimately considering opening a hardware store that caters to boaters.
YOU ARE THE MAN!
I'M SWAPPING TO THESE NOW!
THANKS A LOT!
Where have you found the best price for these? And do they make them in stainless?
BTW, to replace the magnets that we both have, I think you may need to use rivets or something to hold the Beau Clips on. Because screws would go down through the main seat and into the hull, which you don't want. I haven't devoted much more mental effort to figuring that out yet.
I've only been in and out of the new bench seat a few times since installation, haven't even taken the boat out, and the damn rivnuts have already pulled out of the back of the seat. So I removed the seat-back again, took the remaining rivnuts out, and IN WENT BEAU CLIPS! I LOVE these things!


YOU ARE THE MAN!
I'M SWAPPING TO THESE NOW!
THANKS A LOT!
Where have you found the best price for these? And do they make them in stainless?
I just thought about this, too. The male half of the beau clip will have to go on the bottom so that it can stick up into the foam of the top as opposed to down through the hull.
I had cause to remove my seat back yesterday while performing some maintenance in the engine bay. I found that the Bauclips hold almost too well. To remove it I had to stick a pry bar down behind the seat and pry directly on the clips because just pulling on the seat itself was causing the thin plastic seat backing to deform before the clips pulled apart. This doesn't really change how I feel about the clips. They're still BY FAR the best option and what SeaDoo should have sent from the factory, IMO. But I thought I would let people know that so that they could make their own judgements, or at least just be aware of how tight they are.
- Status
- Not open for further replies.
Similar threads
- Replies
- 0
- Views
- 518
- Replies
- 0
- Views
- 374
- Replies
- 7
- Views
- 605
- Replies
- 2
- Views
- 799
- Replies
- 32
- Views
- 950