The moves are,,,
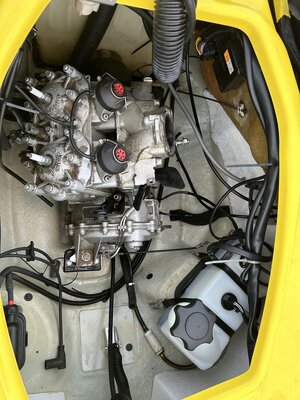
you need to lift the seat high into the air,,,that will reveal a large rubber round cover,,,that is directly above the baffle.
To lift the seat, remove the battery ground and then remove the 17 mm hex nut from the 17 mm hex bolt,,,,I have a short stubby 3/8's just for this job,,,and a short 17 mm wrench for the nut,,,put a rag under it,,,do not lose it.
Remove the large clamp that holds the rubber bellow,,,now you can lift the seat "up up and away",,,I tie off the seat so it will not come crashing down,
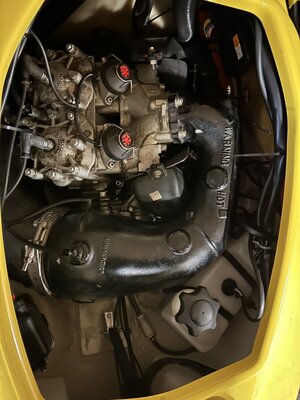
Now remove the rubber round cover to expose the top of the baffle fuel pickup
The big move in all fuel selector fuel line replacements is to remove the selectior with lines still attached,,,and you just replace them on a work bench.
So you will remove the selector knob,,the large plastic retaining nut,,be easy on after tightening,,,it will break,,,
I then will loosen the 8 mm clamp that holds the baffle in...this allows me to lift it up almost above the hull,,for easy access to the clamps holding the fuel lines,,,BEFORE you remove any hose thoroughly mark the "on " and "reserve"lines,mark everything,,don't use whightout,,,it will come off,,,,
The front fitting will the return line from the carb,,the rear line will be a vent line,,,actually,,,you do not need to replacethe vent line,,anyway,,,
I may have inadvertently missed something,,but you now get the basic idea,,,pull the entire selector with lines attached out in one big piece
For me,,getting the bloody bellow boot clamp BACK later on always slows me down,,,make sure it is installed fully!!!,,it may seem like it is fully on,,,when in fact it is not!
Things to note,,,the vent fitting should be 180 degees opposite to the return line,..the vent fitting will have a vertical notch on it,,,have a very strong light or flashlight for this job,.dometimes the notch is not there,,,have a small mirror as well,,,it will help identify the markings on the side of the baffle,,all 4 shoukd be marked on the side of the baffle.
At the end,,,Make sure to rotate the baffle so that the "on" and "reserve"lines are perpendicular to the ski,,,and not at an angle,,the purpose being that the baffle can "trap"fuel slightly better upon acceleration if it is 90 degees to the hull.
Last note,,when you insert the selector into the hull,,,align the small notch in the hull with the small protrusion on the selector,,,AND make sure that it sits flush with the hull,,,sometimes a clamp or two will sit a tiny bit high to prevent the "flushness" of the selector/hull fit.,,you may have to re-orient a clamp or two,
If you have an air tool,,,that will make the removal of the 17 mm nut much easier
If a hose,,is in the way,,,,like the gas fill hose or oil fill tube,,,remove one side of them to the side.
I also leave the water/fuel separator attached as well,,its held by a 10 mm nylock nut,,,don't lose it,,,that line goes directly to the carb,,,and can't remember how hard it is to get at the carb fitting,,,but you want to remove that "in" line still attached to the separator,
Make notes how various lines are routed for easier assembly at the end...take lots of pictures as you work.
Let us know how it goes.