• This site contains eBay affiliate links for which Sea-Doo Forum may be compensated.

1997 SPX Motor Rebuild -The Saga W/Pics

Status
Not open for further replies.

CASPX

New Member
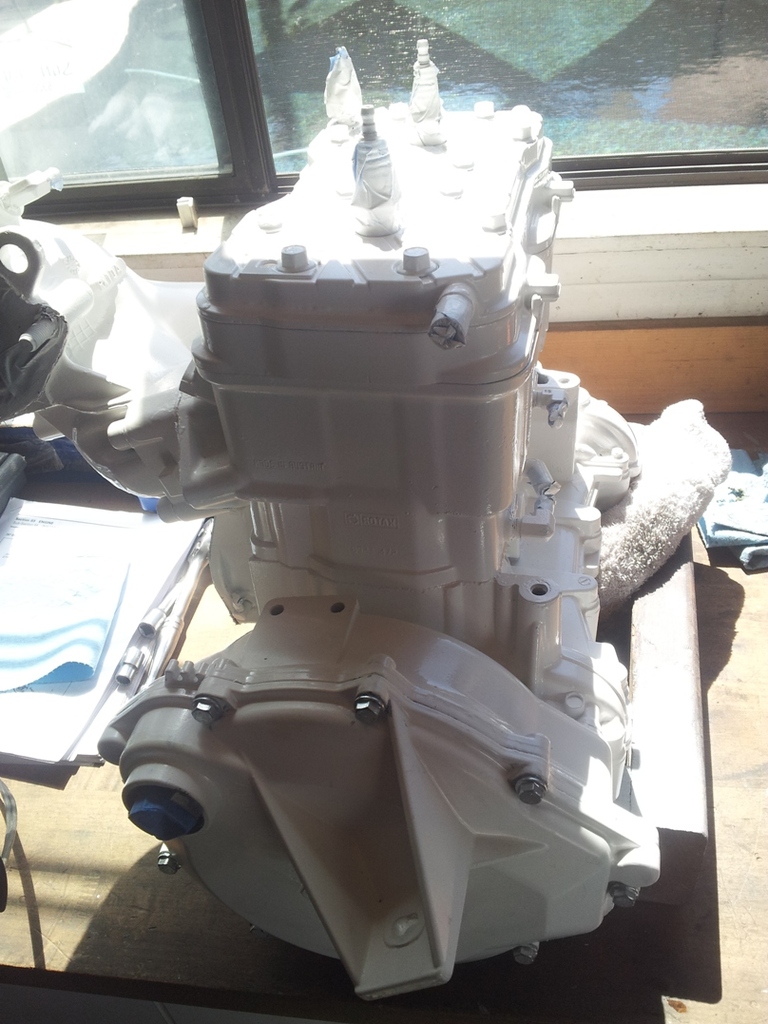
Well after 2 years I'm almost finally done with my motor rebuild thanks in part to a lot of the guys on here so I figured it's about time for a rebuild thread.


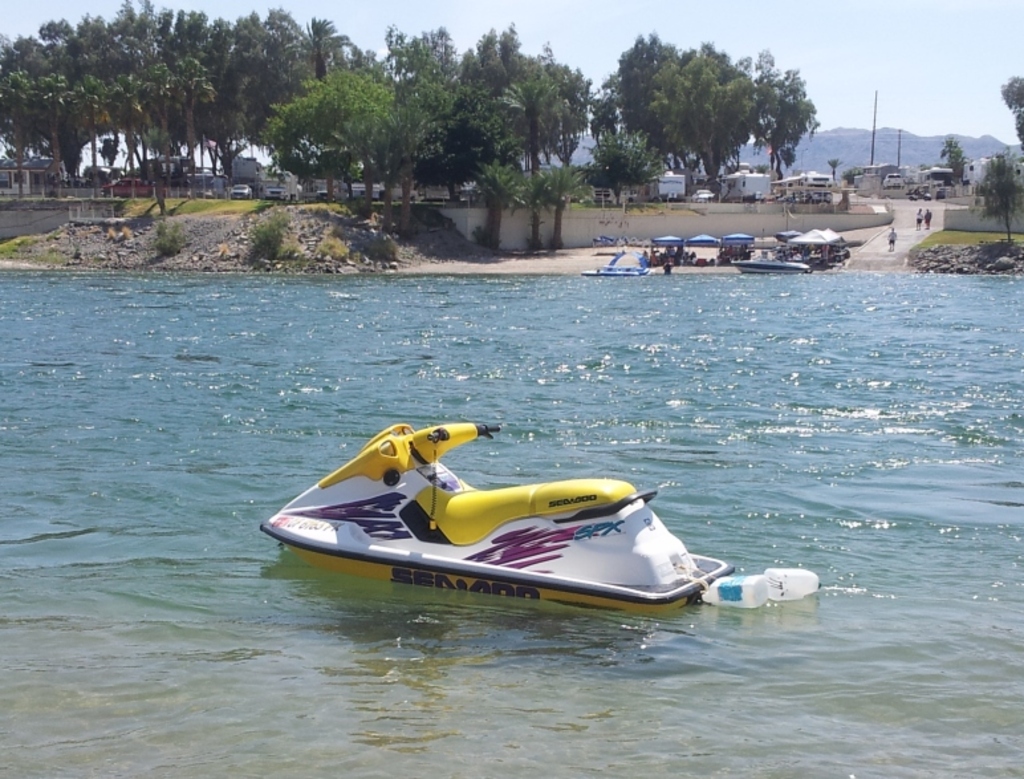
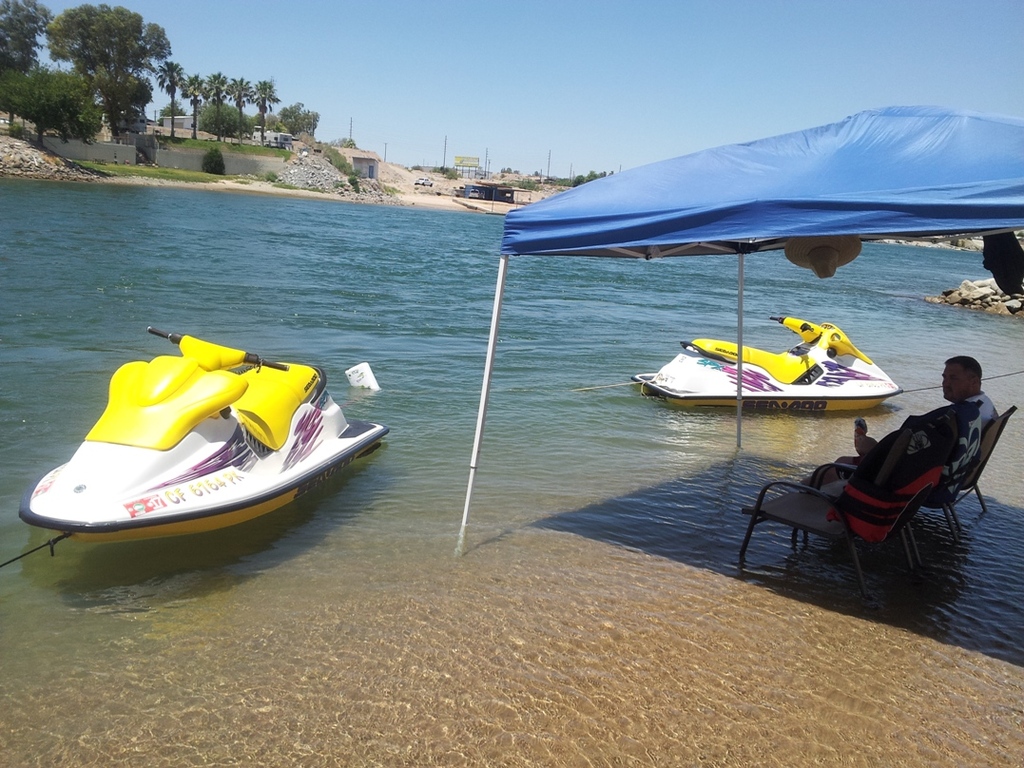
Have 2 1997 SPX's both bought new in 1997 and used for only about 10-15 hours over the course of 13 years in the port of Long Beach, Salt Water. Of course as they age things start to happen and one of the first things that happen was the pipe plug rotting through and creating a hole which was discovered after about a 2 hour ride in the ocean. Removed the pipe welded in a new plug and called it good. Used the skis 2 or 3 more times until about 4 years ago when I found this forum and read about all the fuel line issues. So I replaced all the grey temp lines with trident marine fuel line, cleaned the carbs, filters, selector, fixed the fuel gauge baffle, changed the jet pump oil, replaced the oil filters, and polished & waxed them including the trailer.

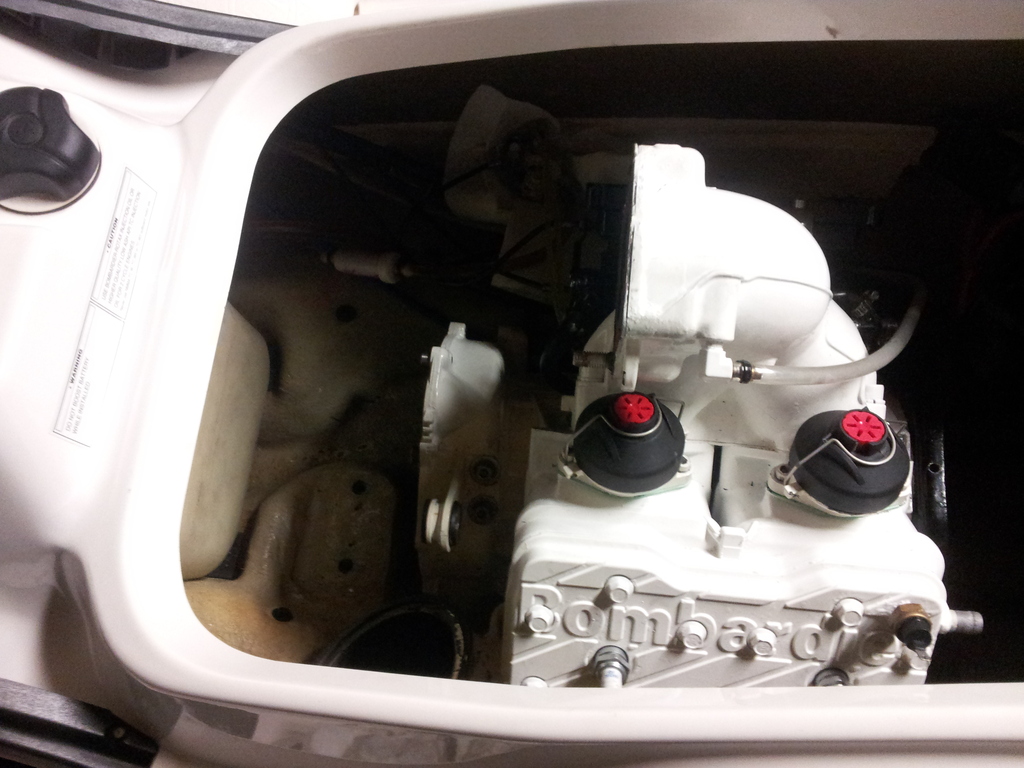
One always had starter issues, replaced one starter and the replacement stopped working so I pulled them both and they where covered in what looked like dirt. I disassembled both of them cleaned them, greased them, & tested them. Both worked good so I stuck the OEM one back in the bike and took it to the local lake for memorial day 2013. Both bikes ran good fr most of the day until we parked them for the afternoon. When we tried to leave and the starter would just spin so towed it back to the launch.

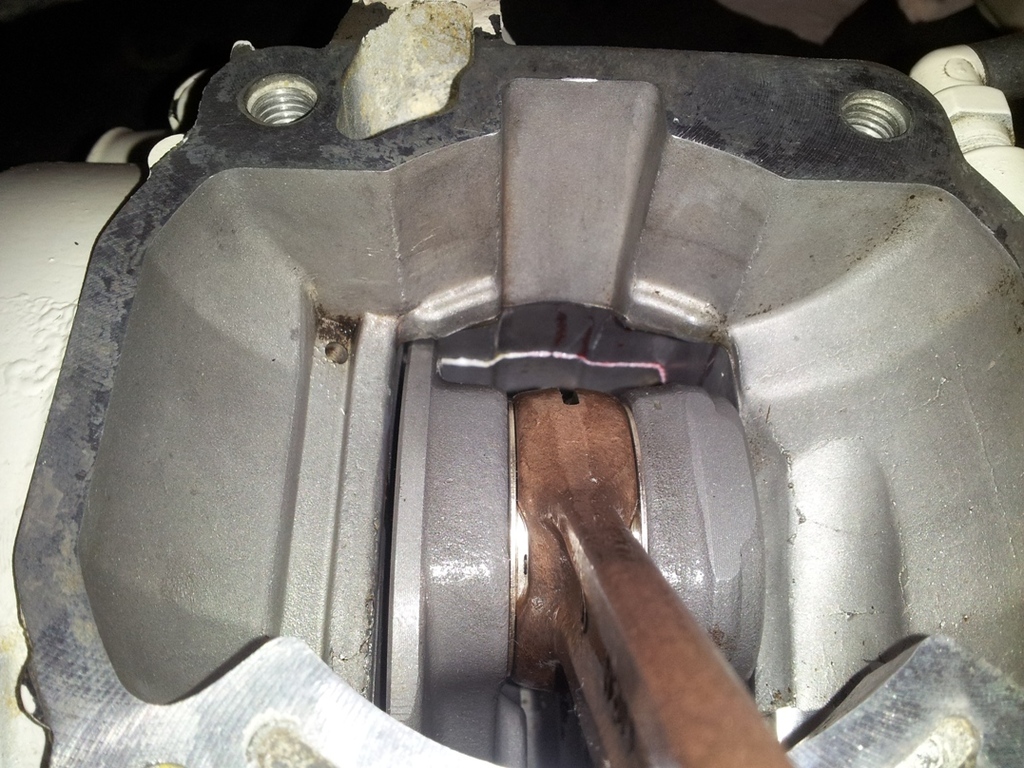
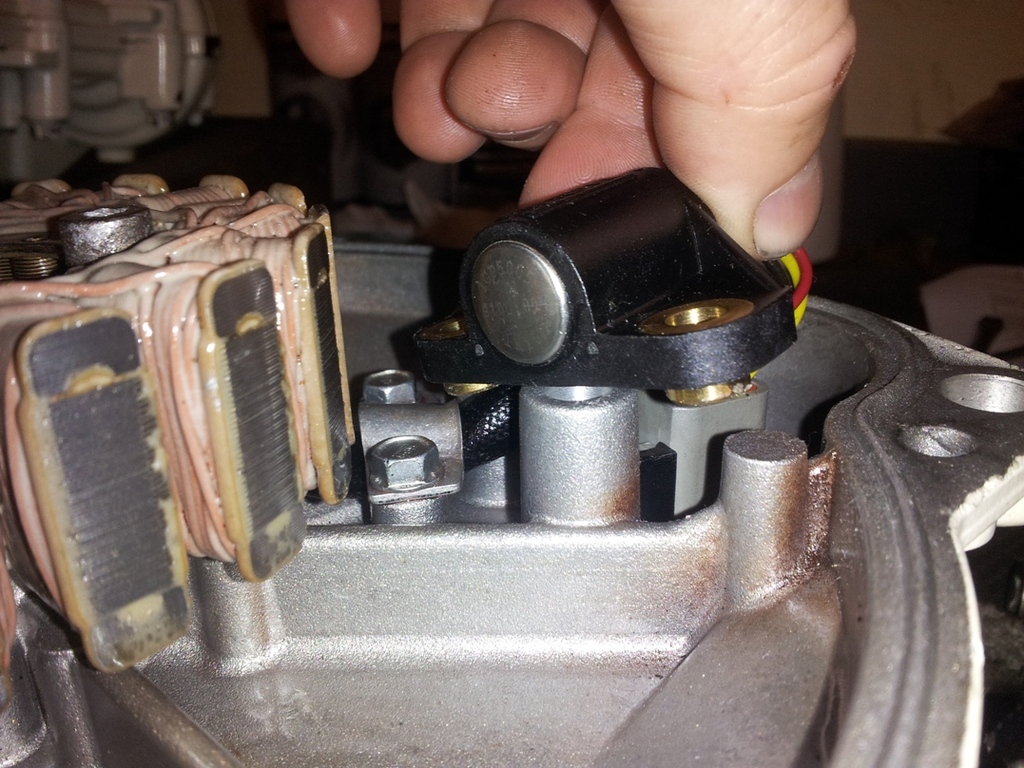
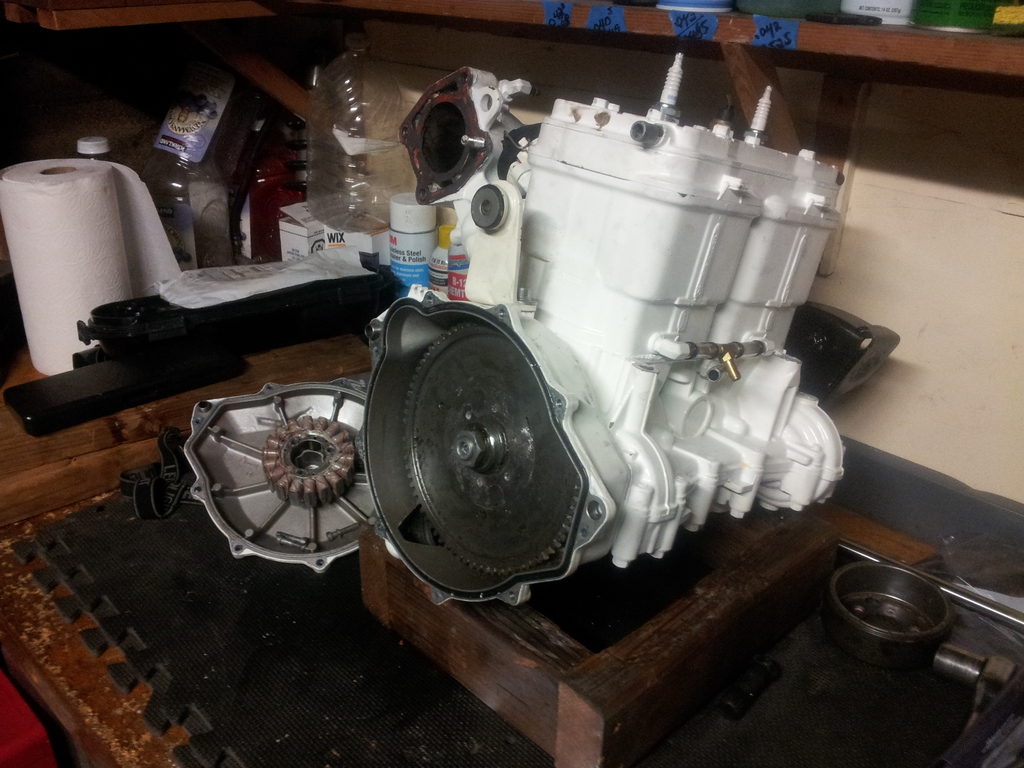
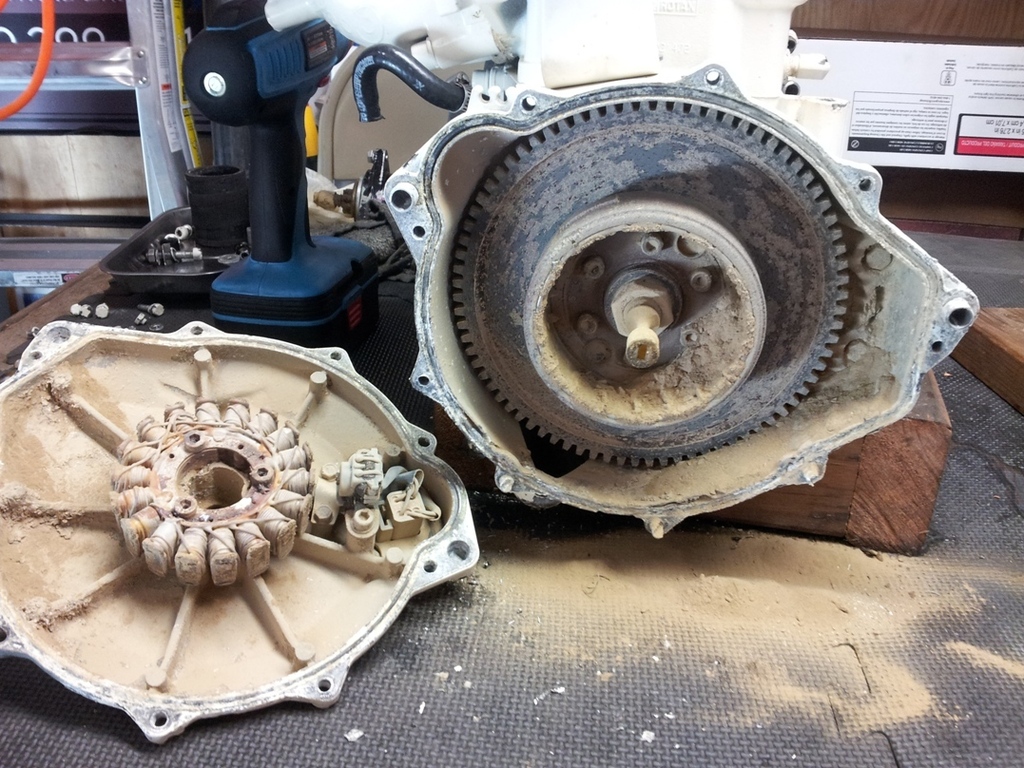
After all that work I decided that I'd try to find out what the problem was so after digging in to it for 5 hours I said F-it and pulled the motor. When I cracked open the stator here's what I found.

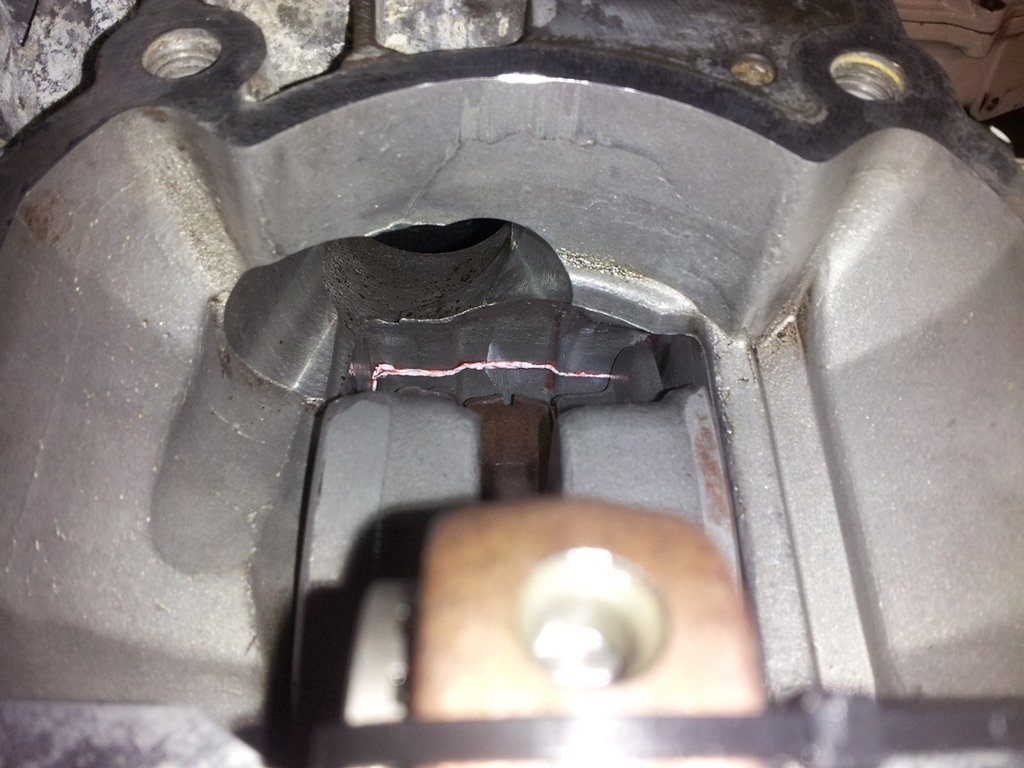
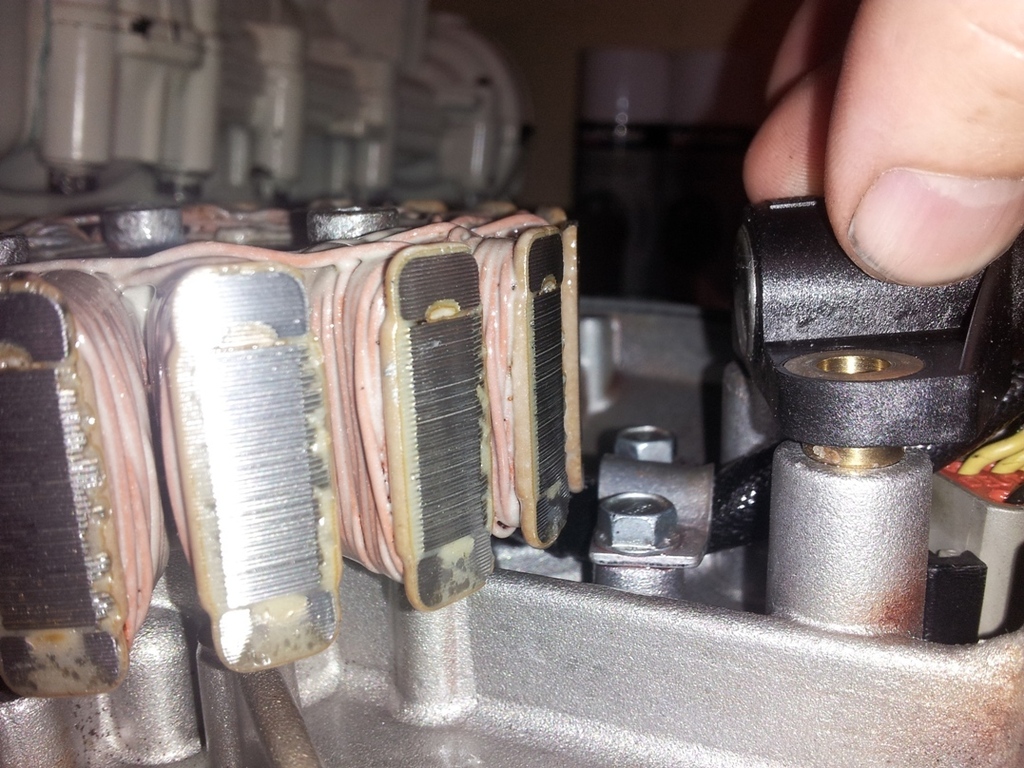
I've come to the conclusion that salt water got blasted in to the stator cover through the Deustch stator plug on the front of the housing when the pipe plug went and sat in there for probably 8-10 years then we'd grind it up with the occasional 2 hours of use every 4-5 years. You can see the water line on the back of the stator housing.

115.jpg

116.jpg


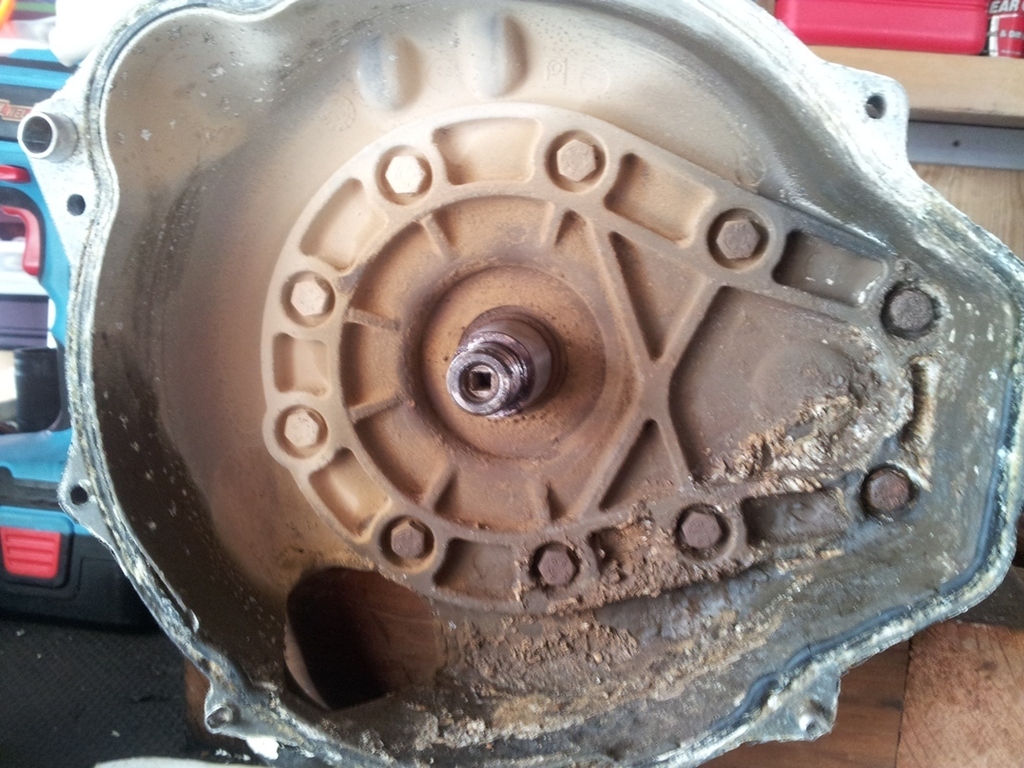
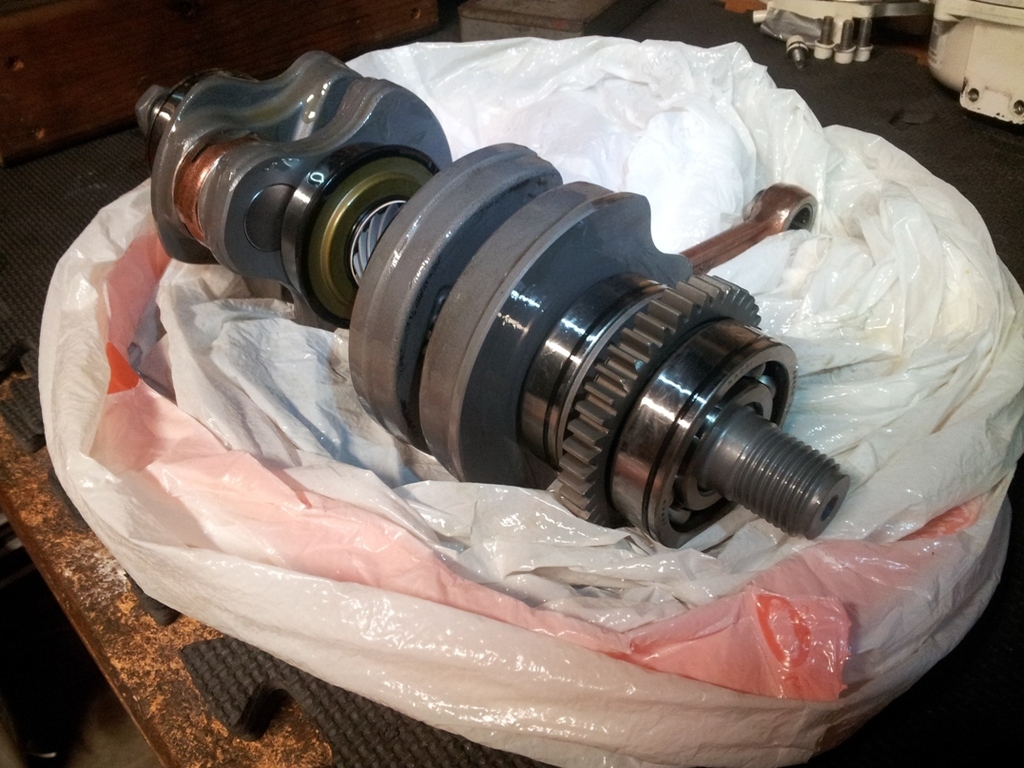
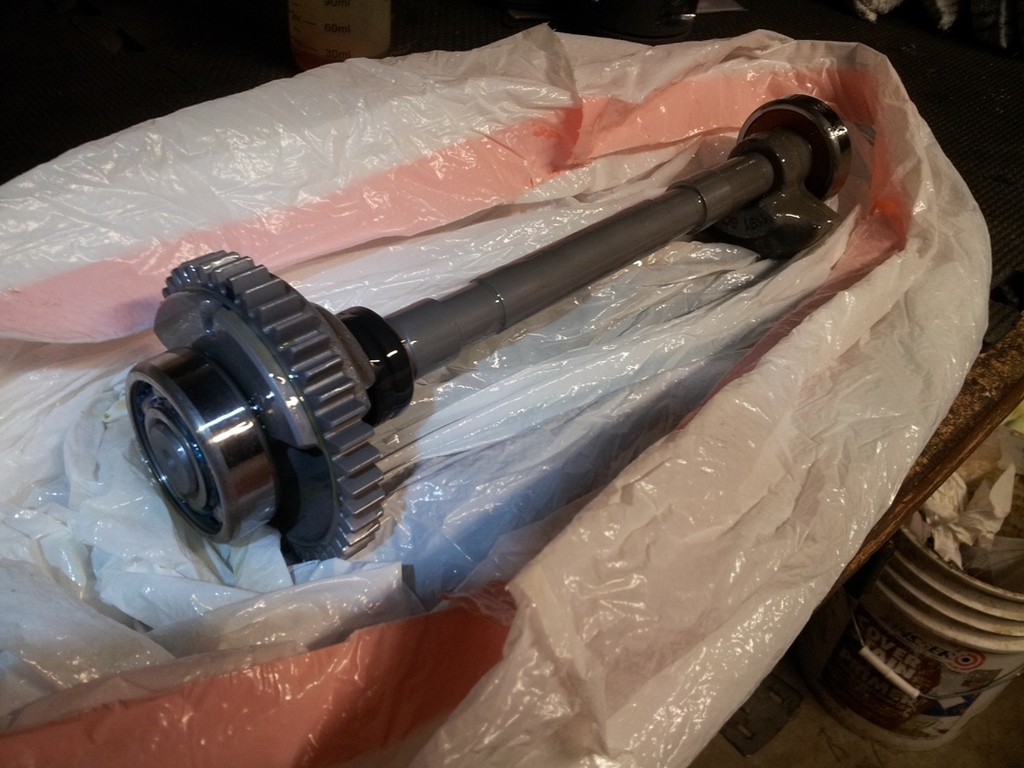
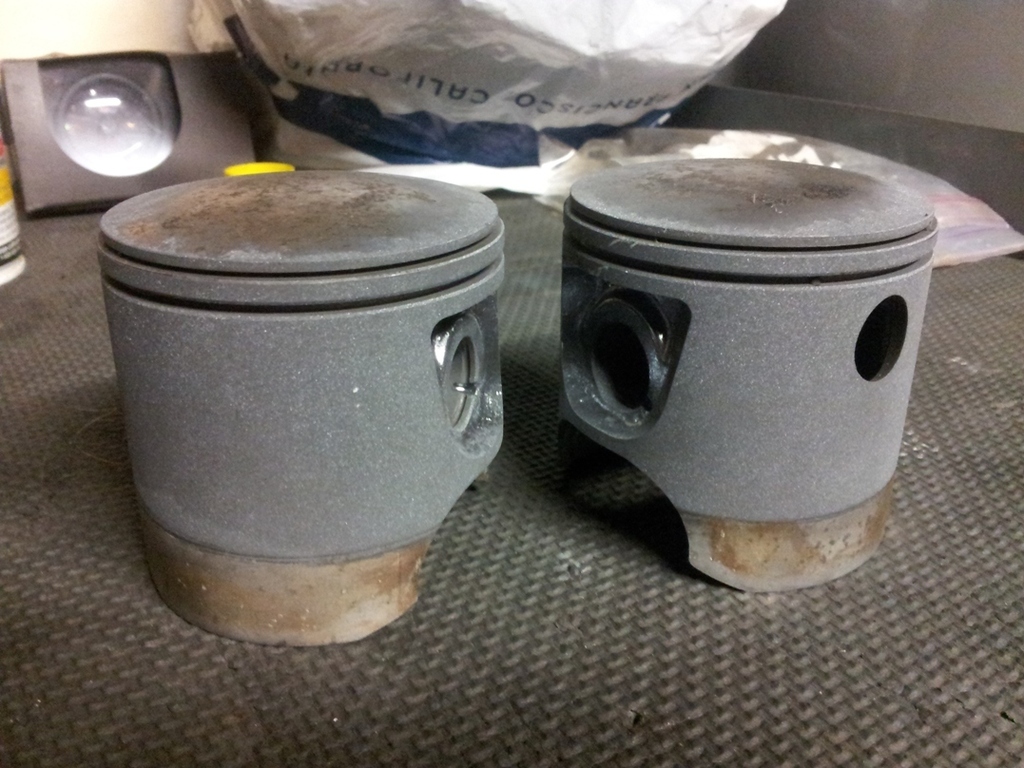
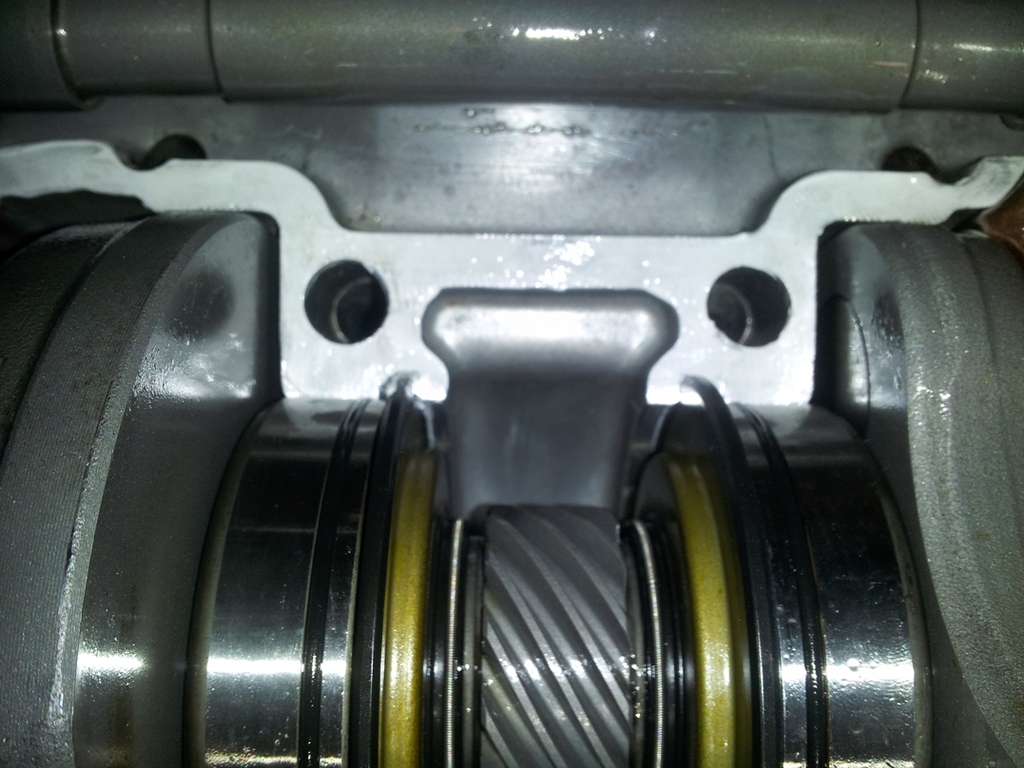
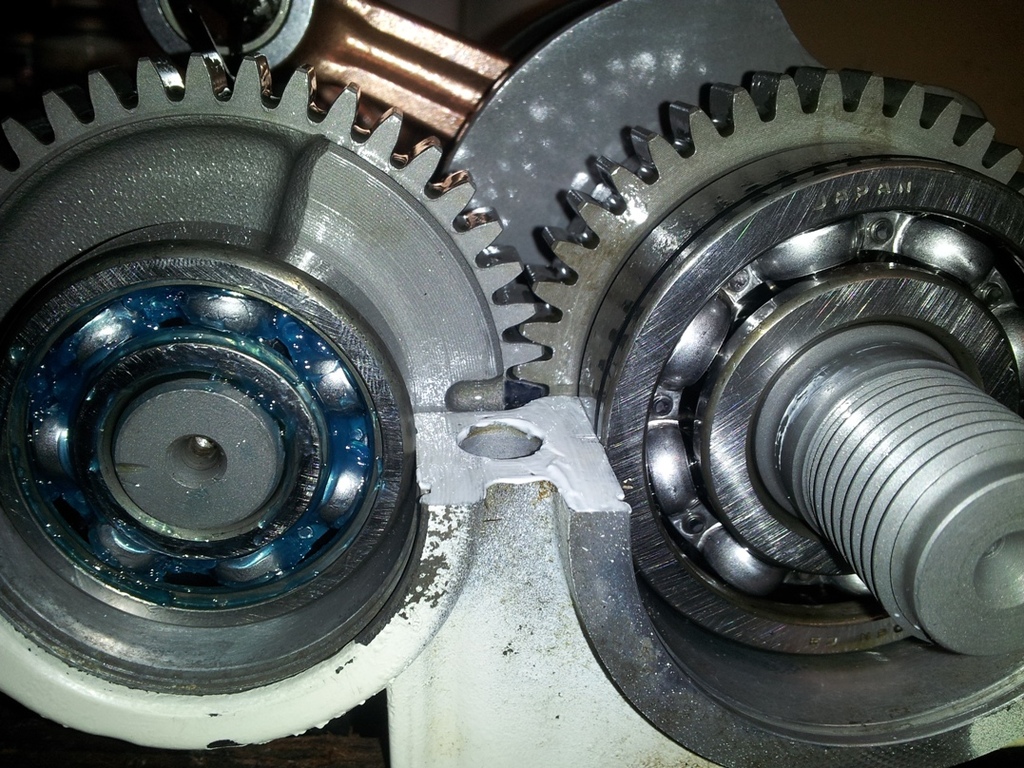
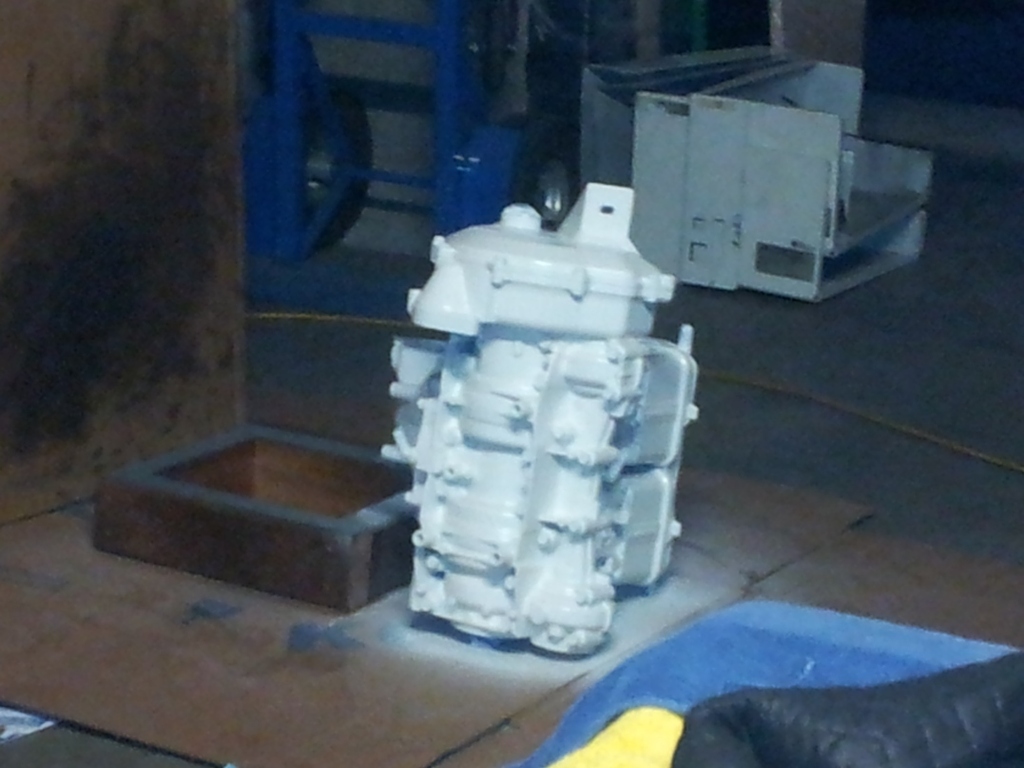
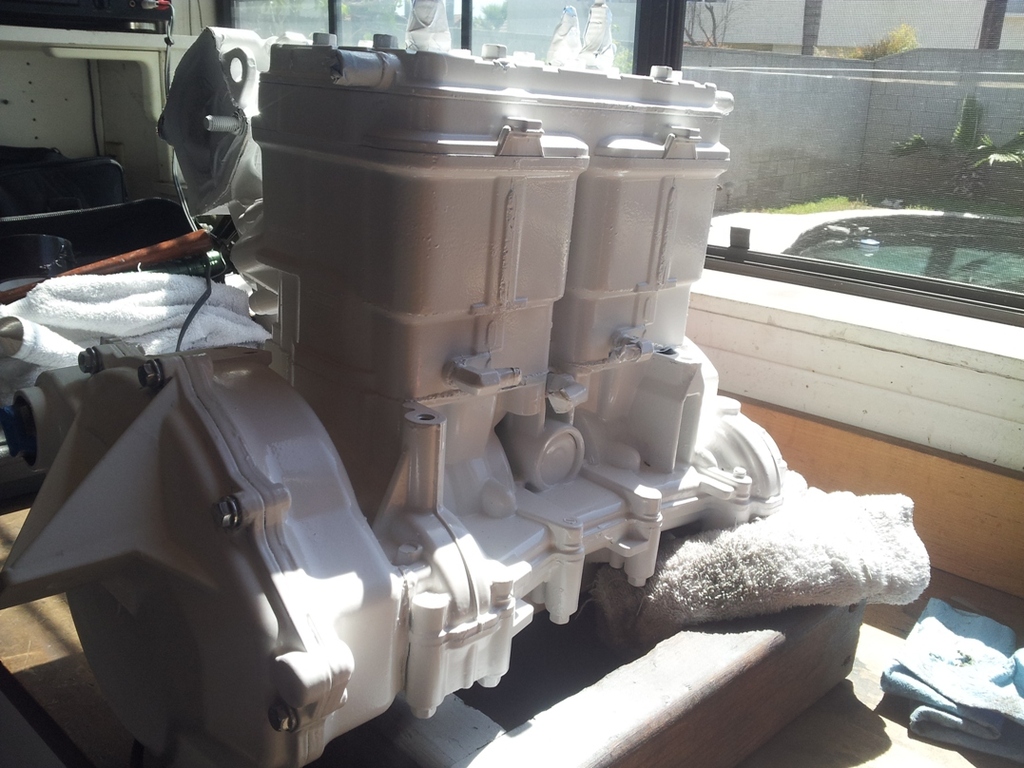
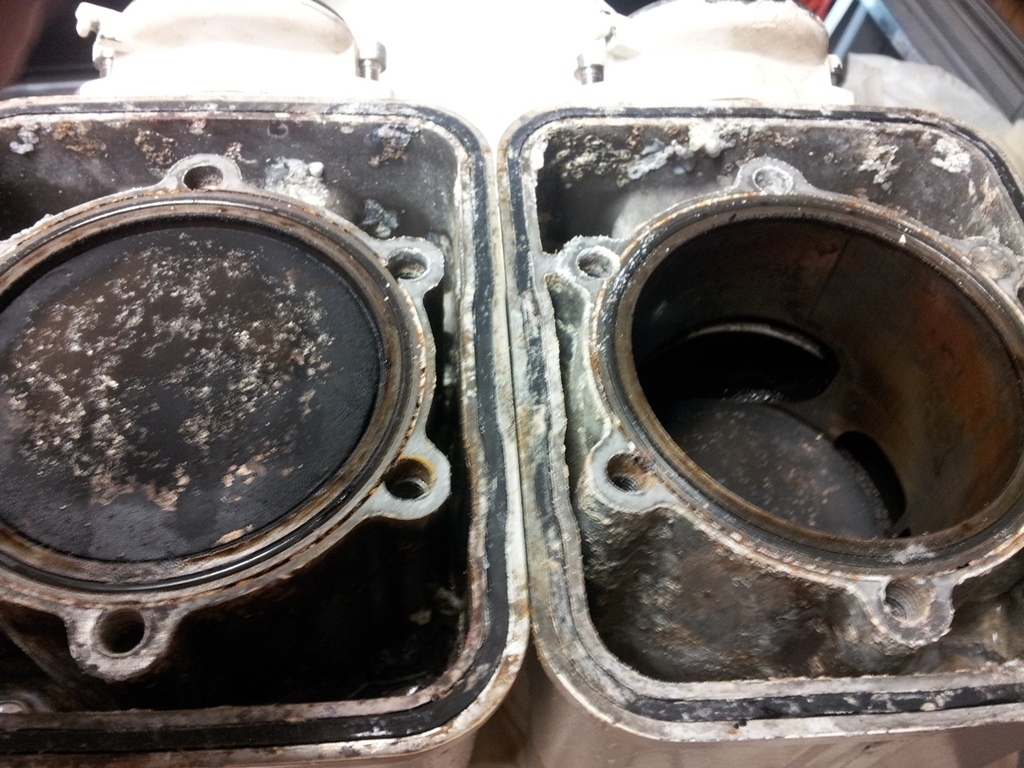
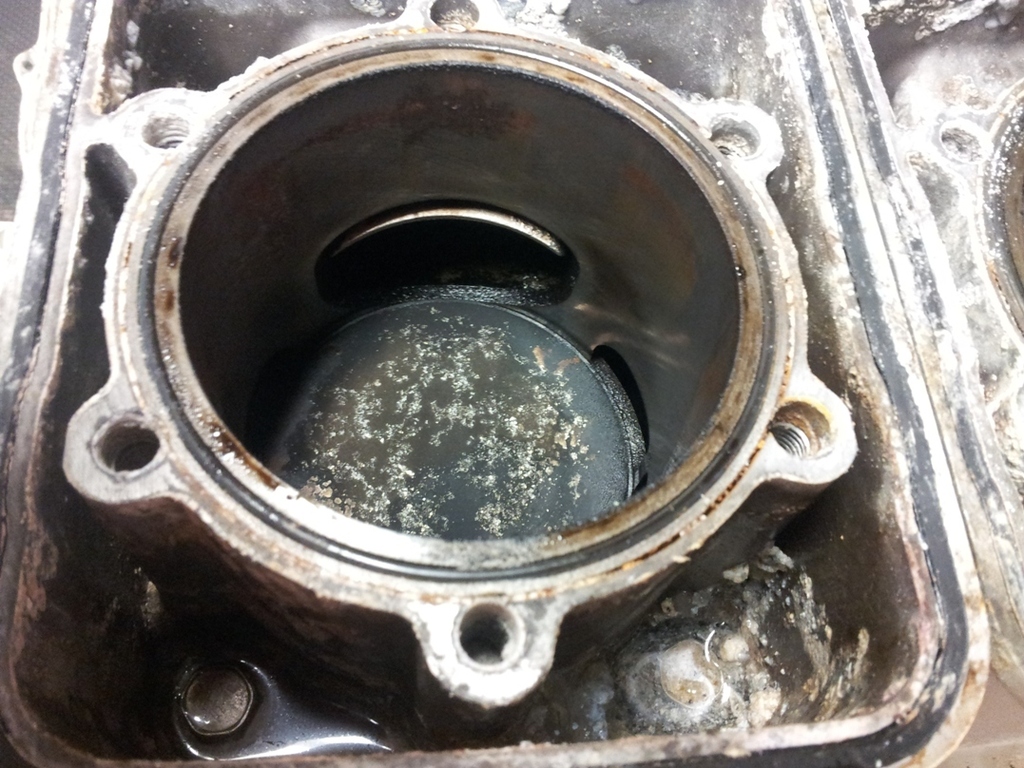
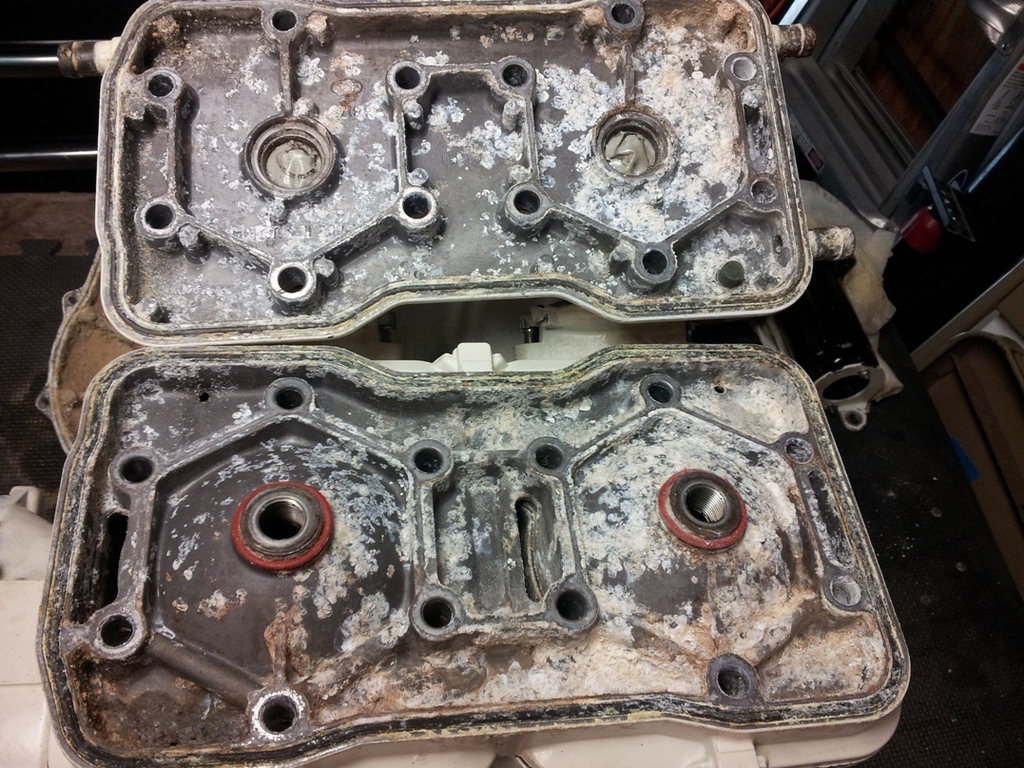
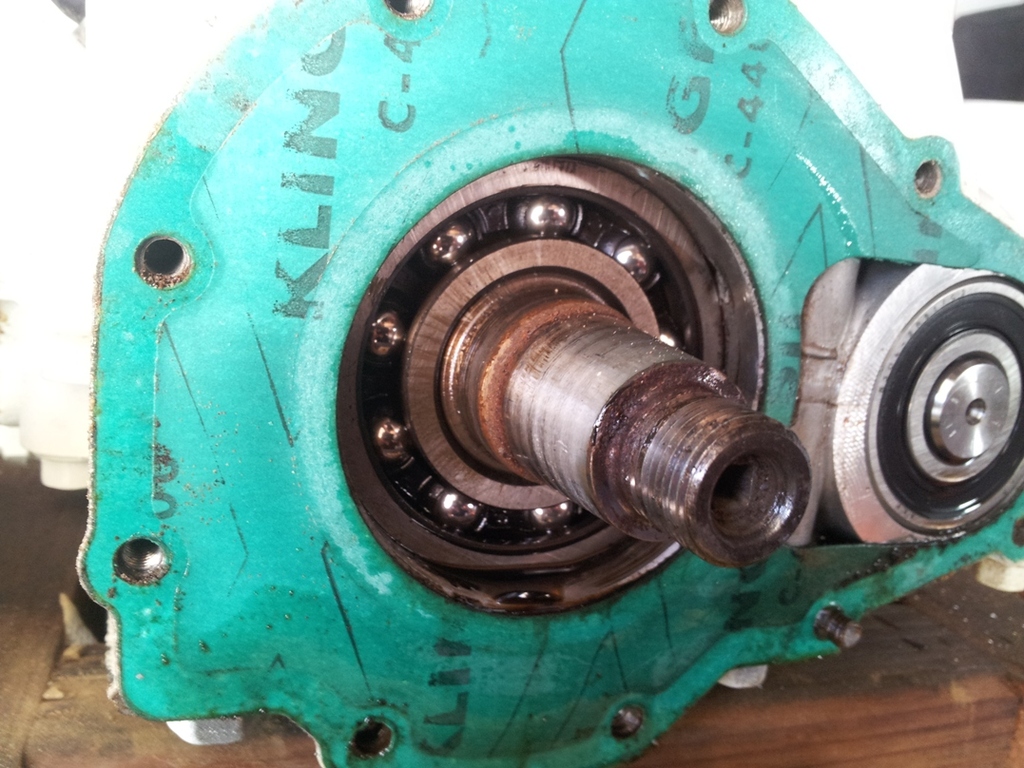
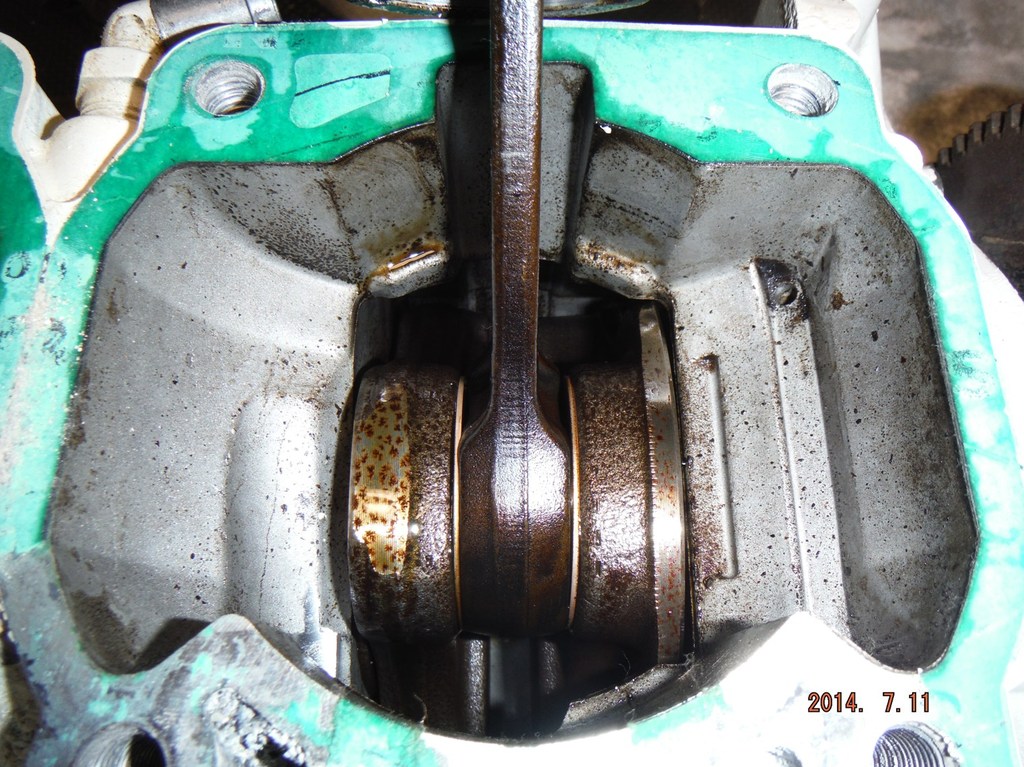
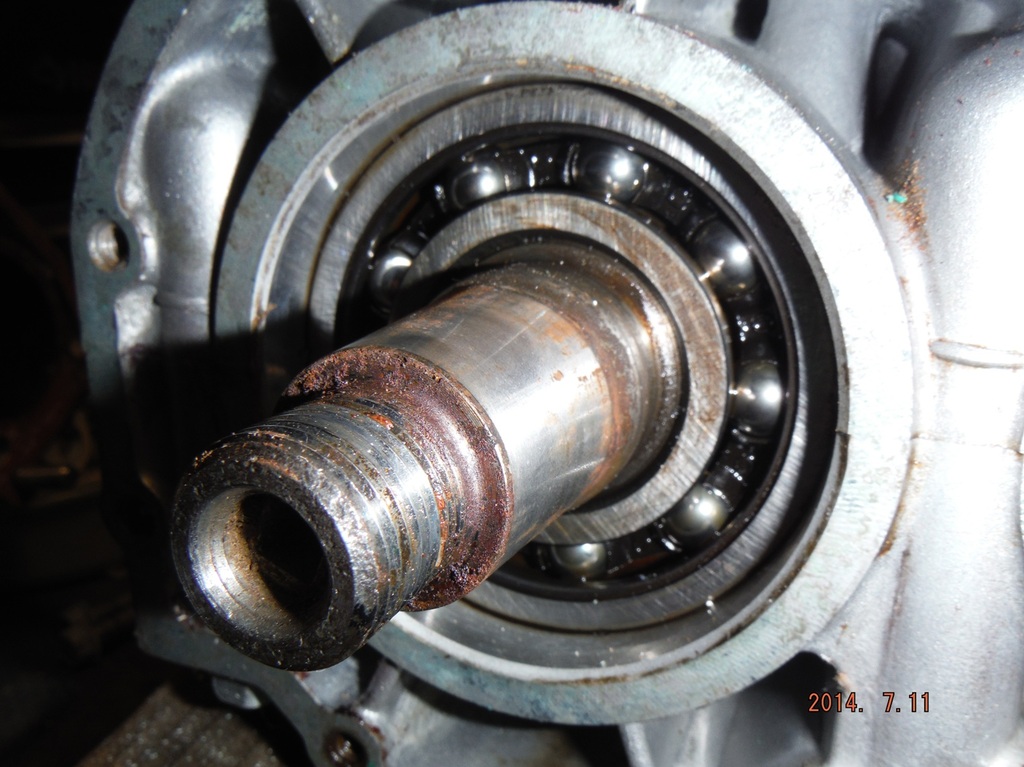
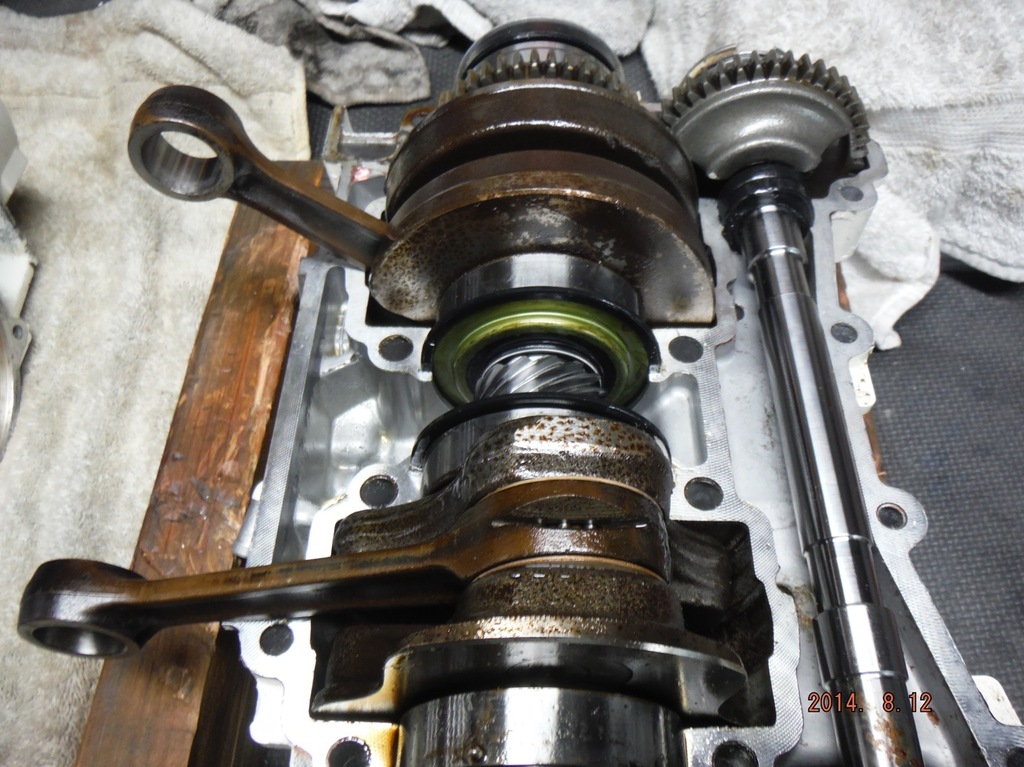
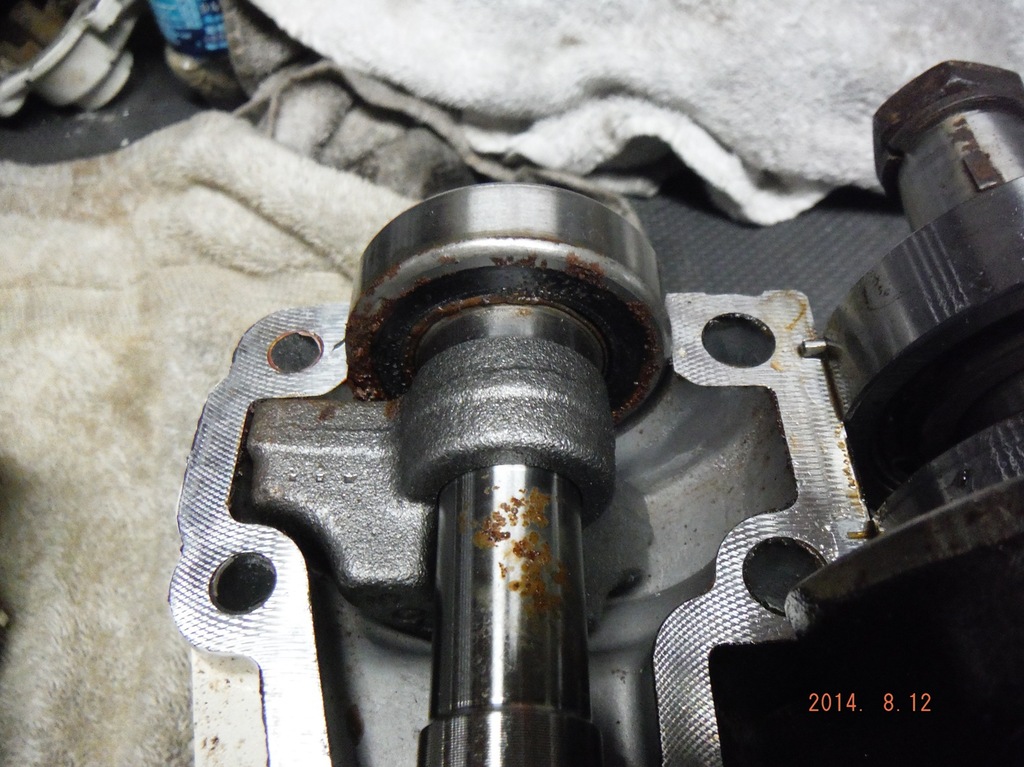
So after learning a little more I decided it was probably best to tear the motor all the way down and rebuild it VS risking blowing it because of a compromised crank seal. So here’s what I found when I dug in to it.
425.jpg

426.jpg

118.jpg

117.jpg

427.jpg

428.jpg

429.jpg

430.jpg

120.jpg


431.jpg

432.jpg
 
Last edited by a moderator:
Seadoo’s are not a huge market out here on the west coast so all of my local BRP dealers suck so after 6 months of looking I finally found a guy who rebuilt race motors out of his home shop as a referral from Water craft Magic to rebuild my OEM crank.

122.jpg

123.jpg

433.jpg
 
Last edited by a moderator:
So after my business and life got in the way for almost a year with the motor in boxes I finally got back in touch the rebuilder and took the crank over to be rebuilt. Took him 2 weeks and I had it back but by this time it was desert riding season and my bike needed some love to keep it going so the crank sat sealed in a bag for another 5 months.
434.jpg


During this time the rebuilder had recommended that I soak the original pistons in simple green for a week to get the carbon off so I figured if one week is good longer should be better. Well I put them in some Tupperware and forgot about them for 5-6 weeks and when I remembered here’s what I pulled out.

435.jpg


Well that cost me another 2 months of searching ebay for cheap OEM pistons and another $150.

At this point I was finally ready to start the rebuild so after studying RacerXXX’s posts about cleaning & assembling motors it was time to take the leap & start the assembly process.
 
Last edited by a moderator:
As I was dry fitting the crank and counter balancer I discovered that one of the center crank bearings was missing an o-ring s I had to hunt down the proper size get it and get it installed, cost me another week & a half but I was finally ready to start putting it back together after more than 2 years in boxes.
436.jpg

437.jpg


Bottom end assembly went smooth got it all back together in 2-3 hours.

Just the right amount of 1211
438.jpg

439.jpg

440.jpg

441.jpg

442.jpg
 
After a couple days I dry fitted top end assembly and took a squish measurement. Of course the gasket that came with the WSM kit was a 6 hole and I needed a 4 hole so off to the local steelership for the right one. Read all of the group K articles on how to precision assemble the top end (again thanks racerXXX for the link) so with the right gasket I put the top end together, measured the squish and for some reason the back PTO measurement was a little bigger but I figured it wouldn’t hurt as that is the cylinder that gets runs the leanest.

After Getting the top & bottom end together I put the new stator housing & cleaned up & pulse wheel on. Since the original stator was soooo rusted out I bought a clean OEM Stator out of a GTX and it came with a pick up coil but when I went to put it in the stator cover the pick up coil wouldn’t fit so I pulled out the original wire brushed it, clear coated it and wired it in to the new stator just like the original. With the new stator cover and new stator correctly wired I put o the stator cover and thought we where good to go. I was WORNG but wouldn’t find out until much later and dam near 20 hours of messing with it.
443.jpg


231.jpg
 
With the whole motor assembled I decided to paint it with the duplicolor wheel paint (shot out to racerXXX) So I made a homemade paint booth out of cardboard and painted it on my garage floor. The next day I took it to my bothers to do final motor assembly and put it in the ski.

Looks so nice & clean:
444.jpg


445.jpg


446.jpg


447.jpg
 
Well after a marathon weekend re-assembeling the starter, trying to figure out what oil to put in the counter balancer chamber (I finally went with synthetic 75-90 gear oil and called it a day), figuring out what motor mount shims to replace and in what order I rigged a back yard sling from the garage rafters and put the motor in. Then I set the motor and bolted it down.

Since my bother had housed both skis over this 2+ year ordeal it was time to move them out and let him have his garage back so off to the family business they went. With a river trip planned for the following weekend I came back down that Tuesday and worked on them until 11pm at which point I said F-it and pack it all up and towed it home and stuffed the in my garage so I could finish them for the trip. Pulled an all nighter the night before we left going to bed a 5:30am and waking up at 8:30am to drive for 6 hours to the river. I was to tired to mess with them so I decided to mess with the skis in the am.

Got up the next day and the good all original ski fired right up no problems but the rebuilt ski had a grinding noise when I hit the starter…nothing. Well after a weekend of trying to diagnose the issue RacerXXX helped me and said I should see if the motor turned over. Well guess what it didn’t, wouldn’t budge even with channel locks on the PTO flywheel (though I did unthread it). So had one ski for the weekend, long trip & lots of time wasted.

448.jpg
 
After getting it back home I bought a impeller removal tool (thanks RacerXXX) and spent the next Sunday pulling the jet pump at RacerXX’s suggestion. The Jet pump was fine so I figured it was most likely the other end of the motor so After 7 hours with my head in the hole trying to remove the cover & pulse wheel without moving the motor set I finally got the stator cover off without removing the motor from the hull and wa la the motor turned freely so I knew it was binding in the stator some where. At that point the motor was pretty much unbolted but it was getting late and I called it a day.
449.jpg


Later that week I was sooo done f-in with this thing I pulled the motor out by hand and put it on the bench so I could actually work on it instead of trying to crochet a quilt through a drain pipe (this is what I liken to working on the motor in the ski to). After getting the motor on the bench I pulled the pulse wheel and put the stator cover back on and it wouldn’t turn so I knew it was not the pulse wheel. Shined a light through the oil pump drive shaft cover and there was the problem, the stator bolt heads where hitting the crank nut and the lip of the flywheel, I FINALLY FOUND IT!!!

After puling the stator cover and the stator it self I pulled the original one and measured them both. The new stator was 4.5mm thicker that the original, I had found the problem of the locked motor. I did some research and posted on here and found out that skis with direct Injection (DI) have slightly larger stators than carbed skis. A good way to tell is the pick up coil, get one with the same pick up coil as the one your replacing, as lots of ebay resellers don’t know the difference and that’s how I wound up with this one it was labeled for a SPX when it was for a GTX with DI. Finding out the hard really sucks as it cost mea river trip and probably 40 hours of headache!

Ordered a clean OEM replacement stator & pick up coil from a ebay seller after confirming it was the right one, put it on the cover and bolted it on and what do you know the motor still tuned over NO MORE locked motor.


450.jpg


451.jpg


452.jpg
 
Last edited by a moderator:
While the ski was out of the hull I pulled the starter to test it and see if it worked. Well I didn’t want to spark the positive post and screw up the threads so I hooked it all up except the ground at the ear and hit the ear and only got a buzzing tried this 2 more times and on the 3rd time POP! I figured I smoked the armature. Not sure if it because I ran it backwards with the ground being connected last or if it had issues from being bound up at the river trip (Also broke the starter bendix cause the motor was stuck).

Either way it was smoked so I took the Chinese replacement starter that we had bought when all of this started and used the good OEM body to replace the Chinese one’s body with a broken magnet and Frankensteined a working starter together (I also order a back up one off ebay for the tool box). Got it all assembled flipped the end cap because I had it backwards (big end goes towards the starter body), hooked it up properly hit the positive battery terminal and it spins but the bendix does not come out. After several attempts I figured out the armature was spinning backwards and therefore sticking the bendix to the shaft. After reading on here I could rotate the body 90 degrees I moved the body and still nothing, same backwards direction. Switched the cap, the body in all combinations after trying everything I threw in the towel and went back to re-read the post and on the way to the office remembered it said 90 degrees NOT 180. I went back in the rotated the body only 90 degrees, hooked it and BAM the bendix came out. That was most of a Saturday, f-in bike!
453.jpg
 
Last edited by a moderator:
So after getting the motor all back together and cleaned up it was ready to go back in. During this time I was also working on the jet pump, the shaft had surface rust and the receiving end of the pump spines where pretty rusted so I taped off the splines and the surfaced part and clear coated the shaft so it wouldn’t rust any more and I cleaned up the splines and receiving port in the jet pump. I had ordered new neoprene seals for the intake scoop so I cleaned up the hull & scoop with acetone and polished & waxed it then put the neoprene seal on. Then I finished cleaning up the jet pump and greased and reassembled it so it was ready to go back in the ski.

This brings me to this last weekend. Dropped the motor back in on the original mounts but keep it loose and then installed the jet pump housing back in with the shaft in place. It took 2 sets of hands but I got it in and back together. So I spent all day Saturday setting and reinstalling the motor and all components. Thinking I was good to go I got 5 gallons of fresh gas called it a night.

Got up Sunday and back to the salt mine to finish this thing or so I thought, the light at the end of the tunnel was just a train headed my way.

After mixing the 5 gallons at 50:1 and dumping it in I tried to fire the bike several times with the choke on I could see through the gas filter I was not getting gas in the line so I spent the afternoon figuring out how to prime the lines since they where totally drained. In the end it ended up being I needed to remove the line that feeds the carbs and blow in to the return line to pressurize the feed line and get it flowing until all of the air pockets where out. After getting all of this figured out and the lines primed I figured I was good to go….NOT.

Tried firing it several times; I could see the gas flowing through the filter but nothing. Put brand new plugs in it, checked and had plenty of good spark but it just wouldn’t fire. Pulled the plugs and they looked wet so I figured it was flooded. As I was not sure how much gas had flowed in to the motor over my 20+ attempts to start the motor with the fuel pump pulling each time I removed the plugs and turned it over but nothing came out so there must not be a lot of fuel in the crank case, I believe good news. Let it sit with the plugs out for an hour tried to start it and it caught for a second but as soon as there was pressure on the crank the bendix slipped back and just spun up. Tried 3-4 more times and nothing just turning over no signs of life. At this point I think the patient is dead  and called it a night.
 
Last edited by a moderator:
So this is where I stand, after 2+ years and probably well over 100 hours I have a motor that will turn over but not fire. I’m going to go out and try it again this morning after leaving the plugs out all night and see what happens.

I also noticed that I have oil dripping from the PTO oil injection line. I replaced them with Tygon lines when I did the original clean up 3 years ago and used 2 zip ties on it but there is a leak. I did blow compressed air through the brass nipple from the line side in to the intake side. It took a fair amount of pressure for it to pop but it finally did. When I did this could I have F-ed the valve up and it’s not flowing oil from the injection pump and back pressure is what’s causing the leak? Also is there a way to test these nipples to make sure they’re working properly?


This has been a hell of an ordeal that I wouldn't recommend to anybody. I’m at the finish line I just need to get this thing done in the next 3 days as I have another river trip in 4 days and would like to have it running and running right for the trip.


Thanks for all your help to everybody whose answered my posts.


I’ve learned a lot good and bad and if you’re going to undertake a project like this make sure you’ve got a big bottle of these :cheers:

454.jpg
 
Last edited by a moderator:
Well after leaving the plugs out all night and most of the day today I popped them in and hoped for the best. Hit the starter with no choke and bang she coughed, sputtered....making progress.

Repeated this 3 or 4 more times and was able to goose her up to a decent running RPM....SHES ALIVE!!!!! .......FINALLY :hurray:

Once I got her up and running there was so much smoke from all the oil I used on assembly garage looked worse than cheech & chong on the side of the freeway.


Killed it after 20-30 seconds, rest & restart, did this 3 times...and she starts now!!!


Now I can stop doing this :banghead:
 
Last edited by a moderator:
50 to 1 is too lean, mix it 40 to 1. The gear oil in the rotary valve cavity should be Seadoo two-stroke oil.

I'm glad you chased it into a better place.
 
Well I took them out for the 4th weekend and broke her in good:thumbsup:

Ran her at 40:1 but it seemed too rich.

Put 10 Gallons through it and so far it's running no problems :hurray:

74.jpg
 
Last edited by a moderator:
Status
Not open for further replies.
Back
Top