1996 Speedster Restoration

Note: This site contains eBay affiliate links for which SeaDooForum.com may be compensated
I don't believe that hull warpage even if it exists to a degree that than be quantified, can cause misalignment at all much less that degree of misalignment. Quality control isn't there. Or.... that alignment doesn't factor in all that much. I'm a machinist by trade, vibration analysis, and everything in between. The design of the coupling and distance between drive points can allow for a great degree of misalignment without much ill effects. There are drive shafts and PTO couplings that wear out and others that seem to last forever. That is what good alignment achieves and why it is so important in the industry. Anyway... my stuff is always aligned cuz that's how I roll. LOL Might be extra work but the end result makes a big difference even in top speed of the boat or ski. Friction, heat, lost of power.

Not by choice will I EVER work on another Seadoo Boat and if I do it will be a work of Charity. :D Main reason is the stretching and getting at everything.... painful. :D
 
Last edited:
I don't believe that hull warpage even if it exists to a degree that than be quantified, can cause misalignment at all much less that degree of misalignment. Quality control isn't there. Or.... that alignment doesn't factor in all that much. I'm a machinist by trade, vibration analysis, and everything in between. The design of the coupling and distance between drive points can allow for a great degree of misalignment without much ill effects. There are drive shafts and PTO couplings that wear out and others that seem to last forever. That is what good alignment achieves and why it is so important in the industry. Anyway... my stuff is always aligned cuz that's how I roll. LOL Might be extra work but the end result makes a big difference even in top speed of the boat or ski. Friction, heat, lost of power.

Not by choice will I EVER work on another Seadoo Boat and if I do it will be a work of Charity. :D Main reason is the stretching and getting at everything.... painful. :D
I will have a better understanding of the aligning once I actually do it, Lol. I just like talking. It sounded like those engines were way out of alignment before you shimmed them? How much were they out? Could you see obvious wear from them being so far out? So lines worn off? Etc. I’m just Leary if the alignment tool, I have one but haven’t used it yet. If there were even a 1/16th if play where the alignment shaft goes through the tools fitting what would that equate to over say 4 feet? My math says 1/4” or if the transom or hull had deformed a 1/16th from sitting in the sun for near 30 years if in fact it could, again that 1/16th over 4 feet would be 1/4”. I will be interested to check one of My 6 runners. If they end up being way out again it would make me wonder as I have driven them countless hours in that condition with no damage. Just talk for the sake of talking, I like following your threads, you do really nice work.
 
I will have a better understanding of the aligning once I actually do it, Lol. I just like talking. It sounded like those engines were way out of alignment before you shimmed them? How much were they out? Could you see obvious wear from them being so far out? So lines worn off? Etc. I’m just Leary if the alignment tool, I have one but haven’t used it yet. If there were even a 1/16th if play where the alignment shaft goes through the tools fitting what would that equate to over say 4 feet? My math says 1/4” or if the transom or hull had deformed a 1/16th from sitting in the sun for near 30 years if in fact it could, again that 1/16th over 4 feet would be 1/4”. I will be interested to check one of My 6 runners. If they end up being way out again it would make me wonder as I have driven them countless hours in that condition with no damage. Just talk for the sake of talking, I like following your threads, you do really nice work.

Look at post 49. I have a picture of the Starboard Engine with the exact shims that were in there when I removed the engine.

I don't think that fiberglass is going to deform much if at all especially in that short distance. I've used reverse dial indicators to align my wife's GTX. Can't get closer than that. :) I also used rim and face dial indicators to check parallel alignment. I know Seadoo doesn't do this. The big issue is that mount base. If it is lined up then when you replace the engine you should be pretty close. I think that happened to me.... ONCE. :D I did an alignment on my cousins ski and he told me the ski was smooth enough for him to notice. If anyone wants their equipment to be reliable and happy a good alignment goes a long way to achieve those ends.

As for your concern for the alignment tools and such, if you have a quality kit you'll have a very good alignment. You have play up and down left and right but it isn't much. You have to make sure the base is clean and not deformed, no bumps or dings. I think for a non-perfectionist, if the bar slides in with no provocation... the alignment is fine. I can feel if the engine alignment is not parallel as the bar won't bottom easily in the PTO hub. The front on the engine can be high or low, left or right will cause this. Left and right is easy to fix... up an down you have to shim. That is the issue, that fiberglass isn't machined it is poured so not all the accurate. One mount may need more shims than the other. I spent 4 hours on one jet ski but that baby was spot on when I finished. LOL Sometimes I have to make thick shims and such so it takes longer. Good Luck !!
Keep up the good work. I’m hoping you will reply when I start my 1998 Challenger project.
 
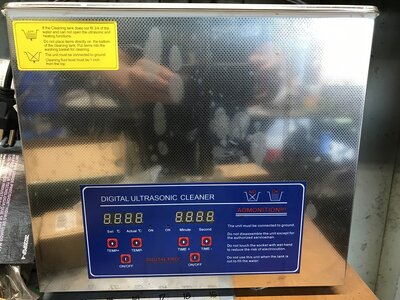
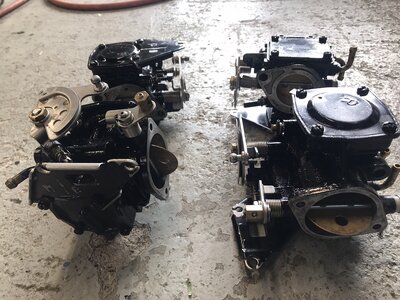
Working on the carburetors and finding multiple issues. This is why I believe the only way to insure reliability is look at everything. Clearly aftermarket carbs kits were used. The carb check valves were way too thick, diaphragms, seats unmarked, return line on the carb plugged. A few years ago because of the difficulty in getting the carbs inner parts clean I purchased an ultra sonic cleaner. It is a great tool but when you finish you have to repaint the carbs which is not fun. :) Just the thought of build 4 carbs irked me but I finally manned up. LOL Gotta set the pop-off then paint.

Is there a Pop-Off number that people like to use on the 717 Speedsters?? I'm gonna see what happens with the new springs but I'll be looking for something around 52psi. I find Seadoos run better with the Pop-Off in the upper range. They seem to like "lean." I got the range from the Seadoo repair manual 40-56 psi.

--> Video is here --> Ultrasonic Cleaner

Carburetor Ultrasonic Cleaner.JPG
 
Working on the carburetors and finding multiple issues. This is why I believe the only way to insure reliability is look at everything. Clearly aftermarket carbs kits were used. The carb check valves were way too thick, diaphragms, seats unmarked, return line on the carb plugged. A few years ago because of the difficulty in getting the carbs inner parts clean I purchased an ultra sonic cleaner. It is a great tool but when you finish you have to repaint the carbs which is not fun. :) Just the thought of build 4 carbs irked me but I finally manned up. LOL Gotta set the pop-off then paint.

Is there a Pop-Off number that people like to use on the 717 Speedsters?? I'm gonna see what happens with the new springs but I'll be looking for something around 52psi. I find Seadoos run better with the Pop-Off in the upper range. They seem to like "lean." I got the range from the Seadoo repair manual 40-56 psi.

--> Video is here --> Ultrasonic Cleaner

View attachment 64983
I feel pain when I have to rebuild 2 so I hear yours with 4. That’s 560.00 just for carb rebuilding. Still cheaper than paying 4000.00 for one of these boats and then fixing it.
 
When I rebuilt the carbs on my HX and the 95 XP, both those 717’s called for an 80 gram spring and both popped off at 50 pounds. Well 3 of them popped at 50 and the one carb on the XP popped at 45. I was told that would be fine. I’m guessing the arm had been bent slightly at some time I’m the past but I didn’t want to go bending it. I’ve always read that there’s really no need to do a pop off if your using the Back to OEM kits from OSD but I do anyways just out of curiosity and to make sure all is well. Sounds like your getting close to having this boat finished? I’ve read that these boats with 2 717’s move along very well. I’m betting you end up keeping this boat.
 
I never trust the springs and always do pop-off. I like them within 2 pounds. I'm anal as I only like to do things ONCE. :D I've had to pull my own carbs of 2 GTXs 5 times to get them set correctly. these were my first skis. Lots of people had advice and opinions. Now .... I know. LOL :D A lot of these guys have not worked on skis much and some have never worked on fuel injected skis either. They try to help though and that is important. Lots of good advice but you have to find out for yourself sometimes.

Right now I'm running out of internal carb screws and I need to figure out the size and a good source. If you go to the wrong people you'll pay a high price for one when you can buy 10 for a couple more $$$. I need the screw for the clamp that holds down the brass seat (needle & seat) and the screw that hold down the lever that lifts the seat and holds the spring in position. Don't know what to call it. LOL Take Care,
I don’t bend the lever to adjust pop off, as a matter of fact I don’t adjust pop off at all, but you have a good point, I suppose you could get a spring that’s just a little off for whatever reason. Manufacturing defect.... or just the wrong spring. My biggest worry is that someone has tried bending the lever to adjust the pop off. I think for 8.00 I will start having a couple extra levers on hand. I haven’t come across a source for the internal screws but that would be handy. I may do a little searching tonight.
 
I don’t bend the lever to adjust pop off, as a matter of fact I don’t adjust pop off at all, but you have a good point, I suppose you could get a spring that’s just a little off for whatever reason. Manufacturing defect.... or just the wrong spring. My biggest worry is that someone has tried bending the lever to adjust the pop off. I think for 8.00 I will start having a couple extra levers on hand. I haven’t come across a source for the internal screws but that would be handy. I may do a little searching tonight.

I don't bend the lever either. I think that is a ridiculous method for manipulating Pop-Off. As you move the lever you lower the contact point on the bellows. I make sure all the levers are even as they should be. It is easy enough to bend them back a tad but I have plenty of new extras. I have a lot of brand new parts for the mikuni carbs but always end up needing the one I don't have. :D Cheaper to buy the set than individual gaskets.

I am going to look for those screws as well. :) Good Luck !!
 
I just ordered the screws that hold the check valve block on the Carb. I ordered them in 2018. M4 X 14mm .7mm pitch. Stainless Steel. Amazon $7.49 for 40. I hope the are the same.... :D

No way am I gonna find the others cheap or in bulk. They are special. Ebay has them for $6 and up each.
PN = C6 0308-G (Item 41 on parts list) oval screw that holds down the lever assembly (M4 .5mm pitch roughly 6mm long)
PN = CW2 0307-G (Item 34 on parts list) Screw with washer that hold down the seat clamp. (M4 .5mm pitch roughly 6mm long)
That check valve block your referencing, is that the one that has the Mylar film on the back of it held down by a little screw? If it is, those screws have been in rough shape from my experience. Nice find. 6.00 a screw is enough run one sense, but I bet you or I would be happy to pay it, if one was needed.
 
That check valve block your referencing, is that the one that has the Mylar film on the back of it held down by a little screw? If it is, those screws have been in rough shape from my experience. Nice find. 6.00 a screw is enough run one sense, but I bet you or I would be happy to pay it, if one was needed.

No I didn't measure that check valve screw. I had to get my 25X magnifying glasses out to match the threads to the gauge the others. That dang thing might be 3mm.... LOL

You are correct on "paying the price" for the screws when you need one but I build so many carbs I like to have lots of spare parts. Dumping $60 and on 10 iddy bitty screws is tough for me. I just paid $7.40 for 40 screws. :D
I wouldn’t pay the 60.00 either if I had some good used ones around.
 
I found the screws for good prices on Ebay but I had to shop as usual. :) I got (5 for$12) (C6-0308-G) that holds the arm on the carb. They combined shipping so that's great for me.

I now have spares for the biggest pain in the but screws on the carbs. I've only had to replace them a couple of times over the many carbs I've rebuilt but they are nice to have. I have a scrounge pile of carbs and parts so I can scavenge what I need. This will make it easier and more convenient. I'm very careful with these screws when removing and reinstalling them. Gotta be friendly to the next guy that will be working on the carb. :D

On a side note: I often have to replace screws on the check valve block because many times I have to use a center punch and hammer to loosen the screws. That is much more efficient and I don't often damage the screwdriver slots which retains that option. I use stainless for replacements. I have
 
Paint is drying on the carbs. Gotta rebuild the jet pumps, install everything on the engines exhaust etc... much work left before I try to fire it up.
 
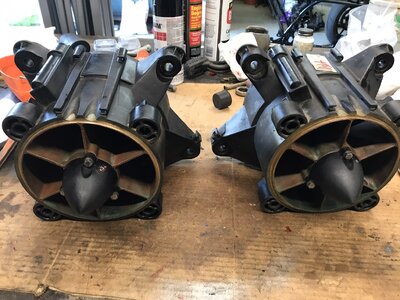
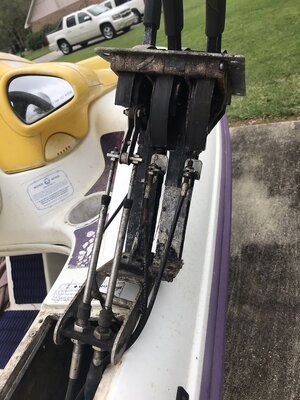
If I find a good part on this piece of junk I'll let you know. :) I can't get over people buying stuff like this with little to no mechanical experience. They just as well set their money on fire. Considering what I'm running into this boat hasn't run in 5+ years. Actually I don't mind too much because I go through everything anyway. I trust "nothing." Jet pumps rebuilt. Azz end is almost ready but I have a bad reverse cable to replace so I might wait on that before installing the pumps. We'll see. It is fairly easy to get to with the pumps in place. I dislike having to wait on parts but no way do I have a reverse cable for a boat. :) I put the drive shafts in the lathe for some clean up and of course one was bent. That's one of the fun parts for me, truing the shafts up.

Speedster  Carbs & Jet pump (1).JPEG

Speedster  Carbs & Jet pump (2).JPEG

Speedster  Carbs & Jet pump (4).JPEG

Dirty junk. Gonna clean it up and get it working smooth. I'm gonna dislike matching the cable settings but all in a "weeks" work. :D

Speedster  Carbs & Jet pump (5).JPEG
 
A few VIDEOS on The Speedsters' drive shaft in the lathe and getting it to run true. Vibration isn't good at 6k + or any RPM. I was just cleaning the shaft up but this one was a tad bent. Roughly (.060") run out. I've had much worse. I enjoy this part especially when I already have the 3-jaw chuck in the lathe. LOL

Shaft Clean up and Runout observation

Got the hammer and the dial indicator nearby to do some bumpin on the shaft. I like to get the runout around (.005") total reading.

Shaft runout tools at the ready

I let more of the shaft extend from the chuck to determine if the whole shaft was running true. Looks good to me.

Final Runout check n the lathe.
 
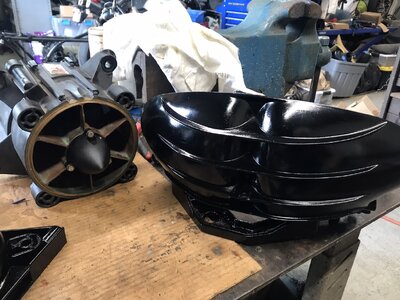
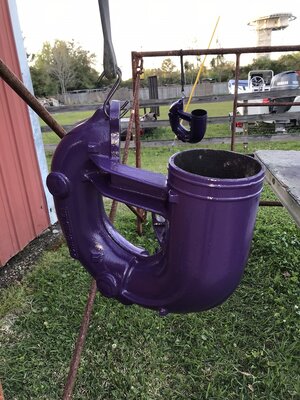
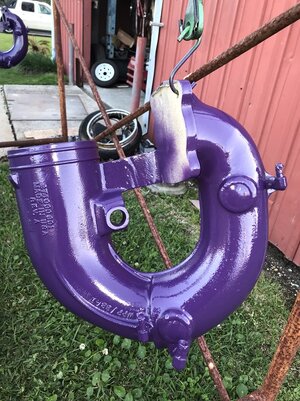
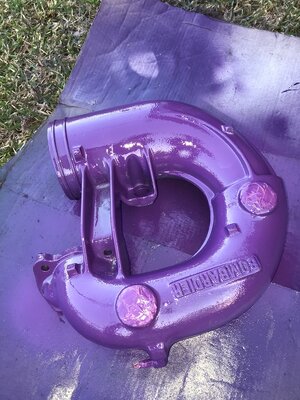
The SAGA continues. :D I ended up using a spare exhaust manifold.... thank heaven for spares and I got plenty. So I painted all 3. Gonna bring the leaky one to the welder next week. Always do a good inspection so there are fewer surprises if any at all. That is our goal. Going in with the exhaust, jet pumps and carbs really soon. Then we'll find out what's whut. :D After I get everything in place I love the final tweakin. Small things then smaller things and it gets better with every tweak.

Speedster Exhaust Painted (2).JPEG

Speedster Exhaust Painted (3).JPEG

Speedster Exhaust Painted (1).JPEG
 
I had the weirdest problem with both jet pumps. I spent a couple hours on the Port side trying to figure out what was going on. After much testing I determined that the pump mounts needed to be shimmed. I can't quite figure out why but the engines were getting tight to spin by hand. I lined everything up way better than it was previously and I had no rubs. I could easily move the shaft in and out while I was testing but some spots were tight. Finally I began to loosen the pump nuts one at a time and I found one in particular as soon as I loosened it the engine turned free. I then checked the height of the landing across the pump mount and found it was different so I shimmed it and it worked fine. I was surprised when the same condition existed on the right/starboard engine but it didn't take me as long to rectify. This is one weird boat for sure.

I just unplugged the cooling water lines out the back. All were plugged solid. This boat has obviously neglected for a lot of years. That's why I go through everything though. Crazy stuff !! I'm gonna put some parts on it today. :)
 
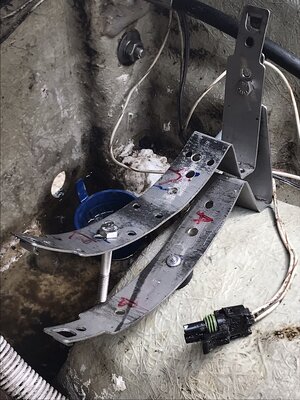
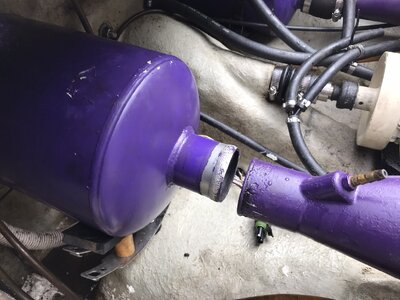
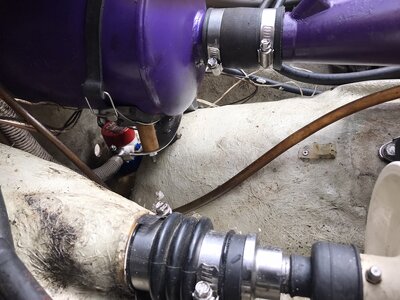
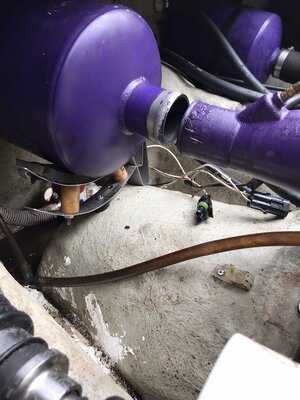
Multiply how long it should take by "4" and that is a better guess. :) I told my wife this boat musta sunk and somebody found it. :) I had to improvise a bracket to hold the right exhaust water box in position. But it is lined up nicely now. I had to so something because there was too much stress on the exhaust pipe to adapter joint. Been trying to get the port carb installed for 2 days but something always leads me astray. I almost passed it... it fell right in place. Yay !! Check out my exhaust bracket. Very sturdy and should do the job long term.

Speedster Exhaust Mount Fabrication (2).JPEG


Speedster Exhaust Mount Fabrication (6).JPEG


Speedster Exhaust Mount Fabrication (1).JPEG
Speedster Exhaust Mount Fabrication (7).JPEG
 
Last edited:
Multiply how long it should take by and that is a better guess. :) I told my wife this boat musta sunk and somebody found it. :) I had to improvise a bracket to hold the right exhaust water box in position. But it is lined up nicely now. I had to so something because there was too much stress on the exhaust pipe to adapter joint. Been trying to get the port carb installed for 2 days but something always leads me astray. I almost passed it... it fell right in place. Yay !! Check out my exhaust bracket. Very sturdy and should do the job long term.

View attachment 65047


View attachment 65048


View attachment 65050
View attachment 65049
Nice work on the exhaust brackets.
 
Back
Top