[MENTION=28488]cheappc[/MENTION] is aware of it. He said he was going to try to fix the files soon! :cheers:does anyone know why I cant see cheappc's pictures but i can see other peoples? I would like to view this since I will be reupholstering my 199 seadoo speedster in the next week or so.


You are using an out of date browser. It may not display this or other websites correctly.
You should upgrade or use an alternative browser.
You should upgrade or use an alternative browser.
Step by Step Guide on removing your upholstery and reupholstering your seats!
- Thread starter cheappc
- Start date
jimini cricket
New Member
Hi, I would love to see the pictures but they are not showing on my computer, how can i see your pictures? is there a setting i should know about to see them?
jimini cricket
New Member
Sorry the server where the pictures were located was deleted, I am trying to find backups
I hope that you can find backups! Those pictures are worth a thousand words! :willy_nilly:
Any ETA on finding the backups..? I could really use them my rear seat backs need done
Wow I haven't been able to find them, once I switched over godaddy servers, I'm sorry guys, I'm going to keep looking everywhere but I was hoping someone out there saved these pictures..
Wow I haven't been able to find them, once I switched over godaddy servers, I'm sorry guys, I'm going to keep looking everywhere but I was hoping someone out there saved these pictures..
Guessing you still haven't found these.. popular thread!
Guessing you still haven't found these.. popular thread!
i feel terrible not only did Godaddy erase all server without backing it up, my backup drive crashed... its unbelievable, there is only one more thing and thats if its still on my sd card on my old phone which im looking for...


View attachment 33497View attachment 33498View attachment 33499View attachment 33500Once I got started, I couldn't stop lol. Completed it in less than a week. Your instructions helped big time!
I was able to install wrinkle free but as soon as the cold hit, I got wrinkles. Hopefully with the summer heat, they will disappear.
Great job! Can you post a bunch more pictures so we can update the original post with these? The originals were all lost.


Well ladies and gentleman, since I love this forum and I get so much help on here, I wanted to contribute a picture by picture tutorial and explanation on how to remove your seats and reupholstering them. If someone else had this write up, oops, here is another one.
Getting to the bolts under the seats behind the gasoline tank is torturous, also, I put a fan to get air in there, I believe its dangerous working so many hours in the engine bay and only breathing gasoline.
And questions please ask
Here it goes:
First, the bolts are connected here:

Ok there is a bolt under the Starboard side (right hand side) of the boat under the control lever to the rear, is easy to find...
Here is the first bolt right on top of the gasoline tank
You have to remove the cup holder to get to the bolt (port side - left hand side)
I think Im pretty smart, I attached a electrical wire to my socket wrench so it doesnt fall inside the hull (im always dropping things, it is very convenient in case you drop your socket wrench), I found a old ac adapter that I didnt need anymore and used that wire.
Also when you are removing the bolts be very careful you can drop your bolts under the hull.
I recommend a fan blowing air in there I was getting dizzy its hard to be there for so long breathing fumes
Ok this is the first round of pictures, next will be applying my new upholstery!
I think Im being a little bit of service!")
I can't view the pics....any help is appreciated. I can see how the back seats come out but have no clue on the other 3. I can't do the upholstery but I need to remove them to save me a ton of money. Thanks
Anybody know how to get the front seat and side seats cushions off of a 1998 sea door sportster 1800, I bot the front seat back to slide up and off but the others don't budge. Any help is appreciated, I see the directions on the back bench seat, probably be working on that until I hear something else....thanks
UNYboater
Active Member
Nut insert replacements or ideas?
Great read-through (although I also would love to see pictures).
I have a couple of the fixed-nut-inserts (zerts, I've heard them called) on the back-bench backrest on our '99 Challenger 1800 that are gone or just spin in place. I don't see these listed on the parts-list anywhere, although the bolts & washers are there.
I've thought about toggle-bolts vs. pop-rivets but the first thing I have to do is get the spinning ones out...the bolts are in them!
Thoughts?
Sbartolo
Member
I too had a couple inserts that were loose and rusted. They are fastened with rivets. I chiseled the old rivets off. Bought new inserts, bolts and rivets from Home Depot. Remember stainless steal.
For the inserts that were still ok, I managed to thread a bolt onto it, pulled up tight and re-riveted.
If they are just spinning in place, you may have to cut the bolt head. Wish I can help more.
For the inserts that were still ok, I managed to thread a bolt onto it, pulled up tight and re-riveted.
If they are just spinning in place, you may have to cut the bolt head. Wish I can help more.
stainless steel staples
anyone doing this if you check with Fastenal you can order stainless steel staples so they don't rust out
Cheers Suprdave
I didn't call him but I did pick up some 3/16th X 5/8 rivets and they worked perfect. On the back three seats at the top on each side there is a small grove there that you can tuck the extra material across the top of each seat into. I used a smooth off piece of maple. I am sure a Popsicle stick will work perfect.
Cheers Don.
anyone doing this if you check with Fastenal you can order stainless steel staples so they don't rust out
Cheers Suprdave
squad1
Active Member
I hope these are helpful. I didn't take any pics during the removal as it was just me and didn't have a free hand to snap any pics. These are views of the bolt locations and seat backs/benches and anchoring locations. This is the tear down of my 1997 Challenger.
Rear seat back:
(4) 10mm bolts. Remove bolt above MPEM and near the top right corner of the oil tank (pic is upside down for some reason) from inside the engine compt.


Remove the port side cup holder to access the armrest bolt. You must reach into the hole and remove the bolt that is screwed up into the armrest (approx 13.25 inches from the edge of the hole)

Remove the throttle controls and do the same for the starboard side bolt (approx 10 inches from the edge of the opening)

Rear seat back:
(4) 10mm bolts. Remove bolt above MPEM and near the top right corner of the oil tank (pic is upside down for some reason) from inside the engine compt.
Remove the port side cup holder to access the armrest bolt. You must reach into the hole and remove the bolt that is screwed up into the armrest (approx 13.25 inches from the edge of the hole)
Remove the throttle controls and do the same for the starboard side bolt (approx 10 inches from the edge of the opening)
Attachments
Last edited by a moderator:
squad1
Active Member
Rear bench removal:
I used the advice of others and utilized an air powered ratchet to remove the lower bolts. There are (4) 10mm bolts screwed up into the seat bench from inside the engine compartment above the fuel tank: (again, posting upside down for some reason..)


Location view from inside the boat:

After this, the bench is still attached to the boat with 4 plastic pegs. Grab the corners of the bench one at a time and pull upward to separate the bench from the pegs:

I used the advice of others and utilized an air powered ratchet to remove the lower bolts. There are (4) 10mm bolts screwed up into the seat bench from inside the engine compartment above the fuel tank: (again, posting upside down for some reason..)
Location view from inside the boat:
After this, the bench is still attached to the boat with 4 plastic pegs. Grab the corners of the bench one at a time and pull upward to separate the bench from the pegs:
squad1
Active Member
Spotter seat:
Horseshoe section of seat is what holds in the center pieces (no pic of center section right now). This section is held in place with (3) Phillips head screws, screwed up from inside hull. (The two holes inside the seat well are drains). Access these from the ski locker:


The center seat pad just lifts out, and sits on top of a styrofoam block.
The spotter seat backrest is held in place by (3) 8mm nylon lock nuts. These attach to the threaded studs sticking out of the backrest. Access these nuts through the cooler hatch. Two are visible, and the third is along the inside of the port side hull approximately 15 inches from the edge of the hatch:


Carefully pull the side stud inward, away from the hull until the threaded stud clears, and then pull the seat back forward until the two studs clear the holes.
Horseshoe section of seat is what holds in the center pieces (no pic of center section right now). This section is held in place with (3) Phillips head screws, screwed up from inside hull. (The two holes inside the seat well are drains). Access these from the ski locker:
The center seat pad just lifts out, and sits on top of a styrofoam block.
The spotter seat backrest is held in place by (3) 8mm nylon lock nuts. These attach to the threaded studs sticking out of the backrest. Access these nuts through the cooler hatch. Two are visible, and the third is along the inside of the port side hull approximately 15 inches from the edge of the hatch:
Carefully pull the side stud inward, away from the hull until the threaded stud clears, and then pull the seat back forward until the two studs clear the holes.
Last edited by a moderator:
squad1
Active Member
Bow seat back:
This piece is held in place by two clips that are riveted to the hull:

The seat back has two square holes that these clips snap into:

To remove this piece, pull slightly outward on the bottom of the left corner to allow the clip to clear the plastic and pull upward on the left to disengage the clip. I think I used my dominant hand to pull out and up and assisted with the upward push with my knee. This left my other hand to help control the movement upward when the clip finally popped free. The other side is much easier after the first clip is free.
The bow seat pad is held in place with 4 plastic pegs attached to webbing straps sewn to the bottom of the pad. Simply use both hands to grab underneath the straps and pull up each strap one at a time. Don't try to just pull up on the pad. You will probably just tear the straps at the stitching:


More to come as I tear down the covers. I am in the process of taking off the old vinyl and filling in some damaged areas of foam using spray adhesive and medium density foam.
This piece is held in place by two clips that are riveted to the hull:
The seat back has two square holes that these clips snap into:
To remove this piece, pull slightly outward on the bottom of the left corner to allow the clip to clear the plastic and pull upward on the left to disengage the clip. I think I used my dominant hand to pull out and up and assisted with the upward push with my knee. This left my other hand to help control the movement upward when the clip finally popped free. The other side is much easier after the first clip is free.
The bow seat pad is held in place with 4 plastic pegs attached to webbing straps sewn to the bottom of the pad. Simply use both hands to grab underneath the straps and pull up each strap one at a time. Don't try to just pull up on the pad. You will probably just tear the straps at the stitching:
More to come as I tear down the covers. I am in the process of taking off the old vinyl and filling in some damaged areas of foam using spray adhesive and medium density foam.
squad1
Active Member
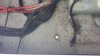
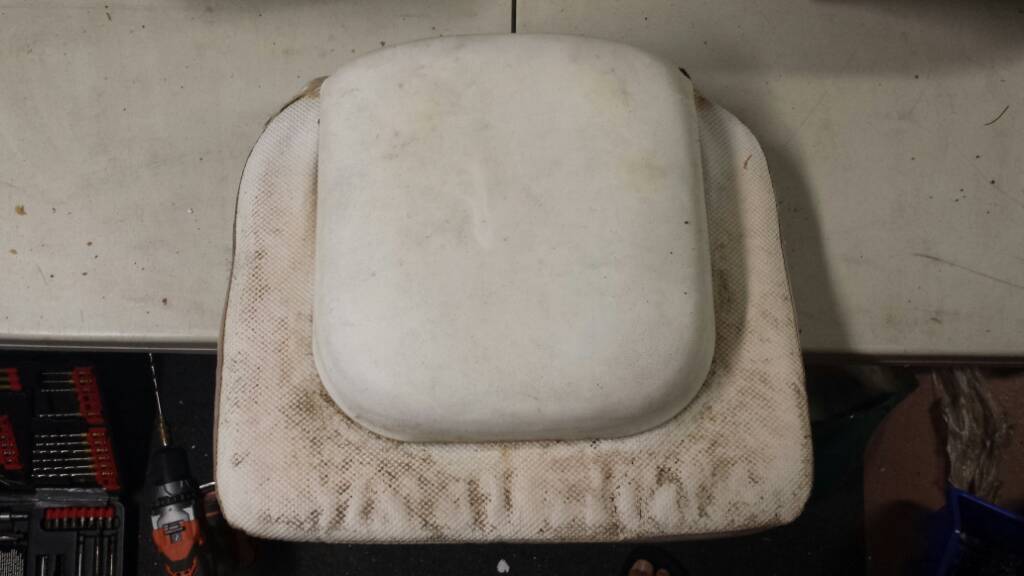
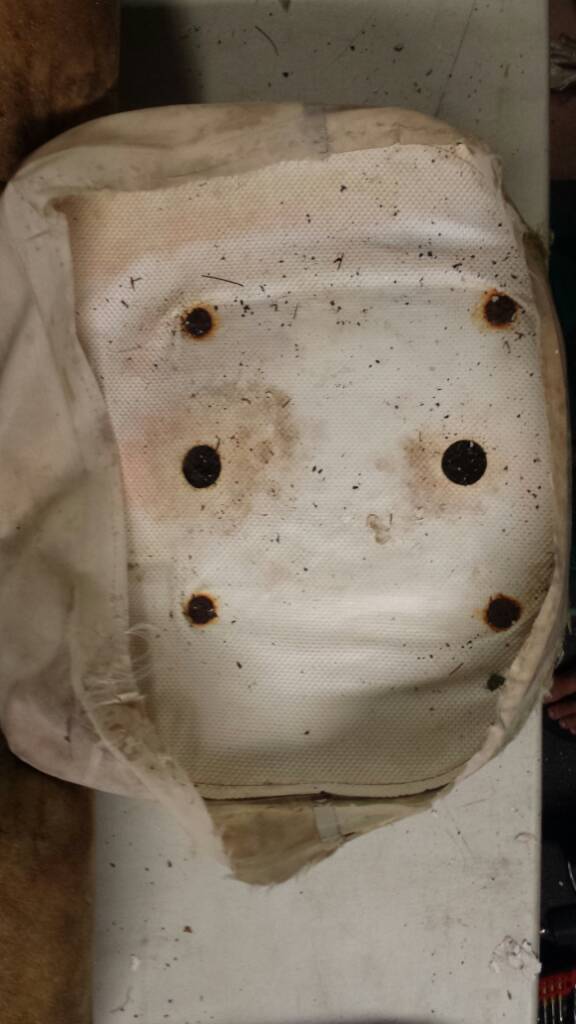
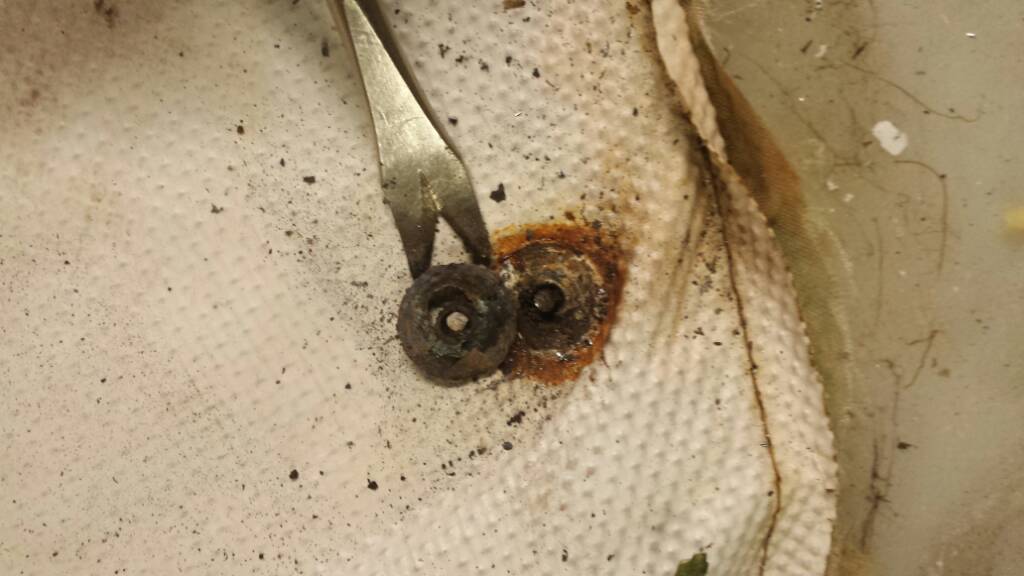
Old rear bench with damaged foam:
4 rivets per seat pad. I drilled them off with a 1/4" bit, just until the head spins off. Don't drill into the plastic. I will probably secure the seat pads with SS carriage bolts as others have mentioned :

Removing the staples with a Stanley staple/brad remover:

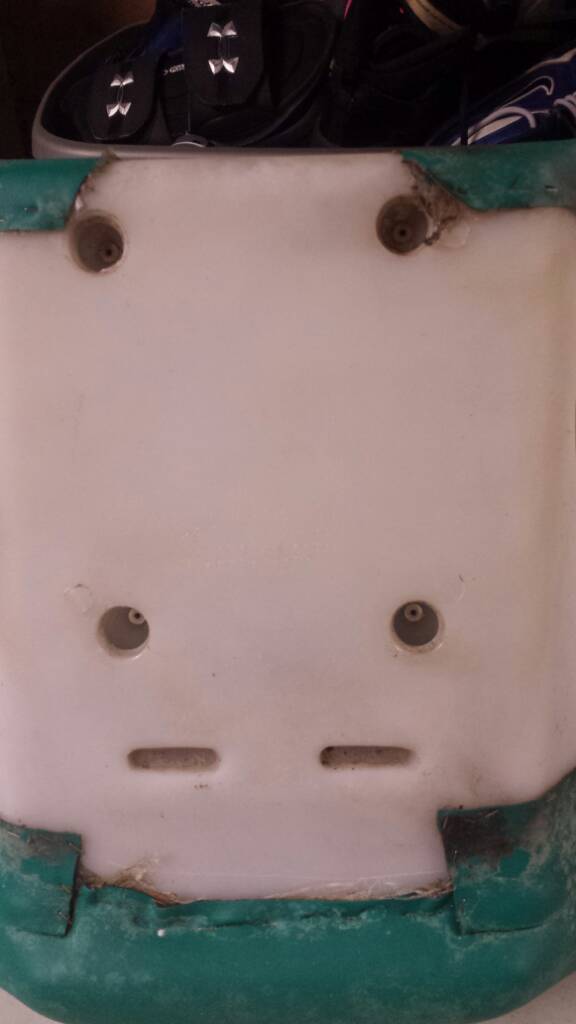
Repairing the weather damaged foam with med. density foam. Cut out the damaged area to the proper depth and fit the foam. Secure with spray adhesive (have your Goof Off handy, your fingers will thank you ):
4 rivets per seat pad. I drilled them off with a 1/4" bit, just until the head spins off. Don't drill into the plastic. I will probably secure the seat pads with SS carriage bolts as others have mentioned :
Removing the staples with a Stanley staple/brad remover:
Repairing the weather damaged foam with med. density foam. Cut out the damaged area to the proper depth and fit the foam. Secure with spray adhesive (have your Goof Off handy, your fingers will thank you ):
squad1
Active Member
Spotter seat center cushion is riveted to the larger base pad cover. To remove the top cushion, pull all the staples on the base and remove large foam base to expose the 4 rivets.
I drilled the centers of the large rivet heads with the same 1/4" bit, and then pried the head free:

I drilled the centers of the large rivet heads with the same 1/4" bit, and then pried the head free:
Last edited by a moderator:
Similar threads
- Replies
- 2
- Views
- 385
- Locked
- Replies
- 20
- Views
- 1,235