


As I posted about 6 months ago I bought a 2001 XP from a family friend for dirt cheap that had a broken engine mount. I spent a lot of time researching the repair but there was not much info out there for this repair. Some said fix it and some said part it out. I decided the ski was too nice and the price was too cheap to just part it out.
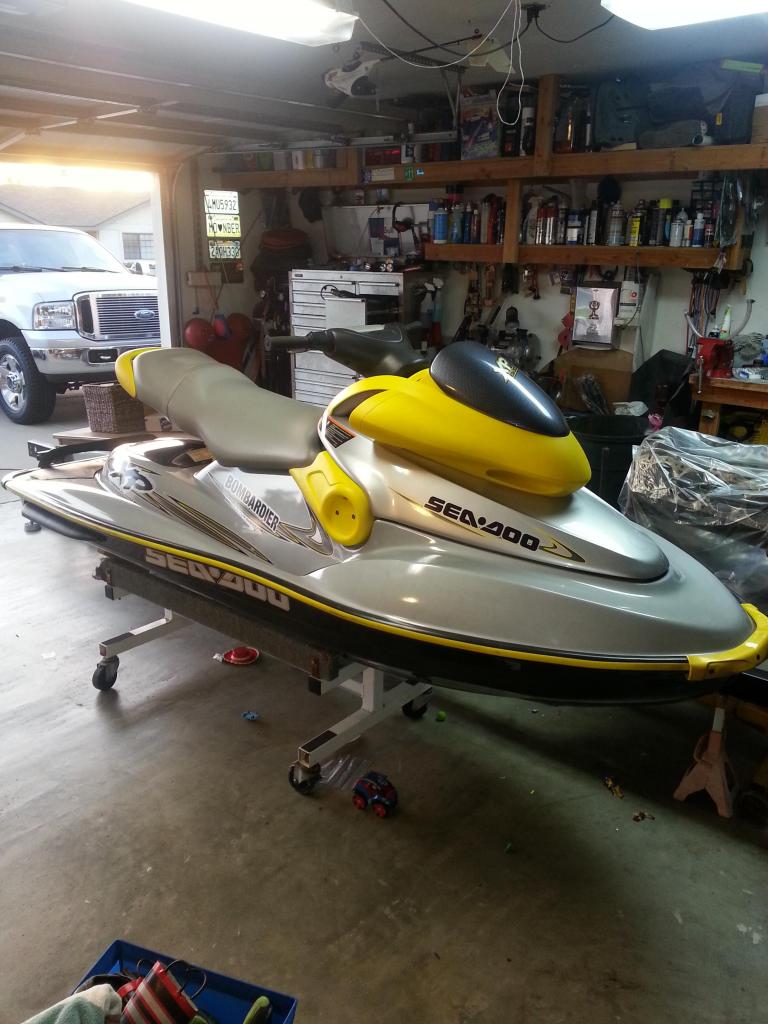
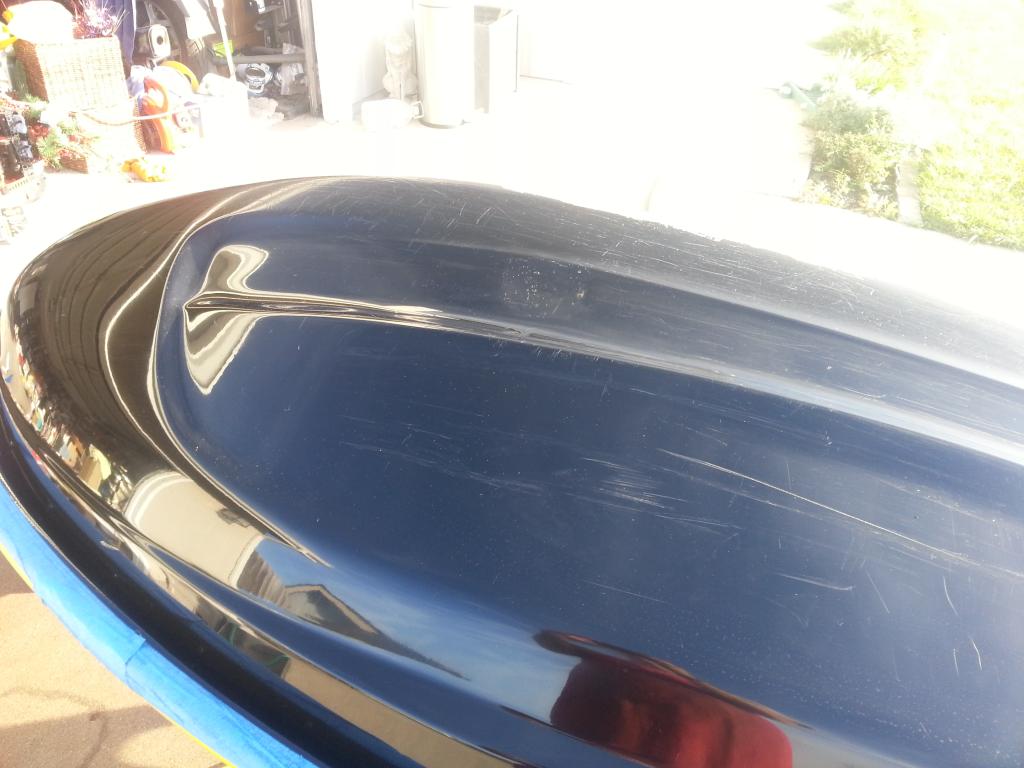
Here she is straight from the road
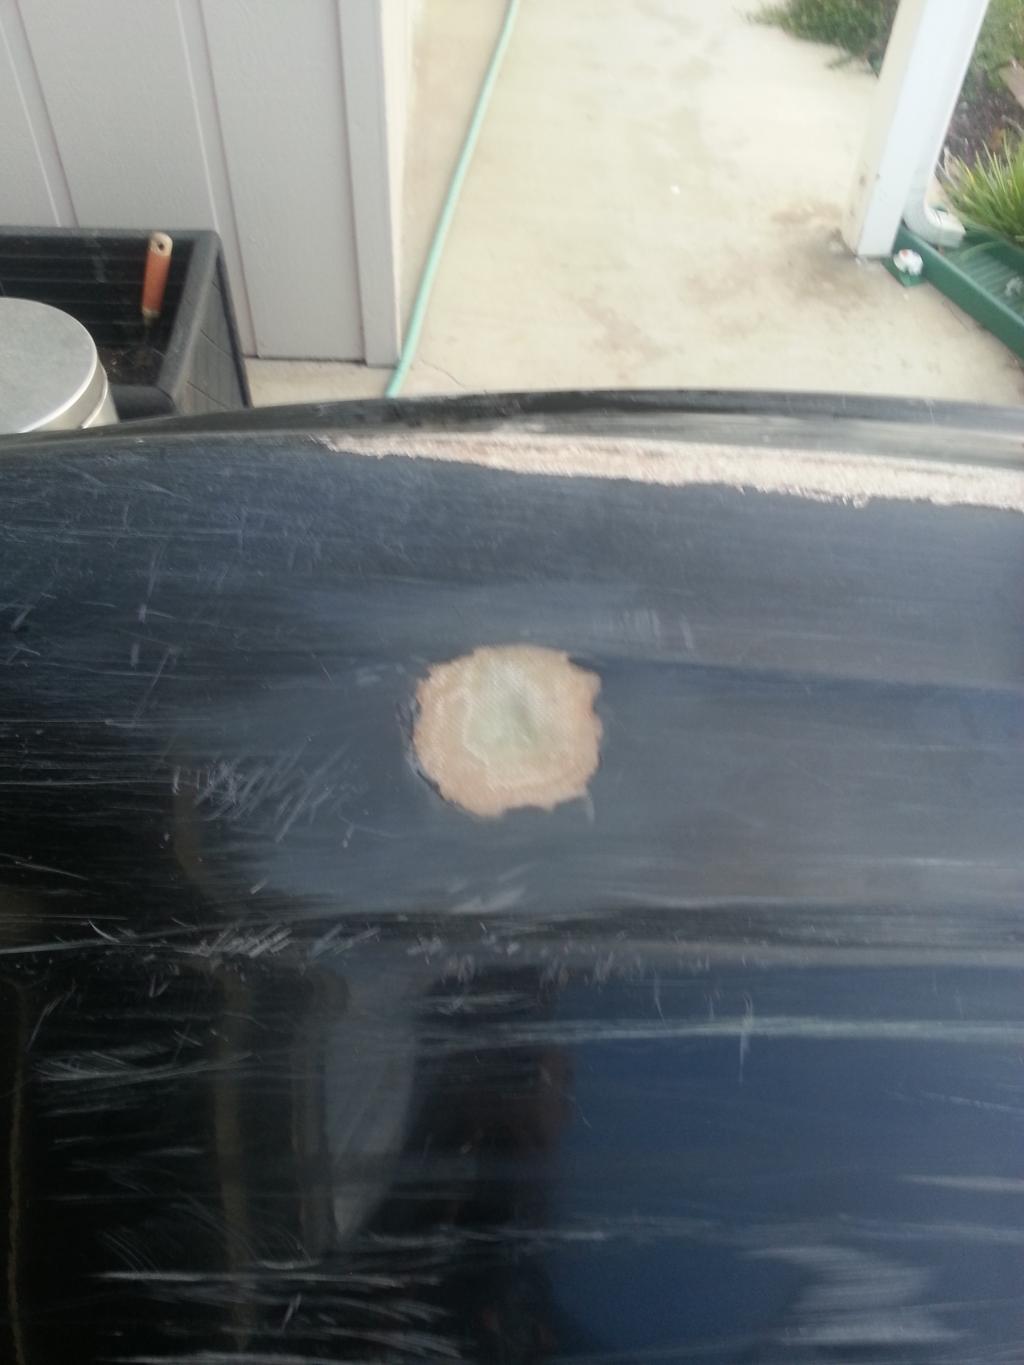
And no, there is no prize for finding the Noid in the picture but you are looking now aren't you....
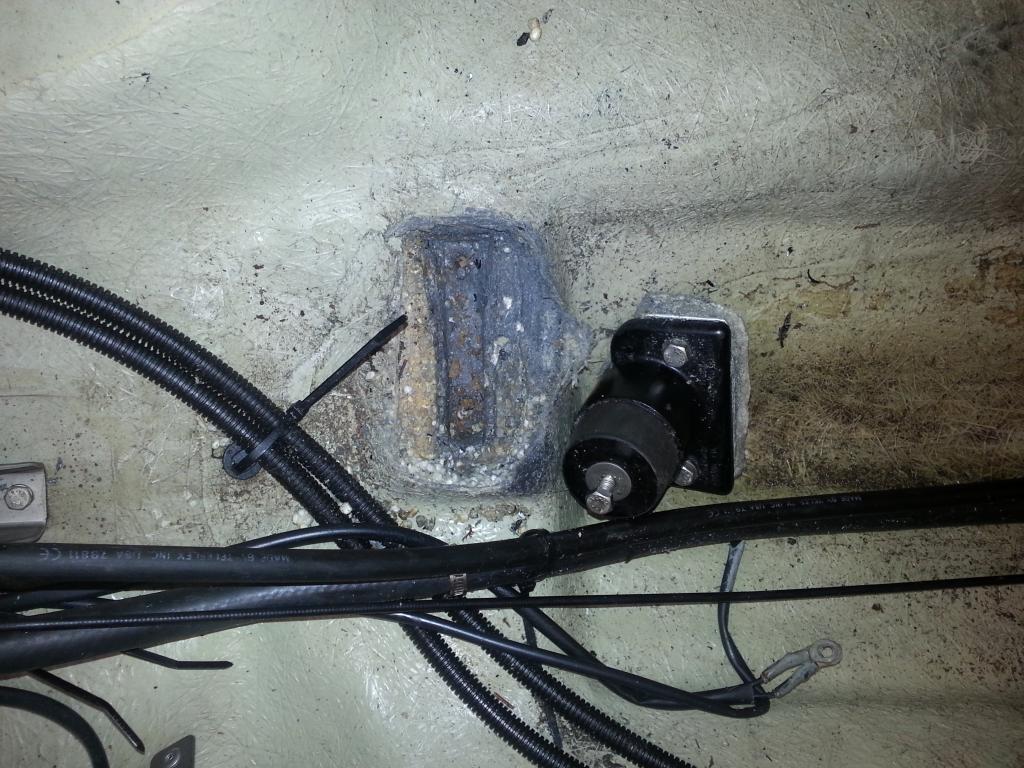
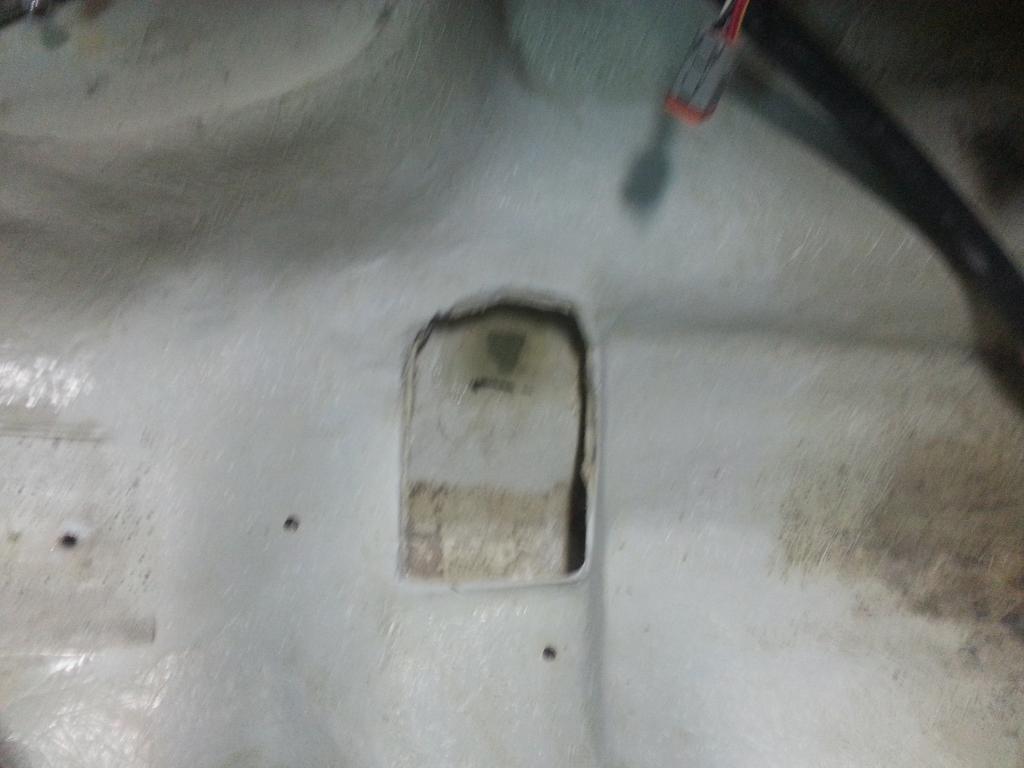
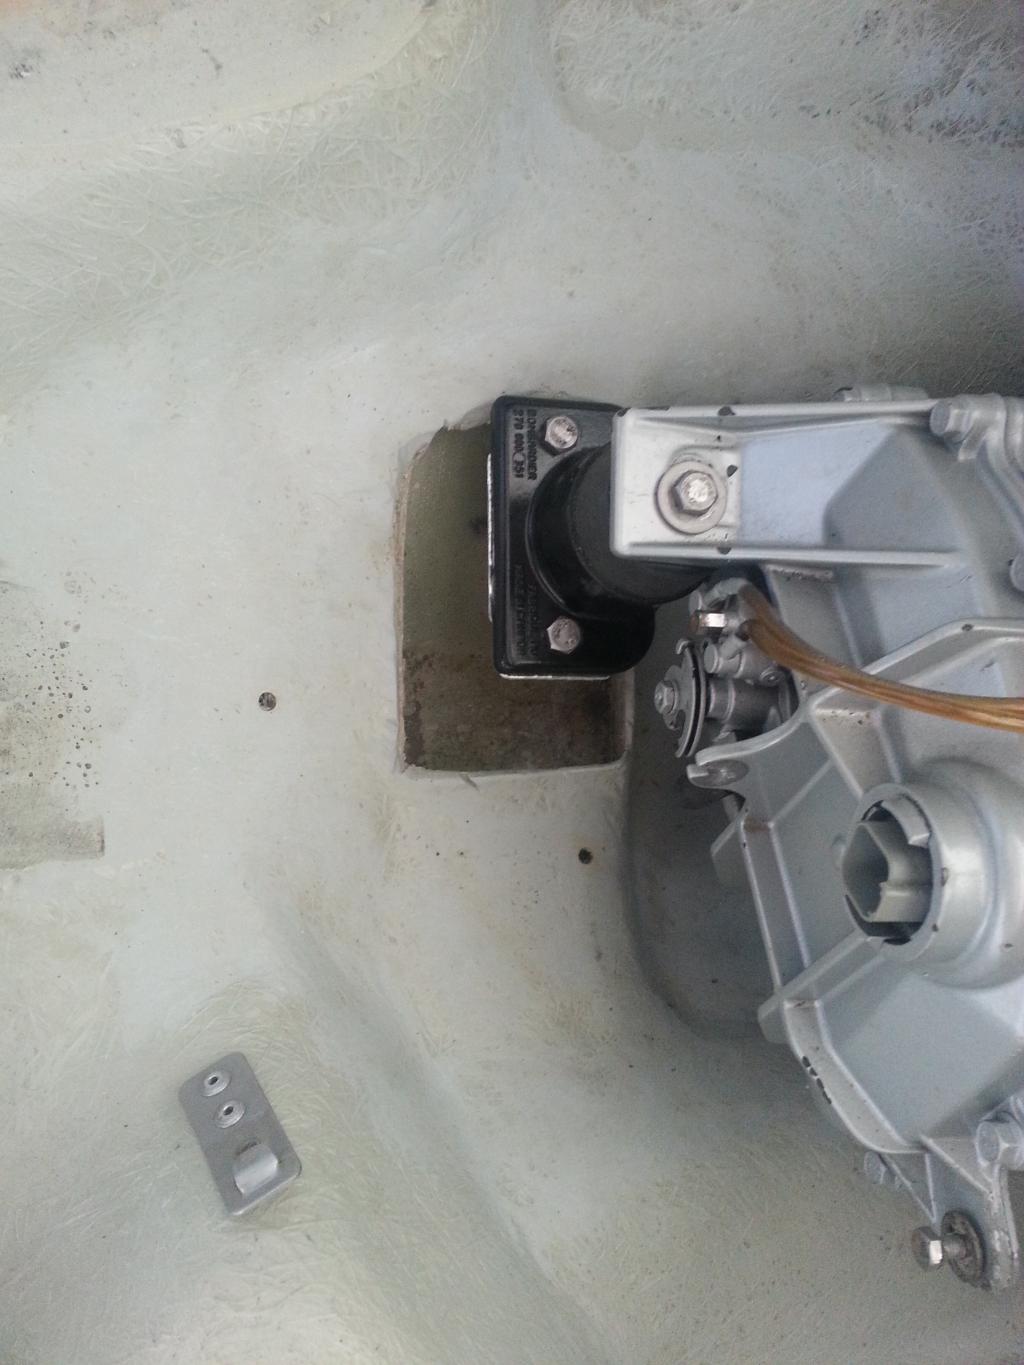
And here is the problem....
I spoke to some members that are very good at glass and carbon fiber as well as some very well known shops and some people said the outer hull was SMC and some said it was standard polyester glass. I still have no clue what it actually is but they all agreed the inner hull is standard polyester glass. The issue is that not much sticks to SMC but poly ester is no problem. I figured I would use West Systems epoxy resin as it has a much higher bond strength with cured polyester and I wanted this to be strong.
The outer hull had a minor crack so I decided to just use the epoxy resin and glass the hole in. If it turns out to be SMC and my patch doesn't hold I will just use a 2 part epoxy like Marine Tex.
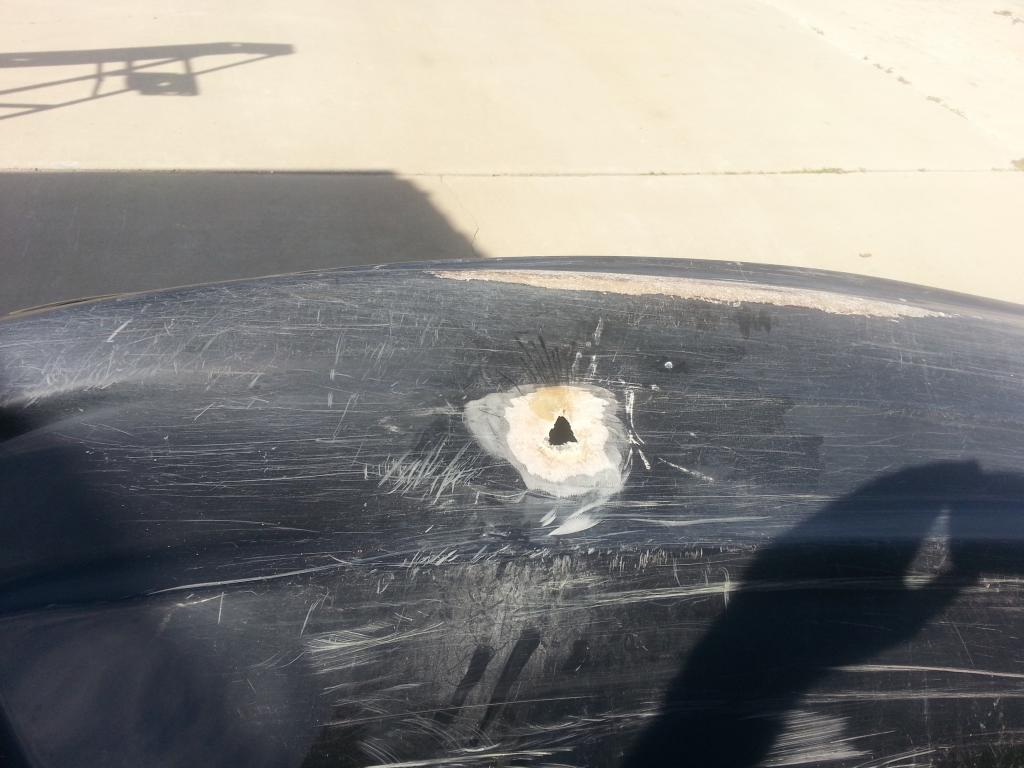
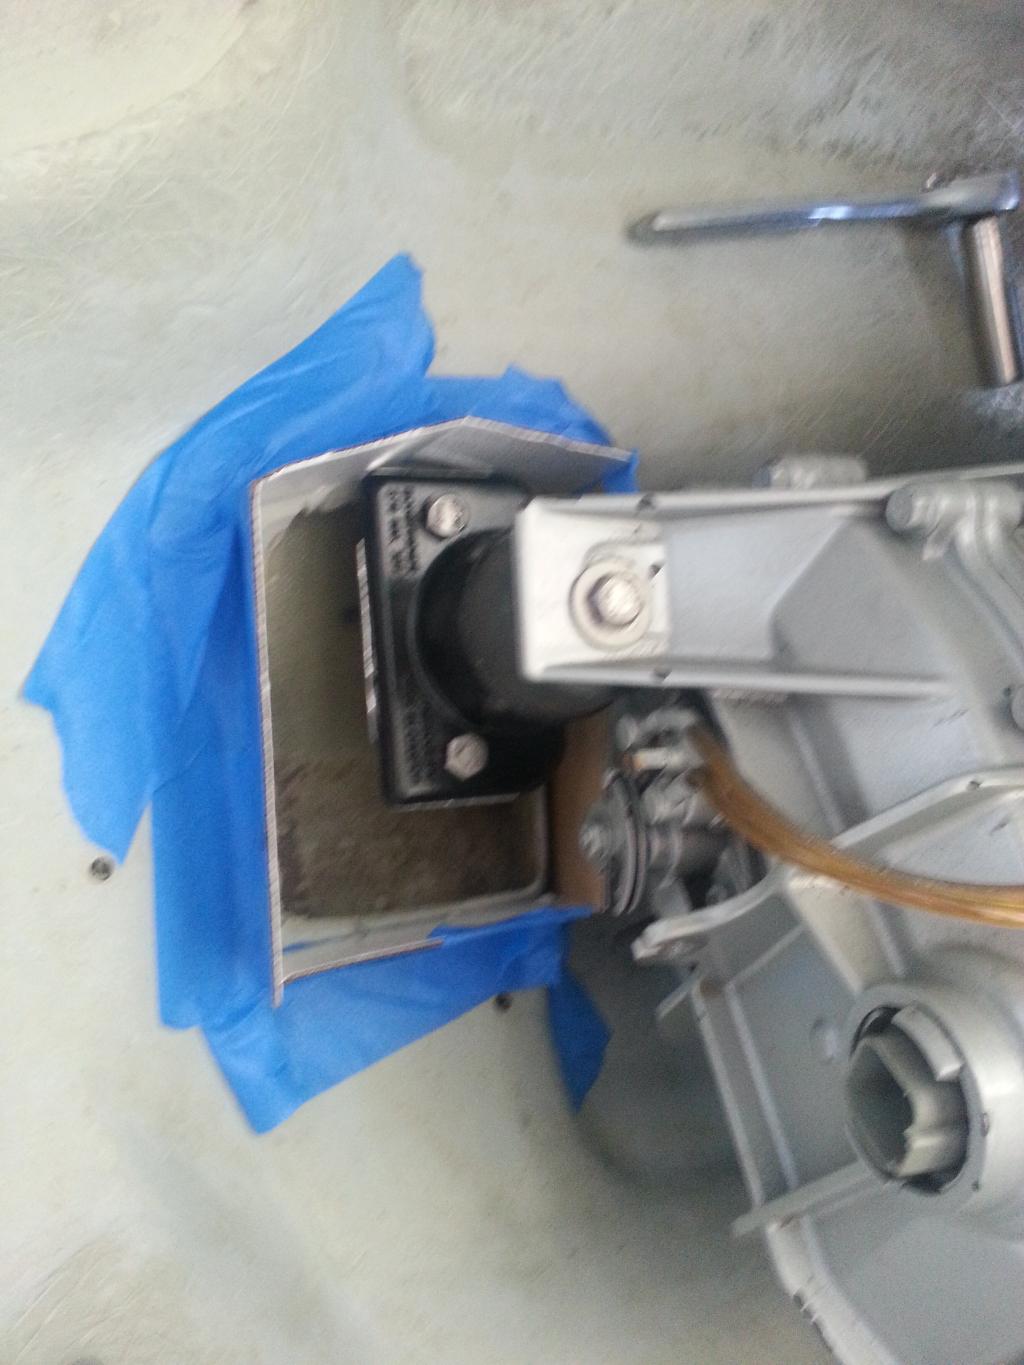
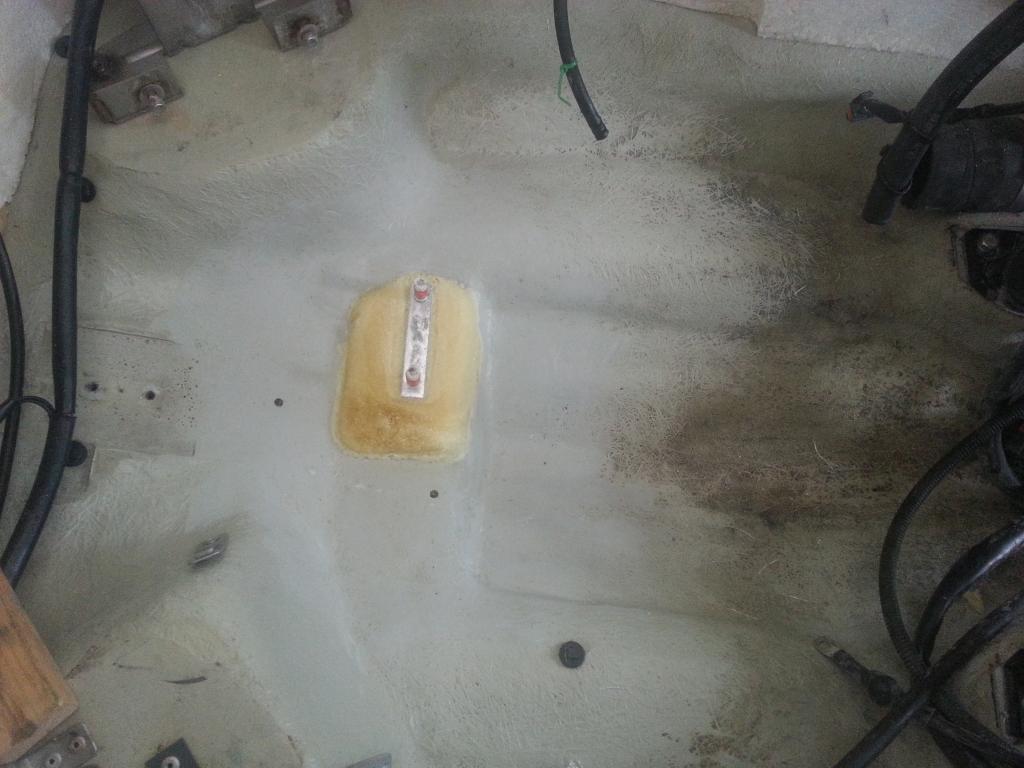
Here is the actual hole where the old aluminum mounting plate punched through the bottom of the ski.
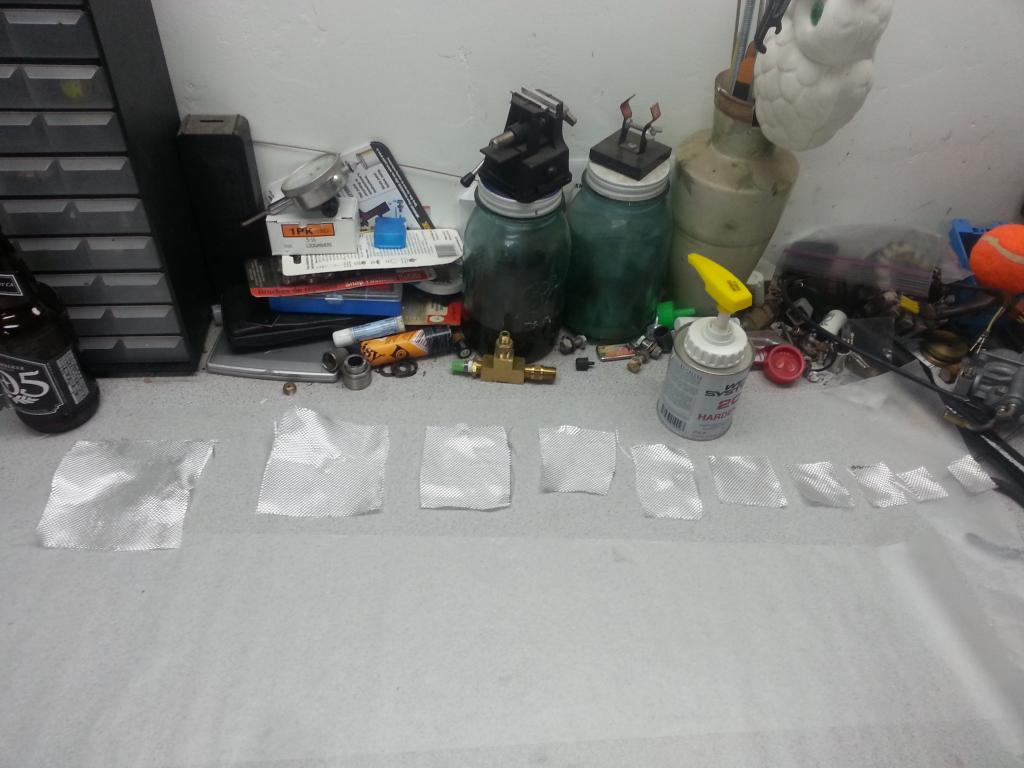
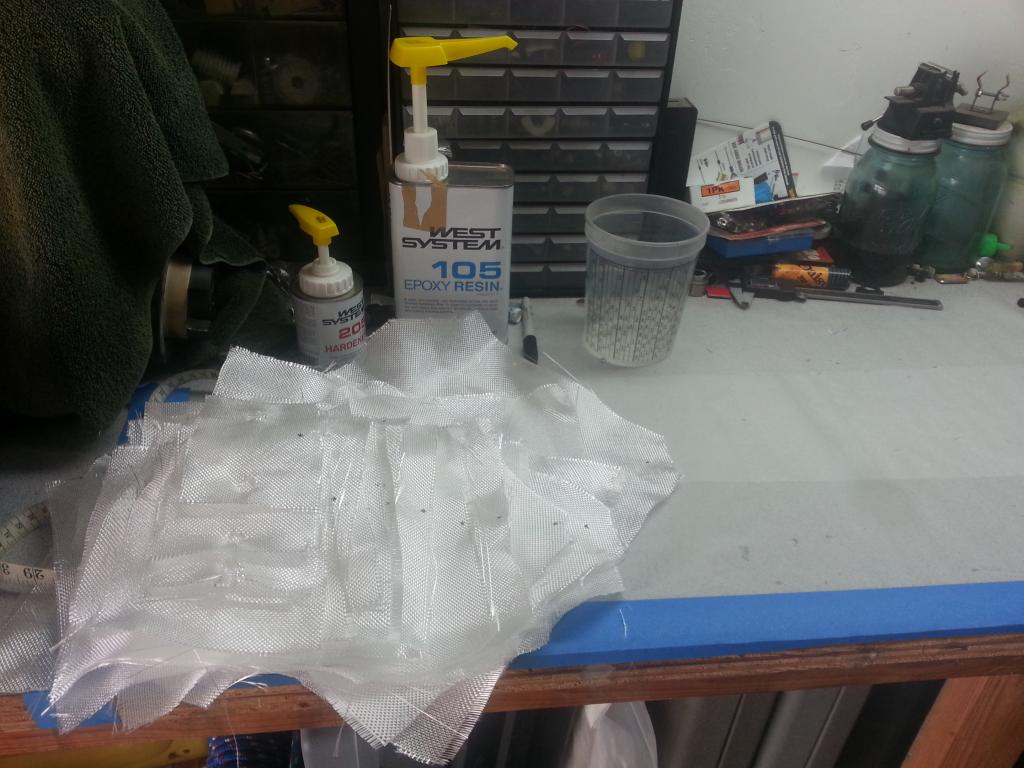
I like to lay out all my glass before I even get the resin out to make sure it is all correct and ready to go.
I finished glassing the outside with about 8 layers of glass.
Then I applied black gelcoat and wet sanded and buffed the entire bottom.
Next up was a few layers of glass on the inside to strengthen the repair.
After that was finished I had to decide how I was going to get the engine in the correct location. Lucky for me I bought the SBT alignment tool a few years ago. So I set the engine in and supported the front with a cross bar and all thread so I could adjust it up and around to get it correct. I made spacers the thickness of the old hull glass and bolted the front mount on with it's aluminum support.
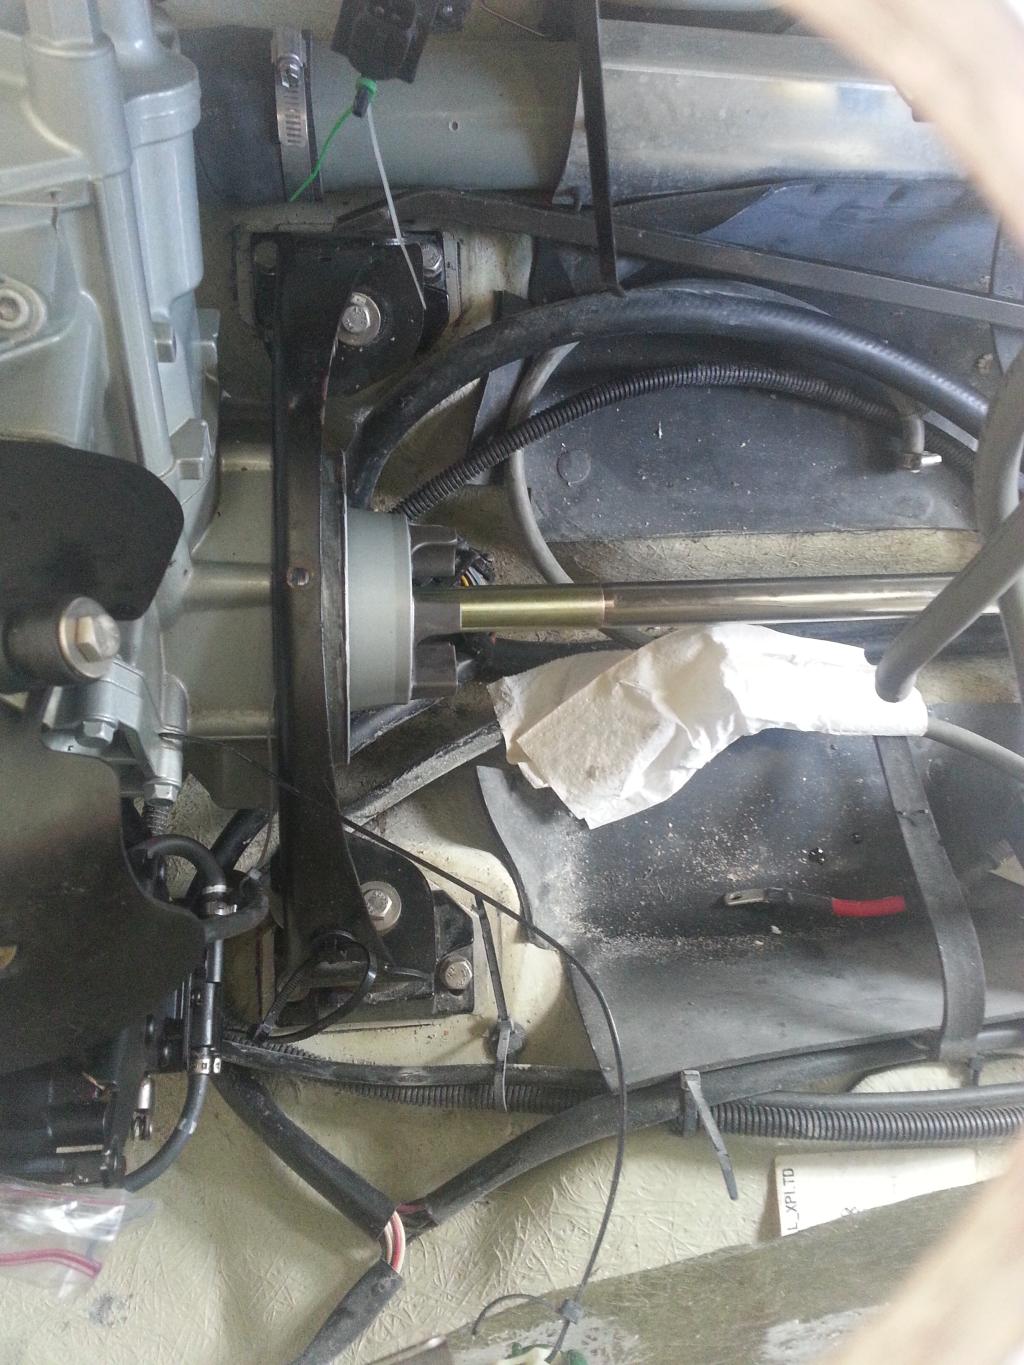
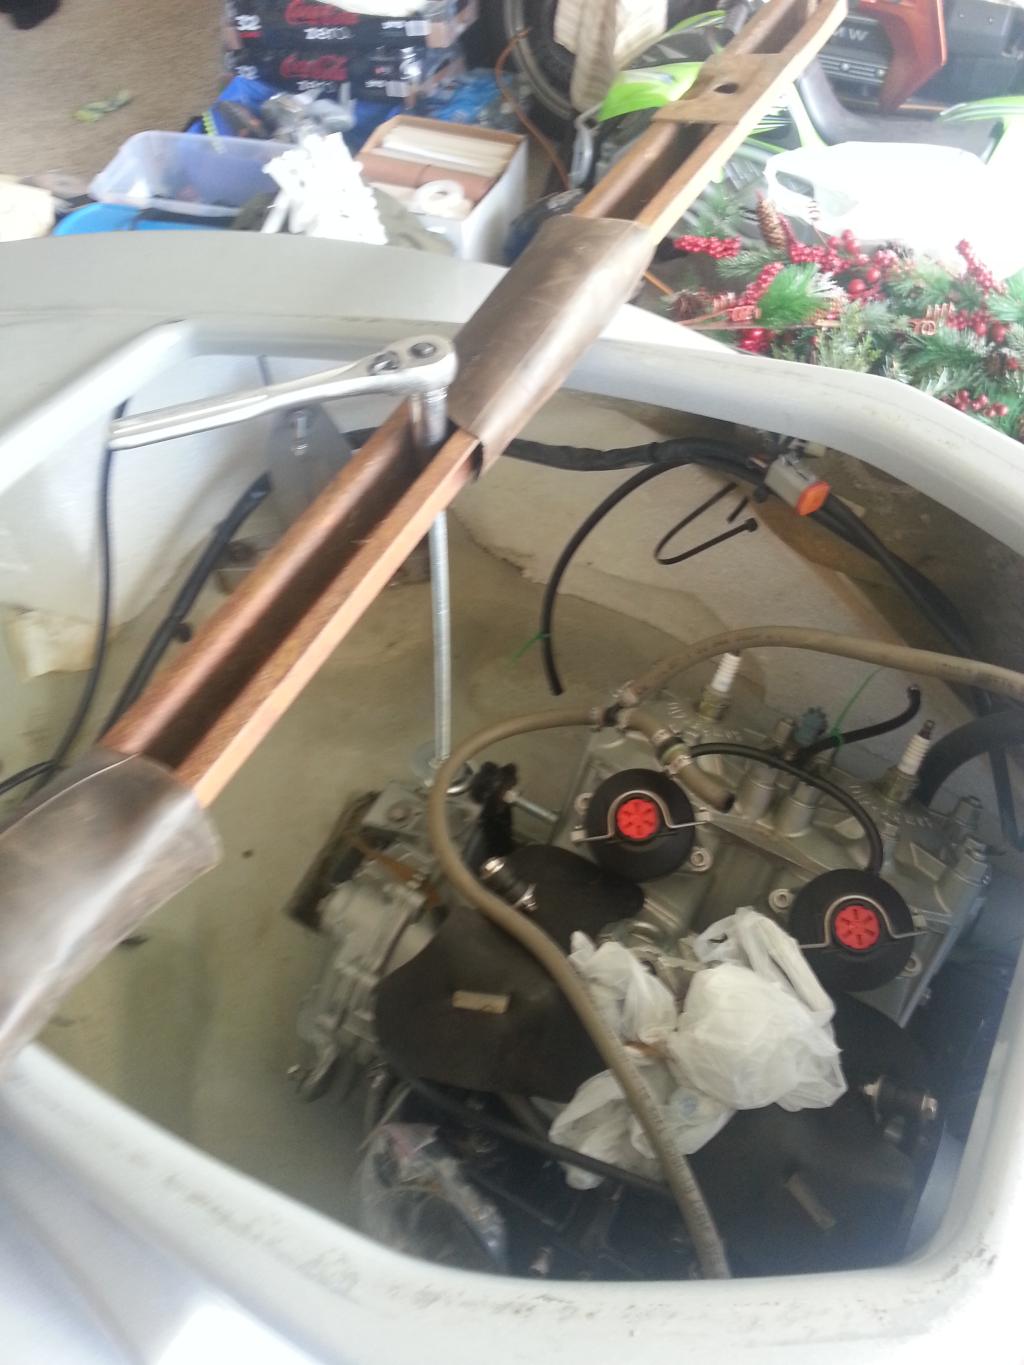
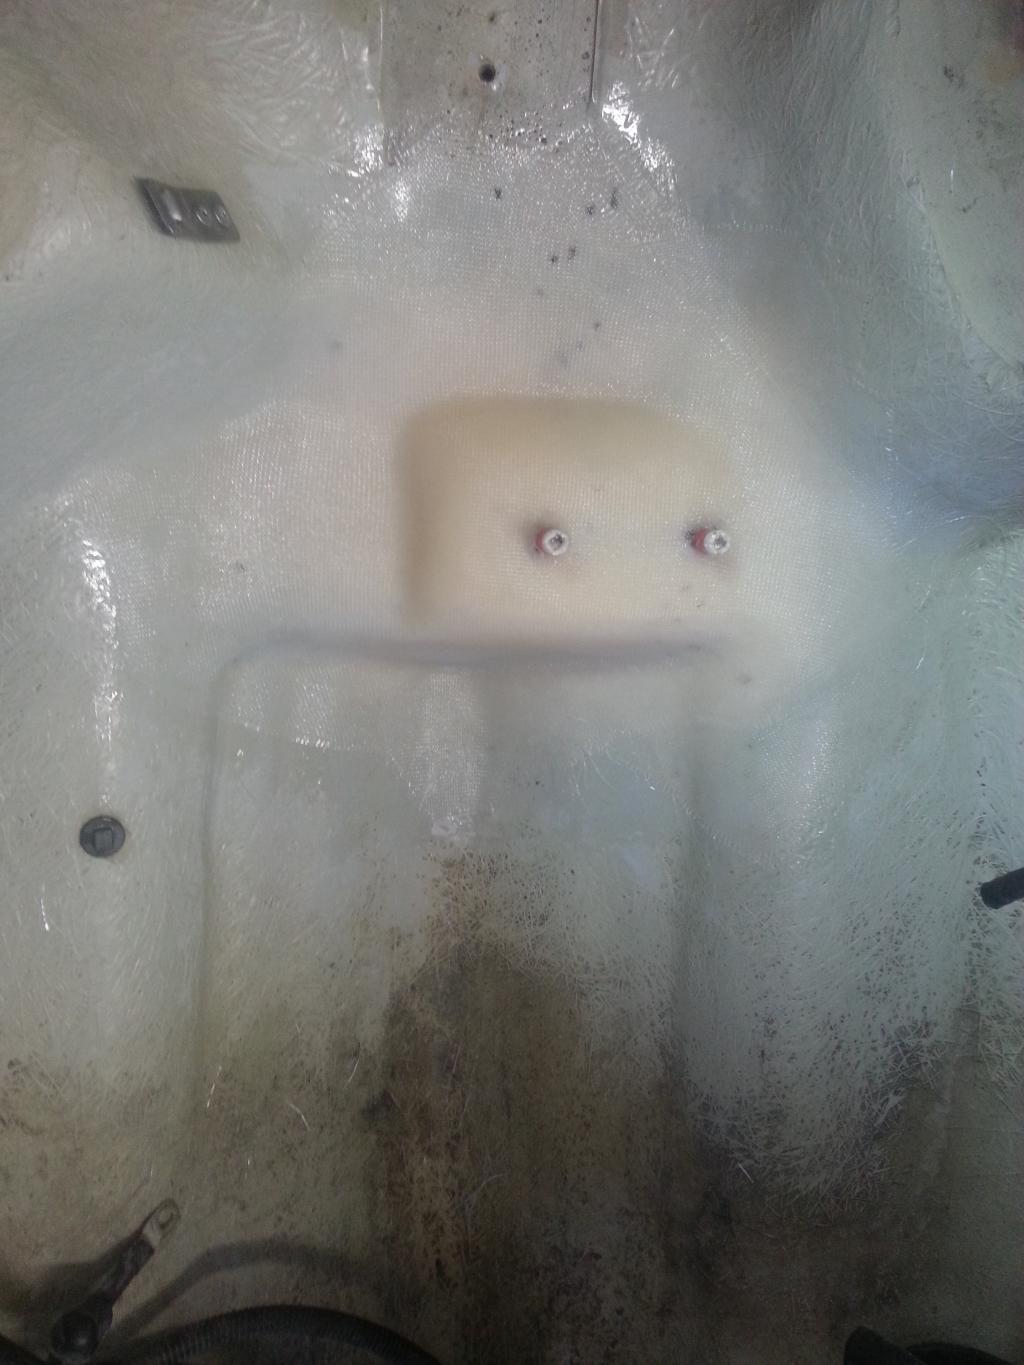
Here is the final location.
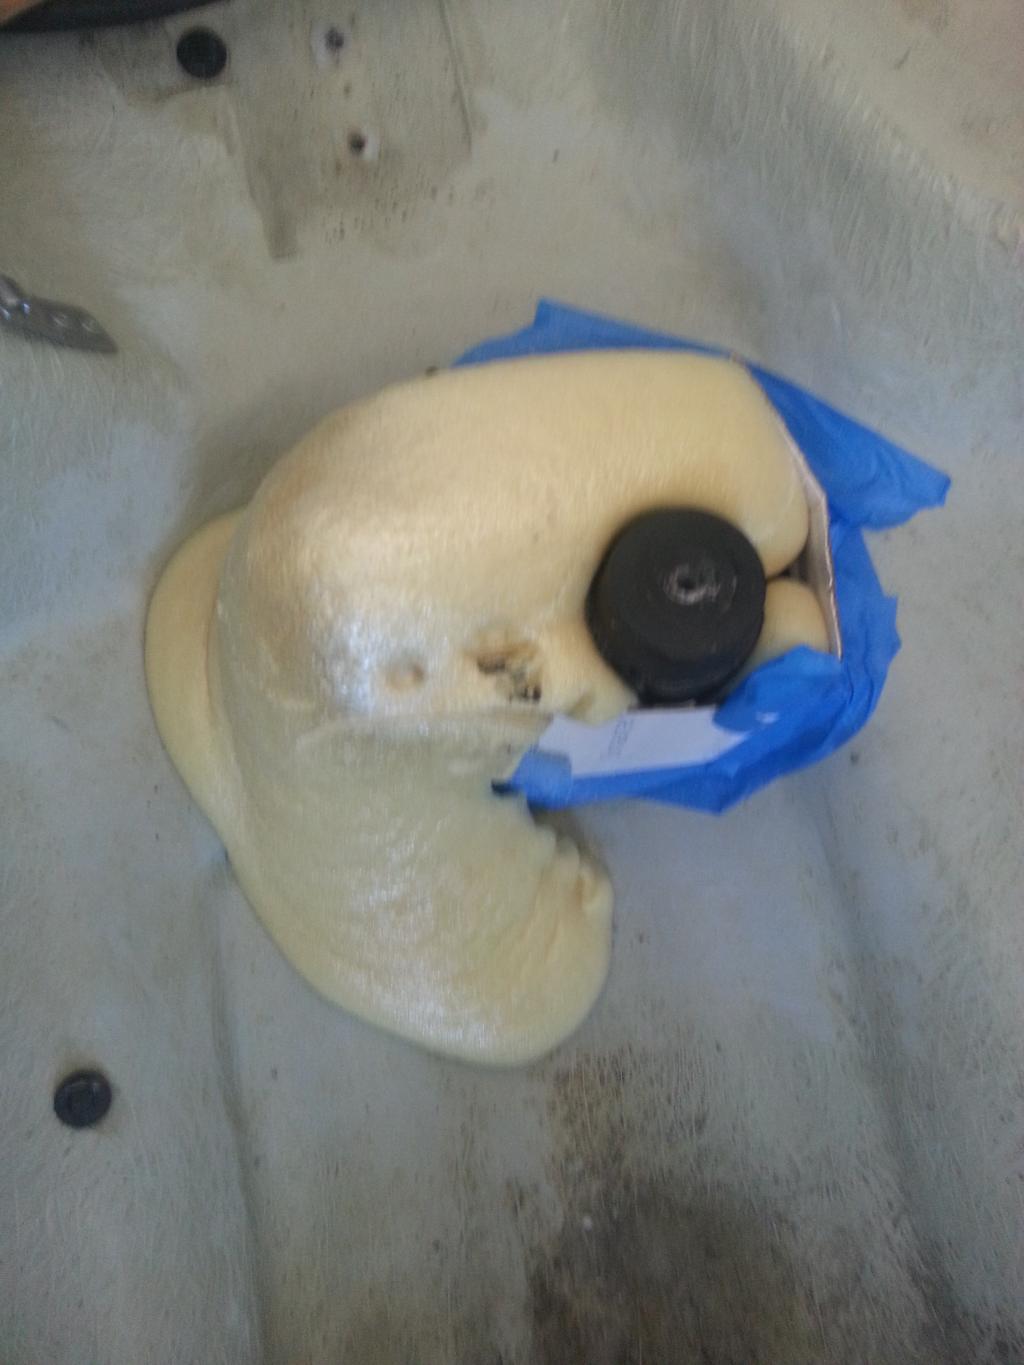
I decided to use 8 lb polyurethane pour foam to support the engine and form the glass. I went with U.S. Composits and they suggested the 8 lb foam and said it would be as hard as pine. I tested some and it was still soft but would support my weight when I stood on it so it is much stronger than the white foam Seadoo used. I made a form for it and poured it in but has no idea how much to use so I guessed.
As you can imagine I used too much foam but it sure locked the aluminum plate into location.
After sawing, chipping and shaping the foam I had my new base for the fibergalss and fingers crossed that nothing moved.

Next I made sure everything was clean and did another wipe down with acetone. Then I cut all of my fiberglass starting small and working up to the final piece. Then one final acetone wipe down.
Here is the stack of all the sheets cut and marked for orientation and finally the resin was ready to mix.
I did not get any action shots of the actual layup because of sticky fingers but I used a few different sized chip brushes and an aluminum fiberglass roller. The method I found that works best for me is to layout wax paper on my workbench then wet out the sheets of glass one at a time and then carry it over and place it in the hull using the brush to tamp it in place and remove all the wrinkles and air then after every couple sheets use the roller to smooth it out. It took three batches of resin but it never started to cure so I am sure the bond is fine it is just that I didn't want to mix too much at once and have it harden too quickly. All in all I placed 23 sheets of glass and I think it looks great. The only thing it seems I did wrong is the glass and resin looks a little milky. From reading it is probably micro bubbles from tamping with the brush to get the glass to conform to all the shapes of the hull but I am not sure how I would have done it any other way and hope it doesn't weaken the repair.
Here is the final result although I will probably mix some grey gelcoat so it matches the rest of the engine compartment.
I hope this helps someone else save their ski and if anyone has and questions, comments or suggestions please add them here for me and others to learn the correct way if my way has issues.
Here she is straight from the road
And no, there is no prize for finding the Noid in the picture but you are looking now aren't you....

And here is the problem....

I spoke to some members that are very good at glass and carbon fiber as well as some very well known shops and some people said the outer hull was SMC and some said it was standard polyester glass. I still have no clue what it actually is but they all agreed the inner hull is standard polyester glass. The issue is that not much sticks to SMC but poly ester is no problem. I figured I would use West Systems epoxy resin as it has a much higher bond strength with cured polyester and I wanted this to be strong.
The outer hull had a minor crack so I decided to just use the epoxy resin and glass the hole in. If it turns out to be SMC and my patch doesn't hold I will just use a 2 part epoxy like Marine Tex.
Here is the actual hole where the old aluminum mounting plate punched through the bottom of the ski.

I like to lay out all my glass before I even get the resin out to make sure it is all correct and ready to go.

I finished glassing the outside with about 8 layers of glass.

Then I applied black gelcoat and wet sanded and buffed the entire bottom.

Next up was a few layers of glass on the inside to strengthen the repair.

After that was finished I had to decide how I was going to get the engine in the correct location. Lucky for me I bought the SBT alignment tool a few years ago. So I set the engine in and supported the front with a cross bar and all thread so I could adjust it up and around to get it correct. I made spacers the thickness of the old hull glass and bolted the front mount on with it's aluminum support.


Here is the final location.

I decided to use 8 lb polyurethane pour foam to support the engine and form the glass. I went with U.S. Composits and they suggested the 8 lb foam and said it would be as hard as pine. I tested some and it was still soft but would support my weight when I stood on it so it is much stronger than the white foam Seadoo used. I made a form for it and poured it in but has no idea how much to use so I guessed.

As you can imagine I used too much foam but it sure locked the aluminum plate into location.

After sawing, chipping and shaping the foam I had my new base for the fibergalss and fingers crossed that nothing moved.

Next I made sure everything was clean and did another wipe down with acetone. Then I cut all of my fiberglass starting small and working up to the final piece. Then one final acetone wipe down.

Here is the stack of all the sheets cut and marked for orientation and finally the resin was ready to mix.

I did not get any action shots of the actual layup because of sticky fingers but I used a few different sized chip brushes and an aluminum fiberglass roller. The method I found that works best for me is to layout wax paper on my workbench then wet out the sheets of glass one at a time and then carry it over and place it in the hull using the brush to tamp it in place and remove all the wrinkles and air then after every couple sheets use the roller to smooth it out. It took three batches of resin but it never started to cure so I am sure the bond is fine it is just that I didn't want to mix too much at once and have it harden too quickly. All in all I placed 23 sheets of glass and I think it looks great. The only thing it seems I did wrong is the glass and resin looks a little milky. From reading it is probably micro bubbles from tamping with the brush to get the glass to conform to all the shapes of the hull but I am not sure how I would have done it any other way and hope it doesn't weaken the repair.
Here is the final result although I will probably mix some grey gelcoat so it matches the rest of the engine compartment.

I hope this helps someone else save their ski and if anyone has and questions, comments or suggestions please add them here for me and others to learn the correct way if my way has issues.
Last edited by a moderator:


") . I can find fault on any system.
. I can find fault on any system.