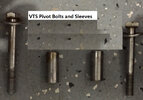
Removing the IBR bucket is not difficult. You will find there are two sets of Pivot Sleeves. They are the same diameter but are different lengths. Be sure to put them back into the correct holes.
I used Ratchet Wrenches on most of these nuts and bolts as there was not enough room for a ratchet and socket in some cases.
There are two O-Rings in the pump housing where the Nose Cone sits. I ordered new O-Rings. That said, my used O-Rings were in perfect condition and would have used them if I didn’t have new O-Rings.
First, remove the Bucket.
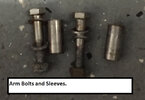
To do so, remove the Arm Bolts, one on each side. (13 mm).
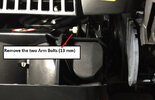
Once the bolts are removed, slide the sleeves out of the joint and flop the arms out of the way.
Now the Bucket can be flipped up and down a bit. You can see the Bucket Bolts while looking over the top of the Bucket. But you will get more swing on your wrench or ratchet from under the Bucket. (13 mm).
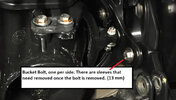
Once the bolts and sleeves are removed, the bucket will be free.
Remove the Steering Nut and Bolt, (10mm).
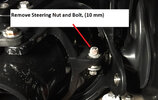
VTS Pivot Bracket, remove one bolt and one sleeve per side (13mm). The Nozzle will pivot left and right out of the way as you previously removed the steering bolt. to remove the VTS Bracket takes a bit of near perfect wiggling to get it out. You will see the plastic glides (round white objects) that the bracket rides on. Take a look at them as best you can as this may help when installing the VTS Bracket. It is not hard, just a tight fit. Coming out is easier than going back in.
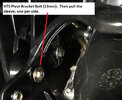
VTS Bolts and Sleeves, Sleeves MUST be pulled out or you cannot remove the VTS Bracket.
Cut the Bailer Tube Zip-Ties, one per side. I left the hoses attached as I felt they would be easier to remove once the nozzle was free. They are not on to tight, break them free with pliers then slide them off.
Remove three Nozzle Bolts, 13mm
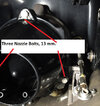
Pop the Nozzle off and you can now see the Cone that contains the Sea Doo Synthetic Grease.
You do not need to remove the pump if you do not want to. You can simply remove the Nose Cone right where it is as the 4-tec uses grease, not oil. I pulled my pump as I wanted to get it in my hand so I could check out the bearing and wear ring as well as the drive shaft spline. This allowed me to lube the rear spline and check things out.
To remove the Nose Cone, us a 5 mm Hex Head. If you are going to pull the pump, loosen the nose cone bolts while they are right in front of you and easy to get to. I have seen some be PLENTY tight and it is easier to torque on them while the pump is still bolted to the ski.
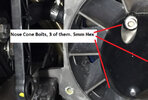
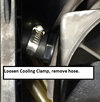
Loosen the Cooling Hose Clamp and remove the hose if you can, if not, you can as you pull the pump. It will be easier to pull the pump if the hose is off.
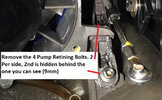
Remove the 4 Pump Retaining Bolts. They screw into the Ride Plate. 2 per side. The 2nd one is hidden right behind the first one. (9mm Hex Head).
The pump is basically free to be removed. It comes out a bit tight, especially if you leave the lower brackets where you removed the 4-hex head bolts. I did leave them in place as I didn’t want to screw with them. Wiggle it a bit and pull toward you. It will slide off the drive shaft and basically be sitting there. Manipulate it a bit and you can get it out.
Take the Nozzle you removed earlier and set the pump on it. This will prevent the rear seal of the impeller from touching the ground and getting damaged.
The Nose Cone only fits in one position. I scratch the nose cone in line with the mounting bracket of the pump just to make it easier when reinstalling it.
If you did not already do so, remove the Nose Cone Bolts. There is a tiny gap for flat blade screwdriver. Slip it in the gap and twist the screwdriver. The Nose Cone will slide up a bit. Work the screwdriver around it until the gap is wide enough to slide the thicker shaft of the screwdriver in the gap and continue to work the Nose Cone off. Once it is off, remove the old grease from the nose and the impeller. SAVE THIS GREASE if it is not water contaminated. I have two skis and both of mine were in great condition. Use this grease to coat all seals, bolt shafts, anywhere the metals touch each other (such as the pump brackets to the ride plate. This will help with electrolysis issues.
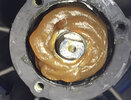
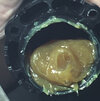
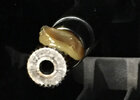
Use the full tube of New Sea Doo Synthetic grease. Look at my picture and you will see that I stacked the grease up on the impeller bearing but left the edge open a bit as the Nose Cone lip will fill that void. Fill the Nose Cone on ONE SIDE only. This is so that air can escape as you seat the cone. I filled the entire bottom of the cone the first time I did this and fought the air pressure as it sealed to the pump housing.
Wire brush all the bolt shafts clean.
While you have the opportunity, lubricate the drive shaft spline, rear impeller seal, all the areas where the metals touch each other. Also coat the sleeves for the pivot areas.
When reinstalling, I used Blue Loc-tite for everything. I coat all of the threads as I believe it helps to seal things and prevent corrosion.
Lubricate the outer lip of the Nose Cone. This will help it to slip into place and help seal against the O-Rings that are in the Pump Housing. Slide the Nose Cone in place. It will not slide all the way down in most cases.. Use Blue Loc-tite on the bolts and get them started. Work your way around and the Nose Cone, it will slide into place. Do NOT tighten just one down on its own, this will tilt the Nose Cone and break it. Do two or three turns and move to the next bolt. Once it is seated, then you can tighten them down.
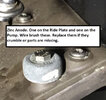
Wire brush the Zinc Anodes. Replace them if they crumble or parts are missing.
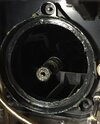
Lubricate the Drive Shaft Spline and spread the grease on the splines and down the shaft where the rear Impeller Seal rides. Lubricate the seal where the pump slides into the hull.
When you go to install the pump, take the two Bailer Tubes and flop them up on top of the Pump as you install it. If not, they will get in the way and get pinched between the pump and the mounting area. You can re-route them once the pump is secure.
Once you get the pump in place, start all 4 of the hex head bolts, snug them, then tighten the bolts to the Ride Plate. Use Blue Loc-tite.
Once the pump is in place, re-route the Bailer Tubes under the Pump, one is longer and it will go to the right side of the ski.
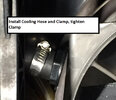
If you have not done so, install the cooling hose and tighter the clamp.
Install the Nozzle and the Bailer tubes to the Nozzle. Zip-tie the tubes.
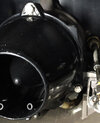
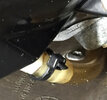
Install the VTS Pivot, Steering linkage bolt., then the Bucket.
Again, lube the pivots using the old grease and use Blue Loc-tight on all nuts and bolts.
I used Ratchet Wrenches on most of these nuts and bolts as there was not enough room for a ratchet and socket in some cases.
There are two O-Rings in the pump housing where the Nose Cone sits. I ordered new O-Rings. That said, my used O-Rings were in perfect condition and would have used them if I didn’t have new O-Rings.
First, remove the Bucket.
To do so, remove the Arm Bolts, one on each side. (13 mm).

Once the bolts are removed, slide the sleeves out of the joint and flop the arms out of the way.

Now the Bucket can be flipped up and down a bit. You can see the Bucket Bolts while looking over the top of the Bucket. But you will get more swing on your wrench or ratchet from under the Bucket. (13 mm).

Once the bolts and sleeves are removed, the bucket will be free.
Remove the Steering Nut and Bolt, (10mm).

VTS Pivot Bracket, remove one bolt and one sleeve per side (13mm). The Nozzle will pivot left and right out of the way as you previously removed the steering bolt. to remove the VTS Bracket takes a bit of near perfect wiggling to get it out. You will see the plastic glides (round white objects) that the bracket rides on. Take a look at them as best you can as this may help when installing the VTS Bracket. It is not hard, just a tight fit. Coming out is easier than going back in.

VTS Bolts and Sleeves, Sleeves MUST be pulled out or you cannot remove the VTS Bracket.

Cut the Bailer Tube Zip-Ties, one per side. I left the hoses attached as I felt they would be easier to remove once the nozzle was free. They are not on to tight, break them free with pliers then slide them off.
Remove three Nozzle Bolts, 13mm

Pop the Nozzle off and you can now see the Cone that contains the Sea Doo Synthetic Grease.
You do not need to remove the pump if you do not want to. You can simply remove the Nose Cone right where it is as the 4-tec uses grease, not oil. I pulled my pump as I wanted to get it in my hand so I could check out the bearing and wear ring as well as the drive shaft spline. This allowed me to lube the rear spline and check things out.
To remove the Nose Cone, us a 5 mm Hex Head. If you are going to pull the pump, loosen the nose cone bolts while they are right in front of you and easy to get to. I have seen some be PLENTY tight and it is easier to torque on them while the pump is still bolted to the ski.

Loosen the Cooling Hose Clamp and remove the hose if you can, if not, you can as you pull the pump. It will be easier to pull the pump if the hose is off.

Remove the 4 Pump Retaining Bolts. They screw into the Ride Plate. 2 per side. The 2nd one is hidden right behind the first one. (9mm Hex Head).

The pump is basically free to be removed. It comes out a bit tight, especially if you leave the lower brackets where you removed the 4-hex head bolts. I did leave them in place as I didn’t want to screw with them. Wiggle it a bit and pull toward you. It will slide off the drive shaft and basically be sitting there. Manipulate it a bit and you can get it out.
Take the Nozzle you removed earlier and set the pump on it. This will prevent the rear seal of the impeller from touching the ground and getting damaged.
The Nose Cone only fits in one position. I scratch the nose cone in line with the mounting bracket of the pump just to make it easier when reinstalling it.
If you did not already do so, remove the Nose Cone Bolts. There is a tiny gap for flat blade screwdriver. Slip it in the gap and twist the screwdriver. The Nose Cone will slide up a bit. Work the screwdriver around it until the gap is wide enough to slide the thicker shaft of the screwdriver in the gap and continue to work the Nose Cone off. Once it is off, remove the old grease from the nose and the impeller. SAVE THIS GREASE if it is not water contaminated. I have two skis and both of mine were in great condition. Use this grease to coat all seals, bolt shafts, anywhere the metals touch each other (such as the pump brackets to the ride plate. This will help with electrolysis issues.
Use the full tube of New Sea Doo Synthetic grease. Look at my picture and you will see that I stacked the grease up on the impeller bearing but left the edge open a bit as the Nose Cone lip will fill that void. Fill the Nose Cone on ONE SIDE only. This is so that air can escape as you seat the cone. I filled the entire bottom of the cone the first time I did this and fought the air pressure as it sealed to the pump housing.


Wire brush all the bolt shafts clean.
While you have the opportunity, lubricate the drive shaft spline, rear impeller seal, all the areas where the metals touch each other. Also coat the sleeves for the pivot areas.
When reinstalling, I used Blue Loc-tite for everything. I coat all of the threads as I believe it helps to seal things and prevent corrosion.
Lubricate the outer lip of the Nose Cone. This will help it to slip into place and help seal against the O-Rings that are in the Pump Housing. Slide the Nose Cone in place. It will not slide all the way down in most cases.. Use Blue Loc-tite on the bolts and get them started. Work your way around and the Nose Cone, it will slide into place. Do NOT tighten just one down on its own, this will tilt the Nose Cone and break it. Do two or three turns and move to the next bolt. Once it is seated, then you can tighten them down.
Wire brush the Zinc Anodes. Replace them if they crumble or parts are missing.

Lubricate the Drive Shaft Spline and spread the grease on the splines and down the shaft where the rear Impeller Seal rides. Lubricate the seal where the pump slides into the hull.


When you go to install the pump, take the two Bailer Tubes and flop them up on top of the Pump as you install it. If not, they will get in the way and get pinched between the pump and the mounting area. You can re-route them once the pump is secure.
Once you get the pump in place, start all 4 of the hex head bolts, snug them, then tighten the bolts to the Ride Plate. Use Blue Loc-tite.
Once the pump is in place, re-route the Bailer Tubes under the Pump, one is longer and it will go to the right side of the ski.
If you have not done so, install the cooling hose and tighter the clamp.

Install the Nozzle and the Bailer tubes to the Nozzle. Zip-tie the tubes.


Install the VTS Pivot, Steering linkage bolt., then the Bucket.
Again, lube the pivots using the old grease and use Blue Loc-tight on all nuts and bolts.
Last edited by a moderator:


